First trees in! Three cherry trees (Bing, Ranier, Stella) arrived a bit earlier than we expected. That's probably a good thing, given the number of things we learned in the process.
Our major take-away from this first tree-planting experience was, wow, we gotta find an easier way. Three trees took 4 hard days of work, often with two people. That probably sounds funny to y'all, and frankly we enjoyed it, but it was wayyyy too inefficient.
Here's what we did:
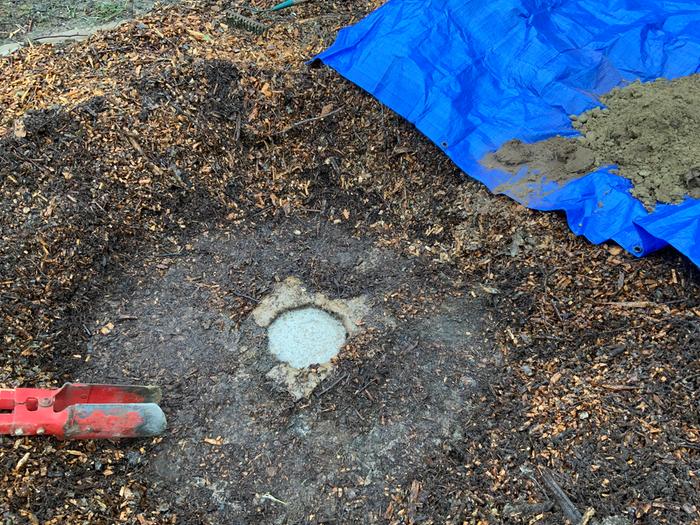
1) Clear away the 12" of wood chips, down to bare ground. (photo 1)
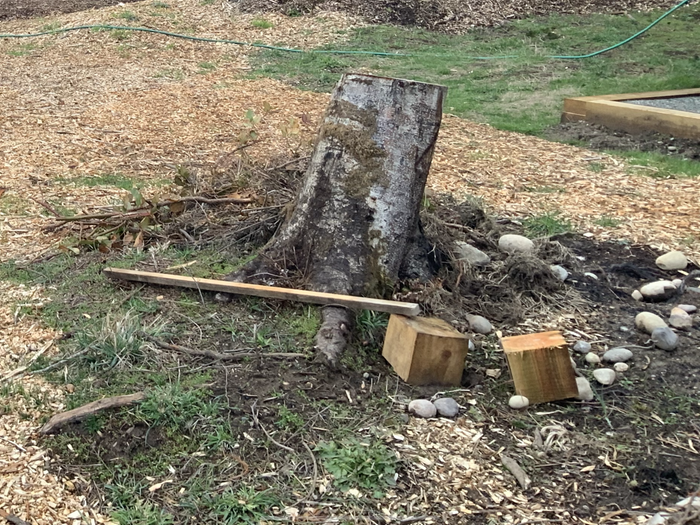
2) Conduct soil drainage test (photo 2). We dug a 12" wide 12" deep hole and filled it with water. We let it drain overnight, then filled it again and measured how far it went down in 1 hour. 4", which is very good drainage. Problem is, it didn't go down nearly that fast on the first fill! So we had hard data that said our drainage was good, and equally hard evidence that it was bad. (BTW, any scientist worth her salt knows there's always conflicting data. "Follow the science" is a quest, not a one-time act. But I digress...)
We then removed and set aside the top 6" of topsoil (to be added back in later).
3) With drainage uncertain (but a preponderance of evidence over the last 2 years that it is not great), we removed and discarded another 4" of soil, just to make room for all of the amendments we were going to add.
4) Post-holed two 6"-wide holes another 24" deep (so a total of 34" below ground level). We filled them with 6" of gravel, then added posts to tie off the new tree, packed with gravel to 6" below the top of the hole. This post hole was purposely over-engineered to not just steady the posts, but also to provide drainage paths through the hardpan.
5) With the posts set, we broad forked the next 6" of soil, amended with a large load of composted wood chips, and mixed well. We imagine that level to be the future primary root zone, so we were pretty careful there. Photo 3.
6) Next was the bare root tree. We soaked the rootball for 3 hours beforehand, stretched out and directionally separated all the roots as far as they could go, then sprinkled layer after layer of broken-up top soil, coconut coir, and a dusting of Mykos mychorrhizol innoculant. That brought the soil level back up to the original soil level. We also tamped the soil in to ensure root-soil contact and watered it well. Photo 4
7) We tied each tree to two posts (the tree was planted equi-distant between to two poles 3' apart) with "Rapiclip" soft wire tie.

Covered the root zone (3' diameter circle) with construction paper followed by 2" of EXCELLENT compost. Photo 5.
9) Installed a 3'-diameter 5'-tall wired fence around each tree, anchored to the posts with sturdy wire.
10) Back-filled the entire area, except inside the wire fences, with 12" of composted wood chips. Photo 6
11) Drank.
This was all Too Hard. We knew it was over-kill, probably, but we figured (correctly) that we would learn a bunch of things we didn't know we didn't know.
So knowing where future trees are going to go (this is a planned forest garden, after all), we plan to put up those tubular free-standing 5'-tall 3'-diameter fences one year ahead of time, over soil from which we've removed chips and broad-forked in compost. We'll then grow beans, peas, zucchini, cukes, etc. on those trellises-to-be-fences for the first year. That should prep the soil and avoid lots of this crazy-hard work. We're initially thinking early peas on the north side of the trellises, then late beans on the south side. We'll then harvest, cut the roots, and chop-'n-drop the greens. Plus lots of compost to support all the growth. This will temporarily push the soil in a bacterial dominated direction, but once we plant the trees and limit the compost (just wood chips), it should quickly shift back to a fungal dominated state.
That's our tentative plan, anyway. We'de be interested to hear others' ideas. Planting trees the way we just did is just too much darn work!

 13
13
 1
1


 4
4


 5
5


 5
5


 . Yay!] We have an excellent pto-driven 6" chipper (Woodland Mills WC68) and a 3" gas-driven chipper (Landworks), but our experience with them is that it is completely impractical to generate large amounts of chips on your own. It's just too much darn work.


 5
5


 3
3


 4
4


 Covered the root zone (3' diameter circle) with construction paper followed by 2" of EXCELLENT compost. Photo 5.

 7
7


 3
3


 6
6


 6
6


 5
5


 2
2


 4
4


