posted 12 years ago
Su Ba has a good point...
To make your own
Choose your species. Maple is easy to find, you'll want hard maple aka rock maple. Oak will do, but can put out more splinters. Pine and softwoods are right out. Gotta be a dense deciduous. All sorts of species can be used. Talk with someone who works with different species.
Make sure the stuff is kiln dried. If the stuff is kiln dried by a local guy, check his references. I did a butcher block counter top for a guy using his own lumber. He had it kiln dried but the kiln operator was not familia with magnolia. Ran the kiln too hot, the result was the outside drying at a different rate than the inside. The result is case hardening. Tore up my planer blades, and I had to let the stuff sit for 2 months before I moved on, had to plane the stuff a second time to straighten it out.
Get the lumber. You'll want #1 grade-no knots, no burls, minor spalting. Look at it before you buy it. Quartersawn is the best and you'll see that reflected in the price.
Store it flat if its going to be a while. Thickness will be a consideration. Thicker stock makes a fine product. You'll be paying for this. Since you'll be planing and cutting, you'll need more than the dimensions of the finished block. A boardfoot (bf) is 1'x1'x1". If you are taking off 1/8" off each side, that thick stock saves you some lumber. 2'x2'x1' block is 48 bf. You'll need probably 20% more for thick stock, 40% more for thin stock. At 6-12 bucks/board foot, the cost adds up pretty fast. Rough lumber is measured by the 1/4". 1 inch stock is 4/4. 2" stock is 8/4. If they surface it (plane it to take off the saw marks), that 8/4 stock is only 1.75 thick (7/4). They can surface 1 side (s1s) or 2 sides (s2s). It will help you a lot is you get the lumber straightlined. They cut one side dead straight, gives you a place to start. You can get your lumber fully dimensioned, s4s, and you pay accordingly. The problem with that is they don't always dimension every board exactly the same.
Time to start cutting
I'm assuming you bought it straightlined. I won't be explaining how to do that.
You can surface the sides now or later. You'll do it later for sure. Surfacing 1 side gives you a clean surface to slide down the saw. No need to do both sides. Do one side. Run it through the saw with the smooth side down.
Rip the board to the desired thickness. If you have 2" lumber, go with 2 1/8 cuts to allow planing it down. Add in 1/8" for the saw blade, you'll wish your lumber was a little wider so you could get one more cut.
You'll have scraps, keep them around for staking tomatoes or arts/crafts.
On the end of each piece, mark it with an arrow, a sign, the word UP, anything that will indicate the UP direction of the board as it went through the saw. Write on the end that came out of the saw last. This gives you the same reference for each piece. Use a pencil, only a pencil, never a pen.
Next is planing
I'll assume your wrote UP on the end. Look at UP, read it normally. To the left is the left side, top is above the UP. Under the UP is the bottom side. The side to the right...that's the right side. When you feed a board, feed the same end first, send in the end with no UP, keep the UP in your hand until it's time to let go. Don't lose your reference.
You want the boards planed on all sides, and the thickness in both directions to be identical.
Run the boards through with the P in UP pointing UP. Being the sides you are planing just came through your saw and you took great care, you should only have to remove 1/32". This gives you a mostly flat surface. Run all your boards on that one side.
let's make a chart
Left...rough
Right...mostly flat
Top...rough
Bottom...rough
L-R thickness...?
Bot-Top thickness...?
When done, it's time for the other side. P is down. This time you are going to pay attention to the quality of the surface. Run all your boards through. 1/32" depth.
Check your boards. Those with acceptable sides you set off in the DONE pile. Others will need to go through again. Take off another 1/32.
You may need to run some a third time, but being you've paid close attention, the 1/16 removed in the first 2 passes should have done the job.
let's check the chart
Left...perfect
Right...mostly flat
Top...rough
Bottom...rough
L-R thickness...varied
Bot-Top thickness...?
If you planed the boards before ripping, you should have a fine side. This has saved you a step.
If you have not, run them all through once with UP upside down.
check the chart
Left...perfect
Right...mostly flat
Top...rough
Bottom...mostly flat
L-R thickness...varied
Bot-Top thickness...?
Surface the top: Run the boards UP facing UP, 1/32" thickness removed.. As they come out of the planer, inspect them, set aside those which are acceptable. Run unacceptable boards again, 1/32" thickness removed.
When all the tops are acceptable the chart says
Left...perfect
Right...mostly flat
Top...perfect
Bottom...mostly flat
L-R thickness...varied
Bot-Top thickness...varied
Now it gets easy
Step A: Run all the board through the planer with left side down. One pass.
Step B: Run all the boards through the planer with the top side down. One pass
Check the right and bottom of each board. If they are not perfect, drop the planer just a hair, repeat steps A and B.
the chart:
all sides perfect
L-R thickness=Bot-Top thickness
You have perfect long squares.
Now we chop.
The planer has left marks on on the infeed and outfeed ends of the boards, probably 2.5-3 inches from the end. This called 'snipe'
When you go to glue up your boards, this snip will appear as gaps. This will ruin an end grain assembly. It's gotta go.
You should be able to see and feel this. You can measure this length, you'll find it consistent on all the boards.
You want to cut it off, but at this stage you want to keep the corners from splintering. Splintered corners will appear as gaps in the end grain.
Rather than cut a single board at a time, you will give yourself an advantage if you can clamp several boards together. Each board offers support and strength to the board beside it. For the outside board, clamp in some scrap wood.
This is a good time for a new sharp blade.
Cut off the first few inches. Take your time with this cut. Easy does it.
Repeat with all the boards, one end only.
Now to cut the boards to the desired length. Cutting multiple boards at a time, as done with the snipe, will give you an advantage.
You can cut with a measured mark or set up a stop.
Either way, take your time. Strive to prevent the corners from splintering.
Repeat with all your boards all the way to the other end.
This other end has not had the snipe cut off.
If snipe can be cut off and your board is the right length, congratulations, you've done a fine job.
If you gotta have a board but the needed length gets into the snipe section, don't sweat it. You can still use these. Make the cut. Be sure to mark this snipe end CLEARLY. You can use them on the interior of the block as long as this snipe end is on the bottom of the block. Optionally, you can use shorts for making deep gaps for putting legs in the table.
Your boards are sized in all dimensions.
Time to glue them up.
It's much like a chess board. You'll do one row at a time. You can do several rows if you have enough clamps.
Set the boards on your worktable, take a good look at them. Two of the rows will be the outside. On the rest of the boards, only the left and right sides will be seen on the finished piece.
You'll have boards of different color, boards of very similar color. This is your chance to give your finished block a desirable appearance.
Line em up.
Here's the tricky part.
You will alternate your grain.
Start with the grain of the first board curving down, set the 2nd board such that the grain curves upward. Keep the grain directions alternating.
If you miss one, you'll be ok, but this method will give you increased strength and a flatter panel.
You can number these boards and panels, take care not to write to hard or dark on the outside visible surface. It will save you some sanding later.
Panel Assembly
You've got your boards in order, properly marked so you don't mix em up when you sneeze. You have several options for joinery.
Biscuits are a fine plan, they increase the surface area of the applied adhesive and help to keep the boards inline. For the outside corners, this is the way to go for a clean appearance.
For the interior of the panel, you can use screws and glue. Predrill those holes or you'll screw up your board. See section above for what it takes to replace a board.
If you want extreme performance, drill holes in the interior boards and connect them with all-thread and bolts. Them boards ain't coming apart.
A note here. If you are adding metal hardware to the inside of a block off wood, stainless steel is the way to go. It won't corrode. Zinc/galvanized steel or mild steel can ruse, corrode, fail, or discolor the work piece.
(Theres another 50 bucks shot to hell)
Glue them up.
Elmer's does a fine job, but there are much better adhesives out there. I've used TiteBond III with excellent results. It has the advantage of being approved for use in food surfaces. I put together a tiny cutting board for bar use. It got wet, stayed wet, and fell apart from the swelling and warping of the boards. Do your homework, ask around, there's a glue for you.
Apply the glue to all sides that will be coming together, even if you are using screws or bolts. Since the outsides will probably be glued, you'll need to clamp everything together. Lots of clamps, ideally, as many as will fit. Every 6-8 inches would be a minimum. If the block is 2' tall, 8 clamps per panel would be good.
Great care wants to be applied here. The boards need to line up along their entire length. Keep an eye that the top edge lines up better than perfect. When you go to join panel to panel, these little differences can add up, throwing off the workpiece after just a few panels.
You can clamp boards across your panel. You can clamp the panel in a form. You can clamp them onto another panel (such as plywood), use wax paper so you don't glue them together. As you tighten the clamps, watch for boards that are coming out of alignment. If some misalignment occurs, you can always put a belt sander on the high points. The critical areas are the outside corners-you'll want them to line up with the next panel, and the top corners-you don't want a gap in the top surface. Good Luck.
Repeat for all the panels.
Let them cure for a couple of days before releasing clamps.
If you don't have enough clamps, assemble one panel at a time. I'm not in a hurry.
When a panel comes out of the clamps is a good time to ensure the flatness of each side. Run your hand over it. If you find a seam that stick up more than you accept, you can take it down with a belt sander, disc sander, or hand planer. If the panel is narrow, running it through a planer could work, but the snipe will frig the whole thing up. I've done panels through a planer, then glued them into wider panels for countertops, but for the butcher block I would not use the planer.
The instructions up to here will give you end grain panels-this is the cutting board in the 2nd picture of the OP. I've done these for tables, countertops, and cutting boards. It's a great way to use scrap wood for drawer fronts.
Time to make a sandwich.
You have several panels, flat-flatter-flattest.
If you including legs built deep into the table, you'll need those if you have not already joined them with panels.
This is a 3-d Jigsaw puzzle. It's going to get heavy.
Set the outside panel on the bottom. You won't have to look at it. It's already tight.
You need to see the top, 2 sides, and take a look at the bottom.
Assemble can be done with screws, and bolts for the core. Biscuits can still be used on the outside, but you'll want some experience with a biscuit cutter for that endeavor.
If going with screws or bolts, assemble the core. Plenty of glue. Keep stuff aligned. The top has to be 100%. The sides need to be 100%.
Don't forget to alternate the grain with each added panel.
Watch the top.
Watch the sides.
If you screw it up, you can always sand it down.
After you have tightened the clamps, check it again.
Put the clamps to it in every dimension, left/right, back/front, top/bottom.
You can assemble the sandwich one piece at a time. Put two panels together, glue and screw, plus a couple hundred pounds of weight on top. Leave it for a couple of days.
Add another panel.
Let the piece sit for a couple of days. When you can't stand it anymore, take off the clamps.
Stand it up.
Check it for balance and level.
Sand down blemishes.
Thank whatever deity you may happen to worship.
Alternately, curse and make a fire.
There are plenty of different methods of constructing an end block. Some get complex and require no screw/bolts or even glue.
The easiest is to cut down a tree, prop it up for a few years until it has well seasoned, cut a slice out of the middle. There should be few cracks and it may serve you well.
You've got an awesome piece in front of you, time to maintain it.
Since this is a food contact surface, oils and stains won't do.
Mineral oil and beeswax. Wipe it on, rub it in, do all sides.
You can do your own research on different ways to maintain the piece.
There are videos and tutorials online to help you.
Tools in this How To
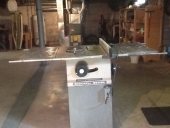
Table saw
Planer
Chop saw/miter saw/radial arm saw, could use the table saw
Sander, belt, orbital or both
Maybe a hand planer
Drill, bits
Clamps, a dozen for the panels, You'll want a couple dozen for the block.
Tape measure
Countersink if using screws
Forstner bit if using bolts
Ratchet/socket if using bolts
Seed the Mind, Harvest Ideas.
http://farmwhisperer.com


UE9s3wEgy(BR05(bDh6g~~60_3.jpg)

 1
1


 Send me a purple moosage to discuss offline if need be.
![[Thumbnail for DSC03204-Wheaton-Labs-butcher-block-.JPG]](/t/28347/a/25149/DSC03204-Wheaton-Labs-butcher-block-.JPG "Filename: DSC03204-Wheaton-Labs-butcher-block-.JPG
Description:")
![[Thumbnail for DSC03191-shletered-butcher-block-(front)-.JPG]](/t/28347/a/25150/DSC03191-shletered-butcher-block-(front)-.JPG "Filename: DSC03191-shletered-butcher-block-(front)-.JPG
Description:")
![[Thumbnail for DSC03194-.JPG]](/t/28347/a/25151/DSC03194-.JPG "Filename: DSC03194-.JPG
Description:")
![[Thumbnail for DSC03184-.JPG]](/t/28347/a/25155/DSC03184-.JPG "Filename: DSC03184-.JPG
Description:")
![[Thumbnail for IMG_20150220_105827.jpg]](/t/28347/a/26162/IMG_20150220_105827.jpg "Filename: IMG_20150220_105827.jpg
Description:")