• Post Reply Bookmark Topic Watch Topic
  • New Topic
permaculture forums growies critters building homesteading energy monies kitchen purity ungarbage community wilderness fiber arts art permaculture artisans regional education skip experiences global resources cider press projects digital market permies.com pie forums private forums all forums
this forum made possible by our volunteer staff, including ...
master stewards:
  • Nancy Reading
  • Carla Burke
  • r ranson
  • John F Dean
  • paul wheaton
  • Pearl Sutton
stewards:
  • Jay Angler
  • Liv Smith
  • Leigh Tate
master gardeners:
  • Christopher Weeks
  • Timothy Norton
gardeners:
  • thomas rubino
  • Jeremy VanGelder
  • Maieshe Ljin

new worm bin information

 
pollinator
Posts: 494
Location: Klickitat, WA (USDA zone 8, Sunset zone 5)
8
  • Mark post as helpful
  • send pies
    Number of slices to send:
    Optional 'thank-you' note:
  • Quote
  • Report post to moderator
So I made a bin from a tote, and filled it with bedding and some garbage, waited two weeks, and added red worms I got from a bait shop.

Look inside, and yup, it looks just like a bin with some garbage in it. No worms in sight. Is there any way to tell the difference between a bin with a few active worms, and a bin with a few dead worms? Or do I just have to wait until the population increases drastically?

Any hints from anyone?
 
gardener
Posts: 1948
Location: PNW Oregon
41
hugelkultur forest garden duck trees books chicken food preservation
  • Mark post as helpful
  • send pies
    Number of slices to send:
    Optional 'thank-you' note:
  • Quote
  • Report post to moderator
You didn't say if you made air holes, or added moisture, but I'll assume you have done both.

The worms will hang out at/near the bottom until it gets to damp down there, then they will be as close to the bottom as comfortable.  When they get hungry (yours won't be for some time) and you put new food in the top and close the lid, check back in 15 minutes - gently move the top layer and you'll see 'em.

Don't be afraid to move the bedding a bit to look for them if your worried.  I bet they are just fine - it's a test of faith.  Soon you will have so many finding them won't be a problem.
 
jacque greenleaf
pollinator
Posts: 494
Location: Klickitat, WA (USDA zone 8, Sunset zone 5)
8
  • Mark post as helpful
  • send pies
    Number of slices to send:
    Optional 'thank-you' note:
  • Quote
  • Report post to moderator
Thanks, Jami, I guess I'll have to dig up some faith. And maybe stirring the bedding is a good idea. The bin contents are mostly newspaper strips, with some coir. The garbage is coffee grounds, egg shells, and lettuce trimmings, but the bedding vastly predominates. Smells earthy, not stinky.

How wet should I keep it? I've seen some bins that were sodden, nearly mud, and others that weren't much damper than good potting soil. I'd worry that the really wet bins would always be on the verge of going anaerobic.

Funny, in some ways chickens are easier than worms. Chickens aren't nearly as introverted...
 
Jami McBride
gardener
Posts: 1948
Location: PNW Oregon
41
hugelkultur forest garden duck trees books chicken food preservation
  • Mark post as helpful
  • send pies
    Number of slices to send:
    Optional 'thank-you' note:
  • Quote
  • Report post to moderator
Ha! yes, introverted worms!

The bedding should just be damp, like good potting soil or they will dry out.  Should it get a bit to damp just add more dry material and lightly mix.
 
pollinator
Posts: 1528
Location: zone 7
18
  • Mark post as helpful
  • send pies
    Number of slices to send:
    Optional 'thank-you' note:
  • Quote
  • Report post to moderator
how many worms did you add?
 
steward
Posts: 3701
Location: woodland, washington
199
  • Mark post as helpful
  • send pies
    Number of slices to send:
    Optional 'thank-you' note:
  • Quote
  • Report post to moderator
have you seen the stacking tray worm composters?  you could easily build one yourself out of nursery propagation flats for pretty cheap and they work really well.  simplifies things quite a bit in my experience, from moisture management to harvesting finished product to separating worms.  the flats cost maybe $4 each and you could start with three of them.

two weeks isn't very long by worm standards.  give them a chance.  word is they'll consume their body weight in a week if they're in good shape, so it might take a while to make a dent in your pile.
 
Posts: 0
6
  • Mark post as helpful
  • send pies
    Number of slices to send:
    Optional 'thank-you' note:
  • Quote
  • Report post to moderator
We just started one of these also!  I had a worm bin several years ago in "the city", they're good for castings but you kinda have to have a huge one with an equally huge worm population in order to dispose of any large amount of vegetable matter.  I've seen really tiny things advertised as a way for urbanites to deal with their cooking scraps and I just don't think they could handle being fed every day.  Maybe they're for people who cook once a week??

Saw a seriously huge bin in New Zealand...like a 4 foot wide circle that was probably 3 feet deep...it dealt with communal kitchen left overs quite nicely and was an almost terrifying mass of seething wormy life.  But it did get smelly every once in awhile.  Those worms lived in their bin outside, which works out in NZ.

Over feeding them is easy to do and will lead to stink issues.  If they don't have enough food (unlikely but possible), some of them will die off and become castings themselves, but the strong will survive.  If they have too much food, especially during the establishment period, you might start thinking that this worm bin idea doesn't work out very well when it turns into a big sloppy smelly mess.  So, my advice is to err on the side of starving them a little, as weird as that seems, especially in the beginning. 

It's easy to get small bins too wet if you add water other than with a few squirts with a mister bottle.  Too wet leads to stinky food and possibly drowned worms.  Most bins have holes in the bottom to let out standing water. 

Too dry and they won't be happy either.  An occassional misting and a loose fitting lid will keep them humid but not sopping wet.  Like Jami said, kinda the moisture content of a wrung out sponge.  Not at all drippy. 

Our bin (it's an old enamel wash tub) doesn't have holes and lives under the sink in our cabin, so I'm being very careful not to get them too wet.  Boards across the top keep the light out and the humidity in. 

I'd prefer a bigger one in a bathtub for the summer months....when we find a free bathtub....You can prop bath-tub-worm-bins up at a slight angle so that excess moisture drains out the drain-hole. 

Worms are shy, and they hate bright light.  I look at ours just after the sun goes down, when the light inside is pretty diffused and dim.  Less likely to hide down in the very bottom that way.  Electric overhead lights seem to scare them. 

You can try one of the mesh floor bin designs (not my preferred method for a number of reasons), or you can put food on one side of the bin for awhile, and then gradually start moving the placement of fresh food over to the other side of the bin (this works best when the bin is longer than it is wide - bathtub shapes).  They'll migrate over from one side to the other as they follow the food, leaving behind castings on the other side. 

If your container is tall, you might not need as much "filler" stuff in it.  They do like to live down in the bottom and it'll make them easier to feed if you don't have to remove a bunch of stuff first.  In my experience, a depth of 6-8 inches seems to be plenty for smaller house sized bins. 

Good luck! 
 
Jami McBride
gardener
Posts: 1948
Location: PNW Oregon
41
hugelkultur forest garden duck trees books chicken food preservation
  • Mark post as helpful
  • send pies
    Number of slices to send:
    Optional 'thank-you' note:
  • Quote
  • Report post to moderator
One more thing.....

If you do get smell or things growing like fugi this will attract small bugs/flies and is not good for the worms.  To deal with this situation simply add new fresh carbon material to the top and you can even mix a little in.  This will help balance out the mix in your worm box should it get to rich, or moist or ?
 
jacque greenleaf
pollinator
Posts: 494
Location: Klickitat, WA (USDA zone 8, Sunset zone 5)
8
  • Mark post as helpful
  • send pies
    Number of slices to send:
    Optional 'thank-you' note:
  • Quote
  • Report post to moderator
Thanks for all the responses!

I made my bin from two 18L totes. The bottom tote is to catch any drainage, the top one has a screened bottom and air holes.

My only real experience with worms was at a community where I briefly lived (personalities just didn't work out). They had a hoop house structure with six 10-foot long worm beds, where the community's compost and trash was dumped. Also, they had rabbits in cages over the beds, which was a good idea. The beds were not managed well, with the garbage going in different beds helter skelter, so the only way to harvest compost and worms was to go through each bed by hand. Which I did. Learned some things. They had lined the beds with landscape fabric "to keep the worms in". Wha??? Like the worms were going to leave en masse, roaming into hard packed dirt, away from their food source??? Large parts of the beds had gone anaerobic, because the paper trash had been deposited whole, without being shredded or ever fluffed up. I pulled newspapers out of there that were 3 and 4 years old, still perfectly readable, if wet. And, in my opinion, the beds were in general too wet, because we were also growing potted plants over them, and the surplus water drained right in to the beds, which couldn't drain because of the landscape fabric lining. Like many things in this community, systematic implementation of a reasonable plan was really lacking.

So I do know the worms don't like light, but I was thinking that they would remain closer to the surface of my bin, where the garbage is. So it would be a good idea to keep fluffing up the bedding down to the bottom of the bin?

A pound of worms costs $30 or more, and since even the closest source would be several days away, and I was concerned that the mortality rate would be too high, I got about 50 worms from a bait shop, and a few more from a kitchen vermicomposter I contacted through freecycle. Yes, that's a very small number of worms, even for a small bin. But I really like the idea of building my own population, rather than buying.

(For several reasons, we did not spend the winter in Klickitat, and the area where we are is *far* different culturally from the PNW - the local freecycle group is not exactly a hotbed of activity, I only got one offer of worms after several requests. And no one wants my kombucha scobys. Can't wait to get back.)

This summer, I will try building a larger worm bin outside. I agree that a larger bin would be a healthier habitat for the worms. I've been mulling how to provide some kind of refuge from freezing weather for worms in an outside bin. Anyone have any experiences to share?
 
Jami McBride
gardener
Posts: 1948
Location: PNW Oregon
41
hugelkultur forest garden duck trees books chicken food preservation
  • Mark post as helpful
  • send pies
    Number of slices to send:
    Optional 'thank-you' note:
  • Quote
  • Report post to moderator
So it would be a good idea to keep fluffing up the bedding down to the bottom of the bin?

No, no continuous fluffing.  But having a plan to harvest the worms, and their castings and replacing castings/soil with new bedding is good.  I know that sentence was vague, but the methods and possibilities are many.

I would take big scoops of the bin (by now I had worms through and through). and put it into my chicken area in a pile.  Give the chickens a few minutes to harvest the worms and then I would scoop up the castings/soil and use it. 

I would gently move the old tub contents over and add new bedding as close to the bottom as possible.  Then pile the old, damp stuff on top of the new dry bedding.  Gravity would pull the moisture down and soon it was all evenly mixed.

Once a year I would start a new tub with large amounts of the old tub added on top, and completely clean out and use most of the old tub contents - this was the fluffing cycle.

 
Anonymous
Posts: 0
6
  • Mark post as helpful
  • send pies
    Number of slices to send:
    Optional 'thank-you' note:
  • Quote
  • Report post to moderator

would take big scoops of the bin (by now I had worms through and through). and put it into my chicken area in a pile.  Give the chickens a few minutes to harvest the worms and then I would scoop up the castings/soil and use it.


That's fantastic, letting the chickens seperate the worms from the castings for you, Jami!  Thanks also for your annual "fluffing cycle."     This thread is very enlightening for all kinds of worm bin situations.

We started our new bin with 25 worms from a bait shop as well, as I'm into "growing our own" also.  We have....not red wiggler worms out in the garden.  I've been trying to leave it alone, I see like, two when I poke around in there and mist.  Hoping it gets going soon and we can have big scoops of worms and soil also! 

They had a hoop house structure with six 10-foot long worm beds, where the community's compost and trash was dumped. Also, they had rabbits in cages over the beds, which was a good idea.


....another one of those almost really great ideas that could have really used some closer management and better thought out design.  Too bad! 

The rabbit urine AND potted plants drippings seem like a great way to make the whole thing too wet.  Worm bins under rabbit cages seem like a good idea, but only if the worms were there to compost their poo exclusively.  Vegetable matter has quite a bit of water in it also.  You'd have to add (shredded!  Who was putting whole paper in those beds?!) carbon really frequently to keep the mix right.  And the rabbit urine seems like it could add too much wet nitrogen too fast?  You don't want to cook the worms by making them a hot compost pile! 
 
                              
Posts: 47
Location: Ohio zone 4-5
  • Mark post as helpful
  • send pies
    Number of slices to send:
    Optional 'thank-you' note:
  • Quote
  • Report post to moderator
I had worms for many years.
I used the 1-1 1/2 " wide strips of newspaper that I soaked in a bucket of warm water mixed with peat moss that was soaked. I squeezed both of excess water, mixed it all together with a few hand fulls of dirt in my wheel barrel and filled the tote 3/4. After it drained excess water through the bottom of the tote, I added the worms, covered them a bit and added the food on top. I use the tote lid as the tray beneath to catch excess water and wandering worms. I lay a light piece of plastic over top of the bedding to keep light out and moisture in. If it gets dry I use a spray bottle to mist the top layer.
If they are outside on a pallet (in the shade)I do use the lid with holes and a heavy rock on top to keep raccoons out.

Once you've been through a cycle with the worms you can add back some of their undigested paper and a hand full or two of their compost for good organisms. It really is a community in there.

I have no qualms about pulling the bedding aside to see what is going on in there.

If your worm population becomes too big, they will get hungry and begin to migrate en-mass out through the bottom drainage holes. 25 worms now is not over populated and won't happen for quite some time.
I put touille curtain in the bottom but they got around it so I gave up on that practice and just check the tray.
The dark liquid that collects in the tray is great liquid fertilizer.
 
Posts: 269
2
  • Mark post as helpful
  • send pies
    Number of slices to send:
    Optional 'thank-you' note:
  • Quote
  • Report post to moderator

jacqueg wrote:
I got about 50 worms from a bait shop, and a few more from a kitchen vermicomposter I contacted through freecycle. Yes, that's a very small number of worms, even for a small bin. But I really like the idea of building my own population, rather than buying.


Two issues immediately come to mind.  Are you sure you got composting worms (red wigglers or European nightcrawlers)?  Most bait worms that I've seen are American/Canadian nightcrawlers, which are not the same thing at all.
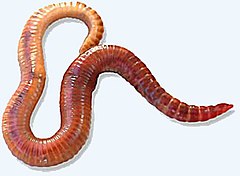
Either way, it will take a long time to breed up from 50 to the thousands you need.  Obviously worm generations are much shorter than human generations, but we're still talking something like 7-10 generations.  Under great conditions, I would estimate at least a year or two before you get anything useful.
 
Posts: 65
Location: Northwest
  • Mark post as helpful
  • send pies
    Number of slices to send:
    Optional 'thank-you' note:
  • Quote
  • Report post to moderator
I want to use worms to reduce my newspaper waste and create some soil. But I don't want to use worms I can't release into my garden. Don't red wrigglers become invasive if released?
 
tel jetson
steward
Posts: 3701
Location: woodland, washington
199
  • Mark post as helpful
  • send pies
    Number of slices to send:
    Optional 'thank-you' note:
  • Quote
  • Report post to moderator

RitaSparrow wrote:
I want to use worms to reduce my newspaper waste and create some soil. But I don't want to use worms I can't release into my garden. Don't red wrigglers become invasive if released?


nope.
 
Rita Vail
Posts: 65
Location: Northwest
  • Mark post as helpful
  • send pies
    Number of slices to send:
    Optional 'thank-you' note:
  • Quote
  • Report post to moderator
I thought it was a problem in some environments - like in northern forests, where escaped fishing worms were wrecking havoc by being too voracious for the rest of the scavengers and wondered if anybody was just using the worms they already have in their gardens.
 
Jami McBride
gardener
Posts: 1948
Location: PNW Oregon
41
hugelkultur forest garden duck trees books chicken food preservation
  • Mark post as helpful
  • send pies
    Number of slices to send:
    Optional 'thank-you' note:
  • Quote
  • Report post to moderator
They are not a problem for you and your soil, that other issue was discussed a while back.  You can do a search here to find it, as I don't remember how all the details went.
 
tel jetson
steward
Posts: 3701
Location: woodland, washington
199
  • Mark post as helpful
  • send pies
    Number of slices to send:
    Optional 'thank-you' note:
  • Quote
  • Report post to moderator

RitaSparrow wrote:
I thought it was a problem in some environments - like in northern forests, where escaped fishing worms were wrecking havoc by being too voracious for the rest of the scavengers and wondered if anybody was just using the worms they already have in their gardens.


it's my understanding that the escaped fishing worms that have disrupted forest ecosystems are nightcrawlers.  the composting red worms are more effective at breaking down food waste, but they also have a narrower range of conditions they'll thrive in.  so they typically don't survive in great numbers outside of cultivation in temperate regions.  unless there are great piles of livestock manure around, in which case they're still not a threat to forest duff.

good question, though.  nothing wrong with being conscientious about your impact on local ecosystems.
 
Rita Vail
Posts: 65
Location: Northwest
  • Mark post as helpful
  • send pies
    Number of slices to send:
    Optional 'thank-you' note:
  • Quote
  • Report post to moderator
Thank you. That's what I was looking for. Another question. Does anyone use their local worms? I understand they might not multiply as fast, but I have noticed that if I have some manure, thee are lots of babies.
 
pollinator
Posts: 11853
Location: Central Texas USA Latitude 30 Zone 8
1261
cat forest garden fish trees chicken fiber arts wood heat greening the desert
  • Mark post as helpful
  • send pies
    Number of slices to send:
    Optional 'thank-you' note:
  • Quote
  • Report post to moderator
Local worms often have more particular temperature and moisture requirements than composting worms - they need to be able to dig deep to escape the heat or to find moisture.  If your manure heap has a lot of worms, they are probably suited to hot, moist conditions and should do fine in a bin.  I think you should go ahead and collect some and see how they do in a bin. 

 
steward
Posts: 7926
Location: Currently in Lake Stevens, WA. Home in Spokane
350
  • Mark post as helpful
  • send pies
    Number of slices to send:
    Optional 'thank-you' note:
  • Quote
  • Report post to moderator
Here is a link to North Carolina State U vermicomposting.  If you follow the links at that site, almost any vermicomposting question you have will be answered.

http://www.bae.ncsu.edu/topic/vermicomposting/
 
Rita Vail
Posts: 65
Location: Northwest
  • Mark post as helpful
  • send pies
    Number of slices to send:
    Optional 'thank-you' note:
  • Quote
  • Report post to moderator
Thank you. I had no idea there was so much to learn 
 
pollinator
Posts: 91
26
4
hugelkultur purity forest garden fungi trees bee
  • Mark post as helpful
  • send pies
    Number of slices to send:
    Optional 'thank-you' note:
  • Quote
  • Report post to moderator

tamo42 wrote:
Two issues immediately come to mind.  Are you sure you got composting worms (red wigglers or European nightcrawlers)?  Most bait worms that I've seen are American/Canadian nightcrawlers, which are not the same thing at all.


If s/he got them from a bait shop, they are absolutely NOT Eisenia fetida:


tel jetson
steward
Posts: 3701
Location: woodland, washington
199
  • Mark post as helpful
  • send pies
    Number of slices to send:
    Optional 'thank-you' note:
  • Quote
  • Report post to moderator

joe pacelli wrote:
If s/he got them from a bait shop, they are absolutely NOT Eisenia fetida


not too common, but Eisenia fetida are sometimes sold as bait.
 
jacque greenleaf
pollinator
Posts: 494
Location: Klickitat, WA (USDA zone 8, Sunset zone 5)
8
  • Mark post as helpful
  • send pies
    Number of slices to send:
    Optional 'thank-you' note:
  • Quote
  • Report post to moderator
Yes, I got them from a bait shop and they were sold as red wrigglers, not nightcrawlers. They were definitely small, slender, and tiger-striped. So some bait shops do sell them. They ate my garbage just fine, too.
 
It would give a normal human mental abilities to rival mine. To think it is just a tiny ad:
GAMCOD 2025: 200 square feet; Zero degrees F or colder; calories cheap and easy
https://permies.com/wiki/270034/GAMCOD-square-feet-degrees-colder
reply
    Bookmark Topic Watch Topic
  • New Topic