Glenn Herbert

Rocket Scientist
+ Follow
since Mar 04, 2013
Merit badge: bb list bbv list
Forum Moderator
Glenn Herbert currently moderates these forums:
Biography
Early education and work in architecture has given way to a diverse array of pottery, goldsmithing, and recently developing the family property as a venue for the New York Faerie Festival, while maintaining its natural beauty and function as private homestead.
For More
Upstate NY, zone 5
Apples and Likes
Apples
Total received
In last 30 days
19
Forums and Threads

Recent posts by Glenn Herbert

You can still add a P-channel to your J-tube feed, just a piece of sheetmetal with edges bent to assure a small clear air path down to the top of the burn tunnel. There are examples elsewhere on Permies.
16 hours ago
Nice work!

You didn't mention how superinsulated your house is; from talking about using that big kitchen stove, it seemed like you needed an average amount of heat to keep the place warm in winter.

A J-tube feed really should be tall enough to hold your typical fuel and have a brick slid over the top for draft control and emergency shutoff. Depending on a downstream damper for flow control is a dangerous idea, especially if it is possible to severely restrict flow with it. If someone closes it while there are still live coals, you could build up carbon monoxide in the room. Draft control is best done with a closure for the top of the feed tube.

I do have concerns that a small system like yours may take a long time to warm the mass you have. It may be hours after you light it that the cobbed bench starts to get warm. The partial barrel over the riser will throw some instant radiation; only use will show how much.
17 hours ago
You are right that you need more exit airflow, but you could easily get that by making little pillars all around the top instead of a flat top with small grooves in it. I might try six pillars with equal spacing and height as their thickness. Put them toward the outside edge of the top of the chimney so there is just enough inner/upper surface to properly support the smallest pot you want to use.
2 days ago
If you want the J-tube feed to stick out of the front of the wood box, an 8" core can work fine. Given the framing between the brick box and the doorframe I would go with 3" of cob over the brick - enough to be sturdy but not take too much space or too long for heat to start to come through it. My recommendation would be an 8x8 feed opening, 8" x 9" high burn tunnel with 8-10" long roof, and 8" diameter riser from perlite-clay. You can line the floor with an inch of strong cob, or pieces of firebrick split 1 1/4" thick, to get the right dimension without cutting lots of firebrick. From my experience, you want about 2" thickness on the riser which gives 12" outside diameter. The simplest way to make this is with a piece of 8" sonotube and a pair of 6" stovepipe sections bent out and snapped together to make a 12" sleeve. As it commonly comes in 2' lengths, I would advise three pieces of stovepipe with one cut in half and fitted to itself, giving a 36" height to set on top of the burn tunnel walls. 36 + 8 = 44", which is just enough for an 8" J-tube with 16" high feed tube. See my RMH build for riser construction details.

You need some insulation under the core so the floor doesn't suck heat out of it; an inch or two of perlite-clay under the core would do the job nicely, with scraps of 1 1/4" firebrick at intervals to stabilize things. To strengthen the core, especially the feed tube, I would surround it with at least 4", 6" would be better, of cob with some perlite mixed into the inner couple of inches. This would give a pretty good mix of strength and insulation. I would use a good amount of straw in the main/outer layer, around the feed and around the brick box, so you don't get large cracks.

For the bell bench, I would make walls of 2" thick block as you mentioned, and internal piers of 4" hollow block on end to support the roof, spaced as widely as you can while supporting all the roof panels. I have found 16 x 16 or 18 x 18 concrete pavers at Lowe's or Home Depot, and those supported all around the edges and at corners in the middle will make a good base for a cob seat. The bell cavity will have the coolest air at floor level, but I would still put in an inch of perlite-clay with a smooth hard top for cleanability, after placing structural block.

2 days ago
A 4" J-tube core which is what you are describing may or may not function well depending on exact details, but in any case is much too small to do you any good. What is the character and size of your existing chimney? If at least 6" metal or 8x8 flue tile, and the chimney draws positively when first started, I believe you could put an 8" J-tube core in, which would give enough heat to warm the space well without feeding it all day.

I have a bunch more to say but have to run now. I will post again this afternoon with details.
2 days ago
The surface finish still has bits of straw or whatever showing, so that part could be refinished with water, assuming it is not augmented with lime. I see gritty patch material from previous repair attempts. A fine clay/sand mix could be worked into the cracks rather than just plastered over the area, and possibly be more durable. I would try to burnish any patching when stiff but not dry to make it as dense as possible.
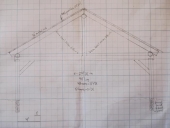
That mostly looks good. You show half-round purlins about 4' apart, but metal roofing generally wants purlins about 2' apart so the metal does not buckle when you step on it for installation. Additionally, 4' spacing would give only half the attachment points to resist wind uplift as 2' spacing would. Half-round purlins at the average size you mentioned would probably still not give adequate strength against bending in either direction, down or up.

In most places, the lincoln log connection of trusses to longitudinal beams would be fine, but for major uplift loads it would not be sufficient; you need something like through bolts tying the trusses to the posts.
There is no reason to use baffles to force a convoluted flow path in the bell (not actually functioning as a bell in your sketch).

What I would recommend is to make the bench an open cavity with just enough brick pillars inside to support the roof/seat, with the manifold open all around and into the side of the existing box, so gases can flow freely. Then have a stovepipe from low in the middle back of the bench to the chimney. Hot gases will naturally flow into the box and upper layer of bench cavity, and cooler gases will sink to the floor and out through the stovepipe to the chimney.
1 week ago
Do you have, or have access to, more brick? With a start like you have, continuing in brick seems like a good idea. To make a batch box, you will really need firebrick; if you build the core from red brick, I would expect the firebox to deteriorate quickly, maybe even in the first winter of serious Maine use.

A 6" batch box core from firebrick on edge (so 2 1/2" thick walls) would just fit inside your existing box with 1" gap for insulation, but would not allow the gases to go down to the base of the enclosure.Given the electrical switch box on the wall behind it, I would be leery of extending that enclosure straight up, or of putting a barrel on top of it.

I think your best bet would be a new or expanded bell enclosure, possibly knocking out some bricks from the bottom side wall to allow air circulation between existing and new bell structures.If you took the existing down a few courses at front and set the core into that, then extended the existing left and front up a few more courses, I think you could do a sidewinder into a taller bell to the right (more or less doubling the existing footprint), and with a good-sized opening lower in the right side of the existing, that could become a functional part of the bell.

If more red brick is hard to come by, you could make the extended bell from cob as long as the core/riser exhaust zone is protected by firebrick. I would make cob bell walls 6" thick for safety if you don't have brick for a continuous inner layer.
1 week ago
The Wheaton Labs videos are rough gravity-load timber framing. A true traditional timber frame has mortise and tenon joints, pegged to withstand tension as well as compression loads. The number, size and species of pegs makes a huge difference; mortise and tenon joints do not use tenons like nails, but like through bolts.

The trusses you draw are not "on top of" the tie beams, the tie beams are a critical part of the trusses, and all have to be pegged together so the joints cannot pull apart. If they are joined properly, the tie beam is largely in tension holding the bottom ends of the sloped top members from spreading. If you depend on the tie beam just supporting the gravity load of the upper members and roof, then it must be really strong to resist bending.