• Post Reply Bookmark Topic Watch Topic
  • New Topic
permaculture forums growies critters building homesteading energy monies kitchen purity ungarbage community wilderness fiber arts art permaculture artisans regional education skip experiences global resources cider press projects digital market permies.com pie forums private forums all forums
this forum made possible by our volunteer staff, including ...
master stewards:
  • Nancy Reading
  • Carla Burke
  • r ranson
  • John F Dean
  • paul wheaton
  • Pearl Sutton
stewards:
  • Jay Angler
  • Liv Smith
  • Leigh Tate
master gardeners:
  • Christopher Weeks
  • Timothy Norton
gardeners:
  • thomas rubino
  • Jeremy VanGelder
  • Maieshe Ljin

My first RMH build

 
Apprentice Rocket Scientist
Posts: 238
Location: Province of Granada, Andalucía, Spain
83
5
gear fungi cooking composting toilet building rocket stoves woodworking wood heat
  • Likes 11
  • Mark post as helpful
  • send pies
    Number of slices to send:
    Optional 'thank-you' note:
  • Quote
  • Report post to moderator
Dear rocket scientists,
in October I’ll finally start building the first RMH for a friend.

@Thomas Rubino, your advice of just going ahead and starting (https://permies.com/t/186176/Rocket-Scientist#1739693) was something I really needed to hear, as I was starting to go in circles in my head. Thank you for that!

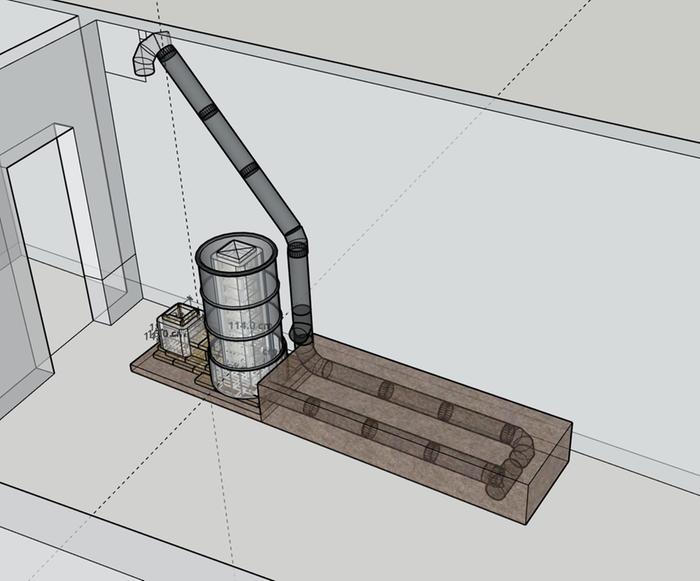
The RMH is going to be on the first floor (street level). The exhaust goes 3 stories up and over the roof, mostly inside. The exhaust is 150mm, so the szstem is limited to 6".

As it’s a first time I am trying to keep it relatively simple and on a budget where possible, without sacrificing quality too much.
It’s going to be a 6” J-tube with a 55 gal barrel.

The mass is going to be a bench the size of a single bed (90cm deep, 200cm long). I was planning metal ducting (150mm) with thermal cob and stones, following the Wiesner rmh "bible".
A relatively short and straight bench, keeping it on the safe side of draft and drag (that old 3 story chimney will be cleaned and inspected before our build, but we cant't change or upgrade it).

Here's a rough design, locating it in the room:


The insulation under the core will be 10cm of expanded clay, bound with clay slip. Expanded clay is the easiest o come by here. I was planning on building a border of cob, then pouring 10cm of the expanded clay and using that as the level board to build the first flat layer of fire brick.
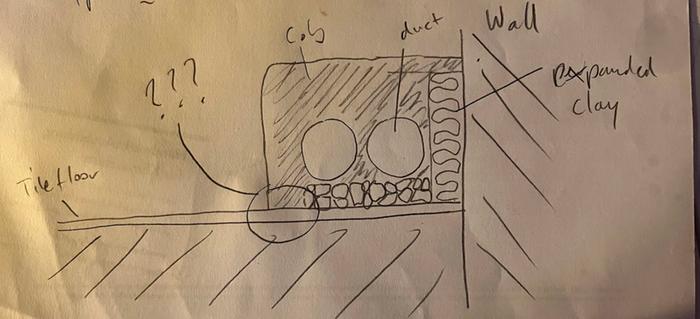
And there I have a question: Will the cob attach to the tile floor or do you think I should put some screws or something into the floor to give it something to attach to?
Between the bench and the wall there will also be a fill in of 10cm of expanded clay.

The bench's first layer (on the tile floor) will be some rubble with a border of cob. Same question here as for the core.

I'm sure there's more questions to follow. Thank you all in advance for your patience and willingness to share!

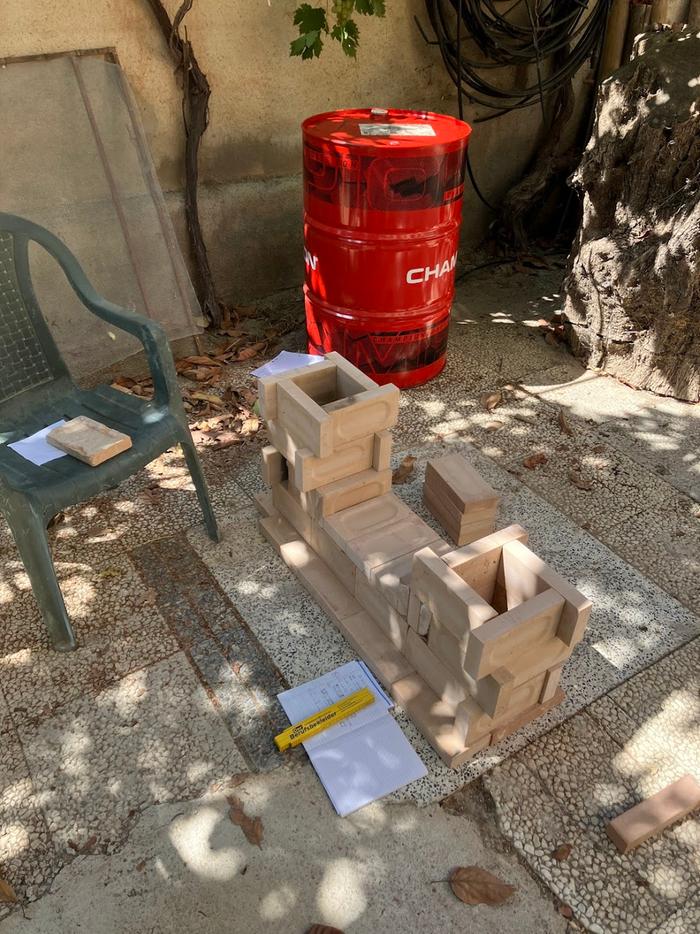
Some photos of the progress:

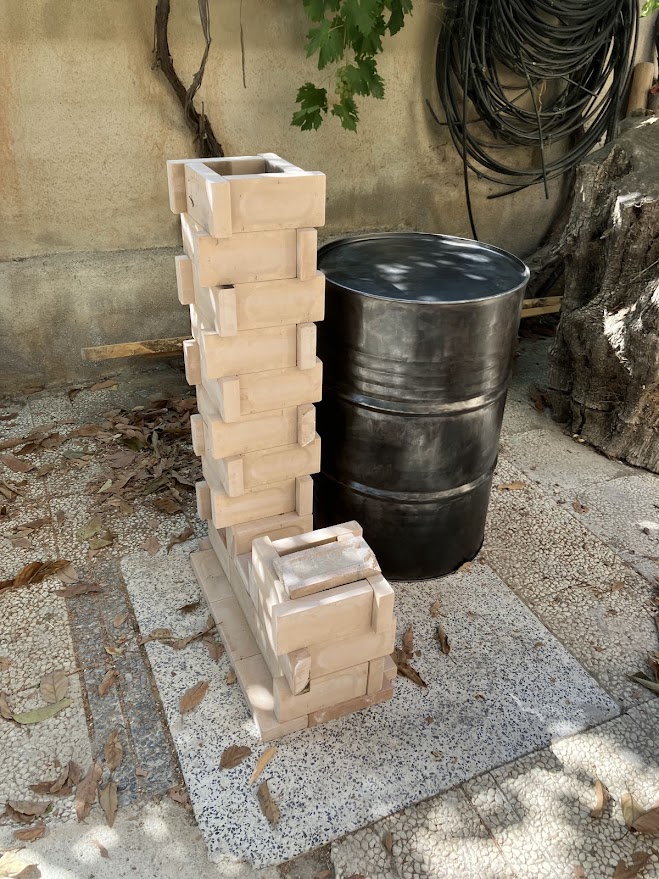
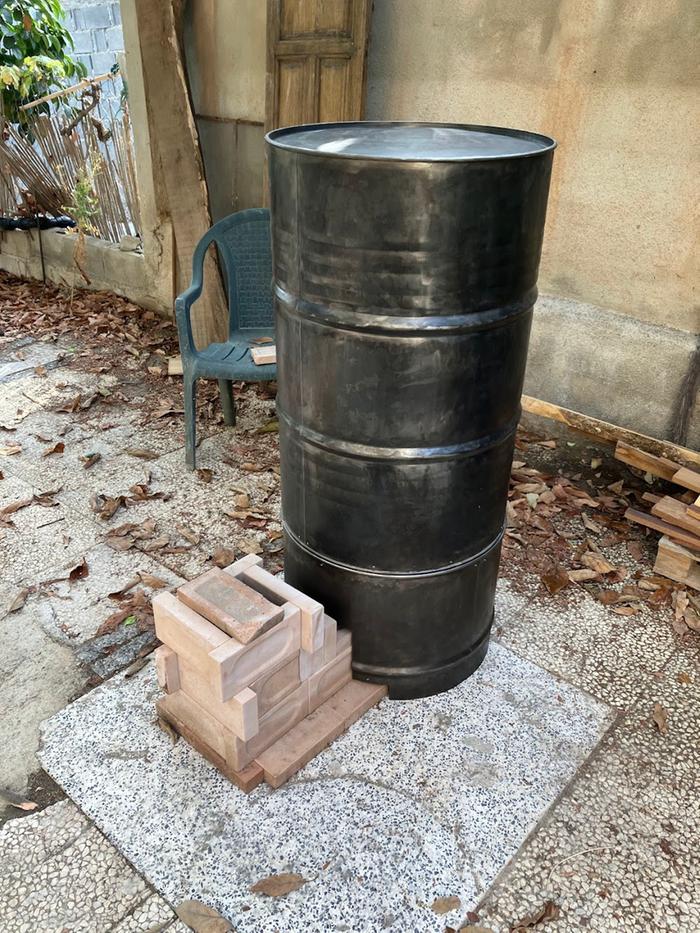
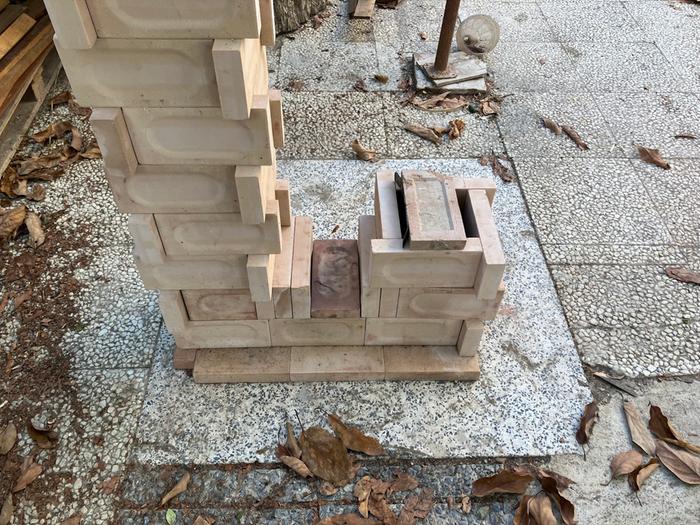
Dry stacking the core:


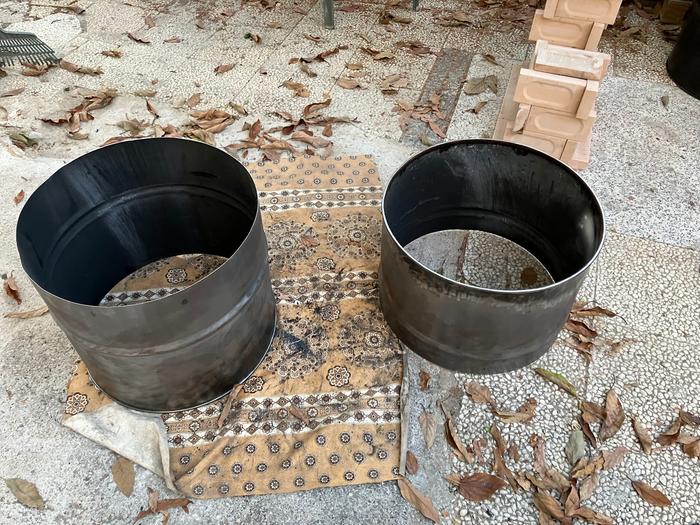
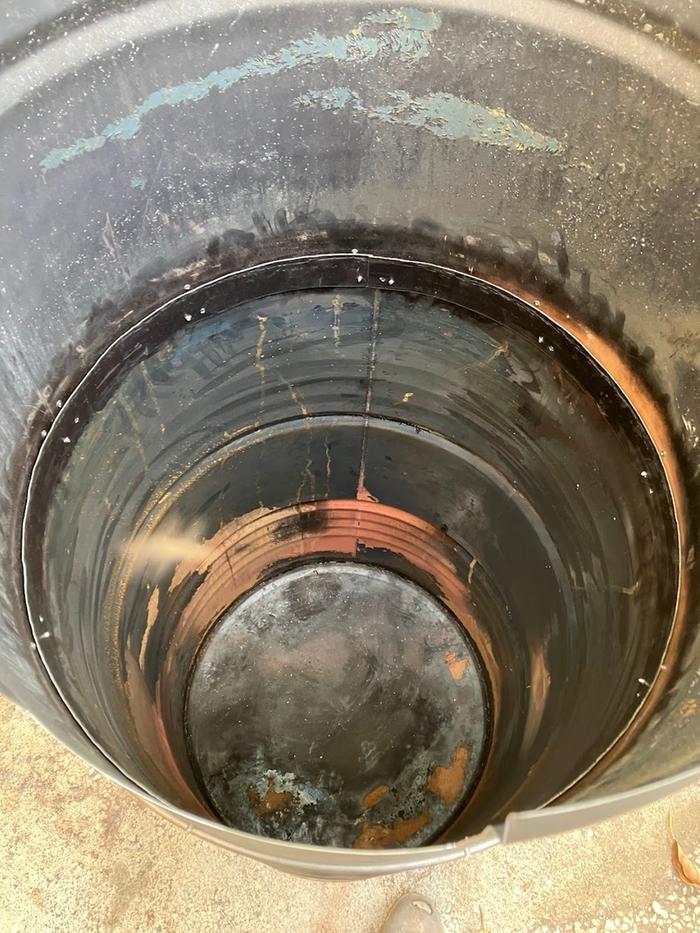
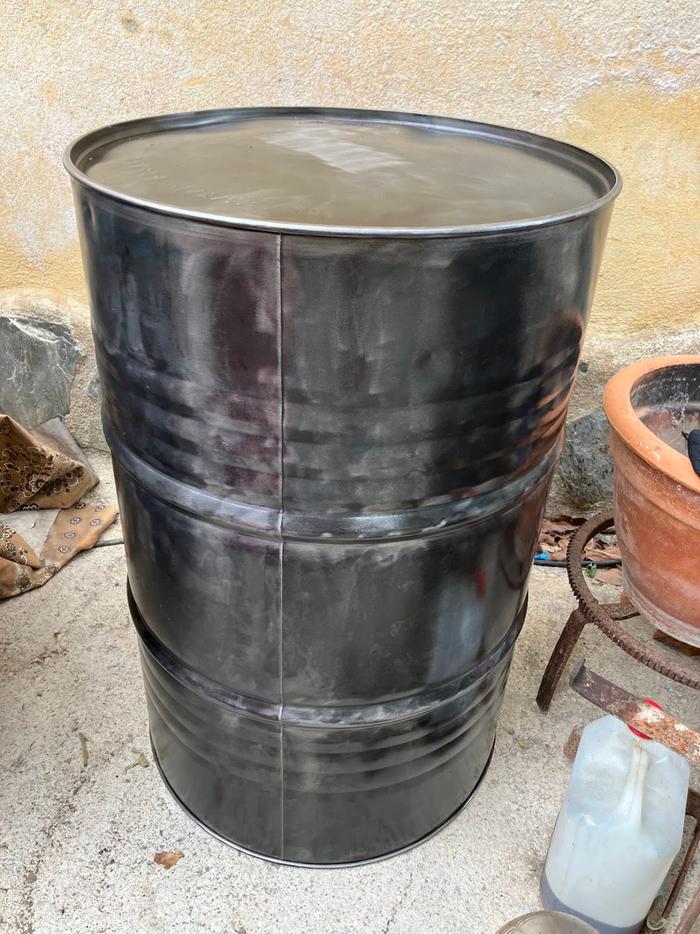
Cleaned up barrel:


rocket scientist
Posts: 6322
Location: latitude 47 N.W. montana zone 6A
3199
cat pig rocket stoves
  • Likes 10
  • Mark post as helpful
  • send pies
    Number of slices to send:
    Optional 'thank-you' note:
  • Quote
  • Report post to moderator
Hi Benjamin;
That J Tube burn tunnel looks too long.
The specification is Apx 12" (31 cm)  of burn tunnel roof.
Too long and you will get massive ash in the system downstream.
 
Benjamin Dinkel
Apprentice Rocket Scientist
Posts: 238
Location: Province of Granada, Andalucía, Spain
83
5
gear fungi cooking composting toilet building rocket stoves woodworking wood heat
  • Likes 8
  • Mark post as helpful
  • send pies
    Number of slices to send:
    Optional 'thank-you' note:
  • Quote
  • Report post to moderator
Hi Thomas. Thanks for the close look.

The dimensions are/were 1:2,2:3:
Feed height 38cm
Burn tunnel length 85cm
Riser 114cm

But I can’t remember the reason why. So I took another look at the plans in the Wiesner book and they go with 1:1,5:3. that means I can make the burn tunnel a whole brick shorter.

 
Benjamin Dinkel
Apprentice Rocket Scientist
Posts: 238
Location: Province of Granada, Andalucía, Spain
83
5
gear fungi cooking composting toilet building rocket stoves woodworking wood heat
  • Likes 4
  • Mark post as helpful
  • send pies
    Number of slices to send:
    Optional 'thank-you' note:
  • Quote
  • Report post to moderator
Has anyone some insight on this?

The insulation under the core will be 10cm of expanded clay, bound with clay slip. Expanded clay is the easiest o come by here. I was planning on building a border of cob, then pouring 10cm of the expanded clay and using that as the level board to build the first flat layer of fire brick.
And there I have a question: Will the cob attach to the tile floor or do you think I should put some screws or something into the floor to give it something to attach to?
 
Benjamin Dinkel
Apprentice Rocket Scientist
Posts: 238
Location: Province of Granada, Andalucía, Spain
83
5
gear fungi cooking composting toilet building rocket stoves woodworking wood heat
  • Likes 5
  • Mark post as helpful
  • send pies
    Number of slices to send:
    Optional 'thank-you' note:
  • Quote
  • Report post to moderator
So I drystacked the core again, this time with a shorter burn tunnel.


Test fire went well after some starting issues.

The dimensions are now:
  • Feed heigt 38cm
  • Burn tunnel 62 cm (with 31 cm of burn tunnel roof)
  • Riser 116 cm

  • That boils down to 1 : 1,6 : 3.


    Benjamin Dinkel
    Apprentice Rocket Scientist
    Posts: 238
    Location: Province of Granada, Andalucía, Spain
    83
    5
    gear fungi cooking composting toilet building rocket stoves woodworking wood heat
    • Likes 5
    • Mark post as helpful
    • send pies
      Number of slices to send:
      Optional 'thank-you' note:
    • Quote
    • Report post to moderator

    Benjamin Dinkel wrote:Has anyone some insight on this?

    The insulation under the core will be 10cm of expanded clay, bound with clay slip. Expanded clay is the easiest o come by here. I was planning on building a border of cob, then pouring 10cm of the expanded clay and using that as the level board to build the first flat layer of fire brick.
    And there I have a question: Will the cob attach to the tile floor or do you think I should put some screws or something into the floor to give it something to attach to?


    Here's a sketch depicting the question:
     
    thomas rubino
    rocket scientist
    Posts: 6322
    Location: latitude 47 N.W. montana zone 6A
    3199
    cat pig rocket stoves
    • Likes 9
    • Mark post as helpful
    • send pies
      Number of slices to send:
      Optional 'thank-you' note:
    • Quote
    • Report post to moderator
    Good first Day, Brand New Apprentice;
    I believe you will be fine with building it as is.
    However, as you are concerned, you might use a side grinder and scuff up the tile where it will be covered to take the slipperiness out of it.
    Your new core layout looks perfect.
    After you have mastered the J-Tube builds, we will enter you in the beginner's Batchbox building class.
    Perhaps, you might be the first to build Peter's new Shorty Core in your part of the world.
    Keep up the good work and remember to post as often as possible so I and other graduates can monitor and learn from your ideas and critique your work to help you improve.
     
    Benjamin Dinkel
    Apprentice Rocket Scientist
    Posts: 238
    Location: Province of Granada, Andalucía, Spain
    83
    5
    gear fungi cooking composting toilet building rocket stoves woodworking wood heat
    • Likes 6
    • Mark post as helpful
    • send pies
      Number of slices to send:
      Optional 'thank-you' note:
    • Quote
    • Report post to moderator
    Thanks Thomas.

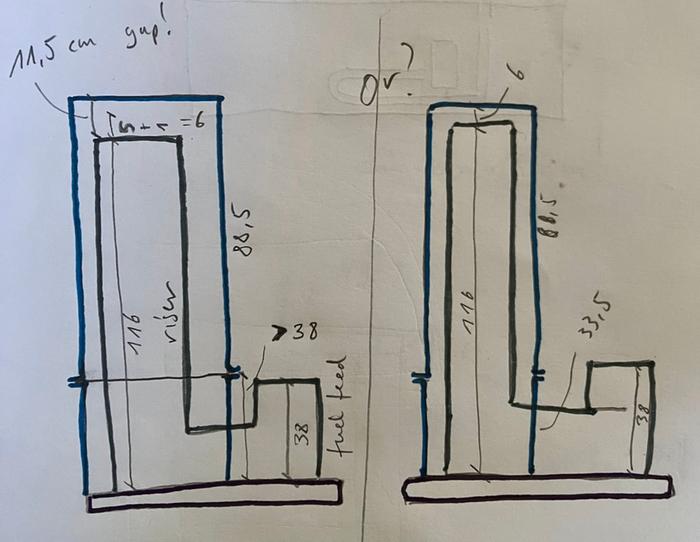
    I am ready to cut the second barrel to fabricate the manifold and I encountered a little riddle.


    So if I go and make the manifold barrel (lower barrel) stick out higher than the feed tube, so the seal sticks out of the cob for easy removal, I end up with a gap of 11,5 cm between the riser and the barrel.

    If I go and aim for the 5 cm gap (2") that I keep reading the manifold can only be 33,5 cm high and thus will end up under the cob or the surface of the cob around the core needs to change height.

    Is there anything against leaving 11,5 cm of a gap?
    I read that the top of the barrel will likely get less hot, so not good for cooking, but actually that may be a plus instead of a downside.
    Any real downsides to consider?

     
    thomas rubino
    rocket scientist
    Posts: 6322
    Location: latitude 47 N.W. montana zone 6A
    3199
    cat pig rocket stoves
    • Likes 10
    • Mark post as helpful
    • send pies
      Number of slices to send:
      Optional 'thank-you' note:
    • Quote
    • Report post to moderator
    No downside other than top-of-barrel heat.
    In fact, we no longer recommend a 5cm(2") gap but suggest an 8cm(3") - 11cm(4.3) minimum.
    With Batchboxes there is a 30cm(12") minimum.

    Many innovations have been introduced since the Wisners published their book.
     
    Benjamin Dinkel
    Apprentice Rocket Scientist
    Posts: 238
    Location: Province of Granada, Andalucía, Spain
    83
    5
    gear fungi cooking composting toilet building rocket stoves woodworking wood heat
    • Likes 4
    • Mark post as helpful
    • send pies
      Number of slices to send:
      Optional 'thank-you' note:
    • Quote
    • Report post to moderator
    Wonderful, thank you.
    Then I'm off to the angle grinder. Will come back with more photos and certainly questions :)
     
    Benjamin Dinkel
    Apprentice Rocket Scientist
    Posts: 238
    Location: Province of Granada, Andalucía, Spain
    83
    5
    gear fungi cooking composting toilet building rocket stoves woodworking wood heat
    • Likes 6
    • Mark post as helpful
    • send pies
      Number of slices to send:
      Optional 'thank-you' note:
    • Quote
    • Report post to moderator
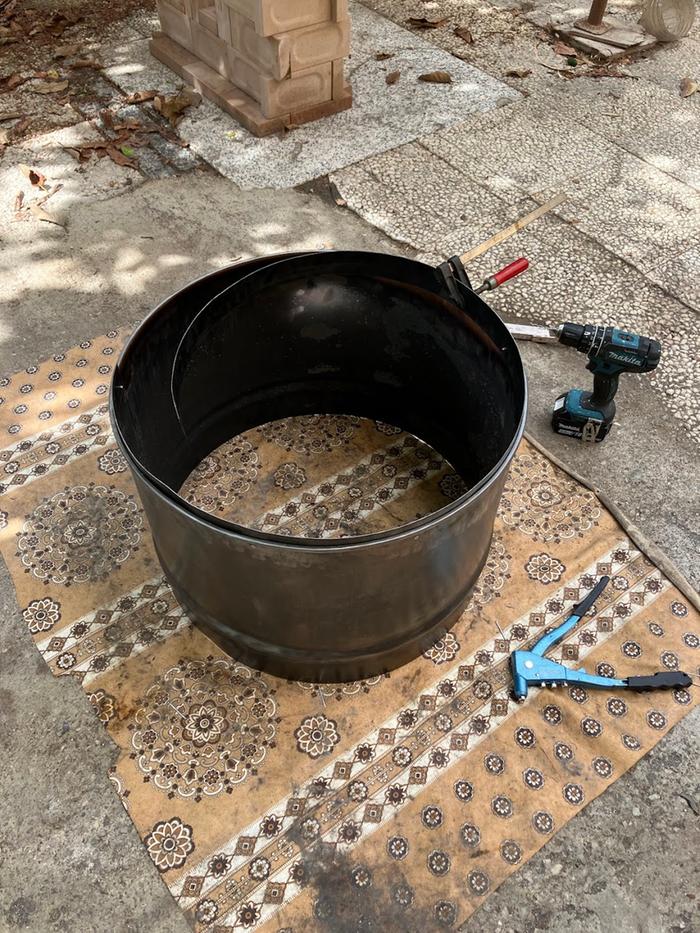
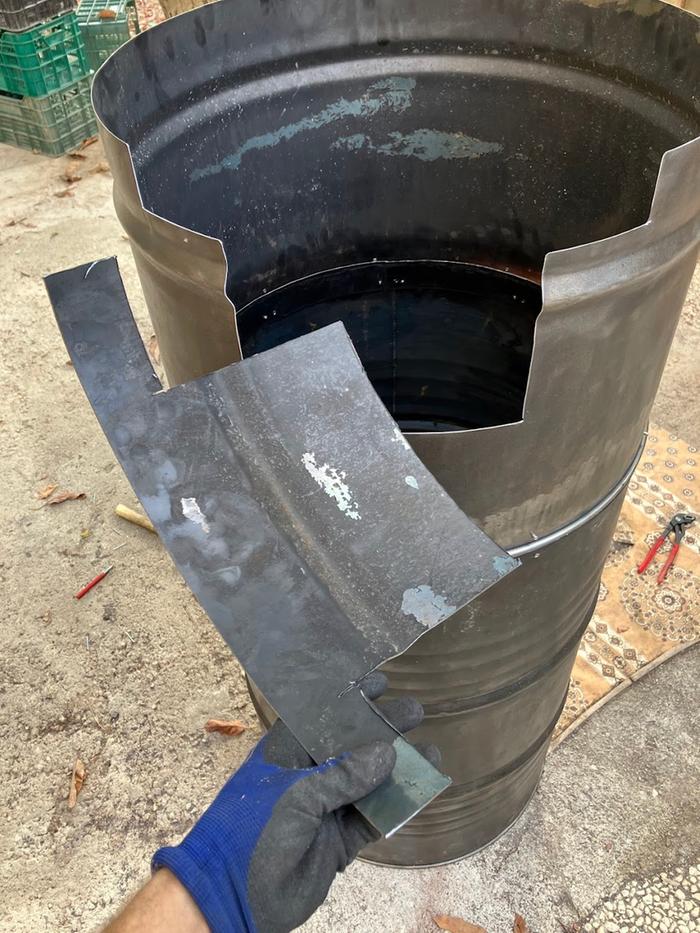
    So yesterday I cut the manifold to a height of 39 cm and a 5 cm ring to make a lip to help center the two barrels that get stacked.


    Today I attached the 5 cm ring as a lip on the manifold with stainless steel rivets.


    To my surprise the top barrel wouldn't fit over it. I measured and it turns out the bottom of the top barrel is 3mm smaller in diameter than the top of the bottom barrel.
    So I had to move the lip to the top barrel.


    Then I cut out a part on the lower barrel/manifold to let it fit over the core.


    This is the result for today!


    Rocket Scientist
    Posts: 791
    Location: Guernsey a small island near France.
    299
    • Likes 5
    • Mark post as helpful
    • send pies
      Number of slices to send:
      Optional 'thank-you' note:
    • Quote
    • Report post to moderator
    Looking good and I am sure it will work, however you could gain a lot more performance if you wanted to?
    The less mass you have in the fire box tunnel and riser, the quicker the stove will get up to temperature.
    You can also add a simple secondary air inlet and use lots of insulation to surround the bricks.
    I am not exactly sure what the expanded clay is formed from, I guess it is small hard balls?
    Can you get vermiculite graduals from garden centers near you?
     
    Posts: 284
    Location: North East Iowa, USA
    71
    • Likes 6
    • Mark post as helpful
    • send pies
      Number of slices to send:
      Optional 'thank-you' note:
    • Quote
    • Report post to moderator
    Your work is already done and it looks good.  But I thought I would toss this out for those with barrel choices.

    If you have a chance to get  barrels with flanged tops, (held together with flange band)  they can be a great deal for the following reasons.

    Very often The top of the flanged barrel will match up perfectly with the bottom of the same brand of flanged barrel.  Thus you will be able to use the flange/band to joint the two.  Thus the bottom of the top barrel will now be UP,  And the top of the top barrel will be down to the bottom barrel bottom.  (clear as mud- I know)   But in this case you only have to cut out the barrel bottom of the bottom barrel.

    And then can cut the bottom barrel to any length you want.  (always nice to use the whole barrel if you have the room and can use the instant heat)

    Hopes this helps someone along the line.

    best of success.
    Scott
     
    Benjamin Dinkel
    Apprentice Rocket Scientist
    Posts: 238
    Location: Province of Granada, Andalucía, Spain
    83
    5
    gear fungi cooking composting toilet building rocket stoves woodworking wood heat
    • Likes 3
    • Mark post as helpful
    • send pies
      Number of slices to send:
      Optional 'thank-you' note:
    • Quote
    • Report post to moderator
    Hi Fox,
    I decided to go with the firebrick for ease of use, availability and longevity. The core will be insulated with high temp rock wool.
    The expanded clay looks like little hard pebbles, yes. It will go under the base, just to insulate the floor.
    I know vermiculite has much better insulation value, but I can't seem to find it reasonably cheap around here. They only sell it ground up to powder.
     
    Benjamin Dinkel
    Apprentice Rocket Scientist
    Posts: 238
    Location: Province of Granada, Andalucía, Spain
    83
    5
    gear fungi cooking composting toilet building rocket stoves woodworking wood heat
    • Likes 3
    • Mark post as helpful
    • send pies
      Number of slices to send:
      Optional 'thank-you' note:
    • Quote
    • Report post to moderator
    Hi Scott, thanks for your input. I'm sure it will be of some use for someone in the future.
    If I had a free source of that type of barrel I would definitely try your suggestion. As of now I can get free barrels that are the closed variant from a garage/repair shop nearby.
     
    Benjamin Dinkel
    Apprentice Rocket Scientist
    Posts: 238
    Location: Province of Granada, Andalucía, Spain
    83
    5
    gear fungi cooking composting toilet building rocket stoves woodworking wood heat
    • Likes 5
    • Mark post as helpful
    • send pies
      Number of slices to send:
      Optional 'thank-you' note:
    • Quote
    • Report post to moderator
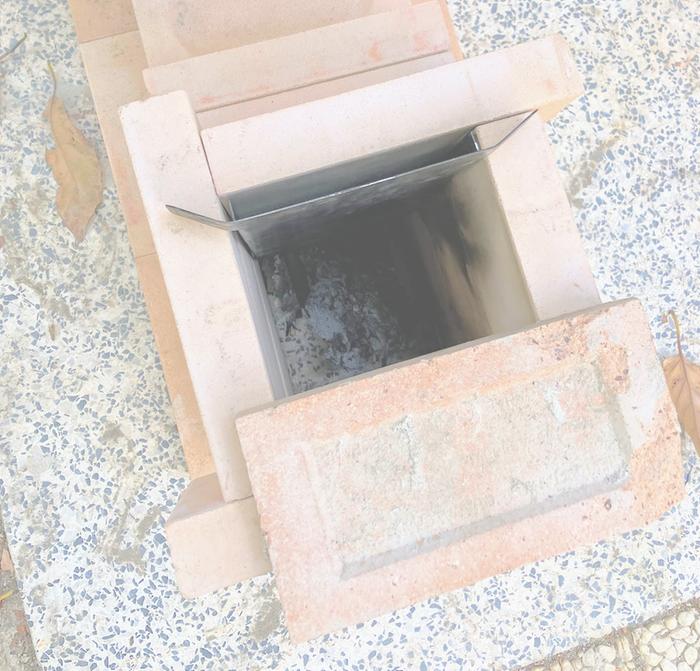
    Today I made a P-Channel, or Peter channel.
     
    thomas rubino
    rocket scientist
    Posts: 6322
    Location: latitude 47 N.W. montana zone 6A
    3199
    cat pig rocket stoves
    • Likes 6
    • Mark post as helpful
    • send pies
      Number of slices to send:
      Optional 'thank-you' note:
    • Quote
    • Report post to moderator
    Hi Ben;
    Nice job on the Peter channel!
    I am afraid it is going to have a limited life, as the temps at the bottom of the feed tube will quickly warp and then spall the thinner metal.
    I made mine using a 1/4" steel plate, and that only lasted two seasons before spalling and needing to be replaced.
    Using a Peter channel protects the first roof brick from damage, allows cooler air into the burn tunnel, and creates a turbulence going into the riser.
    You can also sculpt a burn tunnel roof brick to create even more turbulence and that is called a trip wire.

     
    Benjamin Dinkel
    Apprentice Rocket Scientist
    Posts: 238
    Location: Province of Granada, Andalucía, Spain
    83
    5
    gear fungi cooking composting toilet building rocket stoves woodworking wood heat
    • Likes 4
    • Mark post as helpful
    • send pies
      Number of slices to send:
      Optional 'thank-you' note:
    • Quote
    • Report post to moderator
    Hi Thomas, thanks!
    I mainly just felt like playing around with it and it was only a piece of scrap and about 20 mins of work. Well worth it even if it doesn’t last too long.
    Would you include a trip wire? If so, do you a good source for the dimensions?
    Which roof brick do you usually put it on?
     
    thomas rubino
    rocket scientist
    Posts: 6322
    Location: latitude 47 N.W. montana zone 6A
    3199
    cat pig rocket stoves
    • Likes 4
    • Mark post as helpful
    • send pies
      Number of slices to send:
      Optional 'thank-you' note:
    • Quote
    • Report post to moderator
    I have not used one.
    Peter developed it at the same time as the feed tube channel.
    They were the only improvement over the original  J-Tube.

    By the time I was comfortable enough with RMH construction.
    I bypassed trying to Hot Rod my J-Tubes and I jumped right into the exciting new world of Batchboxes.
    I have never looked back.


    Benjamin Dinkel
    Apprentice Rocket Scientist
    Posts: 238
    Location: Province of Granada, Andalucía, Spain
    83
    5
    gear fungi cooking composting toilet building rocket stoves woodworking wood heat
    • Likes 6
    • Mark post as helpful
    • send pies
      Number of slices to send:
      Optional 'thank-you' note:
    • Quote
    • Report post to moderator
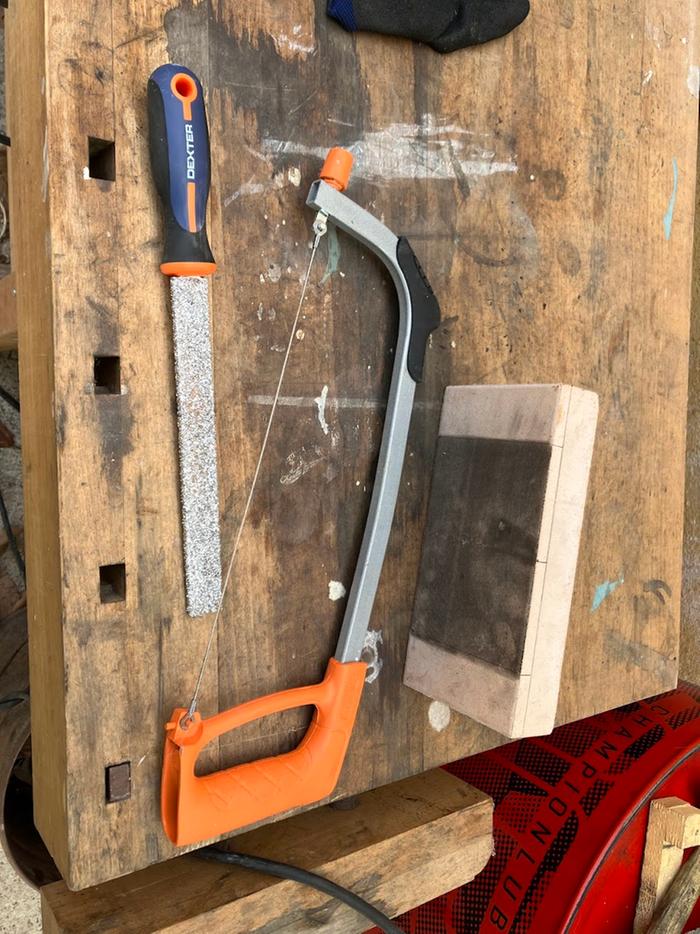
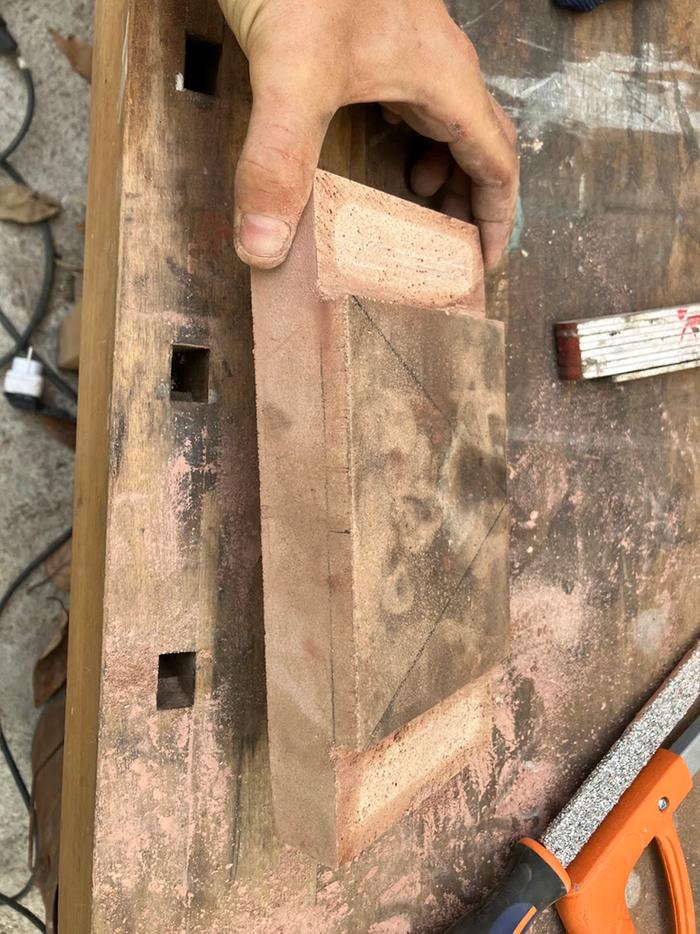
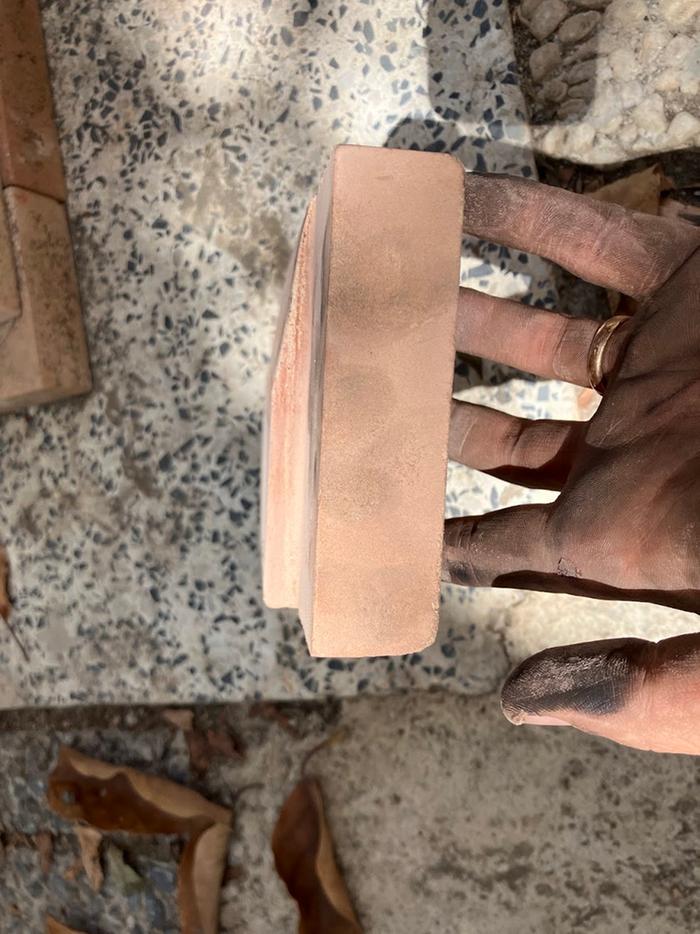
    Today I went ahead and made a trip wire to go with the peter channel.

    Also while researching the trip wire I found a post by Peter van den Berg giving measurements for the peter channel (named after him). He says 5-6% CSA. In case of a 6" system (150mm) covering one complete side that makes 3/8" (9mm). It should hang into the burn tunnel by the same measurement. So I had to grind mine down a bit.

    Here are some pics from the trip wire.


    thomas rubino
    rocket scientist
    Posts: 6322
    Location: latitude 47 N.W. montana zone 6A
    3199
    cat pig rocket stoves
    • Likes 4
    • Mark post as helpful
    • send pies
      Number of slices to send:
      Optional 'thank-you' note:
    • Quote
    • Report post to moderator
    Nice Job Ben;
    Congratulations!  You are now in possession of what might be the only Hot Rodded J-Tube in Spain!
    Keep up the good work!
     
    Always respect your superiors. If you have any. - Mark Twain / tiny ad
    Rocket Mass Heater Jamboree And Updates
    https://permies.com/t/170234/Rocket-Mass-Heater-Jamboree-Updates
    reply
      Bookmark Topic Watch Topic
    • New Topic