gift
Solar Station Construction Plans by Ben Peterson -- ebook
will be released to subscribers in: soon!

Hal Schibel

pollinator
+ Follow
since Nov 04, 2021
Merit badge: bb list bbv list
Biography
Hello! My name is Halley and I live outside of Fairfield, Idaho! I am pursuing SKIP (PEP) as a way to gain a lot of important skills and to improve my home and my property. So far I've pulled the inherited sewing machine out of storage and have started making my own clothes and I've started building useful food-making contraptions that I wouldn't otherwise have thought of having.
For More
Fairfield, Idaho, USA
Apples and Likes
Apples
Total received
In last 30 days
11
Forums and Threads

Recent posts by Hal Schibel

I love this idea! It took me several months of noodling on the idea to decide where I would set up my boneyard. One of my main projects for the summer has been cleaning out the outbuildings. There are a lot of random useful bits of lumber tucked away in each building and they lacked a central location that I could pull from for usability.

To document your completion of the BB, provide the photos or video (<2 min) of the following:
- the area(s) before setting up the hidden boneyard
- part way through setting up the hidden boneyard
- the area after setting up the hidden boneyard
- demonstrate the boneyard is hidden from the view of visitors or the public

Here is the area on the north side of the house prior to setting up the boneyard.


Here is a bunch of lumber that I pulled out of the barn.


I took some pallets and made lumber racks.


After I completed the boneyard! There was one particularly large piece of lumber that I wasn't sure what to do with until I set it on a couple of stumps and made a bench. It made the space a lot more inviting instantly.


I also fixed the broken gate so it will close and hide the boneyard from the road.


Can't see me!

1 day ago
I would like to apply for my Sand Badge in Community, please.
This will be my fourth Sand Badge.
Thanks, all!

Brand a physical location
Complete two of the following:
-Prepare a basic meal (and wash all the dishes) for at least 8 people
-Create (or update) a map showing the points of interest
4 days ago
Here is my map! Coloring is relaxing.

The map.


Some points of interest...

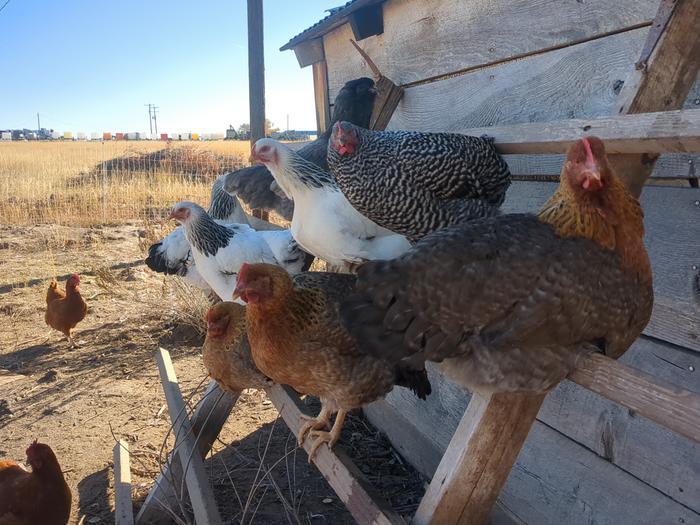
The Chiknik House:


Laundry Lane:


The Barn:


Thanks!
5 days ago
Sharpened my knife with a whetstone I got at the dollar store and a honing steel I got off of Amazon.

The knife wasn't actually super dull when I started, just the tip was pretty bad so it could slice through the paper pretty easily over the rest of the blade but not the tip. After I tried sharpening it the first time I made it worse and it couldn't cut through paper at all so I had to try again.

Here is my knife with the sharpening tools.


Here is a closeup of the blade pre-sharpened. It's not bad.


After my first attempt of sharpening it I can not cut through the paper at all.


Sharpening on the whetstone.


Honing with the blade. Sorry I don't have three hands to get a proper action shot.


Got it. It cuts through the paper like butter.


The blade after sharpening.
2 weeks ago
To show you've completed this Badge Bit, you must provide:
  - a before picture of the mostly empty sand barrel
  - an action shot of the sand barrel being filled during what's obviously summer
  - an after picture of the filled sand barrel
  - a description of how the sand barrel is going to be used

The empty barrel. I put it in the mud room to keep it dry. I've tried keeping burnables in this thing outside with the lid on and it all still ended up wet so this is staying inside.


I went around the field with the wheelbarrow looking for vole hills. The voles kick up a lot of super sandy stuff that is now readily accessible. Thanks, voles.


Almost full. This is about two wheelbarrows' worth of sandy stuff.


Me filling the barrel.


Ta-da. Pretty full. And dusty.


I plan on trying out the method of sanding icy pathways this winter. We usually just break up the ice with a sledgehammer and maybe use a little bit of salt, but this might be easier if it works well. If it doesn't work well, I'll use it to fill in part of the driveway that floods in the spring.
2 weeks ago
Thank you so much! I really appreciate it. And your heaters look awesome!

I swear the hardest part of doing any DIY construction is figuring out what materials you need and where to get them.
2 weeks ago
This was fun! And I only sliced open my fingers four times!

Minimum requirements:
  - useful size and shape
  - smooth
  - something you might actually use
  - made with hand tools only

To get certified for this BB, post three pics.  

 - Your chunk of wood that you are starting with  
 - Progress about half way through, with the hand tools you have decided to use for this
 - Final product

This is a spoon that I made from an aspen. I struggled to find a branch large enough for a spoon that I was willing to part with. This branch I cut down is kind of close to a power line.


I measured it against a storebought spoon.


I started out by splitting it on the kindling cracker.


I made smaller slits with a tiny axe multitool and a mallet. I finally have a use for this thing! I just bought it because it was a silly little axe and I was really into multitools. It even has a tiny saw for the knots.


Partway through. I also got a woodcarving-specific multitool with a spoon knife in it. I also learned when it arrived that you should never pull out all the blades at the same time.


When I first started, I was trying to carve it on my crafting table and it was really putting a strain on my upper back. I then moved outside and bent over so that I could hold the spoon in my right hand with my right elbow resting on my knee and only my left arm with the blade was moving. This was a million times more ergonomic and saved my back. Sorry this picture is sideways. But this is the spoon most of the way through.


Sanding.


It's about the same length as the storebought spoon, although the bowl is smaller.


Closeup.


Here is the spoon next to the first spoon I tried carving for the BB that turned out too small.


After oiling with walnut oil five or six times. It kept absorbing it almost immediately. All done!

thomas rubino wrote:Hi Pablo;
Those bricks are called new clay bricks at Home Depot.
They cost.58 cents apiece. I used apx 400+ in this build.


Hi Thomas,

Could you please provide a link to the item on the Home Depot website? I have been scouring the internet all day for "clay brick" and I cannot find anything remotely similar. What I am finding is no less than $3 a brick and either seem to be concrete or extra thin so I am getting pretty confused and would appreciate some guidance.

Would something like this work? Since I'm seeing a lot of posts around permies about dirt cheap bricks, I'm hoping I won't have to spend this much if I don't have to.

Thank you very much.

Edit: An hour after posting this, I finally figured out that I can find similar bricks if I look at Home Depots in other states. I will have to do more research to figure out which one is the closest to me and has the best price.
2 weeks ago
Thank you so much for the detailed response!!!  Great job on guessing the dimensions BTW, it is in fact 6'x8'.

We haven't actually made ourselves aware of the batch box concept until you brought it up.  Looking around on permies that style definitely sounds like it will better fit our use case!

I want to make sure I understand some of the nuances of your proposed design.  My husband made a doodle of what we think you are suggesting, and would like to know if we are off our rocker on this.

everything drawn over the box is intended to be inside of the box.

Also, would it be possible to make this exhaust chamber out of cinder block? Or should it really be done with brick? Asking because we know a source of an over abundance of cinder block.

red --> brick
grey --> the burn chamber
black --> Bell and exhaust
maroon --> dirt

2 weeks ago
Hello, everyone!

We had an idea for using an existing platform in the barn as a mass for a RMH. I would appreciate any and all thoughts on this idea (i.e. would this thing work well as a bench or is it too big, would it be stupid expensive to get enough stovepipe in here, do we need gravel or can we just fill it with dirt, etc.).

The barn is probably a hundred years old and clearly had chickens at one point in time. Currently we're trying to clear out all the trash and put in some supports to keep the roof from collapsing. After we get the roof a little more supported we want to put a RMH in there to keep the chickens and their water from freezing. There is an existing platform in the corner that had some roosts on it. I think the idea was that you lift up the roosts and sweep up all the poop from the platform without having to bend down and shovel it off the ground. I think it's just dirt inside but it could be trash knowing all the other things we've found in this barn.


Thanks!
3 weeks ago