• Post Reply Bookmark Topic Watch Topic
  • New Topic
permaculture forums growies critters building homesteading energy monies kitchen purity ungarbage community wilderness fiber arts art permaculture artisans regional education skip experiences global resources cider press projects digital market permies.com pie forums private forums all forums
this forum made possible by our volunteer staff, including ...
master stewards:
  • Nancy Reading
  • Carla Burke
  • r ranson
  • John F Dean
  • paul wheaton
  • Pearl Sutton
stewards:
  • Jay Angler
  • Liv Smith
  • Leigh Tate
master gardeners:
  • Christopher Weeks
  • Timothy Norton
gardeners:
  • thomas rubino
  • Jeremy VanGelder
  • Maieshe Ljin

Cliff's permaculture projects

 
Posts: 124
Location: Puget Sound
4
  • Mark post as helpful
  • send pies
    Number of slices to send:
    Optional 'thank-you' note:
  • Quote
  • Report post to moderator
OK, Ludi Inspired me to start my own thread showing what I'm doing on my place. I'll start small and add more as I get a little more experience. So here goes. First my asparagus bed:


OK, it looks like a sand spit, and it is, but this is where my wild asparagus grows. We pick it from late march until early summer. We mark the plants with sticks so we can find them. When one grows to large we let it continue to maturity so it will spread. We have tried increasing the native plants with store bought starts, but they do not take very well. Letting nature do the work seems to work better.

There is also "salt grass", it is a succulent that tastes VERY salty. A couple of years ago, some Korean ladies came to our door, and through sign language and gestures (they spoke no English), asked it they could cut some of the salt grass. We let them. Now periodically they come and gather big bags of this stuff. We found out they use it with other fruits to make this drink/medicine that helps with overall health. They made us some, and I must say it is horrible. They always bring us a small gift when they come, like Kiwi or Watermelon and one time an Orchid plant.

We also have clams, oysters and Geoducks (The largest digging clam) on the spit at low tide.

Notice the diving board that floated up a few years ago. The kids love it.
 
gardener
Posts: 361
Location: Central New York State zone 5a
13
  • Mark post as helpful
  • send pies
    Number of slices to send:
    Optional 'thank-you' note:
  • Quote
  • Report post to moderator
wow that's beautiful!
 
Posts: 9002
Location: Victoria British Columbia-Canada
707
  • Mark post as helpful
  • send pies
    Number of slices to send:
    Optional 'thank-you' note:
  • Quote
  • Report post to moderator
Is your house on higher ground or planned for higher ground ?

Do you make use of drift wood for building and fuel ? Looks like you're in the right spot for it.

Seaweed ?

Too bad about the Korean food. My uncle in Niagara Falls Ontario had the city's largest accidental grove of a type of fruitless grape valued by Mediterranean cultures for the leaves. He had Lebanese, Greek, Italian and Jewish folks who regularly harvested leaves and pruned away at vines that constantly expanded beyond the 100 ft. chainlink fence and invaded the tree tops. All sorts of tasty lamb and beef dishes wrapped in grape leaves were dropped off. Whenever I pruned his trees a small amount of material was placed at the road as a beacon.
 
Clifford Reinke
Posts: 124
Location: Puget Sound
4
  • Mark post as helpful
  • send pies
    Number of slices to send:
    Optional 'thank-you' note:
  • Quote
  • Report post to moderator
This picture is taken from the same spot as the picture above. It is to the left of the above picture.


As you can see we have a county road going through the property, along with ugly power lines.

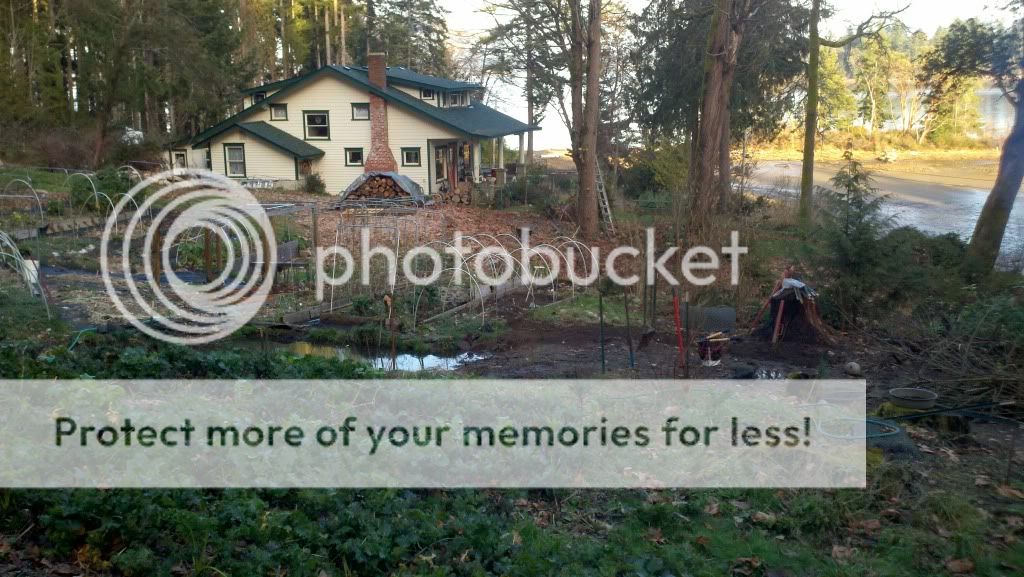
The main house was built in 1910, and was aligned so the side facing us, is facing directly magnetic South. Or at least it was in 1910, the magnetic variation has changed about six degrees since the house was built. The longer I live in the house the more impressed I am with how well it fits in with the environment. From the positioning, to the overhanging porch on the south side, to the solarium on the east side that on cold clear winter days warms the house. The exterior is old growth ceder cut from the cove we live in.

Up the hill from the house is a 24" yurt we put in this summer for my sister in law. To the right of the house is my latest chicken coop, my fruit tree orchard, a hedge of black berries, and a couple of rows of grapes. To the left of the house is my combo storage container/tool shop/green house/carport. To the left of that is the kitchen garden. Even farther to the left is where my now in freezer heaven pigs cleared an area that I am turning into a forest garden. You can see the roof of their house to the left of the telephone pole.

Here is another view from down the spit a ways.


Behind the house we have twenty-two acres of FSC sustainable forest. I'll put up more stuff later but this at least gives a framework to start from.

I'd love to see pics of other homesteads. Maybe we can start a trend?
 
Dale Hodgins
Posts: 9002
Location: Victoria British Columbia-Canada
707
  • Likes 1
  • Mark post as helpful
  • send pies
    Number of slices to send:
    Optional 'thank-you' note:
  • Quote
  • Report post to moderator
I think the idea of everyone having a personal thread showcasing their property and projects is a brilliant idea. I have mostly video footage of mine and have not been able to get the machinery to accept video when I go into attachments. I like videos because it allows me to blather as I pan from scene to scene. Ridley Scott beware.
 
Posts: 471
Location: Jackson County, OR (Zone 7)
2
  • Mark post as helpful
  • send pies
    Number of slices to send:
    Optional 'thank-you' note:
  • Quote
  • Report post to moderator
Looks like a wonderful environment, thank you for posting the pics and info.

Sounds like the salt grass may make a good kim chi if combined with green onions and cabbage... if you like Korean food at all?
 
pollinator
Posts: 3738
Location: Vermont, off grid for 24 years!
123
4
dog duck fungi trees books chicken bee solar
  • Mark post as helpful
  • send pies
    Number of slices to send:
    Optional 'thank-you' note:
  • Quote
  • Report post to moderator
Looks nice. You might want to list some of your goals for the year or questions for forum members. That's what I did for my thread (see "My site" below - first lamb yesterday!). I'm hoping to refer to the goals during the year to keep me on track.
 
pollinator
Posts: 11853
Location: Central Texas USA Latitude 30 Zone 8
1261
cat forest garden fish trees chicken fiber arts wood heat greening the desert
  • Mark post as helpful
  • send pies
    Number of slices to send:
    Optional 'thank-you' note:
  • Quote
  • Report post to moderator
It's gorgeous!

Looking forward to seeing more of your specific projects.
 
Clifford Reinke
Posts: 124
Location: Puget Sound
4
  • Mark post as helpful
  • send pies
    Number of slices to send:
    Optional 'thank-you' note:
  • Quote
  • Report post to moderator
Here is part of my zone one, taken last fall. I did some major work on it last year. You are looking North.


The storage container with attached greenhouse is the hub of our activities. I used to pay $220 per month for offsite storage. I was finally able to convince my wife to take on some debt to finance a 40" storage container, (we don't like debt). It cost us $4,000 with an added door, (the one you see), delivered. Hopefully we will have it paid off this year, then no more storage costs, yea! I turned the first 16 feet into a shop/tool shed using pegboard, tables and shelves. The side you see is painted white to reflect the sun. The side you cannot see is painted forest green. I built the attached greenhouse with double walled thermal greenhouse plastic. The green house has a rocket stove mass heater with the bench running along the wall of the container. You can see the barrel in the green house. I made the cob for the bench with sand and clay from the property but bought the straw. It functions as a warmer for my soil block starts.

Like I said above, I did some major work on this garden last year. My beds were fairly haphazard, and were a pain to mow around, plus it is on a fairly aggressive slope, so manhandling the 300lb DR mower was not fun. Plus the rain water was not flowing right. Parts of the garden was so wet you could not even get in until late spring. Finally, grass was always encroaching on my beds.

So, I laid the weed blocker cloth around each of my beds, then connected the beds with more ground cloth. While doing this I tried to make most of the paths on contour but still able to drain in very heavy rain. The grass that was left exposed was covered in cardboard, mulched heavily, and turned into more beds (mostly perennials). I know some of you will rightfully question the perminess of weed block cloth, but it cut down on my time weeding and edging, use of petrol, and greatly increased my access during bad weather.

Here is another view looking South from the greenhouse.


I stopped tilling the garden except when I am planting a root crop, then I use my broadfork. I pull weeds and let them sit on top of the beds. Of course I use no pesticides, herbicides, or chemical fertilizers on the property. My annuals are rotated every year to a new location. I use the Mother Earth News Online Garden Planner, to plan out my planting.

CI suggested we list some permi goals for this year, here are mine:

1. Establish a forest garden in the area just cleared by our pigs.
2. Put in a grey water system to my fruit trees in the other yard.
3. Raise bees for pollination, honey, wax, and sugar substitute.
4. Reduce my footprint.

 
Cj Sloane
pollinator
Posts: 3738
Location: Vermont, off grid for 24 years!
123
4
dog duck fungi trees books chicken bee solar
  • Mark post as helpful
  • send pies
    Number of slices to send:
    Optional 'thank-you' note:
  • Quote
  • Report post to moderator
Very nice.
I use black plastic and sometimes those ugly cheap blue construction tarp for similar reasons. My garden is right next to my pond and the reeds are very invasive. In fact, the woven cloth weed barrier never stopped them. I do reuse them for a year or two, that makes me feel better about it.
 
Clifford Reinke
Posts: 124
Location: Puget Sound
4
  • Mark post as helpful
  • send pies
    Number of slices to send:
    Optional 'thank-you' note:
  • Quote
  • Report post to moderator
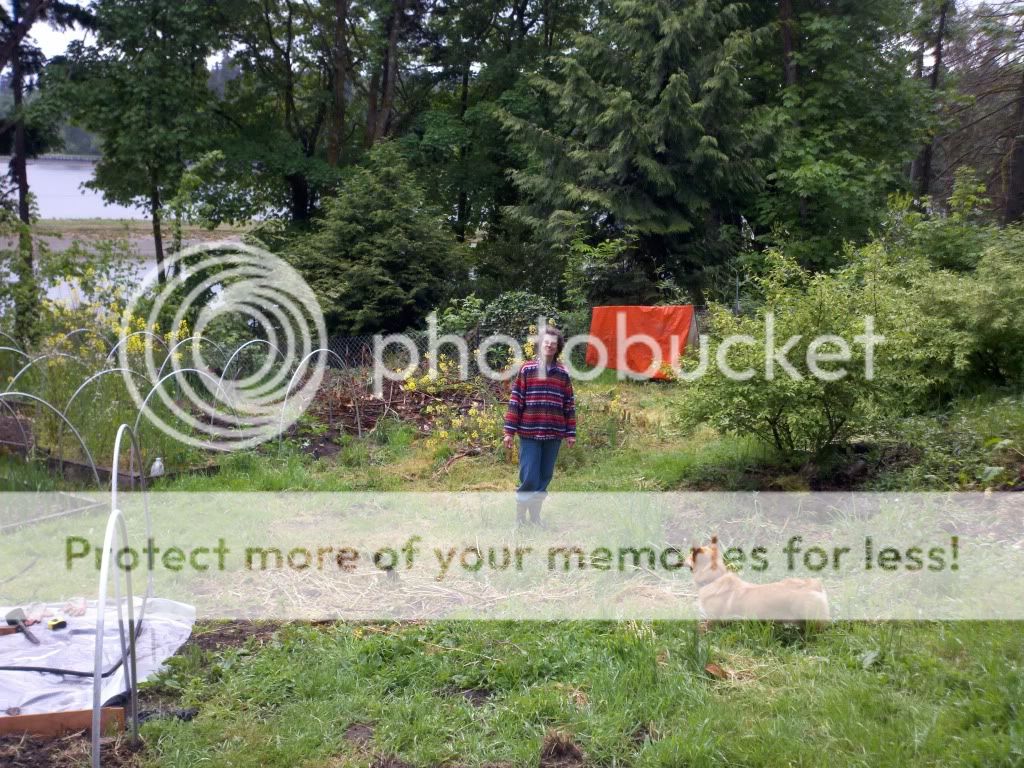
So here is my ongoing pond project. This first picture shows my wife standing where we put the pond in. This area was always damp and a pain to mow. Notice the tarp over the fence. the fence went around an area I was/am clearing out for a forest garden. When this picture was taken, I had three piglets in there.


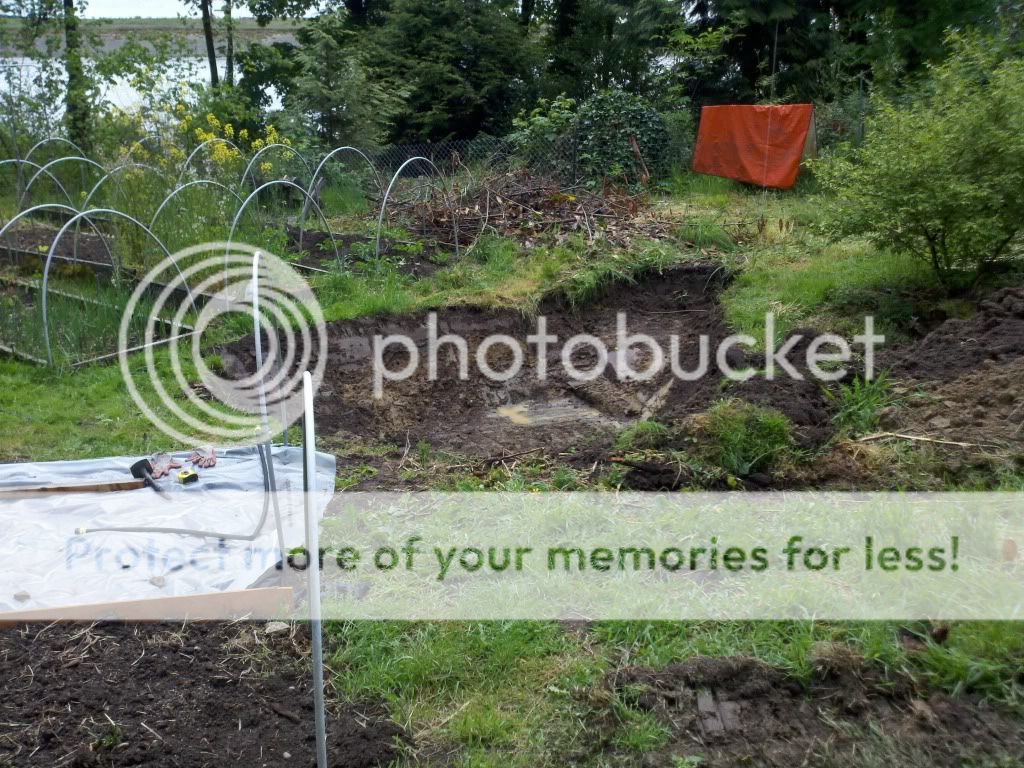
We hired a backhoe to do some site prep for a yurt we were building, and while he was here, he dug my hole for the pond. you can see the water already starting to seep in. I did not want to use a liner, so I thought I would try to let my pigs seal the pond. If it does not work, I will re-evaluate.


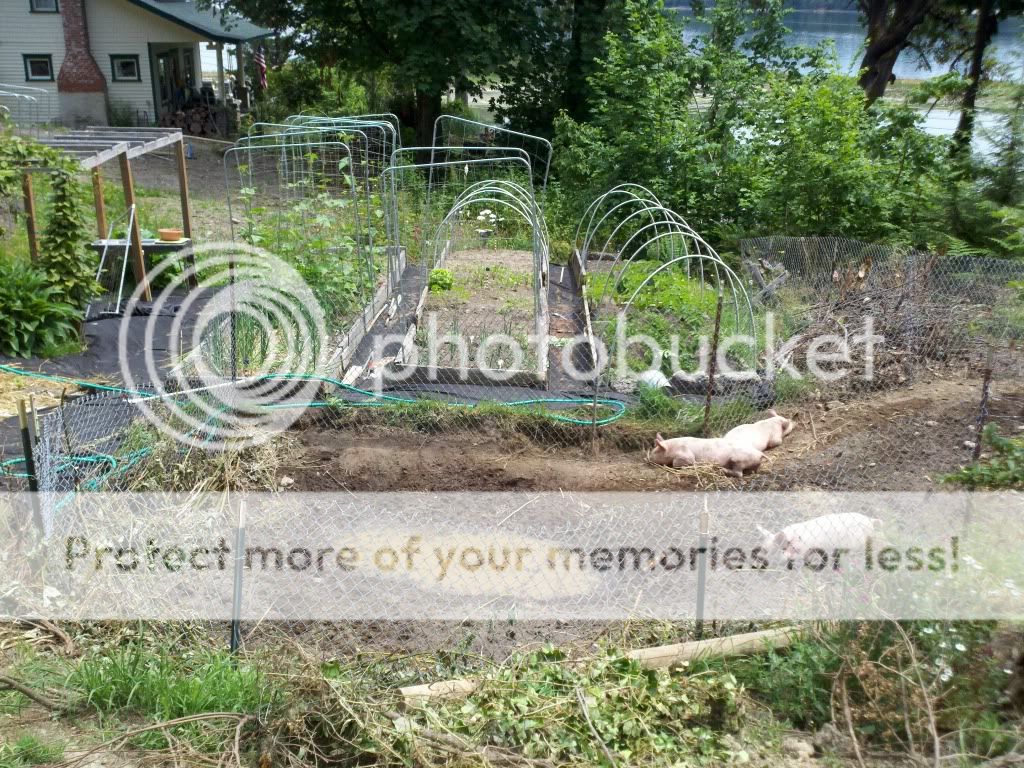
Then I extend the pig pen to include the dug out pond. Notice how the fence is above the pond.


Well the pigs loved that hole. I frequently set the sprinkler up so they could play in it in the pond. They also loved to try and root under the fence. As a result the fence kept lowering as the pigs rooted under it. The pond widened but also got shallower. The pigs loved to root, but avoided the blackberry bushes in their pen. I discovered if I cut the blackberry vines off at ground level and threw them in the open, the pigs would eat the berries and leaves, but not the stems. They would also almost immediately root out the blackberry bush roots and eat them. I would then take the striped thorny vines and put them around the fence. That seemed to cure the try and get under the fence game.


More in the next post.
 
Clifford Reinke
Posts: 124
Location: Puget Sound
4
  • Mark post as helpful
  • send pies
    Number of slices to send:
    Optional 'thank-you' note:
  • Quote
  • Report post to moderator
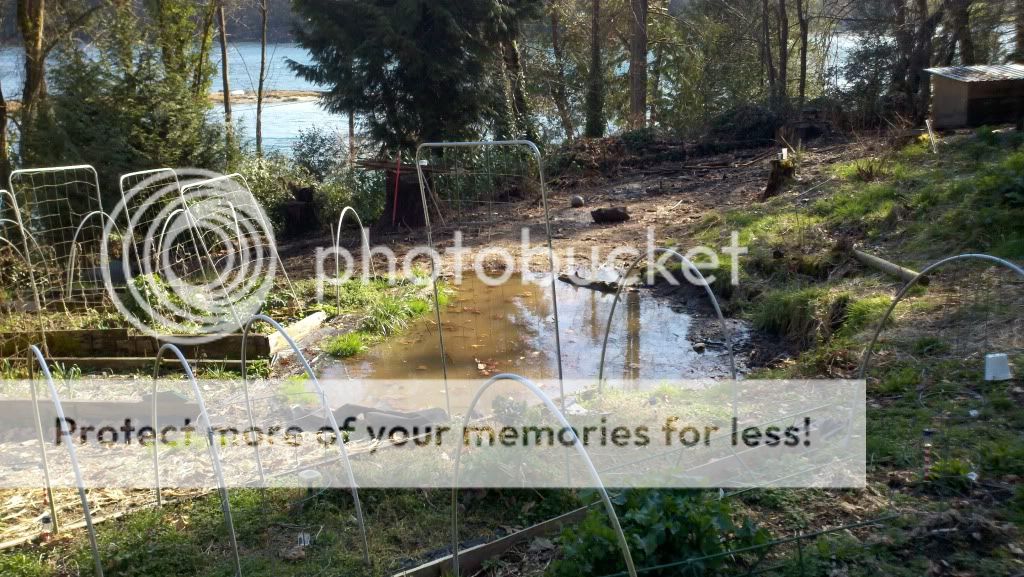
OK, so bottom line, it appears the pigs actually did seal the pond. I'll know for sure after next summer. Right now when the pond overflows, it runs slowly between the raised beds and disappears under the weed cloth.


I am way open to suggestions on what to plant in and around the pond. I know I would like to find some duckweed. Two days ago the ponds first resident moved in. Meet Herman.


And one last pic that I like. That is kale in the foreground on a large (unintentional) hugelkulture bed I have. But that is another story.


Posts: 37
Location: Córdoba, Argentina
  • Mark post as helpful
  • send pies
    Number of slices to send:
    Optional 'thank-you' note:
  • Quote
  • Report post to moderator
Very interesting. Thanks for posting, Cliff. I really love the pigs as pond sealers technique.

Does the pond over-flow eventually lead out away from the house and the zone 1 garden? It looks like a great design feature to have overflow funnel out between the beds, but it made me wonder what would happen in a big rain storm. I.e. would it submerge the beds completely, or is there a planned outlet away from the beds to lower ground?

All the best,

Scott
 
Cj Sloane
pollinator
Posts: 3738
Location: Vermont, off grid for 24 years!
123
4
dog duck fungi trees books chicken bee solar
  • Mark post as helpful
  • send pies
    Number of slices to send:
    Optional 'thank-you' note:
  • Quote
  • Report post to moderator
I planted blueberries near the edge of my pond. They've always done great with no intervention on my part except fencing to keep the sheep out.
Do you plan to let the pigs back in that area?
 
Clifford Reinke
Posts: 124
Location: Puget Sound
4
  • Mark post as helpful
  • send pies
    Number of slices to send:
    Optional 'thank-you' note:
  • Quote
  • Report post to moderator
Scot,
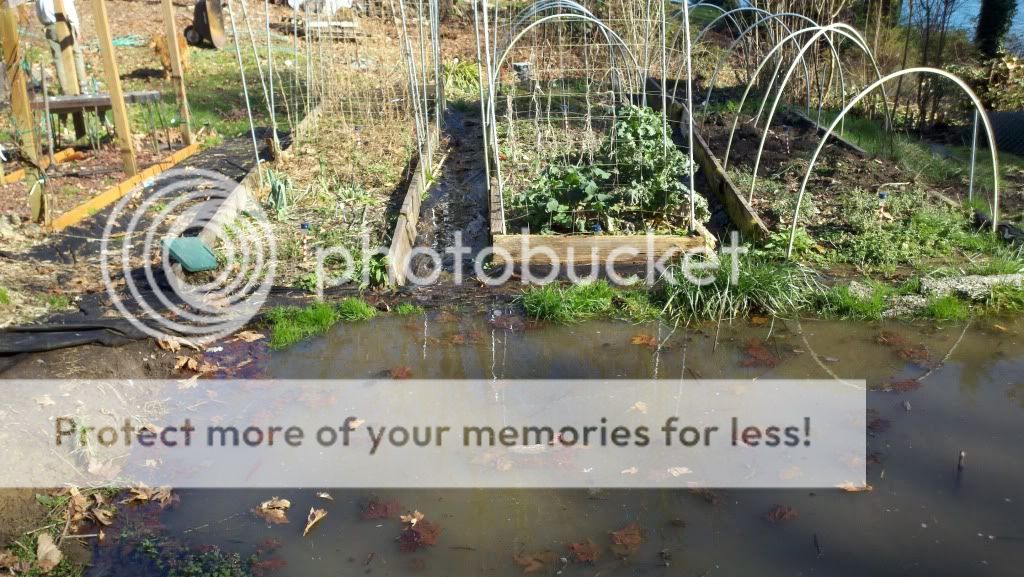
Right now the overflow is ruining down the two paths between those three raised beds. The paths end up on top of a rock wall as shown in the picture below. Now I'm just watching it now to figure out what I need to do, if anything. So far nothing has washed out and the water disappears into the path before reaching the rockery. Were considering turning the patch in the foreground into a rain garden to take in the rainwater off the new woodshed we are building. If I need to, I will run a drain pipe from the pond down the path and make a waterfall off the rockery into the rain garden.


Cj,

So far I have planted two blueberries next to the pond. If the level drops during the dry season, I was thinking of cranberries on the areas that are seasonally flooded. I need to do more research on water loving edible perennials.

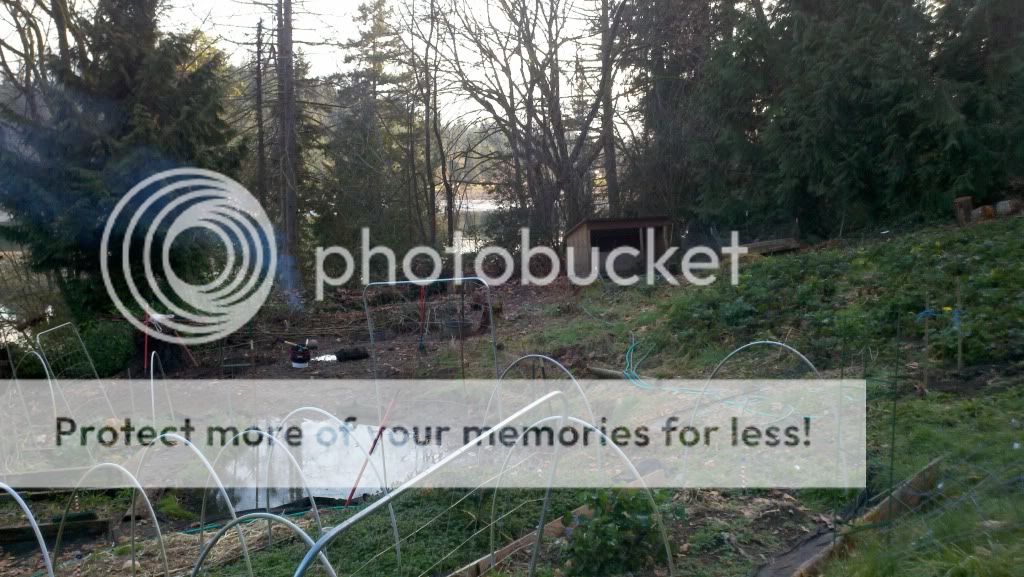
I do not plan on re-introducing pigs to the area they just cleared. If I do pigs again, I have lots of other places they can clear. I plan to turn the area the pigs cleared, (from the pond back to the tree line in the pic below), into a forest garden. The smoke is from a fire I was using to burn the Laural I'm clearing out. You can't bury the stuff because it will sprout. The area above the hose, is an unintentional hugelkulture bed. When the area was logged nine years ago we had all the refuse pushed into a pile. Later, we cut a road on the land above the pile and covered the brush pile with the dirt from the road. Seven years later, I learn about Hugelkulture, scattered all my old seeds over it, and watched it take off. Right now it is mostly kale, but I've pulled radish, squash, pumpkin, tomatoes, cabbage, beans, peas and other stuff off of it this last year. In the food forest so far I have: Blueberry, Hazelnut, Peach, and elderberry. So far, I plan to add a Walnut, some Black Locust, Thornless Blackberry, Jerusalem Artichoke, walking onions, Figs, and my beehives. I'm sure I will be planting many more perennials besides the ones listed.

 
Cj Sloane
pollinator
Posts: 3738
Location: Vermont, off grid for 24 years!
123
4
dog duck fungi trees books chicken bee solar
  • Mark post as helpful
  • send pies
    Number of slices to send:
    Optional 'thank-you' note:
  • Quote
  • Report post to moderator

Clifford Reinke wrote:
So far I have planted two blueberries next to the pond. If the level drops during the dry season, I was thinking of cranberries on the areas that are seasonally flooded.


Water level dropping shouldn't effect the blueberries. Once every 5 years or so our pond loses like 75% of its water during a drought. I don't think I have ever watered the blueberries, even during a drought.

ps
I've read asparagus likes water.
 
pollinator
Posts: 1528
Location: zone 7
18
  • Likes 1
  • Mark post as helpful
  • send pies
    Number of slices to send:
    Optional 'thank-you' note:
  • Quote
  • Report post to moderator
excellent thread, we need a forum to put threads like this and ludi's so they are all together.
 
Posts: 146
Location: Southern Appalachia
  • Mark post as helpful
  • send pies
    Number of slices to send:
    Optional 'thank-you' note:
  • Quote
  • Report post to moderator
Another water loving edible that grows well with blueberries and cranberries is Aronia melanocarpa (aka chokeberry, although I dislike that name and usually just call it aroniaberry). They're not sweet like blueberries but they are nutrient dense, grown as a "superfood" in europe.

Don't forget cattails.

I would think in your location you might want to dig a diversion drain for overflow? Possibly fill it with stropharia innoculated chips, or mushroom logs, depending on how often it floods? Just a thought...

peace
 
Clifford Reinke
Posts: 124
Location: Puget Sound
4
  • Mark post as helpful
  • send pies
    Number of slices to send:
    Optional 'thank-you' note:
  • Quote
  • Report post to moderator

osker brown wrote:Another water loving edible that grows well with blueberries and cranberries is Aronia melanocarpa (aka chokeberry, although I dislike that name and usually just call it aroniaberry). They're not sweet like blueberries but they are nutrient dense, grown as a "superfood" in europe.

Don't forget cattails.

I would think in your location you might want to dig a diversion drain for overflow? Possibly fill it with stropharia innoculated chips, or mushroom logs, depending on how often it floods? Just a thought...

peace


Thanks, I'll check out the Aronia Melanocarna. I'm a little leery on cattails, as it is not a very large pond and they would probably overwhelm the pond. Today the pond is overflowing and running down between the raised beds. It's quite a bit of water, but it is sinking in before it hits the rock wall. I'm probably going to put in an overflow pipe similar to Sepp Holtzers design. This evening I heard two frogs in the pond, double the population in a week.

On another subject, I was talking to my wife about our need to get some wood chips and my son overheard. He has two friends who own tree trimming companies and said he would hook me up. Seems they are always looking for places to dump off wood chips. He said I may be surprised by the amount I would get. I told him I could use as much as they want to dump off. Heck, I could go through 200 yards easily in my soon to be forest garden alone. I am really psyched about this.
 
Clifford Reinke
Posts: 124
Location: Puget Sound
4
  • Mark post as helpful
  • send pies
    Number of slices to send:
    Optional 'thank-you' note:
  • Quote
  • Report post to moderator
Based on Osker's suggestion I ordered two chokeberry bushes to plant by my pond. I received them Yesterday, I'll harden them off for a couple of days before planting.

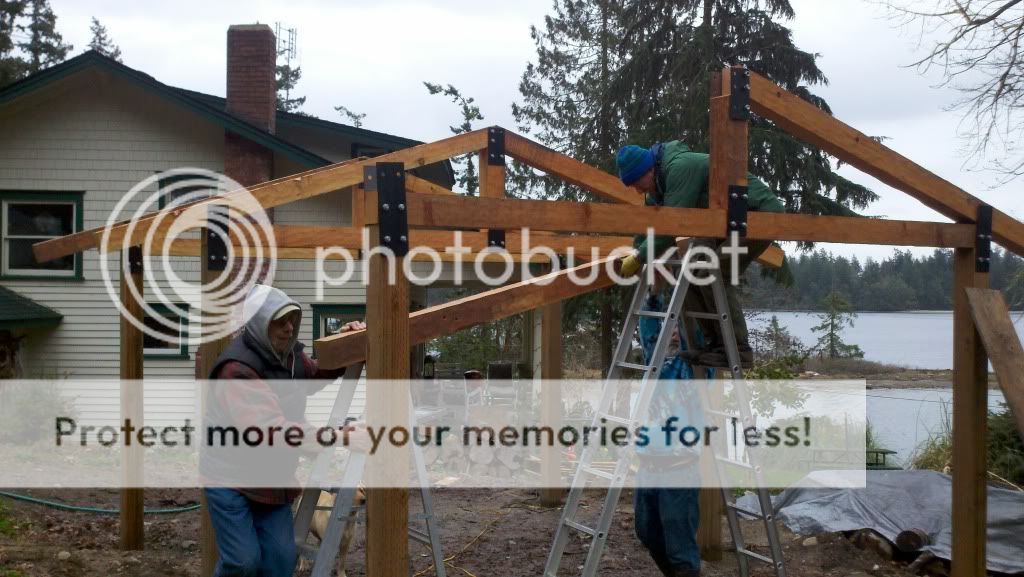
We are building a woodshed.

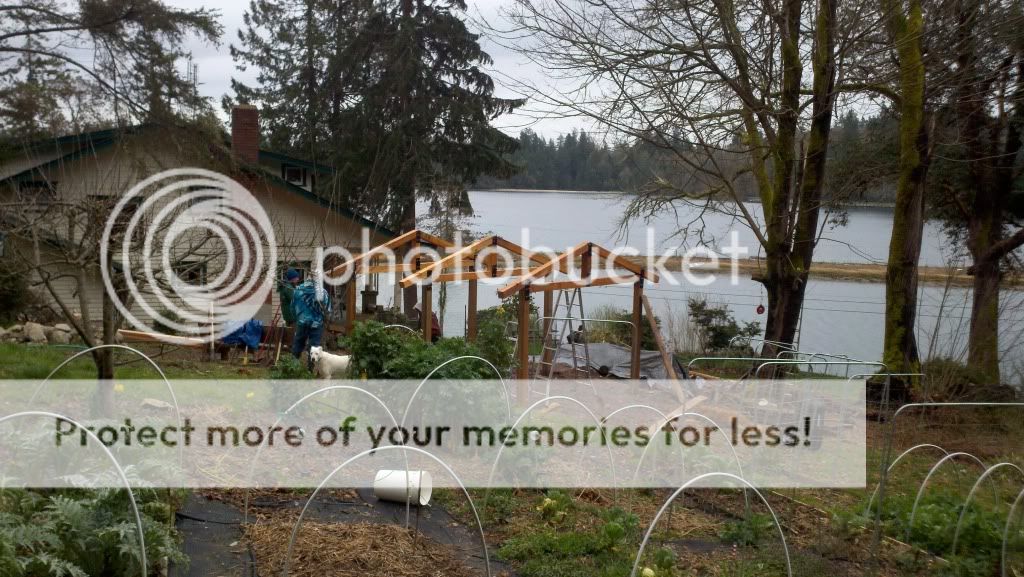
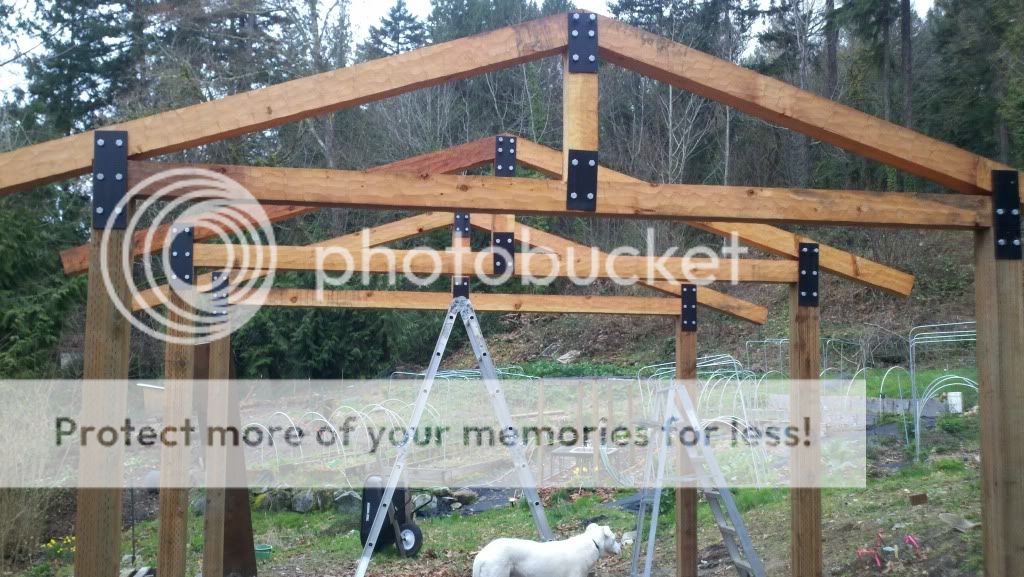
It is sort of a 60th Birthday present for my wife. My two brother in laws are doing most of the work. I pitch in when needed, as I am busy finishing the beehives before the bee's get here Mid April. The frame is made pout of 6x6's. The uprights are treated and buried four feet deep. The truss timbers were salvaged from a specialty wood dealer we are Friends with. The beams are scalloped and look really cool. The structure should be substantial enough to hang a hog or two, or maybe even a cow someday. The BIL on the left, manufactured the black plates out of 3/8 plate aluminum. The holes on the truss pieces were pre-drilled, so it was like building an erector set.


Next comes the roof, and finally the water catchment system.


It will be nice to have a place to store firewood without resorting to plastic tarps.
 
Clifford Reinke
Posts: 124
Location: Puget Sound
4
  • Mark post as helpful
  • send pies
    Number of slices to send:
    Optional 'thank-you' note:
  • Quote
  • Report post to moderator
Here is a link to more pics of the woodshed being built. I'll add more later as we finish it.

http://s289.photobucket.com/albums/ll211/careinke/Building%20the%20wood%20shed%202012/
 
Tyler Ludens
pollinator
Posts: 11853
Location: Central Texas USA Latitude 30 Zone 8
1261
cat forest garden fish trees chicken fiber arts wood heat greening the desert
  • Mark post as helpful
  • send pies
    Number of slices to send:
    Optional 'thank-you' note:
  • Quote
  • Report post to moderator
Wow, nice shed!

 
Posts: 56
Location: SW Virginia Mountains, USA
  • Mark post as helpful
  • send pies
    Number of slices to send:
    Optional 'thank-you' note:
  • Quote
  • Report post to moderator
Great progress, and I love it!

Question: you say blueberries love water. How close to water's edge? Soggy or poorly draining soil ok? Intermittent wet soil? What's best?
 
Clifford Reinke
Posts: 124
Location: Puget Sound
4
  • Mark post as helpful
  • send pies
    Number of slices to send:
    Optional 'thank-you' note:
  • Quote
  • Report post to moderator

darius Van d'Rhys wrote:Great progress, and I love it!

Question: you say blueberries love water. How close to water's edge? Soggy or poorly draining soil ok? Intermittent wet soil? What's best?


Actually someone else said that. I planted some around the pond, so we will see. My soil is mostly clay on new ground and fairly poor drainage. Of course it gets way better as I tend to it. My raised beds get better every year.

I learned something exciting today. Apparently you can mulch with seaweed! I always thought the salt would kill the plants. Evidently, that is not the case. Seaweed mulch has an added benefit of repelling slugs. Here is a link to the article I came across.

How to Mulch with Seaweed

I have LOTS of seaweed.

P.S. The article also mentions using seaweed to feed bugs to your chickens.
 
Posts: 106
2
  • Mark post as helpful
  • send pies
    Number of slices to send:
    Optional 'thank-you' note:
  • Quote
  • Report post to moderator
Cliff, I live in NS and I have been using seaweed for the last few years in my garden. It is the best possible substance on the planet, in my opinion. It acts as both a fertilizer and a mulch. My garlic has gone insane since I started using it. Also, the odd little crab or mussel shell adds a nice visual touch and a bit of calcium to the soil.

It has been very common practice around here for the last couple hundred years for gardeners to go down to the beach and collect a wagonload of seaweed for the garden. I have never heard of a single adverse effect from it. Around here apparently the old ones used to grow their potatoes in seaweed, without using dirt. I tried this once in a wooden box and had no luck. But they didn't do it that way (so why did I? dunno). They dug a trench, threw the potato eyes in there, and just mounded the seaweed on top of it.

Anyway, I have never even bothered rinsing the seaweed. If you have a ready supply of it right there at your doorstep then you are one of the luckiest people on earth. I can almost throw a rock into the ocean where I live but I have to drive about two miles to get to a good seaweed collecting point. In fact, looking at these pictures I would have to say you are really blessed.
 
Willy Kerlang
Posts: 106
2
  • Mark post as helpful
  • send pies
    Number of slices to send:
    Optional 'thank-you' note:
  • Quote
  • Report post to moderator
Oh, and regarding bugs for your chickens, the seaweed I bring home is often popping with sand fleas. They can live for months in my garden if it stay damp enough. Your chickens will probably love them.
 
Clifford Reinke
Posts: 124
Location: Puget Sound
4
  • Likes 1
  • Mark post as helpful
  • send pies
    Number of slices to send:
    Optional 'thank-you' note:
  • Quote
  • Report post to moderator
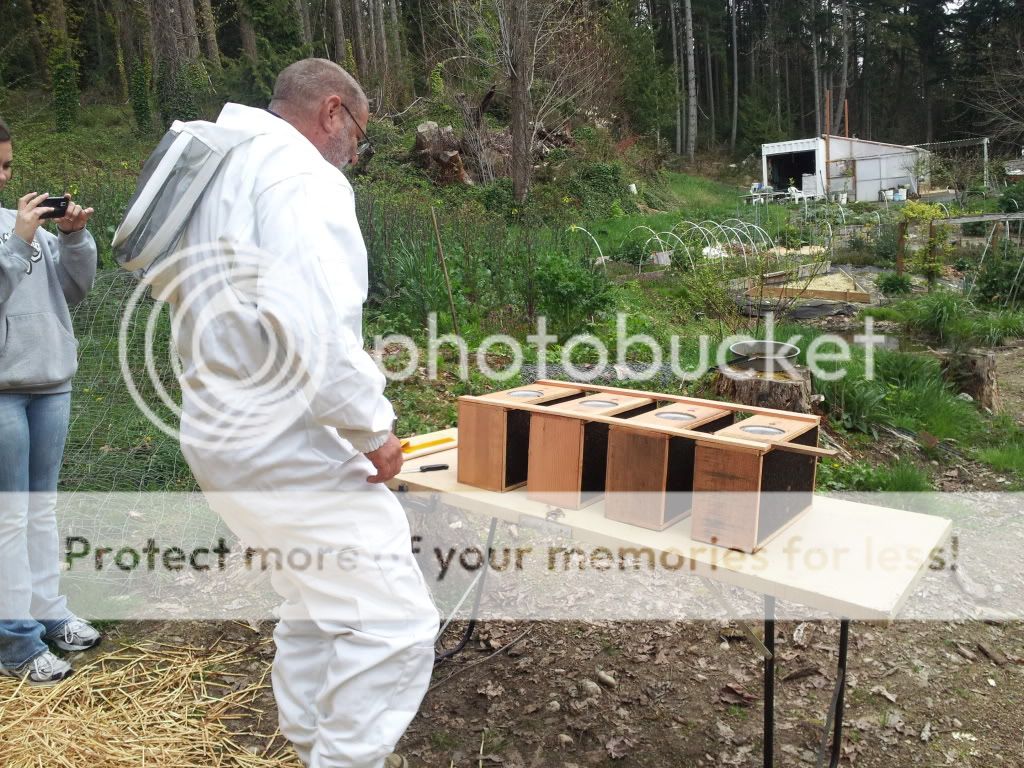
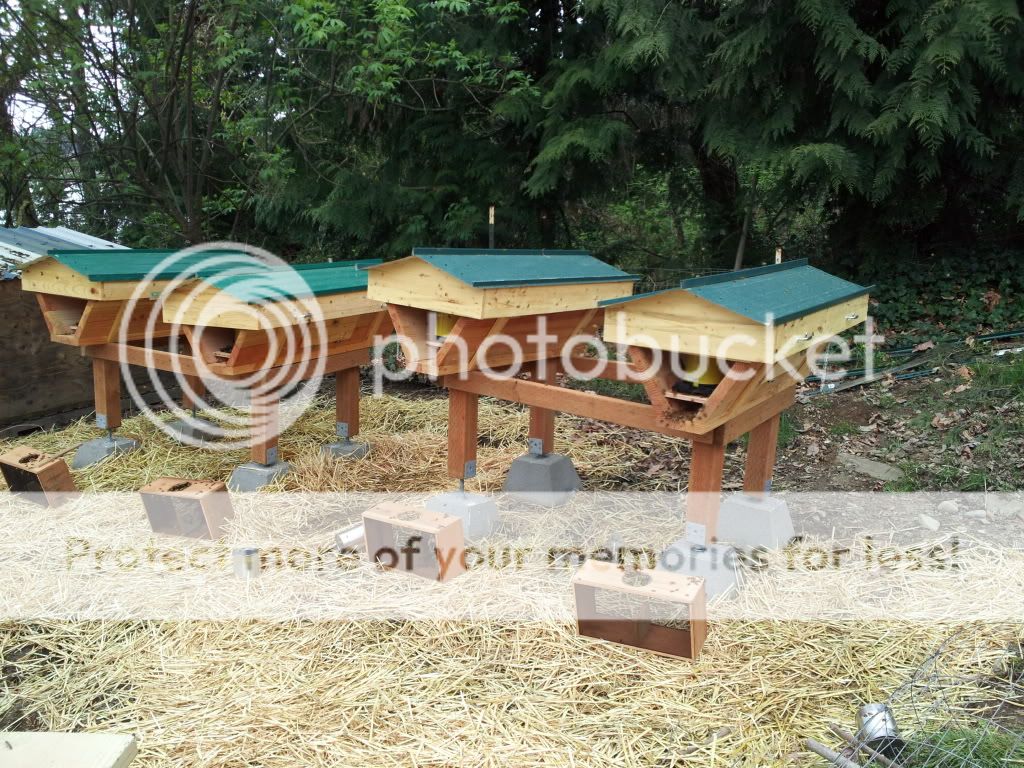
Installed my first two Top Bar beehives. Two more to go, hopefully we will have them finished on Sunday. The bees arrive mid April.

 
Tyler Ludens
pollinator
Posts: 11853
Location: Central Texas USA Latitude 30 Zone 8
1261
cat forest garden fish trees chicken fiber arts wood heat greening the desert
  • Mark post as helpful
  • send pies
    Number of slices to send:
    Optional 'thank-you' note:
  • Quote
  • Report post to moderator
They're beautiful!
 
Clifford Reinke
Posts: 124
Location: Puget Sound
4
  • Mark post as helpful
  • send pies
    Number of slices to send:
    Optional 'thank-you' note:
  • Quote
  • Report post to moderator

Tyler Ludens wrote:They're beautiful!


Thanks Ludi! Hopefully the bees will like them.
 
Clifford Reinke
Posts: 124
Location: Puget Sound
4
  • Mark post as helpful
  • send pies
    Number of slices to send:
    Optional 'thank-you' note:
  • Quote
  • Report post to moderator
Went crazy today buying perennials for my new forest garden. Black current, Jostaberry, Gooseberry, two types of Figs, Two types of Kiwi, perennial Sunflowers, Sunchokes, Yarrow, Blueberry, Wintergreen, Bay, and Rhubarb. Plus crimson clover, white clover, and rye.
 
Clifford Reinke
Posts: 124
Location: Puget Sound
4
  • Mark post as helpful
  • send pies
    Number of slices to send:
    Optional 'thank-you' note:
  • Quote
  • Report post to moderator
Planted two Walnuts, two Persimmons, a Chestnut, two Butternut trees, two Pecans, a cranberry bush, Sun chokes, and Walla Walla Sweet Onions. Most were planted on the Northern edges of East/South facing slopes. These will be big trees, so I don't want them shading out my other stuff. Still lots to go.
 
Clifford Reinke
Posts: 124
Location: Puget Sound
4
  • Likes 1
  • Mark post as helpful
  • send pies
    Number of slices to send:
    Optional 'thank-you' note:
  • Quote
  • Report post to moderator
We had a north wind blow in a lot of seaweed the other day. So we went out and harvested some for mulch. This is at the head of our little cove. All sorts of stuff collects here. Everything from water slides, to rafts, to once a full roll of Tyvek! The Tyvek is now my green house floor among other things. Anyway a simple garden rake seemed to work.


10 six gallon buckets of seaweed mulch in about a half an hour. Now I have to spread it.


I get my bees on Saturday, so tomorrow I'm prepping the hives we built.


Tyler Ludens
pollinator
Posts: 11853
Location: Central Texas USA Latitude 30 Zone 8
1261
cat forest garden fish trees chicken fiber arts wood heat greening the desert
  • Mark post as helpful
  • send pies
    Number of slices to send:
    Optional 'thank-you' note:
  • Quote
  • Report post to moderator
How exciting about the bees!

 
Clifford Reinke
Posts: 124
Location: Puget Sound
4
  • Mark post as helpful
  • send pies
    Number of slices to send:
    Optional 'thank-you' note:
  • Quote
  • Report post to moderator
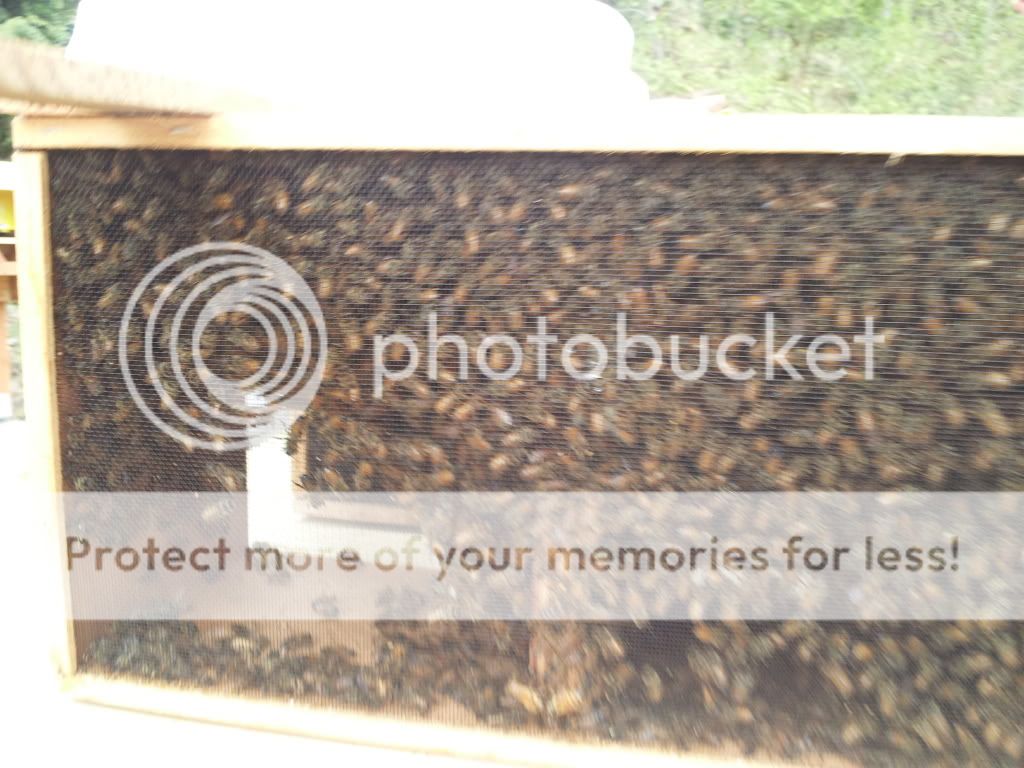
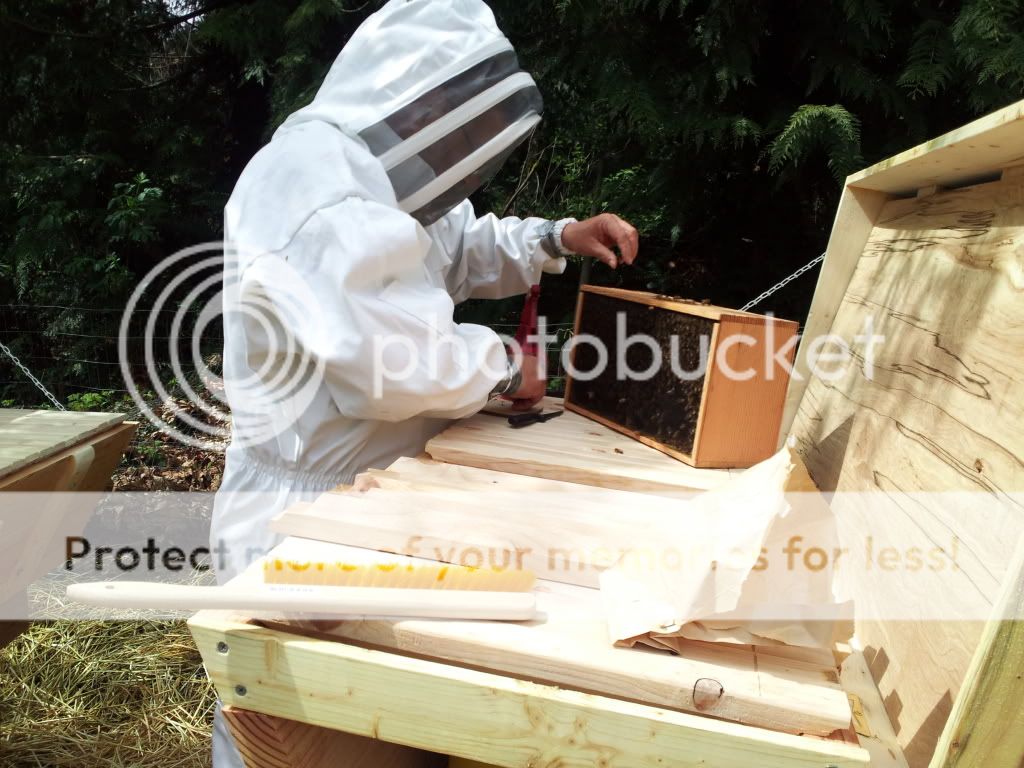
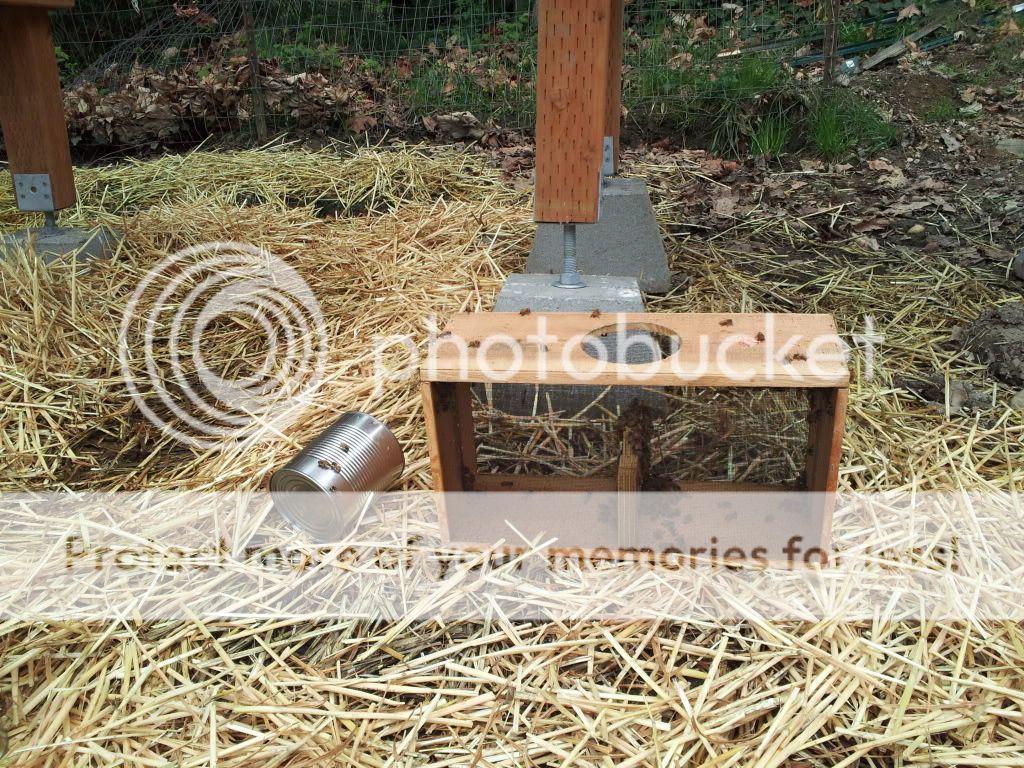
Well we got our bee packages today. We bought four packages from a local beekeeper who drives to California and brings them back. Here is what my packages looked like:


I brought them home in the cab of my pickup. I did not realize there would be bees hanging on to the outside of the packages! Fortunately, the bees were more interested in the queen than me. Here is a closer look at the package:


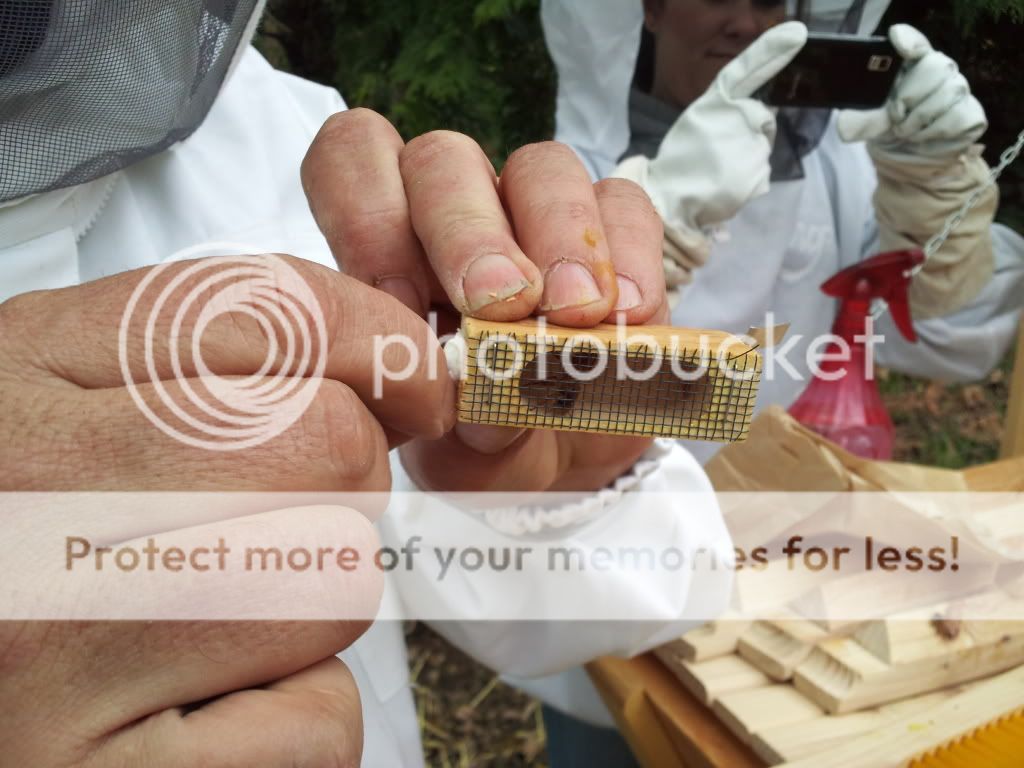
After you take the can with sugar water out, you have to get the queen cage out of the package.


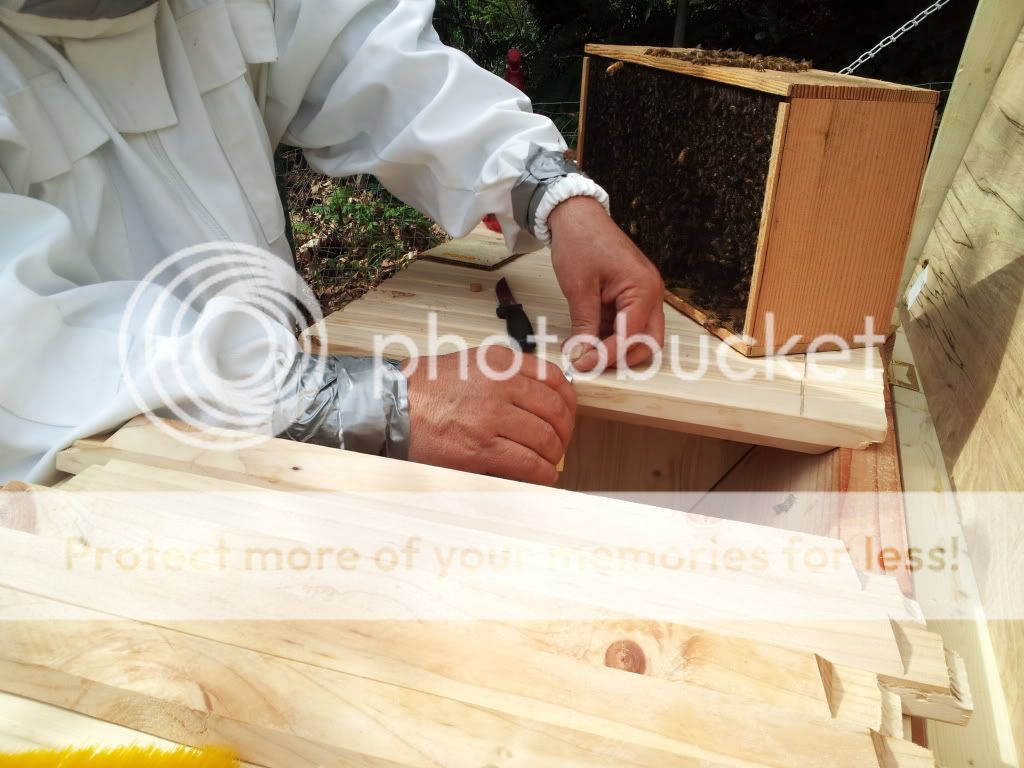
The queens cage has a cork in one end, you take the cork out and cover the hole with your finger, then you put a marshmallow in the escape hole. The worker bees eat the marshmallow so she escapes in a day or two.


Then you attach her to a top bar:


More in next post.


Clifford Reinke
Posts: 124
Location: Puget Sound
4
  • Mark post as helpful
  • send pies
    Number of slices to send:
    Optional 'thank-you' note:
  • Quote
  • Report post to moderator
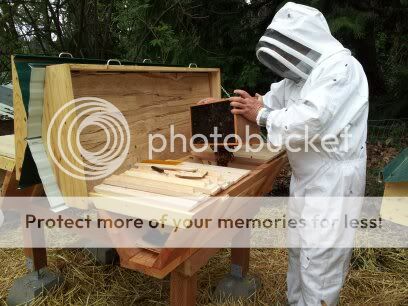
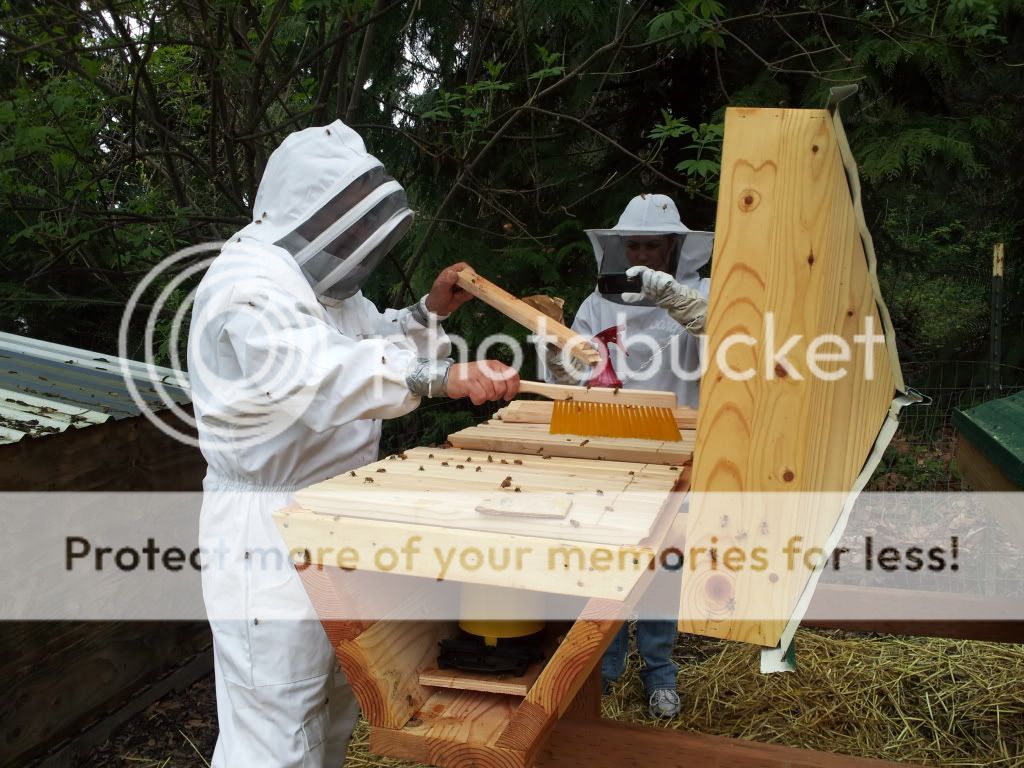
After the queen is secured, you dump the rest of the package into the hive.


Place the package box, (with the bees that did not shake out), in front of the hive door. The bees in the hive will start fanning at the door, so the outside bees can smell the queens pheromones and find the door.


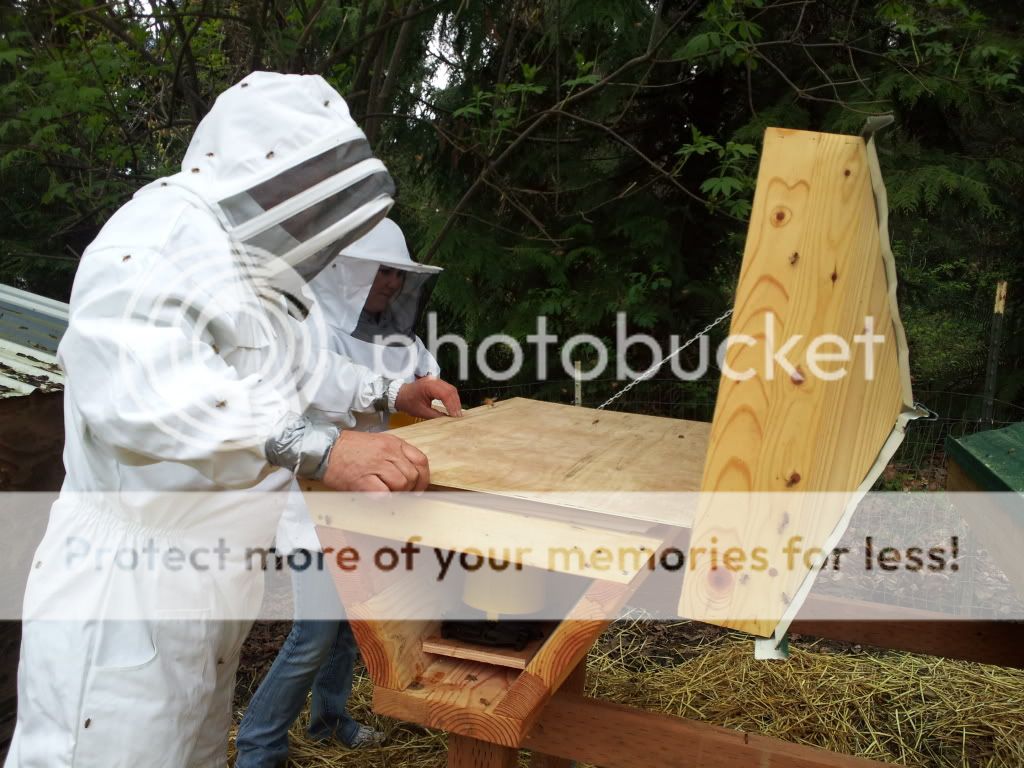
Then put the top bars back and close it up.


I did get stung once because I accidentally crushed a bee while shaking the workers into the hive.

Here is a link to my photobucket account with a lot more pictures taken today.

http://s289.photobucket.com/albums/ll211/careinke/Bees/

P.S. I think it would be really hard to do this with gloves on!
 
Posts: 37
Location: Central Minnesota
  • Mark post as helpful
  • send pies
    Number of slices to send:
    Optional 'thank-you' note:
  • Quote
  • Report post to moderator
I love your place- did you use your own design for the hives? I mean I know top bar hives are pretty simple, but I've seen kits and plans out there as well. I'm trying to decide if I'm just going to build one, build one from plans, or order a kit. I am probably going to buy the top bars, because I don't have the means to cut the angles and I heard the angled ones work better (by angled, I mean the bottom is a triangle... make sense?).

I have often coveted farms/homesteads near the sea because of the wealth of nutrients in seaweed (among other things- climate, clams, etc), but I have to remind myself that every place has its pluses and minuses!

I'm about to start my own project thread, just working on getting my pics to upload!
 
Clifford Reinke
Posts: 124
Location: Puget Sound
4
  • Mark post as helpful
  • send pies
    Number of slices to send:
    Optional 'thank-you' note:
  • Quote
  • Report post to moderator

Brandis Roush wrote:I love your place- did you use your own design for the hives? I mean I know top bar hives are pretty simple, but I've seen kits and plans out there as well. I'm trying to decide if I'm just going to build one, build one from plans, or order a kit. I am probably going to buy the top bars, because I don't have the means to cut the angles and I heard the angled ones work better (by angled, I mean the bottom is a triangle... make sense?).

I have often coveted farms/homesteads near the sea because of the wealth of nutrients in seaweed (among other things- climate, clams, etc), but I have to remind myself that every place has its pluses and minuses!

I'm about to start my own project thread, just working on getting my pics to upload!


Cool on starting your own project thread. It would be nice to get a section on project threads.

The hives are a modified version of the Beelanding.com hives. We bought the plans from beelanding.com then made some modifications. The covers, are our own designed around some scrap roofing panels my BIL had lying around. You are right, the top bars themselves have the most mill-work involved in making them. Each hive cost about $85 in materials. Before we built the hives we thought the ones sold by vendors were way too expensive. After building some, we believe their prices are more than fair. That said, they were a lot of fun as a woodworking project.

The bee class we attended had a top bar hive one of the owners just slapped together quickly. I gotta say it was butt ugly, but it worked just fine, and cost a lot less money and time than ours did. So you can make them quickly and cheaply if you want.
 
pollinator
Posts: 1459
Location: Midlands, South Carolina Zone 7b/8a
43
  • Mark post as helpful
  • send pies
    Number of slices to send:
    Optional 'thank-you' note:
  • Quote
  • Report post to moderator
The whole thing is insanely beautiful and inspirational! Thank you for sharing and I look forward to seeing more.
 
Brandis Roush
Posts: 37
Location: Central Minnesota
  • Mark post as helpful
  • send pies
    Number of slices to send:
    Optional 'thank-you' note:
  • Quote
  • Report post to moderator

Clifford Reinke wrote:
Before we built the hives we thought the ones sold by vendors were way too expensive. After building some, we believe their prices are more than fair. That said, they were a lot of fun as a woodworking project.


That's pushing me to just buy one. Woodworking isn't my favorite thing- I do it when I have to, but I don't really have the right tools or setup to do a good job. So perhaps I'll just buy one. Then perhaps I'll be inspired to build my own for my second hive.

Is there a reason you went with four hives, or did that just sound like a good number? I know it's better to do two, but I can't really fathom spending that much all at once to get started. The bee thing is one that jumps off and on my "to-do" list pretty regularly. I really want to be self sufficient, but we have two or three really awesome apiaries within 30 miles of my house that sell great raw honey at the natural food co-op I buy most of my groceries at. It's really hard for me to be motivated when it's easy and (relatively) cheap to get a decent product nearby.
 
Clifford Reinke
Posts: 124
Location: Puget Sound
4
  • Mark post as helpful
  • send pies
    Number of slices to send:
    Optional 'thank-you' note:
  • Quote
  • Report post to moderator

Brandis Roush wrote:

Clifford Reinke wrote:

That's pushing me to just buy one. Woodworking isn't my favorite thing- I do it when I have to, but I don't really have the right tools or setup to do a good job. So perhaps I'll just buy one. Then perhaps I'll be inspired to build my own for my second hive.

Is there a reason you went with four hives, or did that just sound like a good number? I know it's better to do two, but I can't really fathom spending that much all at once to get started. The bee thing is one that jumps off and on my "to-do" list pretty regularly. I really want to be self sufficient, but we have two or three really awesome apiaries within 30 miles of my house that sell great raw honey at the natural food co-op I buy most of my groceries at. It's really hard for me to be motivated when it's easy and (relatively) cheap to get a decent product nearby.


If you don't like wood working, definitely buy one if you are concerned about looks. If not, then just slap something together and it will work.

Two of the hives are my sons, we are just keeping them for him. We built them for him in return for some future cement work (He is a cement mason). My BIL and I actually built six of them, two each. Overwintering in the PNW is pretty hit or miss. Most hives are killed off by moisture. That is why we went with 2X material, hopefully it will buffer the moisture problems.

 
You got style baby! More than this tiny ad:
2024 Permaculture Adventure Bundle
https://permies.com/w/bundle
reply
    Bookmark Topic Watch Topic
  • New Topic