• Post Reply Bookmark Topic Watch Topic
  • New Topic
permaculture forums growies critters building homesteading energy monies kitchen purity ungarbage community wilderness fiber arts art permaculture artisans regional education skip experiences global resources cider press projects digital market permies.com pie forums private forums all forums
this forum made possible by our volunteer staff, including ...
master stewards:
  • Nancy Reading
  • Carla Burke
  • r ranson
  • John F Dean
  • paul wheaton
  • Pearl Sutton
stewards:
  • Jay Angler
  • Liv Smith
  • Leigh Tate
master gardeners:
  • Christopher Weeks
  • Timothy Norton
gardeners:
  • thomas rubino
  • Jeremy VanGelder
  • Maieshe Ljin

smoke back after 1 hour of burning

 
Posts: 41
  • Likes 1
  • Mark post as helpful
  • send pies
    Number of slices to send:
    Optional 'thank-you' note:
  • Quote
  • Report post to moderator
hello,
First of all thanks a lot for the multitude of information on rocket mass heaters. I spent 2 months reading, watching all the videos and building on that fits my budget and space.
My prototype worked great so does the halfway thing. now I'm stuck on how to carry on.
I build the the entire thing with the exhaust pipe going vertically out the wall. It works wonders. it rockets after 30 seconds to one minute with a little bit of smoke but not enough to make me cry even hanging above it to watch this great flame moving from vertical to horizontal. than it keeps rocketing with great force about one hour and than than suddenly it starts to give smoke back, lots of it and i have to close it and let it cool down. I can start again and same thing. rocket wonder for another hour than smoke back.
I haven't yet build the bench or any kind of chimney outside, best advice on to carry on would be greatly appreciated. By the way my freezing mountain home is already much warmer but carbon monoxide does worry me so any professional feedback is greatly appreciated!
 
Posts: 69
Location: Susquehanna, PA
1
  • Mark post as helpful
  • send pies
    Number of slices to send:
    Optional 'thank-you' note:
  • Quote
  • Report post to moderator
Some pics and specs could help in diagnosing your problem.
 
pollinator
Posts: 4154
Location: Northern New York Zone4-5 the OUTER 'RONDACs percip 36''
67
hugelkultur fungi books wofati solar woodworking
  • Likes 1
  • Mark post as helpful
  • send pies
    Number of slices to send:
    Optional 'thank-you' note:
  • Quote
  • Report post to moderator
Debbie Salemink : Have you gone to www.rocketstoves.com and got Ianto Evans' great book 'Rocket Mass Heaters'? There is no other place with as much information specific to Rocket Stoves in one place as here !
I did not get your reference to 'the halfway thing'. You have not told us how many times you have burned it, did you use a removable top 55 gal drum or other ? is there a noticeable hot spot in the center of the top?
While it is cold re-check one more time that you dont have any lost chunks of mortar in the burn tube, You should have a clean-out with unblocked access to the transition area between the bottom of the drum and where your stove pipe runs horizontally*, though you have said'' vertically out the wall'' please explain that !
How did you seal the gap between the bottom of the barrel,( a leak here may only show-up after your barrel gets hot !) and the top of the brick base of your rocket stove. As a long shot have a large amount of small/short split wood like you use to start it, Continue with it. If this helps try stuffing the feed tube with even more small/short wood .
This is reaching even farther because you get a good burn for an hr but - reduce its diet of bark and pitchy wood - start-up only ! Simply thinking through these questions and posting the answers will bring you other responses here that may help !

G'luck , -Pyro-maticly yours Allen L.

* If your Burn Tunnel is clear, your Barrel is still sealed, and you have clear access at your 1st clean-out, I would try adding a vertical chimney to a point near your eaves,( for a test to see if this would help ) though generally most others would push for 2' higher than the peak of your roof for a final location ! If any thing helps you should share it here, and vice versa. A final place to look is, after you remove your barrel look for loose mortar and/or shifted bricks, and inspect the inside top of your barrel for scorch, soot marks and remeasure distance between Heat Riser and inside of barrel ! again post your findings here, thats how we all learn ! A.L.
 
Posts: 37
2
  • Mark post as helpful
  • send pies
    Number of slices to send:
    Optional 'thank-you' note:
  • Quote
  • Report post to moderator
I've had that problem in the past, it seems to smoke back after there is a good bed of coals going. This signifies not enough "rocket effect" for sustained burning. The heat from the coals radiates upward, smoldering the wood higher than it should. If you have a ash cleanout, make sure it is air tight so the air is feeding only around the wood. You mentioned no bench or chimney, so it may get stronger when you do add on to your system. Forced air induction can work also, something as simple as a PC type fan powered off a small deep cycle battery charged with a small panel can do the trick.
 
Debbie Salemink
Posts: 41
  • Likes 1
  • Mark post as helpful
  • send pies
    Number of slices to send:
    Optional 'thank-you' note:
  • Quote
  • Report post to moderator
Thanks for your replies! I feel more confident finishing it now and than hopefully the problem will be solved I think probably my feed chamber has some leakage.
If the problem persists than I guess I'll rebuild it with a lot more knowledge..
 
Debbie Salemink
Posts: 41
  • Mark post as helpful
  • send pies
    Number of slices to send:
    Optional 'thank-you' note:
  • Quote
  • Report post to moderator
Ok I sealed the front chamber which did'nt change the situation at all in fact it got worse and the draft went in the reverse direction. I guess my only choice was to reread everything and take it apart.
There was almost no ash inside actually it was very little black considering I had been burning it for 2 weeks. Everything was still properly attached. I removed the exhaust pipe. No problems there.
Checked the inner chamber completely clean. Replaced the combustion pipe and lit it up again which during the building process gave me instant pull and heat at the top. Now no pull whatsoever.
I guess I can conclude that there is some leakage in the inner chamber?

Today I'll be starting version 2 but I am worried about the mortar I used to on the chamber which consisted of 3 parts soft river beach sand and 1 part fire clay mixed to look like peanut butter. Would builder sand be a better option?
 
allen lumley
pollinator
Posts: 4154
Location: Northern New York Zone4-5 the OUTER 'RONDACs percip 36''
67
hugelkultur fungi books wofati solar woodworking
  • Mark post as helpful
  • send pies
    Number of slices to send:
    Optional 'thank-you' note:
  • Quote
  • Report post to moderator
Debbie Salemink : yes, a little tho I don't think thats your problem, I need time to re-read everything and then no promises of any brite ideas !
 
Debbie Salemink
Posts: 41
  • Mark post as helpful
  • send pies
    Number of slices to send:
    Optional 'thank-you' note:
  • Quote
  • Report post to moderator
Allen Lumley : I think it most be either the mortar or the packing or a moved brick. I can't really think of another reason why it would work very well first but than cease. I'll build it more carefully and post how it goes.
I managed to find somebody who is glad to share some real clay! not easy to find in my part of Portugal.
 
Debbie Salemink
Posts: 41
  • Mark post as helpful
  • send pies
    Number of slices to send:
    Optional 'thank-you' note:
  • Quote
  • Report post to moderator
Version 2 is up and running. I changed some of the design, i upped the mortar to 50% powder clay 50% builder sand. The front burning chamber now has a dropdown of half a brick for ash. The drum is larger than 55gallon and is 200 litre so we added an extra pipe which leaves about 2.5 inch of air flow space around it.
I fired it up today for the first time and it burns really good (better than the first) gets very hot very fast. not a trace of smoke anywhere, I let burn for about 4 hours. But i do notice little cracks in de clay as it dries....Lets see how it goes
 
Debbie Salemink
Posts: 41
  • Mark post as helpful
  • send pies
    Number of slices to send:
    Optional 'thank-you' note:
  • Quote
  • Report post to moderator
and no chimney build yet, just a pipe than reaches about a foot from the hole in our external wall and then carries on with bricks and mortar...chimney will follow but 2 inches above the roof would mean bringing it up about 5 meter so I hope i can do with a bit less. It seems to burn very well right now even without a chimney and if the clay keeps on cracking that could possibly be the problem in two weeks...I'll post the result it might help others.
 
allen lumley
pollinator
Posts: 4154
Location: Northern New York Zone4-5 the OUTER 'RONDACs percip 36''
67
hugelkultur fungi books wofati solar woodworking
  • Mark post as helpful
  • send pies
    Number of slices to send:
    Optional 'thank-you' note:
  • Quote
  • Report post to moderator
Debbie Salemink : The fact that replacing the barrel solved your problems, seems to point to that barrel, assuming that that barrel started life with both ends closed -
You should check out the remarks by Ben Mosley and my response to him in the forum thread 'Compact RMH design, need opinions', this is pretty uncommon and I am sorry no one caught it !
Do you remember hearing your 55gal drum 'oil can ' with a great big POUNG sound ? This would have happened every time, though not always loudly !
 
Debbie Salemink
Posts: 41
  • Mark post as helpful
  • send pies
    Number of slices to send:
    Optional 'thank-you' note:
  • Quote
  • Report post to moderator
I didnt replace the barrel but made the smoke riser bigger by adding another barrel around it and filled it with sand/clay. It burns so hot that I find it hazardous with kids in the house so i decided to cover the barrel with terracotta clay and left the top as is.
I need to wait now a couple of days before I can fire it up otherwise the terracotta will crack but end of next week Ill see how it goes. It definitely looks very nice with the terracotta barrel and I'm having a lot of fun experimenting............
 
allen lumley
pollinator
Posts: 4154
Location: Northern New York Zone4-5 the OUTER 'RONDACs percip 36''
67
hugelkultur fungi books wofati solar woodworking
  • Mark post as helpful
  • send pies
    Number of slices to send:
    Optional 'thank-you' note:
  • Quote
  • Report post to moderator
Debbie : - o.k. I think i have the picture now. your heat riser is now fatter and you have added some additional thermal mass.
This actually should speed the formation of the doughnut shaped hot exhaust gases that scrub off their heat to radiate out though the barrel,
About how much space do you have between the Heat Riser And The inside of the barrel now.
How much weight do you think you added ?
Did you have a one end open type barrel, or one with both ends closed when you started

I am glad your problem was not with that outside barrel, i know i will watch for that in the future ! PYRO - magicly yours , - Allen L.
 
allen lumley
pollinator
Posts: 4154
Location: Northern New York Zone4-5 the OUTER 'RONDACs percip 36''
67
hugelkultur fungi books wofati solar woodworking
  • Mark post as helpful
  • send pies
    Number of slices to send:
    Optional 'thank-you' note:
  • Quote
  • Report post to moderator
Debbie : - o.k. I think i have the picture now. your heat riser is now fatter and you have added some additional thermal mass.
This actually should speed the formation of the doughnut shaped hot exhaust gases that scrub off their heat to radiate out though the barrel,
About how much space do you have between the Heat Riser And The inside of the barrel now, still 2 1/2 inches ?
How much weight do you think you added ?
Did you have a one end open type barrel, or one with both ends closed when you started

I have Ianto Evans' - other book 'The hand sculpted home ',4X the pages, 16X the skull sweat.

If you continue to have problems with cracks at/near your barrel and can find small pieces of sheet rock, I will get you a Formula for a Gypsum finish plaster.

I am glad your problem was not with that outside barrel, i know i will watch for that in the future ! PYRO - magicly yours , - Allen L.
 
Debbie Salemink
Posts: 41
  • Mark post as helpful
  • send pies
    Number of slices to send:
    Optional 'thank-you' note:
  • Quote
  • Report post to moderator
thanks!
 
Debbie Salemink
Posts: 41
  • Mark post as helpful
  • send pies
    Number of slices to send:
    Optional 'thank-you' note:
  • Quote
  • Report post to moderator
Yes now its about 2.5 inch (growing up in Ireland made me understand inches until they changed to the metric system! Gallons I never understood ) before it was much wider. The extra weight (I'm making a rough guess) would be about 60 kilo.
 
Debbie Salemink
Posts: 41
  • Likes 1
  • Mark post as helpful
  • send pies
    Number of slices to send:
    Optional 'thank-you' note:
  • Quote
  • Report post to moderator
I'll post some photo's and drawings soon but I'll post now about my progress.
I really don't like the oil drum look but covering it with terracotta clay was a wrong choice. For one the clay cracks very fast but mostly it does significantly reduce the heat that the drum emits so I removed it again and I will probably go for a black painted drum.

I think my main problem initially was my clay/sand mix which I'm still not getting completely right as it cracks quite a bit and I removed and change the mix already a few times. I now used the local river sand after playing around with the industrial stuff sold here and mixed it 4:1 and that hasn't cracked yet and seems to get rock hard. The rocket effect is so strong that even if there is some smoke back (which is really very little at the worst of times) because a piece of wood stayed hanging at the top it pulls it straight back in, even the steam around the loader gets pulled straight into heater......and in the first 10 minutes after lighting it already feels much warmer here.

The rocket heater is build downstairs in a 70m2 kitchen with and open stairway to an upstairs area of 150m2, most of the doors and windows have gaps and aren't isolated properly as the building is 150 years old and hasn't been up-kept for 20 years and we're not working as fast as we should. right now its 3 degrees outside but inside feels pleasantly warm. Today I used about 3 handfuls of wood, So we are happy and thankful people.
 
Debbie Salemink
Posts: 41
  • Likes 1
  • Mark post as helpful
  • send pies
    Number of slices to send:
    Optional 'thank-you' note:
  • Quote
  • Report post to moderator
One month ago i was still searching for an a+++ clothes dryer (which are difficult to find) nowadays my rocket stove bakes pizza, dries clothes and keeps us warm but would be difficult to build actually impossible when living in a rented house in the centre of Amsterdam (my last housing situation). And thanks for all the help and advice I found here.
 
Posts: 18
2
  • Mark post as helpful
  • send pies
    Number of slices to send:
    Optional 'thank-you' note:
  • Quote
  • Report post to moderator

Debbie Salemink wrote:One month ago i was still searching for an a+++ clothes dryer (which are difficult to find) nowadays my rocket stove bakes pizza, dries clothes and keeps us warm but would be difficult to build actually impossible when living in a rented house in the centre of Amsterdam (my last housing situation). And thanks for all the help and advice I found here.


Hi Debbie Salemink.

Is there any chance you could post photos of your build. I am planning on building a six inch system in my backyard over the next two weeks. It is intended as a companion to the rocket oven I've been working on. My hope is to extend our outdoor season by adding a warm seat for while we are cooking outside. I'm glad to hear of your success! BTW, how does your mass heater bake pizza?
 
Debbie Salemink
Posts: 41
  • Mark post as helpful
  • send pies
    Number of slices to send:
    Optional 'thank-you' note:
  • Quote
  • Report post to moderator
Before I do that I want to be sure that my system is safe! I'll give it another month or so of burning and checking and testing but if it is I'll take it apart and post photo's here. I bake pizza's right on the top in a boxand watch the box carefully ofcourse. To me it seems like a system that will explode at a certain stage but I'll keep you posted.
 
Mark Stephenson
Posts: 18
2
  • Mark post as helpful
  • send pies
    Number of slices to send:
    Optional 'thank-you' note:
  • Quote
  • Report post to moderator
That sounds great. I'll look forward to your post.
 
Debbie Salemink
Posts: 41
  • Mark post as helpful
  • send pies
    Number of slices to send:
    Optional 'thank-you' note:
  • Quote
  • Report post to moderator
It's still burning very hot and heating our large space very well (in an easy winter climate) but it's giving more and more smoke back at start up as it's getting colder and colder here. I'm thinking of rebuilding Merry Christmas everybody!
 
Mark Stephenson
Posts: 18
2
  • Mark post as helpful
  • send pies
    Number of slices to send:
    Optional 'thank-you' note:
  • Quote
  • Report post to moderator
Hi Debbie. I'm sorry to hear you are having smokeback, but I'm interested that it is happening as the weather gets colder.
I have set up the heater core for my backyard butt warming system. I have built the burn chamber and riser out of 6 inch flue pipe. Around the base I have insulated with a vermiculite/fireclay mix and I've used the same mix to fill the gap between the 6 inch heat riser and its 8 inch outer shell (also of flue pipe).
At this point I'm trying to dry out the insulative material. I think drying is critical because as long as it is holding moisture it is stealing heat.
If I burn wood in the heater core alone it burns beautifully and cleanly, but as soon as I put the barrel in place it begins to smoke. I have taken care to make sure the gap at the bottom of the barrel exceeds the cross sectional area of the flue pipe, and the gap from the top of the riser to the top of the barrel is 2 1/4".
My hypothesis as to why it smokes with the barrel is in place is that the burn is too cold due to the fact that the core is surrounded by damp vermiculite/clay mix. I hope that once it is dry and begins to function as insulation the riser temperature will get hot enough to overcome whatever pressure is created by putting the barrel in place. I believe it is some kind of back pressure that is slowing the burn speed leading to incomplete burning.
 
pollinator
Posts: 3827
Location: Massachusetts, Zone:6/7 AHS:4 GDD:3000 Rainfall:48in even Soil:SandyLoam pH6 Flat
555
2
forest garden solar
  • Mark post as helpful
  • send pies
    Number of slices to send:
    Optional 'thank-you' note:
  • Quote
  • Report post to moderator
So I am guessing that the temperature outside is colder after "1 hour" you started the fire. Uhmm..........
It could mean that you dont have enough updraft.
Hot air in your house could be escaping so fast that it creates a "vacuum" pulling denser/colder air at the bottom of your house.
And that colder air is trying to come in from your RMH exhaust.
Try piping in some cold air near to the ground of your house. Other than thru your RMH.


The wind outside could also be blowing directly into your RMH exhast.
Asumming you have a flexible eblow after your RMS bench "punches" thru the wall.
Try changing the angle relative to the ground. (90>roof, 0>Front of house/road, 180>shed/etc).
Maybe you have to exhaust on another side of your house
 
allen lumley
pollinator
Posts: 4154
Location: Northern New York Zone4-5 the OUTER 'RONDACs percip 36''
67
hugelkultur fungi books wofati solar woodworking
  • Mark post as helpful
  • send pies
    Number of slices to send:
    Optional 'thank-you' note:
  • Quote
  • Report post to moderator
Debbie S. ; Try getting everything running as close to ideal as you can then try turning on the exhaust fans in your bathroom and your range hood
over your kitchen stove ( if you have them ) if this causes instant 'blow back ' then S. Bengi Is right on the nose ! Try isolating the upstairs areas
from the lower and repeat !

You can over tighten a house, air supply wise and get similar results but at least we can eliminate the impossible ! Be safe keep warm ! Pyro Magic-ally Allen L.
 
Debbie Salemink
Posts: 41
  • Mark post as helpful
  • send pies
    Number of slices to send:
    Optional 'thank-you' note:
  • Quote
  • Report post to moderator
It seems to be running beautifully again the last week so I would guess that rainy weather somehow affects stove. No rain-cap on the outside exhaust maybe?
 
gardener
Posts: 1292
Location: Okanogan Highlands, Washington
397
4
hugelkultur cat dog books food preservation
  • Mark post as helpful
  • send pies
    Number of slices to send:
    Optional 'thank-you' note:
  • Quote
  • Report post to moderator
Hi Debbie,
The 'smokeback after 1 hour' problem often comes with stagnation in the barrel. This can be due to air leaks into the barrel (usually shows up fairly soon) or poor insulation around the heat riser.
My guess is that when you added more material around the heat riser, you effectively increased the R-value. Clay and sand still isn't a lot of insulation - you ideally want something like perlite, stabilized with clay if your heat riser is built around flimsy metal; or better, a masonry heat riser wrapped in a good insulation material like refractory blanket (rock wool - 1" or more), perlite (2"), or vermiculite (4" in an insulation container). When you get into materials like sawdust-clay or pumice, you're looking at 6-9" to achieve the same R-values as the thinner layers of better materials.

The other problem is the question of the horizontal exhaust. Not sure what you mean by 'vertically out the wall,' but if you have a conventional roof with vents, you're going to want a conventional chimney (that rises vertically, and remains warm until it reaches a meter or two above the ridge of your roof).
If you have an unconventional roof e.g. rubber membrane, that's hard to put a chimney vent through without leaks, at least bring the chimney as far up vertically within the house as possible before taking it through the wall.
Going out sideways and then insulating your way up ends up being an expensive, difficult solution. Insulated chimney is expensive, and heavy, and you'll need brackets that may be more difficult to fit than the ceiling boxes that come with a through-roof kit.
If your chimney is outdoors, vertical, and cold, you would see the biggest smokeback problems within about 20 minutes of startup. If your chimney is too short, you would see the biggest problems once your house gets warm (if the house draft is sucking air into the chimney), or with certain wind and weather conditions (wind blowing against the side of the house and pressurizing the chimney; or whipping around eaves into the chimney; or sometimes with certain height combinations you get weird effects on warm days, rainy days, etc).

If you do need to 'out compete' house draft, do what you can to weather seal the UPPER HALF of the house, and open some air supply into the lower. (Insulate and seal the ceiling, not the roof, for preference).
In general, any hole in the bottom half of the house will tend to act as an intake (negative house pressure), and holes up top act as outlet vents (positive house pressure). It's easy to chase down all the cold incoming drafts along the floorboards and lower windoes, seal them up tight, and leave the big gaping warm holes in the ceiling and around the upstairs windows because you don't feel any chill from them. Then the negative pressure builds up even more in the bottom half of the house; it's like a drinking straw just gasping to pull some air through that new hole down low in the wall, no matter whether you call it an 'exit chimney'!

The thing Ianto doesn't mention in his book is that most of his buildings have low, membrane-lined roofs, so his stoves don't have to compete with house draft.

Hope everything's working out well now.

Yours,
Erica W
 
Debbie Salemink
Posts: 41
  • Mark post as helpful
  • send pies
    Number of slices to send:
    Optional 'thank-you' note:
  • Quote
  • Report post to moderator
Hi Erica,
Thanks for your replies. I watched a lot of your videos when I build it and they helped me a lot! I think you're right about the space. It's very large and opens from the first floor, where I build it, right up to the second floor.
I get the smoke back only in the beginning nowadays and when I light it up and open the door to outside it keeps burning fine but if I close it it dies and I get smoke back. Rainy weather seems to make it worse. Once it's burning which takes about 30 minutes it keeps going the whole day and night without problems. If I start it up the next morning when it's still warm it will just fire straight into rocket position and burn fine but if I let it cool down it takes more attention.
The first one I build (which was the start of this thread) would start to cause problems once there was some coal building up in the burn chamber, the new one actually works better when there's some coal build up.
I filled my riser with clay and sand (no perlite) and it's much larger (thicker) than most I've seen as a compensation to my larger drum. This takes a while to heat up but gets very hot and after an hour of 2 burning can cook a complete meal (even brown rice and lentil) in about 1 and half hours or pizza in about 10 minutes. However the horizontal (not vertical!) exhaust never gets hot enough to warm a bench and the clay I put around it is not even completely dry after one month of burning!
So I have a very hot drum, that can actually cause burns when you accidentally touch it but the air is already very much cooled down when it get to the exhaust.

I like the fact that I can cook meals on it and it heats our house enough (living in Portugal, where winters are cold but nothing compared to Canada!) I'm still kind of jealous of the butt warming bench so I'll probably build a second one with a bit more knowledge and hopefully a fully functioning bench, but I may keep this one for cooking and heat in my kitchen
 
Posts: 31
Location: Gaia, Portugal
  • Mark post as helpful
  • send pies
    Number of slices to send:
    Optional 'thank-you' note:
  • Quote
  • Report post to moderator
Hi Debbie, just for curiosity, how tall is your chimney? Is it taller than the rooftop?

Have you considered using and H chimney top? like this:


Debbie Salemink
Posts: 41
  • Mark post as helpful
  • send pies
    Number of slices to send:
    Optional 'thank-you' note:
  • Quote
  • Report post to moderator
What I ended up with it is very different than most of what I've seen but works very well here, just in case it helps somebody else, here's the info.

for one the space is very large 70 square meter downstairs with an open stairs to upstairs 3 meters high and slightly bigger.
The climate is Portuguese and at the moment 3 degrees Celsius. Their are lot's of gaps in windows and doors that we haven't got around to fixing yet.
But it's warm inside at this moment.


How we started you can read in this thread, the best one was based on Iante's version from the book but that still didn't completely make it in such a big space.

Our drum is bigger than most.
Our exhaust goes through the wall facing the wind side of the mountain the house is build on overlooking the Tagus river.

We finally doubled the feed of the one in Ianthe's book to fit the large drum, a whole brick by a whole brick by a whole instead of half because that way we can burn more which I thought a larger space would probably need.
We shortened the bench to one meter and heightened the vertical exhaust outside to 3 meters, (no rain or wind cap because until it hasn't seemed necessary but we may do during the next storm).
We stopped buying wood and went back to the dried branches and dead wood we find by the river (works much better in our case, takes less chopping and the notches, because of our larger feed aren't a problem anymore).
The large feed has another advantage and that is that we can push large chunks inside to burn horizontally so that at times it gets even hotter, faster and we can cook food on it.
It's incredibly warm here now, never any smoke back. We use more wood than before but I think we are still saving at least 70% when compared to a fireplace and creating much more heat that radiates a lot further.

Next year we'll rebuild this version to skip the bench because we seldom sit on it and we will use the exhaust to create floor heating instead. Again thanks for all the help and info you've given me!
Hope you're all warm and well until the spring shows it's first smile!
 
Debbie Salemink
Posts: 41
  • Mark post as helpful
  • send pies
    Number of slices to send:
    Optional 'thank-you' note:
  • Quote
  • Report post to moderator
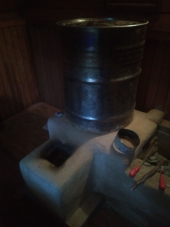
The drum unfinished will be clayed completely
P1310011.JPG
[Thumbnail for P1310011.JPG]
the drum
 
Debbie Salemink
Posts: 41
  • Mark post as helpful
  • send pies
    Number of slices to send:
    Optional 'thank-you' note:
  • Quote
  • Report post to moderator
The burner
P1310007.JPG
[Thumbnail for P1310007.JPG]
 
Debbie Salemink
Posts: 41
  • Likes 1
  • Mark post as helpful
  • send pies
    Number of slices to send:
    Optional 'thank-you' note:
  • Quote
  • Report post to moderator
The cat
P1310002.JPG
[Thumbnail for P1310002.JPG]
 
Posts: 3
  • Mark post as helpful
  • send pies
    Number of slices to send:
    Optional 'thank-you' note:
  • Quote
  • Report post to moderator
I am also struggling with the pressure issue. As long flames are visible, i have a nice draft and sucking sound. After a few minutes of mere smoldering it smokes back. Already rebuilt 3 times, minor fixes not counted. By first and second version (now seen as mock ups only) was the heat riser too narrow (4"), making it longer (from 30 to 39") and raising the barrel accordingly didn't help either. I was thinking also, the internal heat riser enclosure drum, as per the Ewans book is too big, restricting flow. So i tore down everything, took more flue pipe and made a 6" diameter, 63" heat riser with bricks on 4 sides, the 200L barrel standing quite high up, on a waist high brick edge. Heat riser top end to barrel gap measured very meticulously, in the current version first 1,5", now increased to just over 2". It was needed, as it seems to me the upper end of the barrel tends to bulge in when hot. The vertical burning channel is now 20" long and 12cm by 12.5cm (23.25sq.in), and want to keep it that way.
What worries me most is the possibly inproper heat balance and the whole chunk of material having the same temp inside the barrel (no shock drop in gas temperature). The insulation in the top half of the heat riser is only 1" clay-perlite with that masonry enclosure (bricks standing on their side, after the first experience i was worrying over spacing toward outer barel). The 20 foot long 6" flue pipe was barely getting hand warm in mid section, so i took out 2x 90deg elbows and 8 foot of the piping. That helped somewhat on the overall function.
As still no foolproof firing possible, i want now to take out the perite clay insulation, tear down the whole heat riser, replace the outer enclosure with a 12"diameter and 68" long pipe from the scrapyard. The inside of the heat riser will remain the 63" long 6" flue pipe. The insulation will be dry (no clay added) perlite, to my calculation the remaining 100L bag will fill the space up. I also want to make a fresh air intake channel, because it needs now a close-by window being open finger wide to have decent burning.
I have made photos from all steps, including the dead ends.
 
Cob is sand, clay and sometimes straw. This tiny ad is made of cob:
Rocket Mass Heater Jamboree And Updates
https://permies.com/t/170234/Rocket-Mass-Heater-Jamboree-Updates
reply
    Bookmark Topic Watch Topic
  • New Topic