|

|

|

|

|

|
|
|
|
|
|
|
|

|

|

|

|

|
 1
1


richard walker wrote:I cannot lift them without them breaking in half! What am I doing wrong?
1
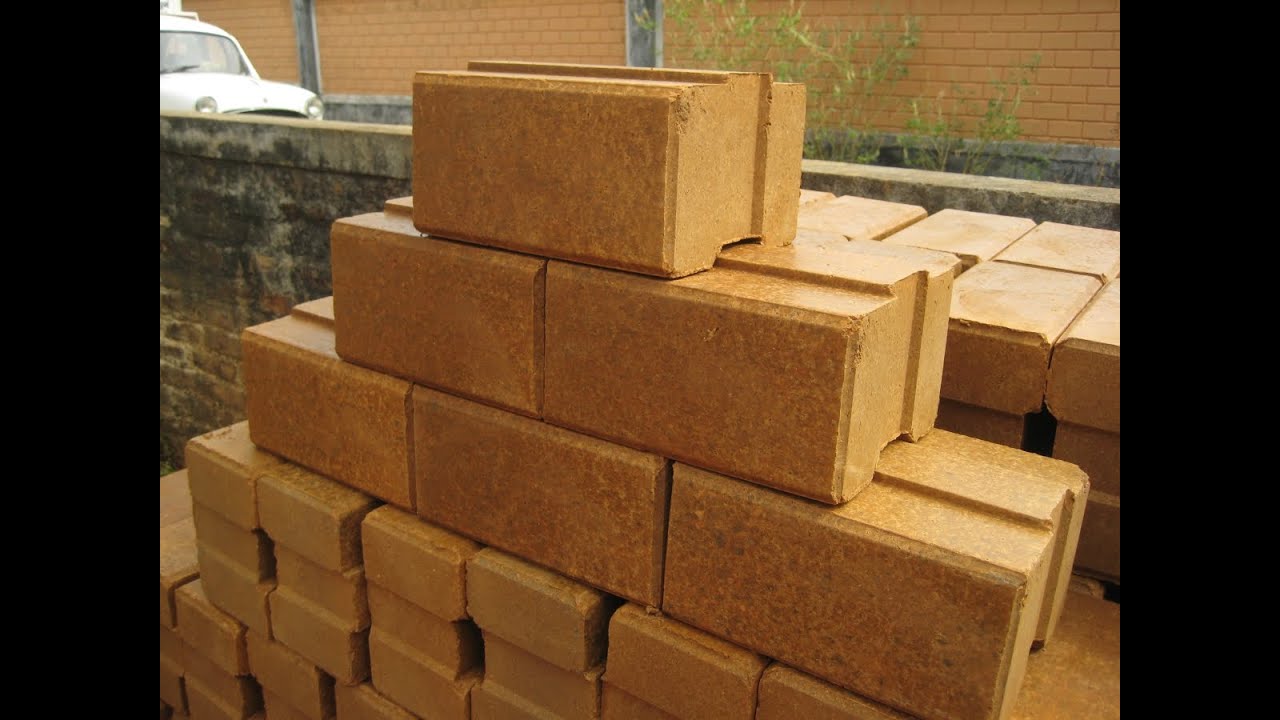
1 2 3 4 5 6 7 8 9 10 11 12 13 14 15 16 17 | Weight: 140 lbs. (63 kilos) Height and base width: 10" x 16" x 26" (24 x 37 x 64cm) Application force of lever: 80 lbs. (36 kilos) Bearing Strength (Fully cured blocks) 200-500 psi (14-35 kg/cm^2) Size of block (3-1/2" x 5-1/2" x lays up 4" x 6" x 12" 11-1/2") (9cm x 14cm x 29cm) (10 x 15 x 30cm) Size of tile (1-1/2" x 5-1/2" x lays up 1-1/2" x 6" x 12" 11-1/2" (5cm x 14cm x 29cm) (5 x 15 x 30cm) Average number of blocks or tiles can be made by two people per day: 300-500 Average number of blocks needed for a two-room house: 2500 Average number of blocks per 100 lbs. of cement: 150 |
5
2
1
 . I am hopefully closing on a house today and thinking about going crazy with ceb to make a retaining wall, grill area/patio, fence, shed, and maybe even a pool or hottub if I can do it.
Any help would be much appreciated thanks!
. I am hopefully closing on a house today and thinking about going crazy with ceb to make a retaining wall, grill area/patio, fence, shed, and maybe even a pool or hottub if I can do it.
Any help would be much appreciated thanks!
![[Thumbnail for IMG_20151221_103629607.jpg]](/t/33406/a/34750/IMG_20151221_103629607.jpg "Filename: IMG_20151221_103629607.jpg
Description:")
![[Thumbnail for IMG_20151221_103608543.jpg]](/t/33406/a/34751/IMG_20151221_103608543.jpg "Filename: IMG_20151221_103608543.jpg
Description:")
![[Thumbnail for IMG_20151221_103558873.jpg]](/t/33406/a/34752/IMG_20151221_103558873.jpg "Filename: IMG_20151221_103558873.jpg
Description:")

 1
1
Elliander Eldridge wrote:Hi, I joined this forum specifically to ask a few questions about this, and to share a link that others might find helpful.
Here's an eBook I found digging around which has some good information on how to make the clay as well as overcoming some of the problems with it:
http://www.rivendellvillage.org/CINVA_RAM_Compressed_Earthen_Block_Press.pdf
1.) Is anyone still selling this unit? I'd like to purchase one pre-assembled if at all possible. (I have absolutely no experience with welding). I sent an email to the first contact in this thread, but didn't get a response about it.
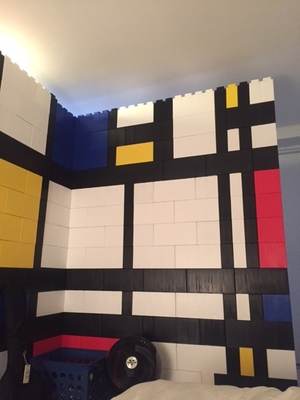
2.) Has anyone considered changing the mold to an interlocking brick design? Like, an H shaped brick? Or bricks set out like Legos?
One image in my head: A press that makes bricks in a Lego mold shape, and with a screw on attachment that could be used to set one to have a hole through the center of one end or the other so that at an interval it could be embedded with standard steel rebar for reinforcing the structure. At the very least, it shouldn't be too difficult to make a mold for something resembling the EverBlocks so that the pieces would connect without mortar and hold together:
An H design where the squares (and gap) are the same size and a perfect cube shape would also allow a brick footing to interconnect. In fact, there is one ancient structure that has stood for tens of thousands of years (at least) uses interlocking H shaped blocks and no mortar.
Here's a replica of one of those blocks which should work fairly well as a mold shape, though obviously not as a simple brick mold.
But even something like this would be an improvement over a flat brick:
That would probably be the simplest modification, requiring one strip of extra metal on the bottom and two strips of extra metal on the top and could still be designed to allow mortar, but would make sure the wall would always be build completely straight. (although I imagine would present a problem when building the corners, so something adjustable would be perfect)
4
 1
1

Gediminas Kavalskis wrote:Hello, Mike. Could You post drawings in mm system ?
1
![[Thumbnail for image.jpeg]](/t/33406/a/41457/image.jpeg "Filename: image.jpeg
Description:")
![[Thumbnail for image.jpeg]](/t/33406/a/41458/image.jpeg "Filename: image.jpeg
Description:")
![[Thumbnail for image.jpeg]](/t/33406/a/41459/image.jpeg "Filename: image.jpeg
Description:") 1
1
![[Thumbnail for image.jpeg]](/t/33406/a/41474/image.jpeg "Filename: image.jpeg
Description:") 1
1
![[Thumbnail for image.jpeg]](/t/33406/a/41682/image.jpeg "Filename: image.jpeg
Description:")
![[Thumbnail for image.jpeg]](/t/33406/a/41683/image.jpeg "Filename: image.jpeg
Description:")
![[Thumbnail for image.jpeg]](/t/33406/a/41684/image.jpeg "Filename: image.jpeg
Description:")
richard walker wrote:
I recently bought a kit from the supplier on your link. You may want to let him know that the slot size has been changed from 2" to 1" for the pull arm guide slot.
So far I have everything welded except the cam. It appears to be going well and Thank You for posting this!
A lot of welding could have been avoided and a stronger product as well, by building certain components out of 1/2" steel such as the bottom push assembly could have been cut as a T, as well as the top and bottom plates. I am currently working with a Machine shop and will have an alternative source available soon for these parts as a kit, using the same dimensions but a slightly different part layout using 1/2" where needed for those of us who are not quite as handy at welding.
Again it was Awesome of You to post his resource! I will post again when it's done.
Thanks,
Richard
Michael Jinks wrote: if the volume of soil in the compression chamber were to be increased by say 50% will the machine still be able to compact it to the same block height of 92cm?
2
Vee Green wrote:Hi Mike. I've been following this thread and I wanted you know if you could design a larger press. I'm thinking of one that could make bricks for home construction. It would be a game changer for me.
2
John Daley Bendigo, Australia The Enemy of progress is the hope of a perfect plan
Benefits of rainfall collection https://permies.com/t/88043/benefits-rainfall-collection
GOOD DEBT/ BAD DEBT https://permies.com/t/179218/mortgages-good-debt-bad-debt
Plans are only good intentions unless they immediately degenerate into hard work -Peter Drucker
John Daley Bendigo, Australia The Enemy of progress is the hope of a perfect plan
Benefits of rainfall collection https://permies.com/t/88043/benefits-rainfall-collection
GOOD DEBT/ BAD DEBT https://permies.com/t/179218/mortgages-good-debt-bad-debt

|
She laughed at how small it was, and now it is even smaller. Poor tiny ad:
permaculture bootcamp - learn permaculture through a little hard work
https://permies.com/wiki/bootcamp
|