

|

|

|

|

|

|
|
|
|
|
|
|
|

|

|

|

|
|


 .
.
"It is a miracle that curiosity survives formal education." -- Albert Einstein
we CAN build a better world
Andor Horvath wrote:Interesting design...might want to consider something heavier (oxy/acetylene tank or similar) for the upper radiant "barrel"
and perhaps you could clarify - is the lower barrel "full' of insulating refractory?
I don't understand the junction between "barrel" and exhaust.
A heavier section top "barrel" could also be augmented with some added fins or pipes to assist in heat dissipation.
Another approach might be to extend your assembly vertically, imagine another barrel acting as mass/bell under what you have drawn

...yeah, I know...endless possibilities!
Also check out this guy's work: http://www.youtube.com/user/tryin2lhard/videos
Nice concept, you've got us all thinking; I'm working on going with smaller CSA's too, hope to post some pics soon
"It is a miracle that curiosity survives formal education." -- Albert Einstein
Andor Horvath wrote:
A heavier section top "barrel" could also be augmented with some added fins or pipes to assist in heat dissipation.


"It is a miracle that curiosity survives formal education." -- Albert Einstein
we CAN build a better world
we CAN build a better world
Andor Horvath wrote:Chris et al,
here's an interesting way to do it (portable, mass, rocket), just make sure you have the correct type of (non exploding) rocks...actually, pretty do-able
http://www.tamizsolutions.com/2012/09/10/the-rock-bucket-rocket/
...more idea fodder
andor
"It is a miracle that curiosity survives formal education." -- Albert Einstein
Andor Horvath wrote:Chris et al,
here's an interesting way to do it (portable, mass, rocket), just make sure you have the correct type of (non exploding) rocks...actually, pretty do-able
http://www.tamizsolutions.com/2012/09/10/the-rock-bucket-rocket/
...more idea fodder
andor
Live long, Live free and Love every minute!
http://wildernessreturn.wordpress.com/
my wilderness return story and adveture
Live long, Live free and Love every minute!
http://wildernessreturn.wordpress.com/
my wilderness return story and adveture
Get involved -Take away the standing of corporations MovetoAmmend.org
...oh, were it only that I could afford 24' of 4"x1" aluminium channel
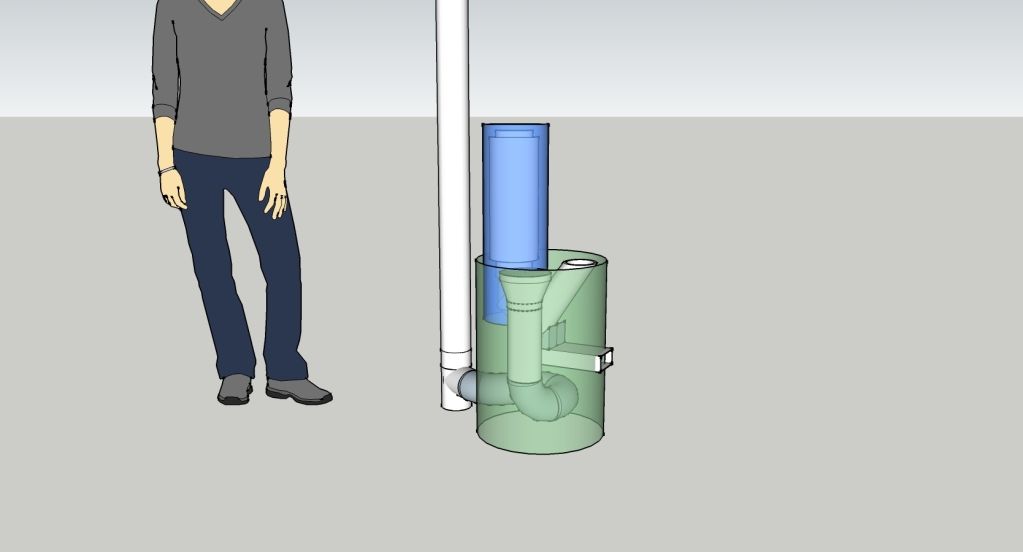
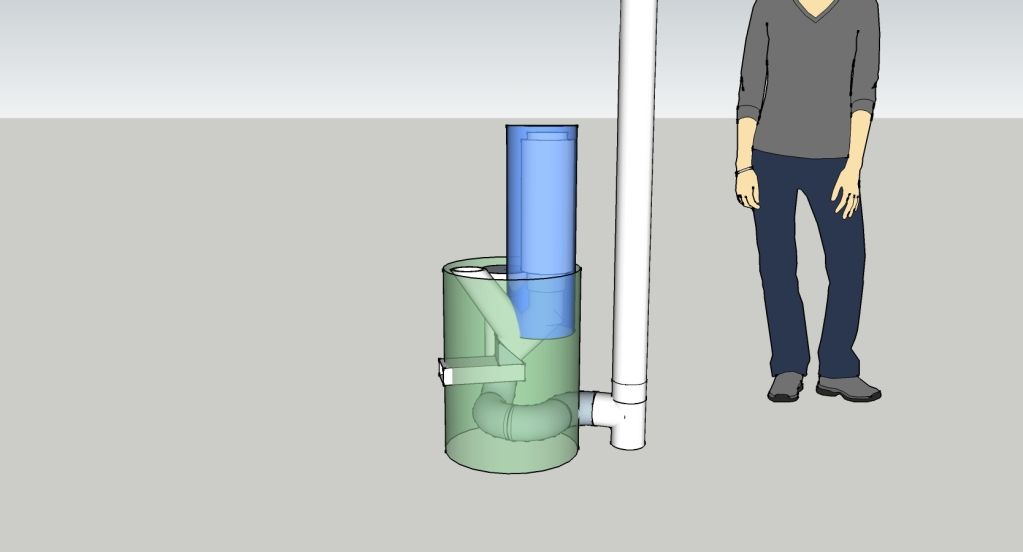
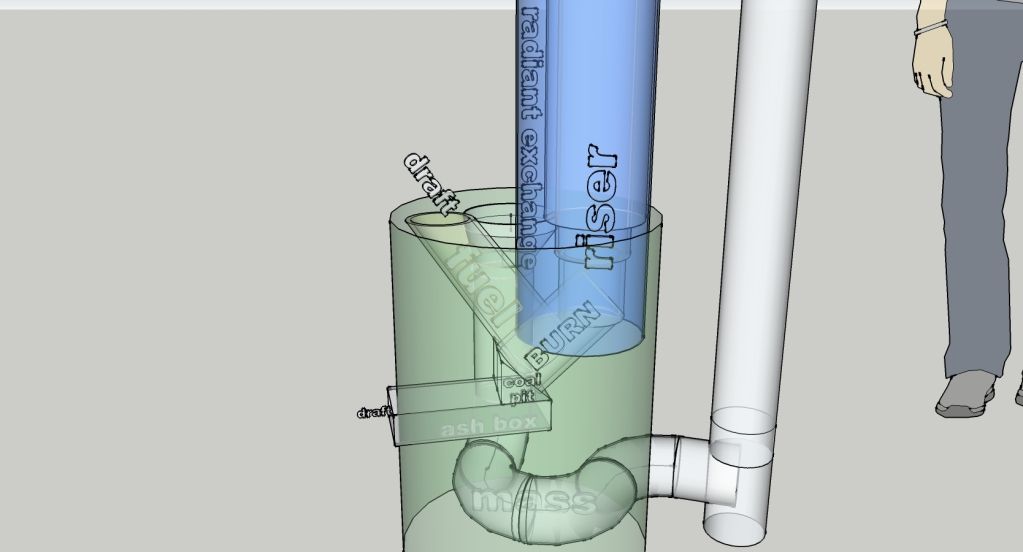
Andor Horvath wrote:Interesting design...might want to consider something heavier (oxy/acetylene tank or similar) for the upper radiant "barrel", and perhaps you could clarify - is the lower barrel "full' of insulating refractory? I don't understand the junction between "barrel" and exhaust.
A heavier section top "barrel" could also be augmented with some added fins or pipes to assist in heat dissipation.
Another approach might be to extend your assembly vertically, imagine another barrel acting as mass/bell under what you have drawn...yeah, I know...endless possibilities!
Also check out this guy's work: http://www.youtube.com/user/tryin2lhard/videos
Nice concept, you've got us all thinking; I'm working on going with smaller CSA's too, hope to post some pics soon
Andor
positively optimistic 🙂 https://www.youtube.com/@613Builds

|
Feb-ROO-airy. I can't stop saying it this way. Help me tiny ad!
building a better world rather than being angry at bad guys
https://wheaton-labs.com/bootcamp
|


