• Post Reply Bookmark Topic Watch Topic
  • New Topic
permaculture forums growies critters building homesteading energy monies kitchen purity ungarbage community wilderness fiber arts art permaculture artisans regional education skip experiences global resources cider press projects digital market permies.com pie forums private forums all forums
this forum made possible by our volunteer staff, including ...
master stewards:
  • Carla Burke
  • John F Dean
  • Nancy Reading
  • r ranson
  • Jay Angler
  • Pearl Sutton
stewards:
  • paul wheaton
  • Devaka Cooray
  • Leigh Tate
master gardeners:
  • Timothy Norton
  • Christopher Weeks
gardeners:
  • Jeremy VanGelder
  • Matt McSpadden
  • thomas rubino

Indoor Pocket Rocket

 
Posts: 39
Location: NH
2
  • Likes 2
  • Mark post as helpful
  • send pies
    Number of slices to send:
    Optional 'thank-you' note:
  • Quote
  • Report post to moderator
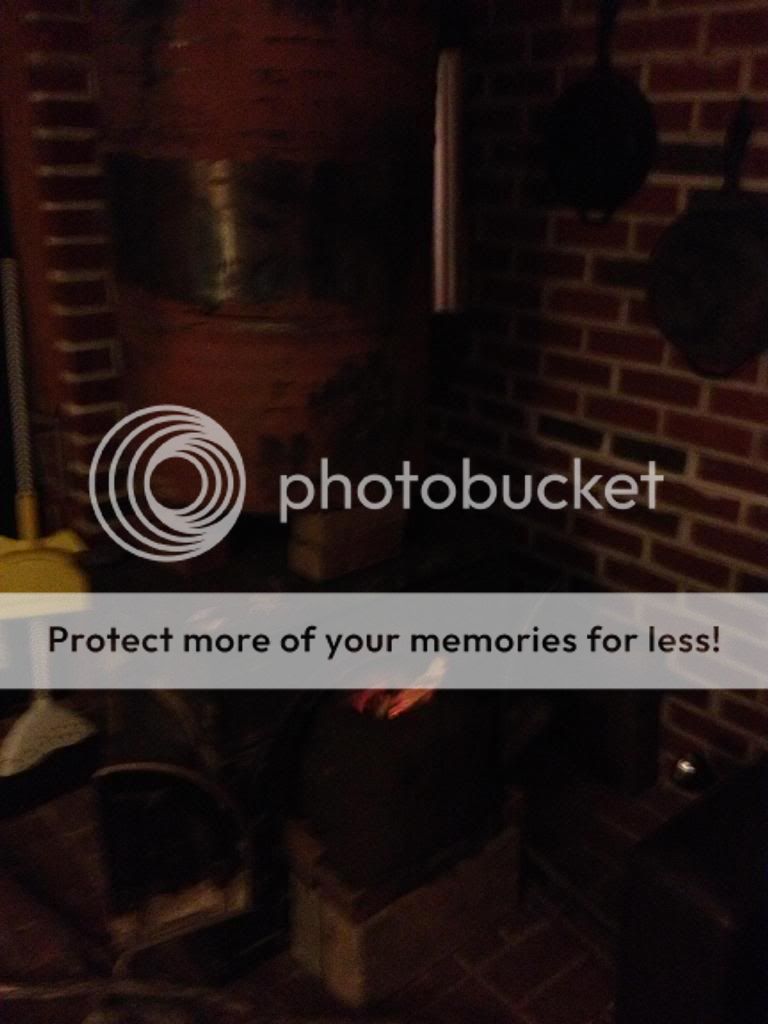
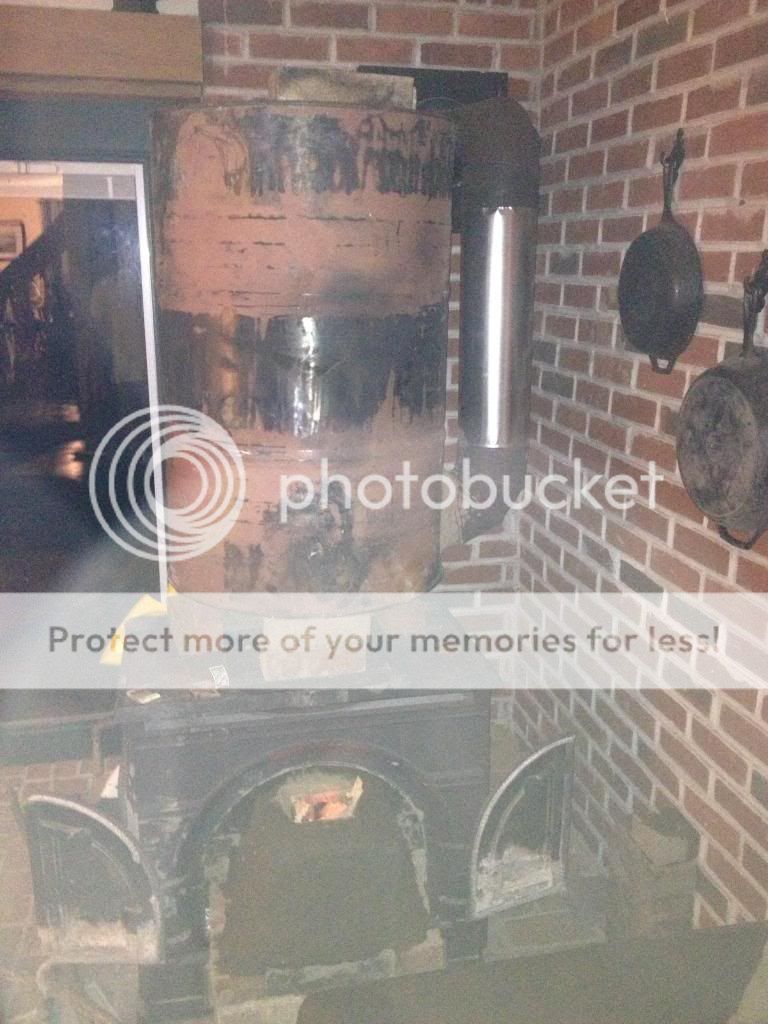
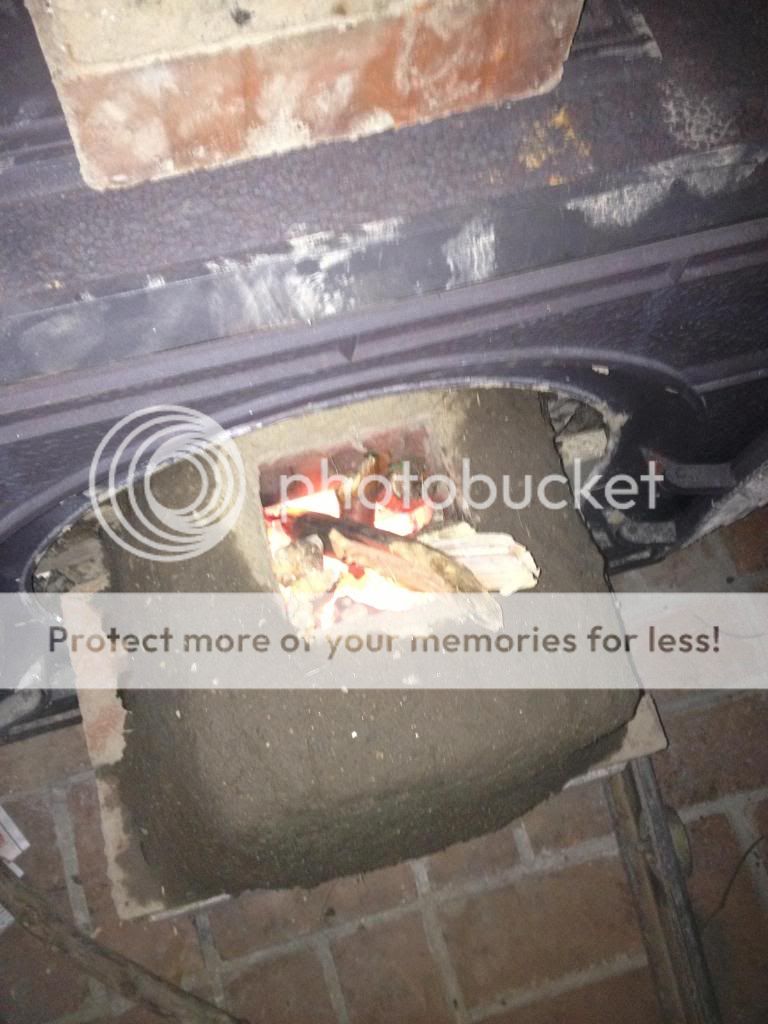
Just put this pocket rocket together in the living-room:


I'm afraid a lot of the heat might just go out the stack (it's hooked up to the existing, insulated chimney for the wood-stove). I was going to cob the barrel today.

It burns like crazy. But the barrel doesn't get as hot as I expected, and it takes some time to heat up. I'm wondering if another "heat cache" barrel up on the stack might work before exiting the exhaust.
 
gardener
Posts: 3467
Location: Southern alps, on the French side of the french /italian border 5000ft elevation
191
  • Mark post as helpful
  • send pies
    Number of slices to send:
    Optional 'thank-you' note:
  • Quote
  • Report post to moderator
You're in for a bell!

Satamax Antone wrote:So, Mike, a bell can store heat for some time, even if there's barely any mass. Not long, but two or three hours is not out of the question.

About bells.

http://www.stove.ru/index.php?lng=1&rs=16.

If you have a massonry wall in the house, you could heat it with one side of the bell. If made square like old home heating fuel tanks, or agricultural fuel tanks.

Here you can see the double barrel bell on Peter van den Berg horizontal batch rocket.


http://www.youtube.com/watch?v=tpsGO9tY8rY

May be you could make something like this. Two stacked barrels on your rocket. No worries about the barrel gap then. Plus two stacked barrels, like this, aside the rocket, aranged as a bell. Vertical bell, with intake and exhaust at the bottom, and which would store and extract heat from the flue gasses. Then, you could use a little mass around the second set of barrels, to keep warmth a smidge more.

Myself, i'm on the track of using square tanks, and covering theses with bricks, dry stacked. Whenever i can find tanks which i like.

 
pollinator
Posts: 4154
Location: Northern New York Zone4-5 the OUTER 'RONDACs percip 36''
67
hugelkultur fungi books wofati solar woodworking
  • Mark post as helpful
  • send pies
    Number of slices to send:
    Optional 'thank-you' note:
  • Quote
  • Report post to moderator
Jeff Rychwa : Yes a lot of heat will go up the chimney and another barrel piped the same way with an interior pipe going almost all the way through,
and then taking the cooler gasses of of the bottom (think your ist pocket rocket turned upside down, will make one of Max's bells.

Two things, need to suspend the barrel with something like aircraft cable, and you will probably need a good T to go into yourWall thimble, with a
removable cap and you may need to prime or warm your stove pipe at that location to get it to Draw ! You will also need a lot of fans to drive all
the hot air that has stratified up by the ceiling !

You need to go to richsoil.com and click on Rocket mass heaters, and learn to burn the paint off of the barrels before you bring them into the house,
You get picked on because other people will see your barrel and think that they to can skip this step! Otherwise a great job, For The Good Of the Craft!

Think like Fire, Flow like a Gas, Don't be the Marshmallow ! As always, your questions, and comments are solicited and are Welcome! PYRO big AL!
 
Jeff Rychwa
Posts: 39
Location: NH
2
  • Mark post as helpful
  • send pies
    Number of slices to send:
    Optional 'thank-you' note:
  • Quote
  • Report post to moderator
I totally agree; I deserve to get picked on. I do know better.
 
Satamax Antone
gardener
Posts: 3467
Location: Southern alps, on the French side of the french /italian border 5000ft elevation
191
  • Mark post as helpful
  • send pies
    Number of slices to send:
    Optional 'thank-you' note:
  • Quote
  • Report post to moderator
Jeff, with what you have, i'd try something like this.

I would line the inside of the pocket rocket you've made with insulation and firebricks. To get a smidge of mass and durability. And make the bell as shown, with your original tube in it.

Filename: pocketrocketbell.skp
File size: 244 Kbytes
 
allen lumley
pollinator
Posts: 4154
Location: Northern New York Zone4-5 the OUTER 'RONDACs percip 36''
67
hugelkultur fungi books wofati solar woodworking
  • Mark post as helpful
  • send pies
    Number of slices to send:
    Optional 'thank-you' note:
  • Quote
  • Report post to moderator
Jeff Rychwa : You would make our host here at Permies.com and richsoil.com very happy if you would take the cast Iron skillets off of the wall and use them,
He has the best video of how to season ,use, and take care of Cast Iron/Steel Skillets I have ever seen, done his way they are truly stick-less fry pans that
last for generations ! For the good of the craft ! Big AL !

 
Jeff Rychwa
Posts: 39
Location: NH
2
  • Mark post as helpful
  • send pies
    Number of slices to send:
    Optional 'thank-you' note:
  • Quote
  • Report post to moderator
Thank you, folks.

I have belt-sanded the paint off the drum. Rather than open it up to install mass, I'm going to cob the entire outside of the unit.

I can't open the skp. file, but I'm very curious to see the content.

I'm also curious to the effect of running the exhaust right off the main unit to the "bell" barrel, but using the bell AS the pipe, rather than running a pipe through it. It seems like the barrel would just load right up with heat (and exhaust), but then force it downward through another exit pipe, until it finally reaches the external exhaust from the house. In other words: why run pipe through the bell rather than running pipe TO the bell, then FROM the bell at the other end?

My god, this question is so simple, but I keep making it unclear. Would the barrel transfer more heat to the room if it was filled to its volume with the forced heat, rather than being filled with radiant heat off of a pipe running through it?

The frying pans, and the dutch oven certainly do get use. My pop is more of a "pioneering" guy, while I'm the "tribal culture" guy, so we trade skills--and recipes--frequently.
 
Posts: 245
Location: near Houston, TX; zone 8b
3
  • Mark post as helpful
  • send pies
    Number of slices to send:
    Optional 'thank-you' note:
  • Quote
  • Report post to moderator

In other words: why run pipe through the bell rather than running pipe TO the bell, then FROM the bell at the other end?


Why indeed? I don't think there is a reason to put pipe in the bell, you are just inhibiting the free flow of gases. Lining one or both of them with fireclay bricks would be good. It would take longer to heat up, but also longer to cool down than if you were only heating the metal.
 
Posts: 17
  • Mark post as helpful
  • send pies
    Number of slices to send:
    Optional 'thank-you' note:
  • Quote
  • Report post to moderator
Jeff Rychwa, how is the tubing arranged inside the barrel? Is it one continuous "U"-tube? If so, how do you plan to clean out the ash? Shop vac?
 
Jeff Rychwa
Posts: 39
Location: NH
2
  • Mark post as helpful
  • send pies
    Number of slices to send:
    Optional 'thank-you' note:
  • Quote
  • Report post to moderator
It's a stack of 6" that goes from the top of the barrel to the exit, and a 24" piece of 8" that drops into the barrel from the top. The 6" is attached with a transition that is screwed-in to the top of the barrel over the hole I made. The 6" doesn't go into the barrel at all. The 8" is pressure fit, so that it is about 1 1/2" off the inside barrel floor. It goes like crazy, but a lot of heat is lost. I can put 3-4' pieces of branches in there and keep it going, but if the wood is slightly wet, it doesn't heat well. I have to supplement with cardboard or paper bags to get the burn temp way up, then it seems to maintain it for a while.
 
Mike Kelly
Posts: 17
  • Mark post as helpful
  • send pies
    Number of slices to send:
    Optional 'thank-you' note:
  • Quote
  • Report post to moderator
Someone more knowledgable can chime in, but can you try extending the 6-inch tubing down the barrel to within 4-6 inches of the barrel bottom? This way the hot gases will be forced to rise to the top of the barrel and then cool and go down and enter the exhaust/chimney. I don't know if this will actually work and provide enough draft but it could.
Draft1-1.gif
[Thumbnail for Draft1-1.gif]
Exhaust extended to bottom of barrel
 
allen lumley
pollinator
Posts: 4154
Location: Northern New York Zone4-5 the OUTER 'RONDACs percip 36''
67
hugelkultur fungi books wofati solar woodworking
  • Mark post as helpful
  • send pies
    Number of slices to send:
    Optional 'thank-you' note:
  • Quote
  • Report post to moderator
Mike Kelly : If you go to - ' first try Pocket Rocket( Rocket Stoves Forum at Permies) ' - There are some Excellent Step by step pictures, The stove pipe that goes down inside the
barrel will burn out first so you may want to make it so that you can easily replace the last 4'', heavy gage black stove pipe or some fabricated stainless would work best here .

This unit is best operated out-of-doors, as much heat goes up the chimney, If left in one spot to long it will set fire to the blacktop as the bottom of the barrel glows Cherry Red Hot !
Inside installation is problematical, due to high levels of radiated heat, Dry stacking bricks completely around this unit will cause the heat absorbed by the bricks to be re-radiated at
a lower Temperature, Its one great advantage is the long lengths of wood that it will take !

It is very popular with Doomsday Preppers, Zombi hunters, People on picket lines, and Ice fishers ! Hope this helps, and is timely, For the good of the Crafts !

Think like Fire, Flow like a Gas, Don't be the Marshmallow ! As always your questions and comments are solicited and Welcome ! PYRO - Logically Big AL !

Late note : I just saw your sketch, the traditionally short length on the exhaust helps keep the supply tube cool enough ,so that only the tips of the wood at the bottom of the barrel
are burning, If enough heat is stored within the barrel the supply tube will get red hot and as the rest of the wood in the supply tube catches on fire we will have lots of smoke back .

However, if you made up a kind of reverse flow Insulated Heat Riser to line the outside of your Feed Tube- so that the insulation is protected from physical contact
with the wood being dropped down your supply tube, it seems to be you could have it both ways- We could call it the Kelly stand on your head heat riser, and the whole improved
Pocket Rocket A Kellys Caldron to separate it from the Kelly Kettle, which actually does hold Water ! Big AL
 
Jeff Rychwa
Posts: 39
Location: NH
2
  • Mark post as helpful
  • send pies
    Number of slices to send:
    Optional 'thank-you' note:
  • Quote
  • Report post to moderator
<sigh>

I guess the next thing to do is decide whether I want to keep the Pocket Rocket in the living-room with more of the barrel exposed, or turn the woodstove into a rocket burner.

That woodstove, I could get to heat this house (1300 sq') within a couple of hours from below 50 dF to 75 dF. The Pocket Rocket isn't doing so well with the radiant heat. I get it blazing with cardboard, which gets the wood going well, but the heat off the barrel is rapid, lasting only minutes, and the wood doesn't maintain the heat. The intensity of the burn is great, but the heat isn't there. I can't get this place over 64 dF, and that's when it's around 60 dF outside. That's not good.

I'm wondering, if I moved the 400-500 lb. stove back into place (putting the Pocket Rocket downstairs for experimentation with a bell system later), if I'd be able to turn it into a more efficient rocket stove with an adjustment (feed tube) at the door, and then still get the high radiant heat results with a more complete, thus clean, burn.

Lots of work, a little late in the year, but boy is this fun.
 
Mike Kelly
Posts: 17
  • Mark post as helpful
  • send pies
    Number of slices to send:
    Optional 'thank-you' note:
  • Quote
  • Report post to moderator
Maybe something like this then?

Draft1-2.jpg
[Thumbnail for Draft1-2.jpg]
Insulated feed tube, insulated base
 
Jeff Rychwa
Posts: 39
Location: NH
2
  • Mark post as helpful
  • send pies
    Number of slices to send:
    Optional 'thank-you' note:
  • Quote
  • Report post to moderator
So, this is what I'm thinking:


I wonder how much heat is lost without the bell system, and how much is recovered with it. In other words: If the pocket rocket loses 70% of the heat generated, even at a more efficient burn, and the bell recovers 50% of that lost heat, then the system is retaining 80% of the heat generated INSIDE the house for a more complete burn, which makes this worth it and cost effective.

But, if it's losing 70% (just for the sake of discussion), and the bell system only recovers 20% of that lost, then it's retaining 50% of the heat generated, at a better burn than a woodstove, but still losing too much heat, whereas the woodstove retains more heat at a less efficient burn.

What to do??
 
Satamax Antone
gardener
Posts: 3467
Location: Southern alps, on the French side of the french /italian border 5000ft elevation
191
  • Mark post as helpful
  • send pies
    Number of slices to send:
    Optional 'thank-you' note:
  • Quote
  • Report post to moderator

Jeff Rychwa wrote:

What to do??


http://donkey32.proboards.com/thread/849/grren-machine-inch-tube-help

http://donkey32.proboards.com/post/8028/thread
 
allen lumley
pollinator
Posts: 4154
Location: Northern New York Zone4-5 the OUTER 'RONDACs percip 36''
67
hugelkultur fungi books wofati solar woodworking
  • Mark post as helpful
  • send pies
    Number of slices to send:
    Optional 'thank-you' note:
  • Quote
  • Report post to moderator
Mike Kelly : Great, exactly what I was saying, I think, that The barrel should be set in wet clay slip perlite for maximum weight dis tribulation and some brick to catch an
occasional edge of the barrel.
Any of the aluminum reflecting barriers work best if they are reflecting into an air space,and are marginally more effective if they have an air gap behind them, all i would change
would be to go back to Ianto Evans' original practice and use an Elmers glue to glue a heavy weight kitchen grade aluminum foil Directly to the floor !

Jeff Rychwa : Even with the improved version of the pocket rocket -the Kelly Cauldron, I was afraid that it would send most of the heat up the chimney, you are moving a
tremendous amount of air through it and it is gulping some of the warmest air at waist high rather than off of the floor

Once some friends of mine were going to take a 50'' x 50'' grate that set over an old coal furnace that was converted to oil, sink a Pocket rocket directly into the center, so the
Feed Tube was flush with the floor, and be able to walk over and drop in a 4 foot piece of fire wood directly into the Feed Tube. Their landlord heard about that plan and found
new tenants !

Two things, One, if you do give up on your Pocket Rocket in its present configuration, you might try hooking it up outside to see just how clean the exhaust is on that bad boy,
I think that you will be surprised, It just comes down to the same thing exactly as you are trying to do with the horizontal pipe on your Rocket, you are still missing out on heat
as much of it is going up the chimney

The time that any of the Rocket Stoves are the most efficient is when they are not running, with no air escaping out the chimney compared to any other stove/heater there is no
corresponding infiltration of cold air to cool the house down, and cause the heater to $witch on !

Second, I was just thinking if you had the exhaust of the First pocket rocket going up and into a second barrel directly over head, the second barrel could have a supply tube that
went most of the way to the top of the second barrel, exactly like an upside down Pocket Rocket, The discharge could be feed from the (now) bottom of the second barrel directly
into your Wall Thimble, this would create one of those bells that Max is so in love with !

We could call it Kelly's Coupled Cauldrons ! Nothing ventured, noting gained ! Big AL
 
Mike Kelly
Posts: 17
  • Mark post as helpful
  • send pies
    Number of slices to send:
    Optional 'thank-you' note:
  • Quote
  • Report post to moderator
Allen Lumley : Is this close to what you have in mind?
Draft1-6.jpg
[Thumbnail for Draft1-6.jpg]
 
Satamax Antone
gardener
Posts: 3467
Location: Southern alps, on the French side of the french /italian border 5000ft elevation
191
  • Mark post as helpful
  • send pies
    Number of slices to send:
    Optional 'thank-you' note:
  • Quote
  • Report post to moderator

Mike Kelly wrote:Allen Lumley : Is this close to what you have in mind?


Mike, this is prety much what i had drawn in sketchup. Tho, i wouldn't do the heat riser plunging into the bottom barrel myself. or maker a system where i could remove in fast in case it doesn't work as expected. jmho.
 
allen lumley
pollinator
Posts: 4154
Location: Northern New York Zone4-5 the OUTER 'RONDACs percip 36''
67
hugelkultur fungi books wofati solar woodworking
  • Mark post as helpful
  • send pies
    Number of slices to send:
    Optional 'thank-you' note:
  • Quote
  • Report post to moderator
Mike Kelly : Yes that is a very good match, A couple more thoughts occur to me, as we want the discharge of the second barrel to be at the same height as the wall thimble
there will be a natural space, or gap that could be filled with a baking oven. Kelly's Cooking Cauldrons ? Kin we have a set of french doors with curved glass inserts ?!?

The discharge from the second barrel should flow into a 'T' somewhere in between it and the Wall Thimble. That could serve as a way to get the whole thing to draft when the
whole system is cold, Most dampers are not solid, they have a hole that the manufacture believes is the right size to allow for some air circulation to protect the piping against
damp and rust, I think that a damper if extremely well marked might be handy in this case !

If you look under the hood of most cars today, you will see that there is a large surround sometimes called a shroud around the fan that cools the radiator to channel the air
through and past the radiator,can we have a shrouded fan setting on top of the second barrel with sensors mounted on the Barrel to control the speed of the fans and potentially
their downward draft producing cooling of the shells and help heat the room ? ?

For the good of the Craft ! Big AL !

 
Jeff Rychwa
Posts: 39
Location: NH
2
  • Mark post as helpful
  • send pies
    Number of slices to send:
    Optional 'thank-you' note:
  • Quote
  • Report post to moderator
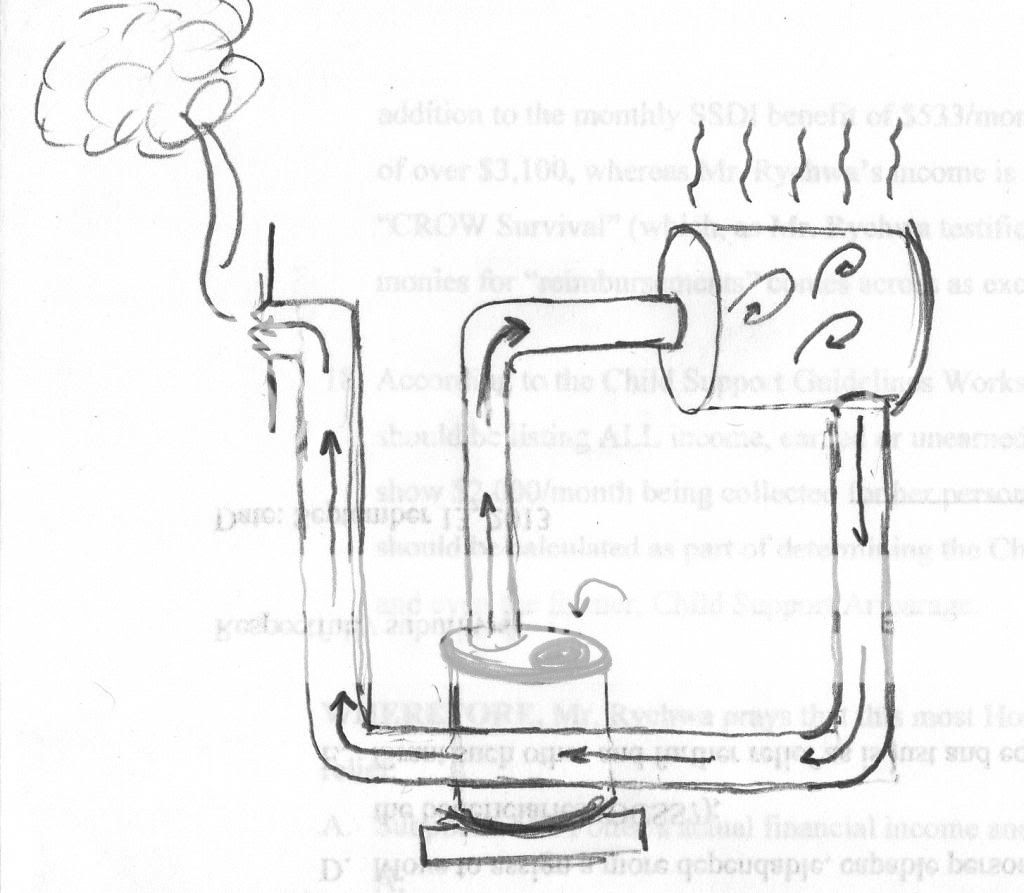
I was thinking that the "bell" barrel would be horizontal in order to dissipate or radiate more heat across the larger surface area faster into the room. That would "cool things down" inside faster, allowing for a quicker draft or down-flow out of the lower portion of the barrel, again, cooling off in the room, running along the floor, ultimately to rise and exit out the wall thimble, where it would be buoyant relative to the frigid outdoor air.

I wanted to keep the second barrel away from the stove, because I don't want the stove adding radiant heat to the air inside the bell. I'm concerned about the draft, so I'm trying to picture the "T" that allen mentions; although, according to how the dynamics work with RMHs, I would imagine the draft would pull rather conveniently by just adding heat to the burn chamber, as per usual.

So, here's the new concept I'm putting together:


My intention is to place the second drum (55 gal) horizontally hanging up by the frying pans, so that the stack from the stove will tap into it, at that height, near the top of the rim of the barrel. Then I'll drop the exhaust pipe from the barrel down to the bricks, across, and then up and over to the wall thimble.

Then pray.
 
Jeff Rychwa
Posts: 39
Location: NH
2
  • Mark post as helpful
  • send pies
    Number of slices to send:
    Optional 'thank-you' note:
  • Quote
  • Report post to moderator
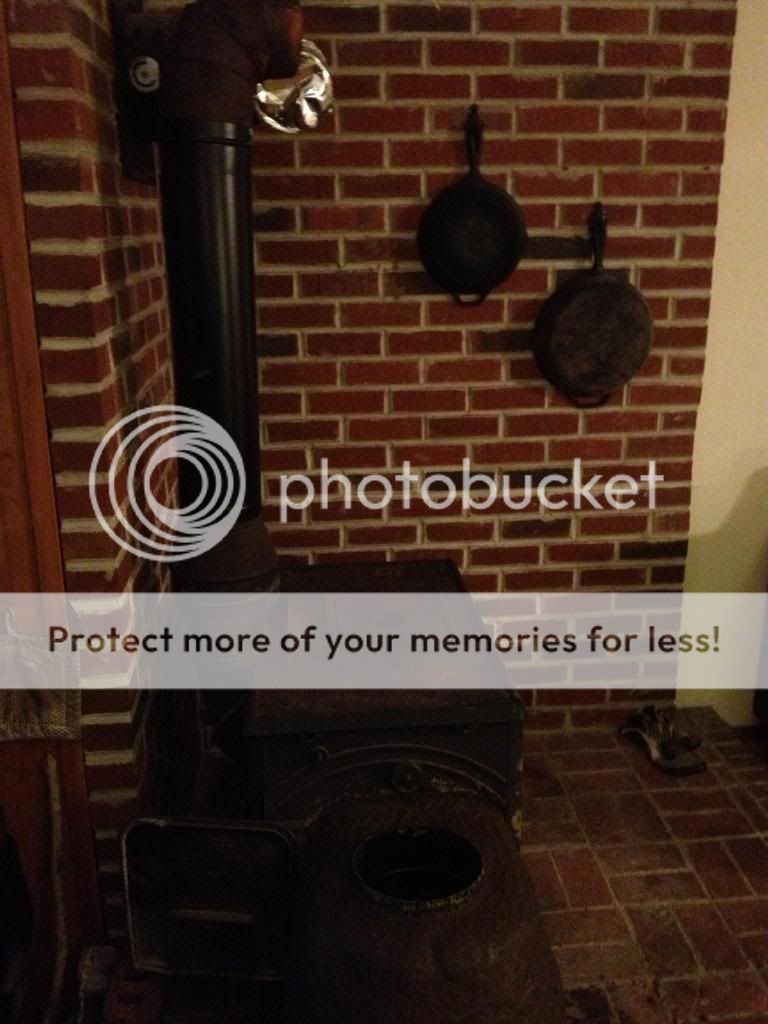
Well, I abandoned the feed-tube and the extra pipe idea. I insulated the riser coming right off the woodstove, and I tried using variations of the feed tube off the end of it, as pictured above, but it just didn't draw strongly enough. I tried filling the stove with bricks to cut down the volume of the burn chamber, but that still didn't really do much.

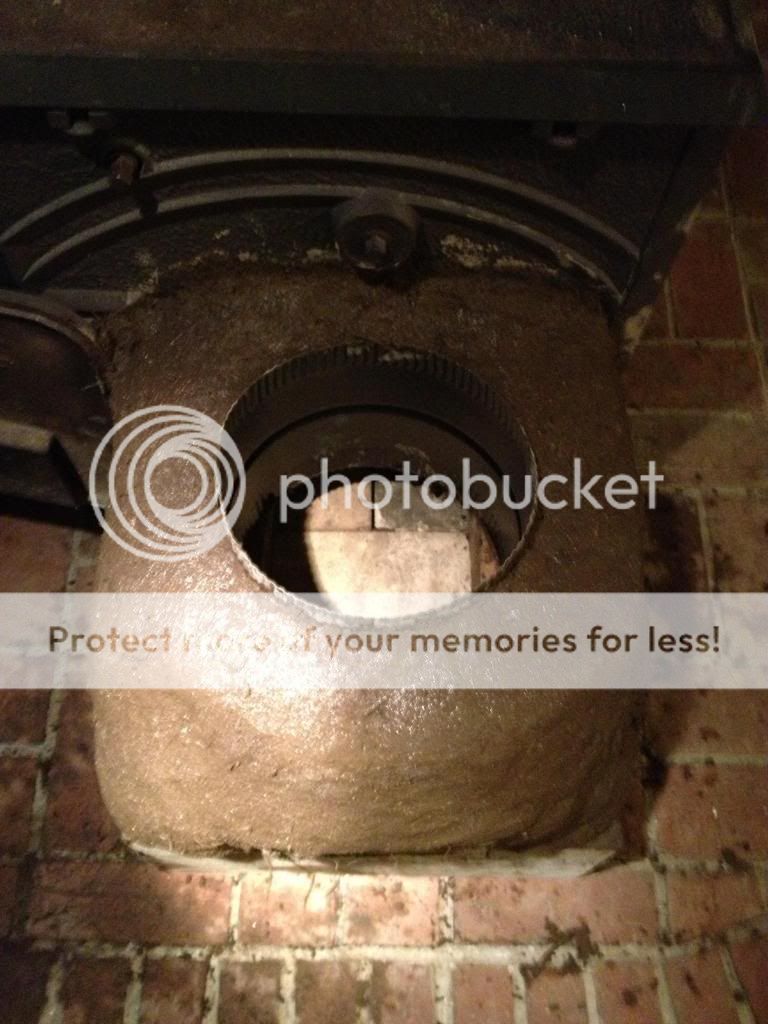
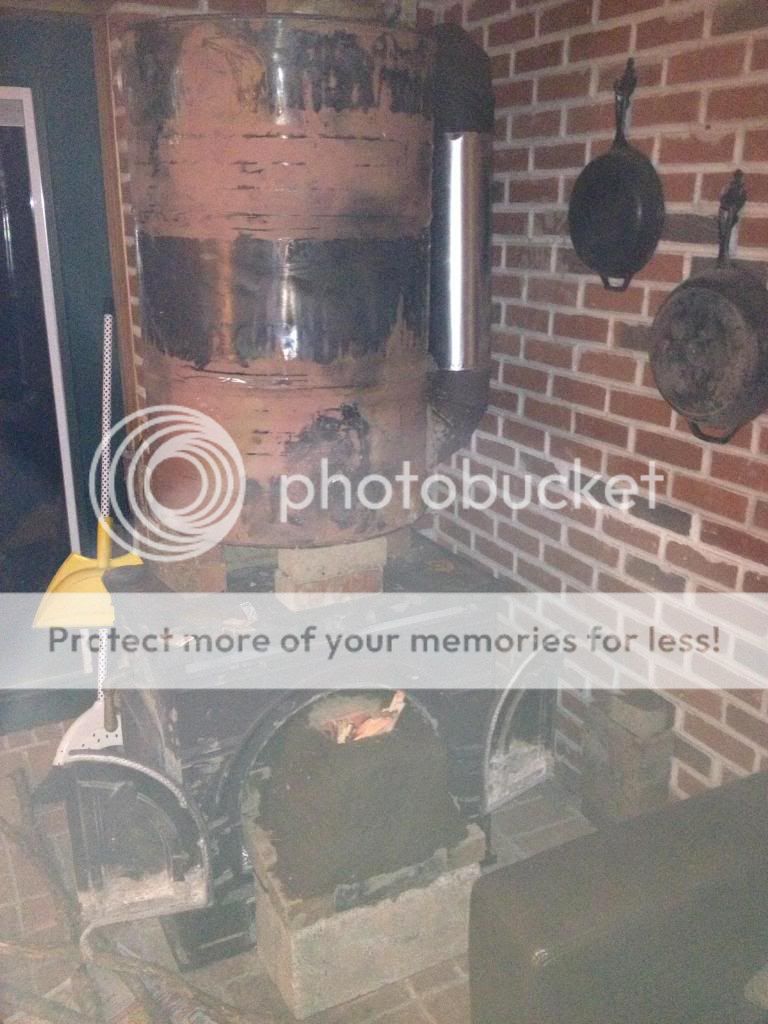
So, I took the entire feed tube off the stove, and I put the barrel upright over the insulated riser (I insulated it with a cob:vermiculite mixture), with a 2" gap at the top, and I have the exhaust hooked to the side of the barrel at the bottom, then it goes up about 2' to the thimble.

I basically just put a bunch of paper and wood in the burn chamber, like I always have, and lit it. The draw is still slow. It's weird how this worked so well with the pocket rocket, but with the woodstove, it's so different.

All I can figure to do now is decrease the volume of the burn chamber again with a bunch of bricks and see if that makes up for the needed push that's missing. The exhaust is a 6" d pipe, so that means that my burn chamber volume can't be more than 18", roughly. What makes this tough is that the stove has a strange modification inside on the roof, like some kind of "reburn" mechanism, maybe. The flue opening in the stove is like 14" long and 2" wide, which means I might have to even stuff some of that with cob, I suppose.

Regardless, the neat thing is that the barrel on the stove did retain a lot more heat than the stove used to. It reached 250 dF at the top (on the side of the barrel) with one burn of some paper and a few thin sticks of Ash. The temp in the house did go up by about 4 degrees within a half hour, so that's good. But I want a cleaner burn.
Maybe after the cob dries it will be more efficient. I'm actually looking forward to playing with the inside dimensions tomorrow, with the bricks, to see how that might affect the burn.
 
Jeff Rychwa
Posts: 39
Location: NH
2
  • Mark post as helpful
  • send pies
    Number of slices to send:
    Optional 'thank-you' note:
  • Quote
  • Report post to moderator
Success.

 
allen lumley
pollinator
Posts: 4154
Location: Northern New York Zone4-5 the OUTER 'RONDACs percip 36''
67
hugelkultur fungi books wofati solar woodworking
  • Mark post as helpful
  • send pies
    Number of slices to send:
    Optional 'thank-you' note:
  • Quote
  • Report post to moderator
Jeff Great, When can we have pictures ! Big AL !
 
Jeff Rychwa
Posts: 39
Location: NH
2
  • Mark post as helpful
  • send pies
    Number of slices to send:
    Optional 'thank-you' note:
  • Quote
  • Report post to moderator
She's goin like blazes! I'm burning branches, and the thermometer's up to 200 dF so far. I'd like to see it hotter, but the real test will come when Winter hits.


It was something else trying to cob the bricks inside the stove. But it seems to have worked. The burn chamber is actually tapered upward--more of a "J" shape than a 90 degree angle.
 
allen lumley
pollinator
Posts: 4154
Location: Northern New York Zone4-5 the OUTER 'RONDACs percip 36''
67
hugelkultur fungi books wofati solar woodworking
  • Likes 1
  • Mark post as helpful
  • send pies
    Number of slices to send:
    Optional 'thank-you' note:
  • Quote
  • Report post to moderator
Jeff Rychwa : W.O.W., What do you think your final ratio in height / depth between the Feed Tube and the Heat Riser is! With that much draft, it is possible that you are pushing the
largest part of the mineral fly ash out the chimney at the top, but I think you should plan on a Clean Out 'T' just where your elbow leaves the bottom of the barrel, because it
is never safe to put a damper in a Rocket Heater/ You may have to have a cap stone to place over the Top of the Feed Tube to reduce air flow to allow you to have small hot fires
w/out extra air cooling down your burn temps, You may even have to use the cap stone to keep air from whistling up the chimney while your unit is hot and no fire is burning, This
is Part of the reason regular Rocket Mass Heaters are called J-Bends, like the ones under your sink, they work to stop thermo syphoning, yours should too, but check it out! You are
a very crafty and clever man ! This was great thinking outside the box ! Big AL !
 
Jeff Rychwa
Posts: 39
Location: NH
2
  • Mark post as helpful
  • send pies
    Number of slices to send:
    Optional 'thank-you' note:
  • Quote
  • Report post to moderator
Thank you for the feedback, Allen.

A "T" is a great idea. I'm going to try to install one with a sort of ash-screen on the upstream side.

It occurs to me, because I already went through the days of construction and firing a barrel already, that I probably could have gotten the same (if not better) effect by just running a row of 6" pipe right off the riser up and down with a bunch of 180 degree joints (about 20' worth) rather than have the barrel at all, just like a giant radiator. <sigh>
 
allen lumley
pollinator
Posts: 4154
Location: Northern New York Zone4-5 the OUTER 'RONDACs percip 36''
67
hugelkultur fungi books wofati solar woodworking
  • Mark post as helpful
  • send pies
    Number of slices to send:
    Optional 'thank-you' note:
  • Quote
  • Report post to moderator
Jeff : but, But, but, we've always done it this other way ! There I got that out of my system !

What if your fly ash catcher is a big success, woun't it end up restricting your flow ? There I got that out !

Right now more thn anything you need Cob lots of it and a great big lump of bad ol 'coal in your stocking foe Christmas ! A. L.

late note: you need to start a new Forum Thread, Big AL !

Even though your own personal rocket is a bit of a Frankinstien model, or may be especially because it is its own thing !
I am suggesting we call it simply the Rychwa Rocket ! For the Good of the Craft ! A. L.
 
Cindy Mathieu
Posts: 245
Location: near Houston, TX; zone 8b
3
  • Mark post as helpful
  • send pies
    Number of slices to send:
    Optional 'thank-you' note:
  • Quote
  • Report post to moderator
Jeff,

I believe what you are describing would be a long flue. Bells work better than flues. See the blog at Dragon Heaters.

a row of 6" pipe right off the riser up and down with a bunch of 180 degree joints (about 20' worth)


In addition, gases don't flow very well through constricted 180's; the friction builds up. I don't think this would draft well at all.

Our castle build of chimney flue liners does behave like a giant radiator. The gases have plenty of room to flow easily and it drafts really well.
 
Jeff Rychwa
Posts: 39
Location: NH
2
  • Mark post as helpful
  • send pies
    Number of slices to send:
    Optional 'thank-you' note:
  • Quote
  • Report post to moderator
Thanks, folks.

So, as an update, I took the feed-chamber and burn-tube out of the wood-stove. It was working well as a rocket stove, but I had to feed it small sticks (like half wrist diameter at most) every ten to fifteen minutes.

I turned the wood-stove back into a wood-stove, but I left the insulated riser and barrel on.

It works amazingly. I'm astounded.

The mini-rocket stove that it was put out about 150ºF as an average, 200ºF being the hottest I could get the top of the barrel. As a wood-stove with riser, it puts out 400ºF on average, with 500ºF being the hottest it's reached with one armload of dry sticks that are forearm sized.

The exhaust out the chimney is almost no smoke at all, just like the basement dragon. So between the two, this house is quite toasty, quite quickly, on much less wood than I used for the non-riser-and-barrel wood-stove.
 
Satamax Antone
gardener
Posts: 3467
Location: Southern alps, on the French side of the french /italian border 5000ft elevation
191
  • Mark post as helpful
  • send pies
    Number of slices to send:
    Optional 'thank-you' note:
  • Quote
  • Report post to moderator
Jeff, i don't know how your woodstove is inside. But you could may be line it with insulating firebrick for better efficiency.

Hth.
Max.
 
Jeff Rychwa
Posts: 39
Location: NH
2
  • Mark post as helpful
  • send pies
    Number of slices to send:
    Optional 'thank-you' note:
  • Quote
  • Report post to moderator
I managed to get 7 kiln bricks into the fire-box.

The temp at the top of the barrel hit 500ºF, while the pipe just at the wall thimble was at 250ºF. That tells me that the surface area of the barrel, plus the 6' of 6" exhaust pipe are radiating enough BTUs to reduce the exit temp by half of the barrel temp. That's pretty neat. But I still want to be able to recover more heat.

I'm just so blown away by looking at the top of both chimneys outside and seeing virtually no smoke at all. Unfortunately, I do see the waves of heat emanating from them, but, still...
 
pollinator
Posts: 4006
Location: Kansas Zone 6a
281
  • Mark post as helpful
  • send pies
    Number of slices to send:
    Optional 'thank-you' note:
  • Quote
  • Report post to moderator
You HAVE to see some heat shimmer, or you will not be pumping air out. Then it will either smother or smoke back.

Do you have a way to test the exhaust temp at the top of the stack? without putting your life in danger? Three or four feet down from the raincap (so it doesn't have outside air mixed in cooling the temp) will tell you how much heat you really have to play with.
 
allen lumley
pollinator
Posts: 4154
Location: Northern New York Zone4-5 the OUTER 'RONDACs percip 36''
67
hugelkultur fungi books wofati solar woodworking
  • Mark post as helpful
  • send pies
    Number of slices to send:
    Optional 'thank-you' note:
  • Quote
  • Report post to moderator
Jeff Rychwa : O.K., I think I understand your present application, you are using your wood stove as a conventional wood stove but now have an insulated Heat Riser going into your
barrel, and are now taking the cooler, but still hot exhaust gases off of the bottom of the barrel, in effect creating a bell out of the Barrel!

Do I have it right, or is there a different wrinkle in the build ? If so a simple sketch will be worth More than a thousand words ! It has been interesting following your build !

The other day someone mentioned that when all wood was cut and split by hand, w/o chain saws and splitters, smaller fires fed smaller wood and much more frequently was the norm
don't for get your hard earned knowledge and go back to loading on that big old chunk to 'holder over-nite ! Big AL !
 
Jeff Rychwa
Posts: 39
Location: NH
2
  • Mark post as helpful
  • send pies
    Number of slices to send:
    Optional 'thank-you' note:
  • Quote
  • Report post to moderator
That's exactly what it is: a bell.

The insulated riser off the stove really drags the air-feed, and the bell gets super hot. The exhaust off the bottom of the barrel (which is standing upright over the stove, still, as in the pics above), needs a "T," as you mentioned, but that cooler exhaust really is being pushed upward and out the thimble. The external chimney is insulated, too, so that is assisting with a pull, but certainly the external chimney doesn't seem to be sucking all the heat right out of the stove to warm the yard.

My favorite part--about which I've gone on, I know--is that the exhaust at the top of the chimney(s) is predominantly heat/vapor with little- to no smoke at all. I'm stoked. Just seeing that and knowing that I'm getting a really efficient burn (regardless of heat loss for the moment) makes me happy and hopeful, regarding the limited pollution and resulting limited need for excessive tree death.

I posted a flyer at my general store to get people who are dumping off brush piles at the dump to bring them to my house instead. I can feed both stoves branches, and I could, potentially, pass the word on Rocket Heaters to folks so that more people will get on board.
 
Posts: 1
  • Mark post as helpful
  • send pies
    Number of slices to send:
    Optional 'thank-you' note:
  • Quote
  • Report post to moderator
so what happens if I bury a pocket rocket in the ground with exhaust horizonalty as if it was high mass heater. I need a low profile design for a high tunnel. I want to bury the exhaust and then build aquaculture spaces between raised beds.
 
allen lumley
pollinator
Posts: 4154
Location: Northern New York Zone4-5 the OUTER 'RONDACs percip 36''
67
hugelkultur fungi books wofati solar woodworking
  • Mark post as helpful
  • send pies
    Number of slices to send:
    Optional 'thank-you' note:
  • Quote
  • Report post to moderator
Matt Koster : Stand by i am P.M. ing you am a slow typeset ! BIG AL !
 
Posts: 18
  • Mark post as helpful
  • send pies
    Number of slices to send:
    Optional 'thank-you' note:
  • Quote
  • Report post to moderator
You could put fins on the barrel or use a fan to cool it.
 
There's a hole in the bucket, dear Liza, dear Liza, a hole in the bucket, dear liza, a tiny ad:
Rocket Mass Heater Jamboree And Updates
https://permies.com/t/170234/Rocket-Mass-Heater-Jamboree-Updates
reply
    Bookmark Topic Watch Topic
  • New Topic