• Post Reply Bookmark Topic Watch Topic
  • New Topic
permaculture forums growies critters building homesteading energy monies kitchen purity ungarbage community wilderness fiber arts art permaculture artisans regional education skip experiences global resources cider press projects digital market permies.com pie forums private forums all forums
this forum made possible by our volunteer staff, including ...
master stewards:
  • Nancy Reading
  • Carla Burke
  • r ranson
  • John F Dean
  • paul wheaton
  • Pearl Sutton
stewards:
  • Jay Angler
  • Liv Smith
  • Leigh Tate
master gardeners:
  • Christopher Weeks
  • Timothy Norton
gardeners:
  • thomas rubino
  • Jeremy VanGelder
  • Maieshe Ljin

Basement rocket stove


Posts: 4
  • Mark post as helpful
  • send pies
    Number of slices to send:
    Optional 'thank-you' note:
  • Quote
  • Report post to moderator
Hi all, I have read most of the posts on rocket stoves and purchased the book.....fascinating stuff!
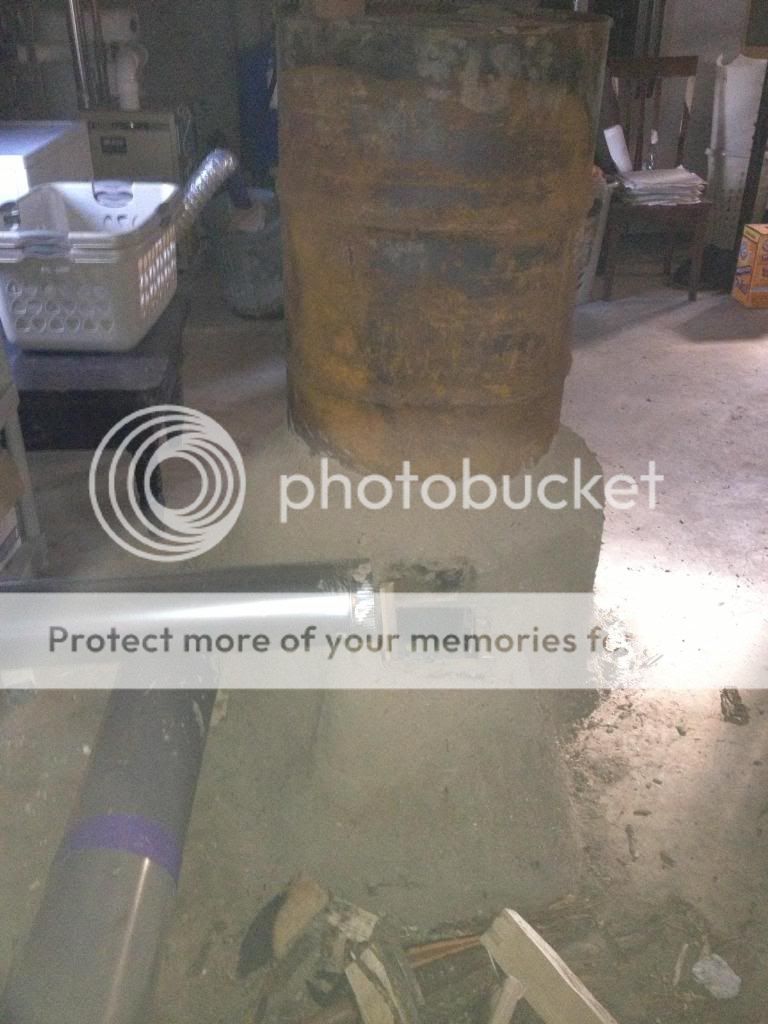
So went ahead and built my first stove with a few limitations. I had a 36" x 8" insulated riser (insulated s.s. chimney section from a rehab store) and a old 45 gallon hot water tank stripped of insulation and outer metal cover. Also had to be built in the basement of my home in eastern Ontario.

My first problem was that I couldn't find used 8" pipe for the exhaust so after many tries in Kiji I opted to run two 6" pipes to be run in parallel as lots of 6" pipe available in my local scrap yard.

I also have a problem with making cob......not too much clay in my garden so had to make do with refractory cement.

Well, my first burn proved interesting as it filled my basement with smoke. I thought that the two sections of 6"dia exhaust pipe were too long so dismantled the sections of pipe to shorten but soon realized that I had a negative pressure in the basement......lots of draft in the wrong direction down the exhaust pipes.

Hmmm what do I do now? So I added a vertical mounted electrical fan to provide initial combustion draft  and immediately turn off the fan when a burn has started. When the fire is going well I remove the fan assembly and replace with an old saucepan lid to close off the fan vent.

Right now it's 22 degrees  so I have not really been able to test the stove but look forward to - 30 degrees to see how it works. My initial test showed lots of steam from the exhaust after about 15 minutes of burn time.

So my thanks to all that have come before me and have inspired me to take a second look as to how wood actually burns and provide heat with little pollution.....and that's amazing 
 
Posts: 79
Location: Maine, USA
  • Mark post as helpful
  • send pies
    Number of slices to send:
    Optional 'thank-you' note:
  • Quote
  • Report post to moderator
The fan inside is a good idea

Good luck and post some pics !
 
Posts: 10
  • Mark post as helpful
  • send pies
    Number of slices to send:
    Optional 'thank-you' note:
  • Quote
  • Report post to moderator
I want to do something similar and have concerns on drafting.  Did you add a bypass to start the stove without the majority of the thermal mass?  Is the chimney vented out a basement window or did you do a chase all the way up to the roofline?  If a chase.. did you do so inside or outside the house (Thinking a heated chase would keep a good draft going.

Would you mind posting some pictures of your fan setup?  Thanks!
 
            
Posts: 4
  • Mark post as helpful
  • send pies
    Number of slices to send:
    Optional 'thank-you' note:
  • Quote
  • Report post to moderator
Well, I'd love to respond with photos but how do you do it?
 
Craig Conway
Posts: 79
Location: Maine, USA
  • Mark post as helpful
  • send pies
    Number of slices to send:
    Optional 'thank-you' note:
  • Quote
  • Report post to moderator
To post a photo on a forum

1. Go to postimage.org

http://www.postimage.org/

2. Click "browse" and find your pic

3. Choose "resize to 1024x768"

This is polite because in most cases that is enough. But cameras today take huge pics that are unnecessarily large. Giant pics take more bandwidth and more time. Too small is not good, too big is not good, I can only assume 1024 is just right ?

4. Choose "family safe" (assuming it is LOL)

5. Click "upload it"

6. Now you are on another page and can see your image at the top, below are codes.

Next to "Thumbnails for forums (1)" click "copy to clipboard"

7. Now on this page (here on permies forum) right-click and choose "paste" to paste the code.

It looks kinda like this :

"postimage.org/image/c570os04/][/url]

The image is click-able.

Cheers!
Craig


Posts: 4
  • Mark post as helpful
  • send pies
    Number of slices to send:
    Optional 'thank-you' note:
  • Quote
  • Report post to moderator


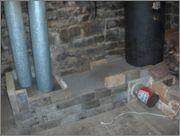
Image shows vertical twin exhausts through basement window using a piece of cement board where the window glass used to be.


image shows thermal mass of regular bricks and stone dust......no cob available. I have been building up my soil for 30 years......lots of worms but no clay.


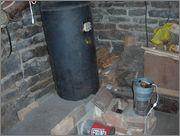
The fan assembly is visible here and is only run for initial fire lighting.


Last image shows old saucepan lid closing off fan vent and ketchup can clean-out. My last project (for now) will be to replace insulation in the walls.

Thanks Craig for sharing the "how to post images"
 
Craig Conway
Posts: 79
Location: Maine, USA
  • Mark post as helpful
  • send pies
    Number of slices to send:
    Optional 'thank-you' note:
  • Quote
  • Report post to moderator
That looks cool

I am in nearly the same situation, not far South in Maine USA!

If you put up detailed plans for what you did I'll try it in my basement too and see what happens.

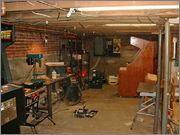
I have a basement workshop that gets too cold in the Winter


I'll see if I can find 8" pipe and I'll look for something more portable than cement, like sand or crushed rock or something.

Cheers!
Craig


Posts: 4
  • Mark post as helpful
  • send pies
    Number of slices to send:
    Optional 'thank-you' note:
  • Quote
  • Report post to moderator
Well I just tried my first prolonged burn............not so good. I initially started the fire with "fan assist" but didn't take long to get small blow backs bringing smoke into the basement. There was no outside wind and smoke was exiting both exhausts. But within a few minutes more I noticed one stove pipe hotter than the other and finally the cooler of the two went completely cold. Still getting blow backs but then I realized that as only one stove pipe was exhausting then the other was bringing air into the stove.

I capped the cool stove pipe and now the fire burns cleanly and as hot as the "Fires of Hades" with only steam exhaust. I could try to balance the pipe lengths more accurately but I am not sure that it is worth all the effort, I will just make do with a single 6 inch vent.

SPYSTYLE I am afraid there are no plans for this stove only what is available in the book and many on-line videos...sorry.
 
Craig Conway
Posts: 79
Location: Maine, USA
  • Mark post as helpful
  • send pies
    Number of slices to send:
    Optional 'thank-you' note:
  • Quote
  • Report post to moderator
OK, I am ordering that book
 
Posts: 26
  • Mark post as helpful
  • send pies
    Number of slices to send:
    Optional 'thank-you' note:
  • Quote
  • Report post to moderator
Hi Yuri and others,

I'm considering building a rocket mass heater in the basement of my holiday home. I'm curious what your purpose was in building your rocket mass heater: was it to heat the basement itself, or did you intend it to help with heating of the floor(s) above as well?

In my case the basement is the best place to build because...
1. ...the other owners/user's won't care if I make a mess there
2. ...there is not a lot of space on the ground floor that anyone wants to sacrifice to a mass heater
3. ...all floors except that in the basement are wooden, so there are weight support issues in any case

I'm hoping that a mass heater in the basement will heat the whole house (hot air will presumably accumulate under the wooden floor, and may pass through a few cracks).

The basement only sits below one half of the house: under the other half there is solid sand. There is one spot in the middle where a mass heater would be almost under the center of the house.

So I'm curious what the effect of your mass heater has been on the temperature in the house as a whole.

Kind regards,
Wytze
 
Posts: 8
Location: Battle Creek, Mi
  • Mark post as helpful
  • send pies
    Number of slices to send:
    Optional 'thank-you' note:
  • Quote
  • Report post to moderator
Hi Yuri, in your issues of draft, I have to ask...is the gap between the barrel, and heat riser too big? Another question is, is the heat riser insulated?
 
gardener
Posts: 5171
Location: Cincinnati, Ohio,Price Hill 45205
1011
forest garden trees urban
  • Mark post as helpful
  • send pies
    Number of slices to send:
    Optional 'thank-you' note:
  • Quote
  • Report post to moderator
Cool build, I am headed in this direction myself..
You should check out this thread. It educates about stack effect, which you may be dealing with!
 
pollinator
Posts: 4154
Location: Northern New York Zone4-5 the OUTER 'RONDACs percip 36''
67
hugelkultur fungi books wofati solar woodworking
  • Mark post as helpful
  • send pies
    Number of slices to send:
    Optional 'thank-you' note:
  • Quote
  • Report post to moderator
Wytze Schouten : Sure do it, a rocket will definitely warm up your personal living space ! but go into it with you eyes open, a dollar bill is 6 inches long, take (3) 1 dollar bills
and lay them out to create a space 6'' Xs 6'' this is sized correctly for a basement say 25 feet by 40 feet or smaller, Visualize feeding that small hole, and being on constant
attendance for at least 45 min to 1.5 hours, ether is possible with a first build, after say an hour of near constant attention, you now have increased the internal temperatures
in your Burn Tunnel/Combustion Chamber to create a visible red hot glow, at this point a piece of wood placed in the Feed Tube will seem to spontaneously burst into
flames ! At this point you can switch to 3-4 of the largest pieces that will fit within this 6'' by 6'' square, now you just need to be within hearing distance of your R.M.H. to make
sure that it continues to burn a maximum efficiencies until your thermal mass bench is charged, The R.M.H. works very well for the home bound person who can give the rocket
the Attention it needs for 3-4 hours twice a day or 5-8 hours in winter, if you are that person, and don't mind moving down into the basement to tend it as you go through your
other domestic chores, this will be a perfect fit for you, your house mates surely will drop by several times a day never forgetting to thank you for the nice warm floors you are
providing them! For the good of the Crafts !

Think like fire, flow like a gas, Don't be the Marshmallow ! As always, your comments and concerns are welcome and Solicited ! PYRO - Logically BIG AL !
 
Wytze Schouten
Posts: 26
  • Mark post as helpful
  • send pies
    Number of slices to send:
    Optional 'thank-you' note:
  • Quote
  • Report post to moderator
Hi Al,

Thanks for your extensive answer, Allen.

So basically the biggest obstacle to heating the house with a mass heater from the basement is not the nature of the heat (stored in stone, distributed slowly as radiation) or its ability to travel up and heat the ground floor from below... but my willingness to stick around and tend the fire.

Hmm. That *is* a serious obstacle.

This reminds me of another thread I read here, where Erica Wiesner warned against having a rocket mass heater in a space where you have nothing else to do.

My mind instantly conjures up images of long metal slides that will allow me to feed the heater without having to climb down into the basement. And of portholes in the ground floor that allow me to check on the heater, again without climbing down. But that also feels like putting the cart before the horse.

I think I need to reconsider. Thank you for making explicit what the trade-off is.

Wytze
 
Posts: 39
Location: NH
2
  • Mark post as helpful
  • send pies
    Number of slices to send:
    Optional 'thank-you' note:
  • Quote
  • Report post to moderator
I had similar issues with my basement RMH, which was explained to me as "Stack Effect."

To overcome this, I extended my exhaust up past the second floor, which is more of a neutral pressure zone. Further, I placed an "inlet" air vent pipe that comes from the basement exterior wall horizontally to my feed tube. Sometimes, to get the RMH primed, I need to open the basement door or a window, but once it's running, it goes quite nicely with no other opening, save for the air inlet and standard construction leaks.

Tightening the upper portion of the house reduces air escape, thus, reducing the displacement of the cold, high-pressure air from the basement. But I'm actually trying to use the dynamic to my advantage so that the radiant heat from my stove rises to the second floor, at least, if not the third, effectively.

[/URL]
 
Creativity is allowing yourself to make mistakes; art is knowing which ones to keep. Keep this tiny ad:
Rocket Mass Heater Jamboree And Updates
https://permies.com/t/170234/Rocket-Mass-Heater-Jamboree-Updates
reply
    Bookmark Topic Watch Topic
  • New Topic