• Post Reply Bookmark Topic Watch Topic
  • New Topic
permaculture forums growies critters building homesteading energy monies kitchen purity ungarbage community wilderness fiber arts art permaculture artisans regional education skip experiences global resources cider press projects digital market permies.com pie forums private forums all forums
this forum made possible by our volunteer staff, including ...
master stewards:
  • paul wheaton
  • Anne Miller
  • Carla Burke
  • Nancy Reading
  • John F Dean
  • Timothy Norton
  • Jay Angler
stewards:
  • r ransom
  • Pearl Sutton
  • Tereza Okava
master gardeners:
  • Christopher Weeks
gardeners:
  • M Ljin
  • Megan Palmer
  • Kate Downham

Extracting indigo pigments from young Persicaria tinctoria leaves

 
gardener
Posts: 2329
Location: Zone 6b
1573
forest garden fungi books chicken fiber arts ungarbage
  • Likes 12
  • Mark post as helpful
  • send pies
    Number of slices to send:
    Optional 'thank-you' note:
  • Quote
  • Report post to moderator
Japanese indigo Persicaria tinctoria is a dye plant wildly cultured in East Asia for the blue indigo dye. Typically, mature plants at blooming stage are harvested, soaked in water, aerated and precipitated with lime. Due to the weather pattern in my area, annual Japanese indigo grown from seeds are most healthy and robust in early summer during the vegetative stage. They struggle in mid summer drought and it is labor intensive to keep them to maturity. I prefer doing the extraction with young leaves, as the indigo precursor, indican, is also at the highest concentration in these tissues.

With some trials and errors, I come down to procedures that yield good amount of high purity pigments within two days. It's largely similar to the regular method but with a few tweaks. Here I am going to show the key steps to watch out for.

1. Plant tissues
Top few inches of young healthy leaves. No dirty, damaged or diseased leaves to reduce the risks of microbial degradation.

2. Soaking temperature
Temperature from 70 F to 80 F preferably. If it is too hot outside, I do the soaking indoors.

3. Water for soaking
The pH of water used for soaking makes a big difference. Indican leaches out faster in acidic water than in alkaline water. Tap water is generally alkaline and can significantly slow down the extraction. However, lowering the pH too much can also inhibit later steps.

4. Duration of soaking
Longer soaking increase yield but also increase the amount of impurities. If the pH is optimal, the first  24 hours is enough to leach out the majority of indican and little non-specific compounds.

5. Hydrolysis and oxidation to produce indigo
Hydrolysis of indican is also pH dependent. Oxidation is straightforward and the production of indigo can be visualized by the blue color.

6. Precipitation with calcium
Traditional it is done with hydrated/pickling lime. I primarily use soluble calcium salt. They both have pros and cons.

In the following posts I will show how a small extraction is done in a regular drinking glass with common household chemicals, how to visually follow each step, and how to adjust the amount to achieve high yield.

Growing indigo takes time, resources and space, I wish you all make the best out of it and enjoy dyeing with this natural pigment!


May Lotito
gardener
Posts: 2329
Location: Zone 6b
1573
forest garden fungi books chicken fiber arts ungarbage
  • Likes 7
  • Mark post as helpful
  • send pies
    Number of slices to send:
    Optional 'thank-you' note:
  • Quote
  • Report post to moderator
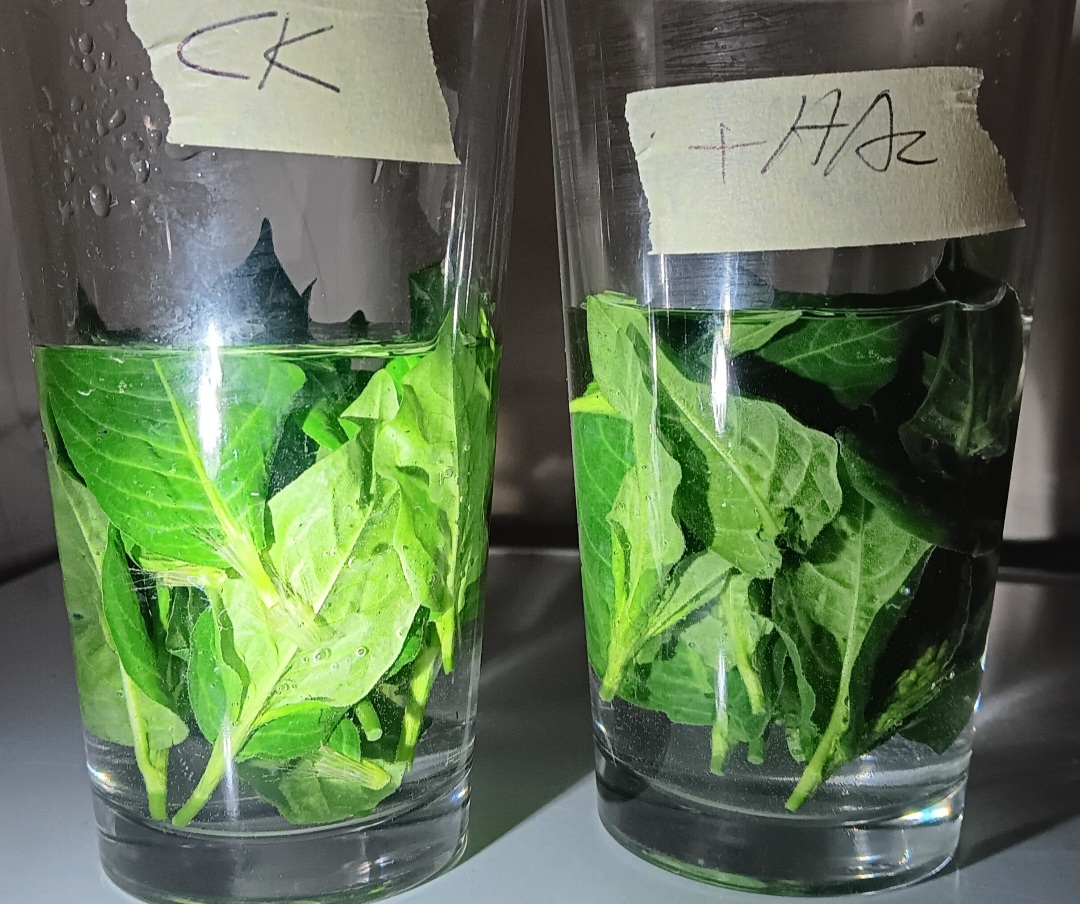
Using a black light flashlight to visualize indican leaching

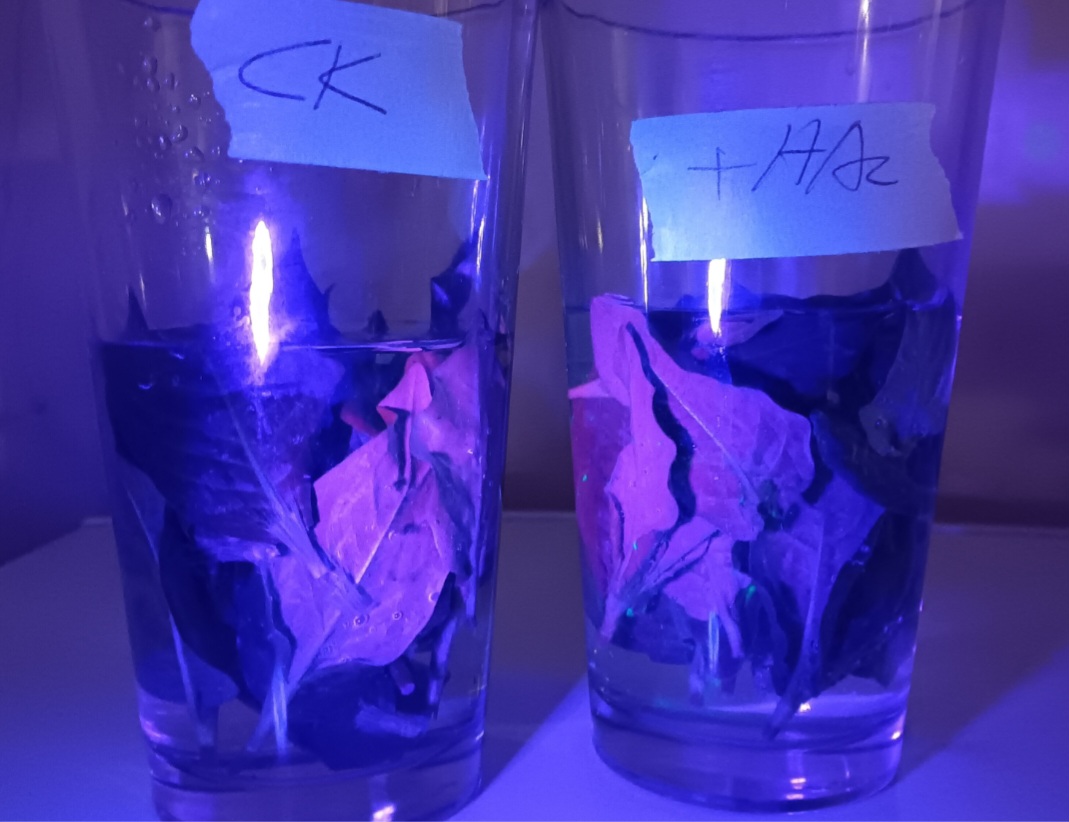
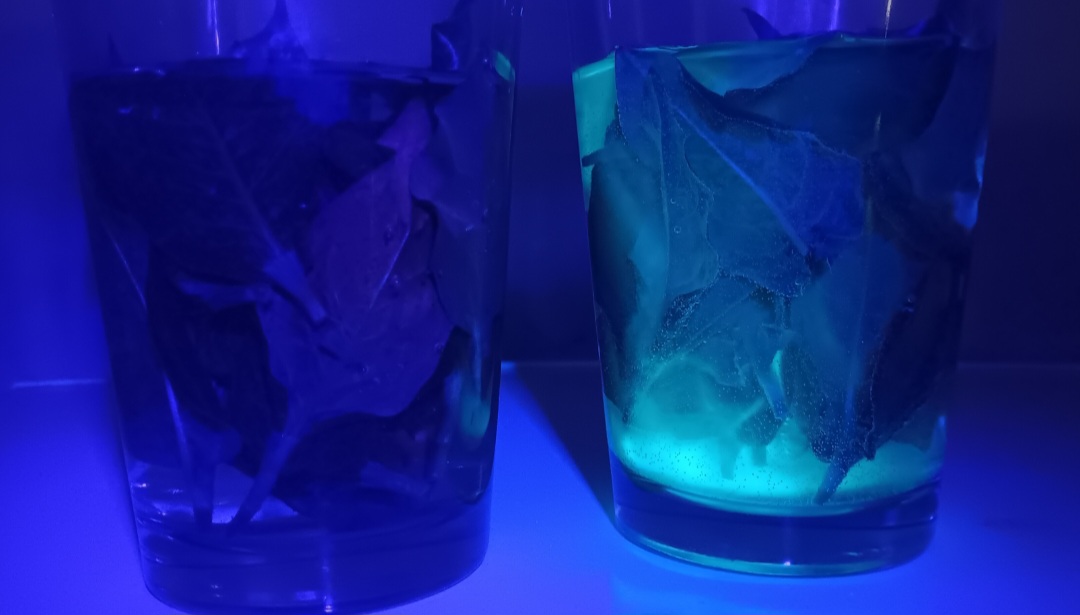
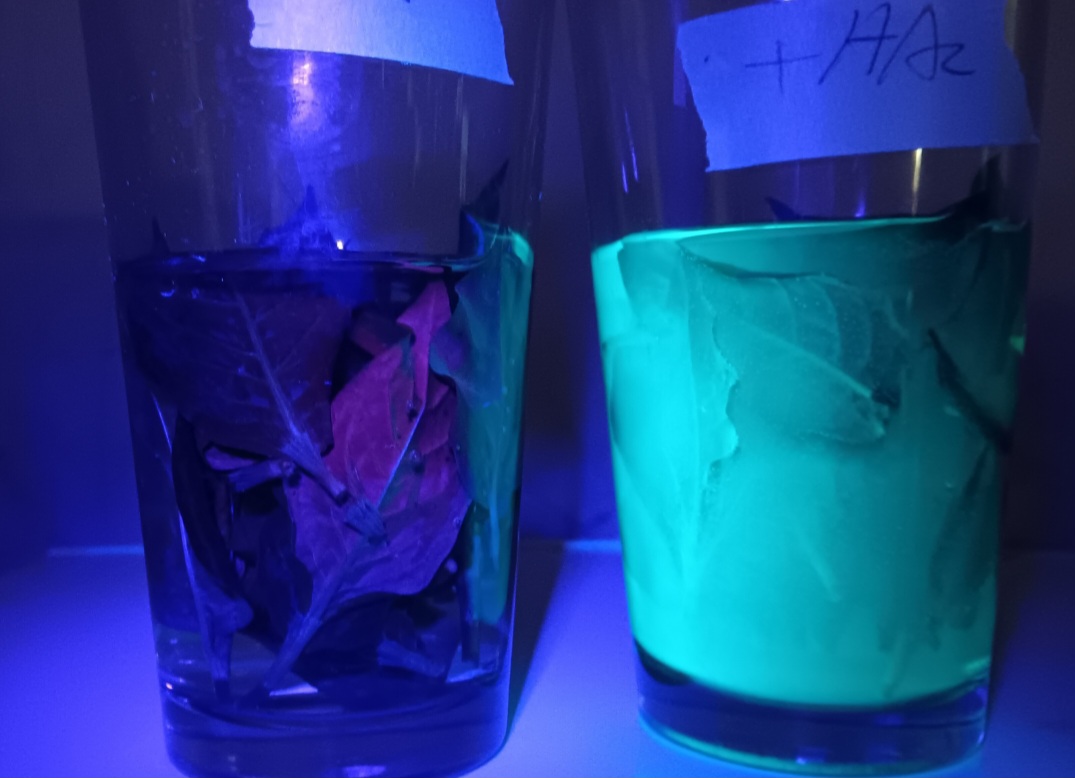
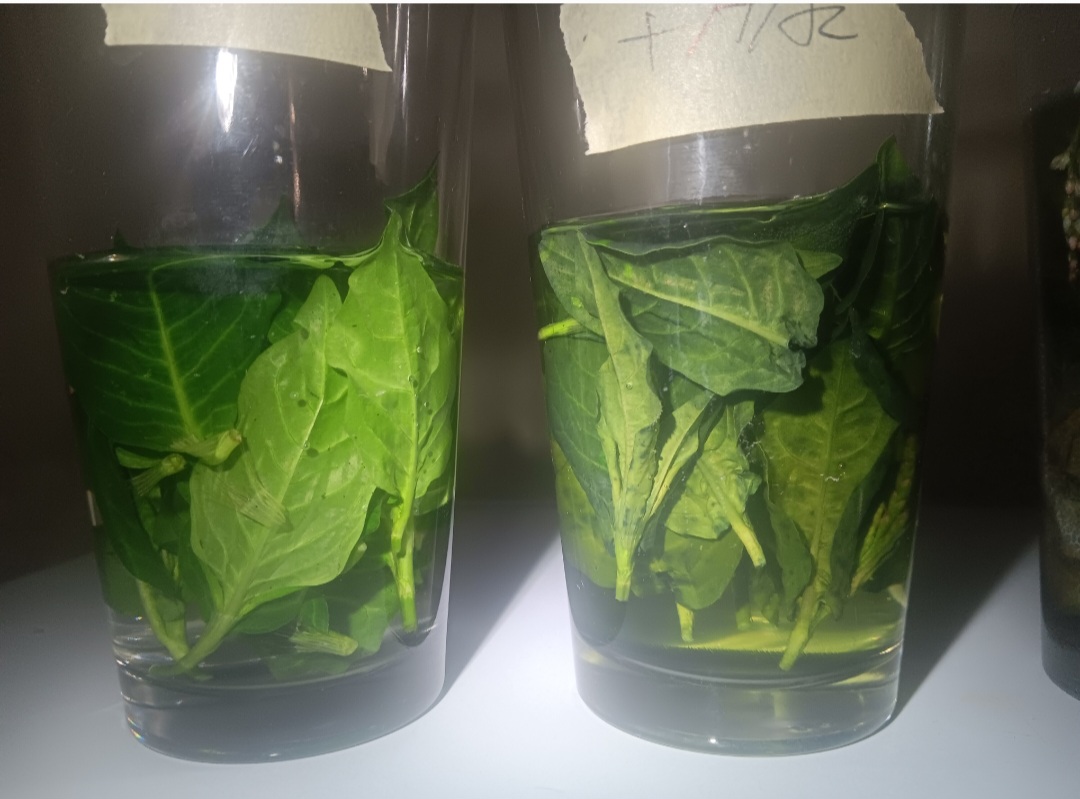
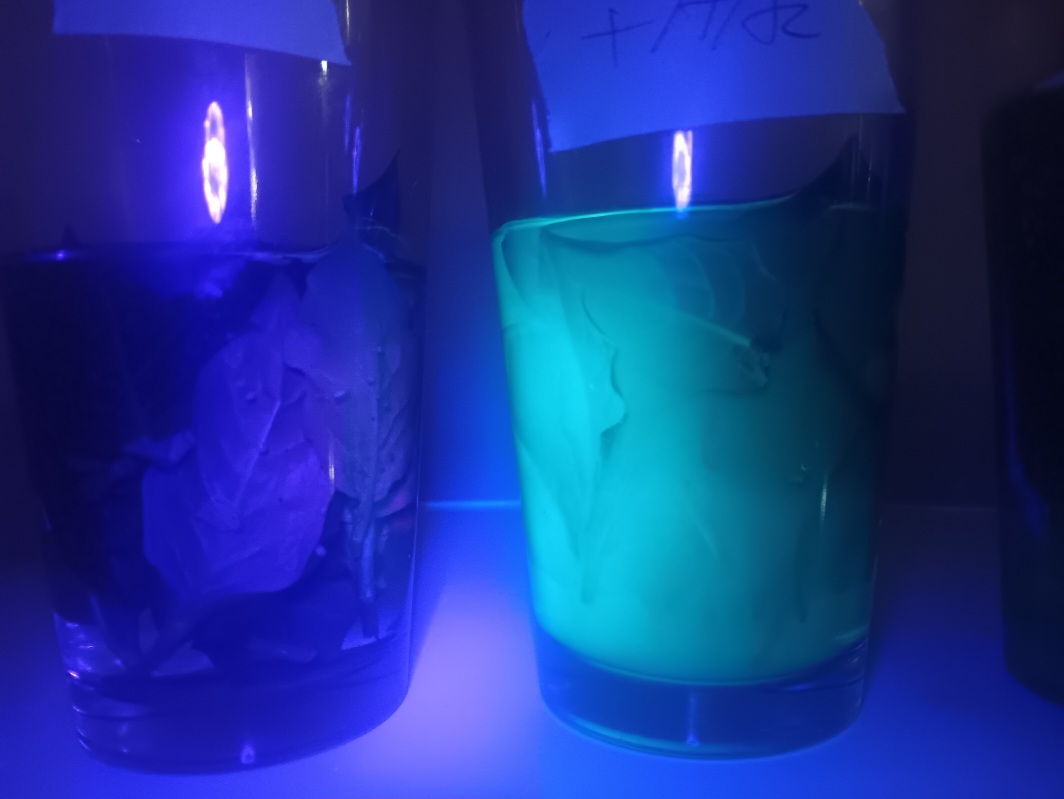
One of the the challenges of indigo purification is that the precursor, indican, is colorless. It is hard to tell if the soaking is successful because of this. Usually people wait till they see oxidized blue indigo film on top of the water. Yet if you soak young P. tinctoria leaves, without the interference of pigments from old leaves and flowers, you will notice the water is turning a bit green antifreeze-like under the sunlight. If you use a UV flashlight, the green glow is very prominent in the dark. I am not sure the mechanism of this and no literature shows indican is fluorescent, but indican contains a indole moiety that potentially can absorb UV. Maybe there is something else binding to it that together they give out the bright green fluorescence. Nevertheless. I find that the optical density of green fluorescence correlates positively with the yield of indigo and use it to optimize soaking conditions for maximum indican release.

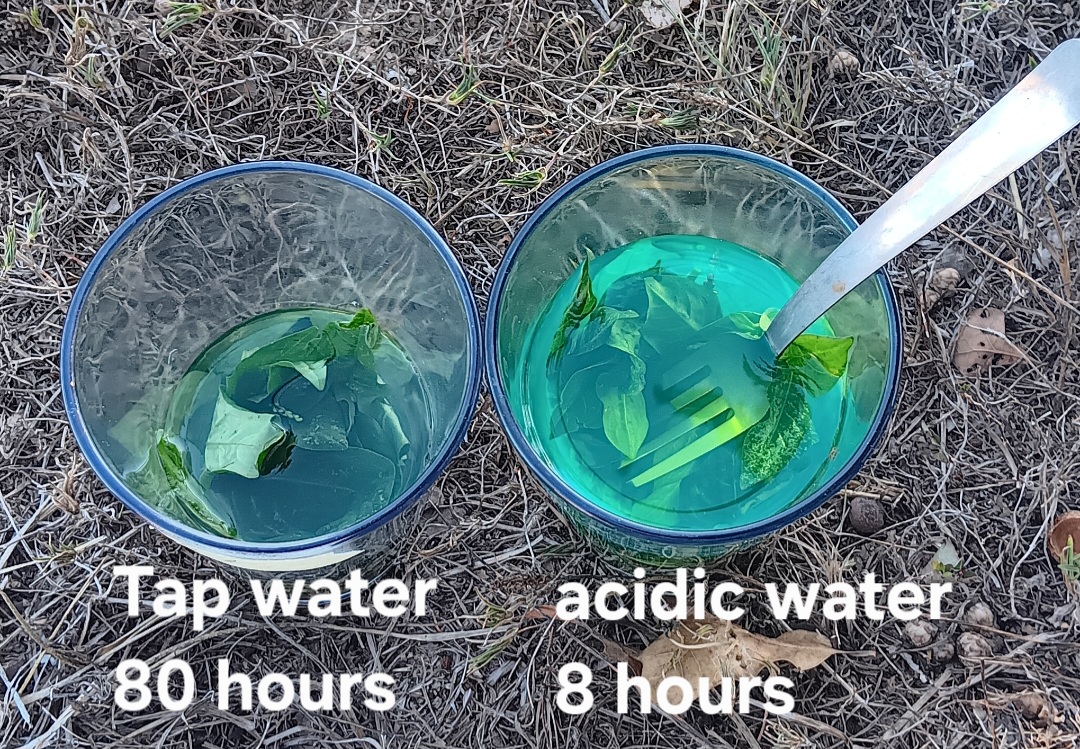
The contrast between soaking in alkaline tap water and acidic water with vinegar added is very dramatic as shown below. That'show I come up with the amount of vinegarto add abd the duration of soaking. If you use rain water, or well water, or less alkaline tap water, my numbers probly don't apply. By using a blacklight flashlight, you would be able to see wether the soaking is working and decide on the right amount for yourself.
Visible-light-0-hour.jpg
Soaking young leaves in tap water vs pH lowered with vinegar
UV-0-hour.jpg
Soaking young leaves in tap water vs pH lowered with vinegar
UV-1-hour.jpg
Soaking young leaves in tap water vs pH lowered with vinegar
UV-10-hours.jpg
Soaking young leaves in tap water vs pH lowered with vinegar
Visible-light-24-hours.jpg
Soaking young leaves in tap water vs pH lowered with vinegar
UV-24-hours.jpg
Soaking young leaves in tap water vs pH lowered with vinegar
3-day-in-alkaline-tap-water-vs-8-hours-with-vinega.jpg
Under sunlight
Under sunlight
 
May Lotito
gardener
Posts: 2329
Location: Zone 6b
1573
forest garden fungi books chicken fiber arts ungarbage
  • Mark post as helpful
  • send pies
    Number of slices to send:
    Optional 'thank-you' note:
  • Quote
  • Report post to moderator
According to the public quality report, my local tap water pH is about 7.8 from over 1000 ft deep well. Hardness is very high at over 250 ppm. The high calcium ions could strengthen the cell walls and slow down leakage. Besides,the indigo plants are grown in full sun so they have thick and tough leaves that remain turgid in water for a long time.

Common 5% white vinegar pH 2.5 is diluted in tap water to reduce pH. I go no more than 1 table spoon to 2 cups for fast small scale extraction. For large scale extraction from mature plants, which I haven't tried this year, I plan on reducing the ratio to 1:100 or lower and soak up to three days.  pH in the soaking water would be around 3 to 4.

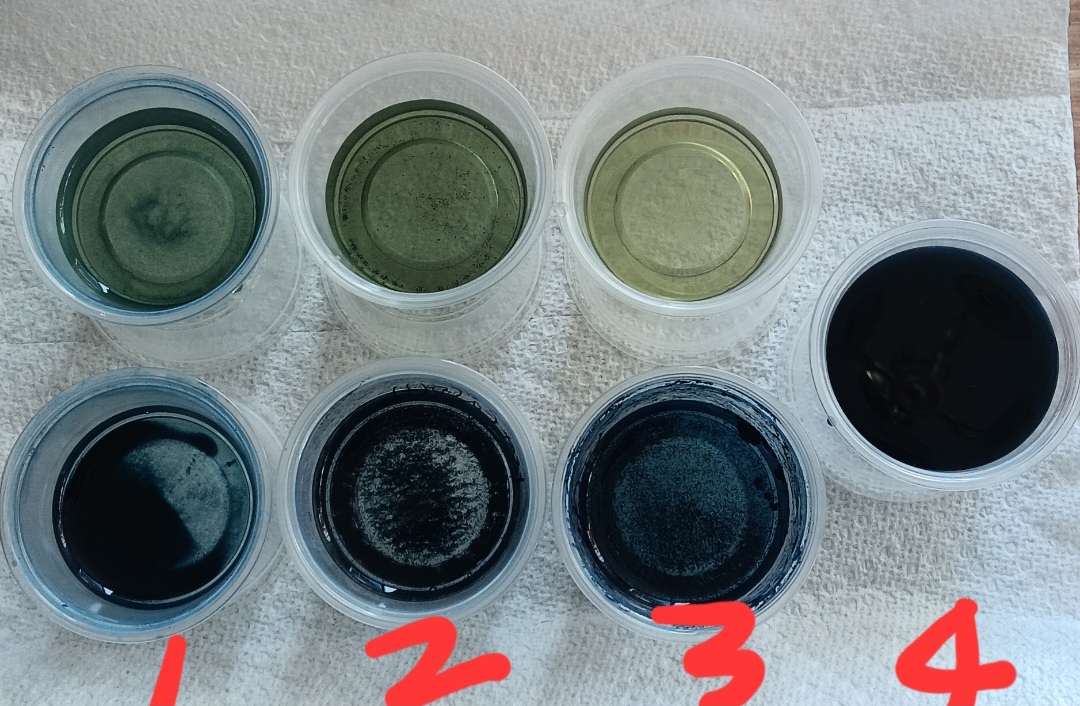
Beta-glucosidase, the enzyme that breaks down indican into glucose and indoxyl, has optimal activity around pH 5 to 6.  The simplest way is to add hydrated lime powder to both increase pH and precipitate indigo pigments (method #1). I prefer adding small amount of washing soda just enough to have indigo forming, then adding calcium for precipitation ( method #2 and #3).

I tested both hydrated lime Ca(OH)2 and calcium chloride for indigo precipitation. The former one results in bulkier aggregates easy for filtering and the latter gives finer and more unstable precipitation. The supernatant from hydrated lime is very alkaline and needs to be neutralized before discarding, while that from soluble calcium is less harsh. Or I can just let the blue water sit for a long time and indigo will settle at the bottom eventually (method #4).

Of the four options, some is faster, some is easier, some requires less material, some gives higher purity. It's personal choice which one to use so just play around and have fun.
Indigo-precipitation-comparison-.jpg
Either way will work as long as the starting solution has plenty of indican
 
May Lotito
gardener
Posts: 2329
Location: Zone 6b
1573
forest garden fungi books chicken fiber arts ungarbage
  • Mark post as helpful
  • send pies
    Number of slices to send:
    Optional 'thank-you' note:
  • Quote
  • Report post to moderator
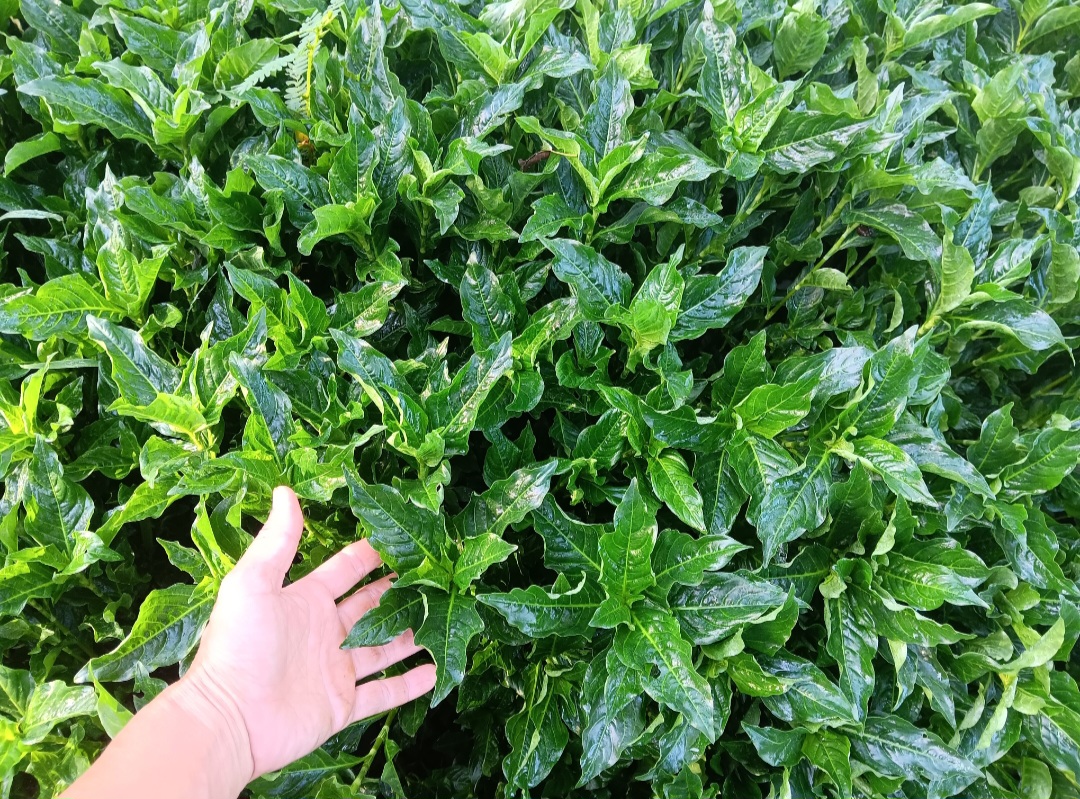
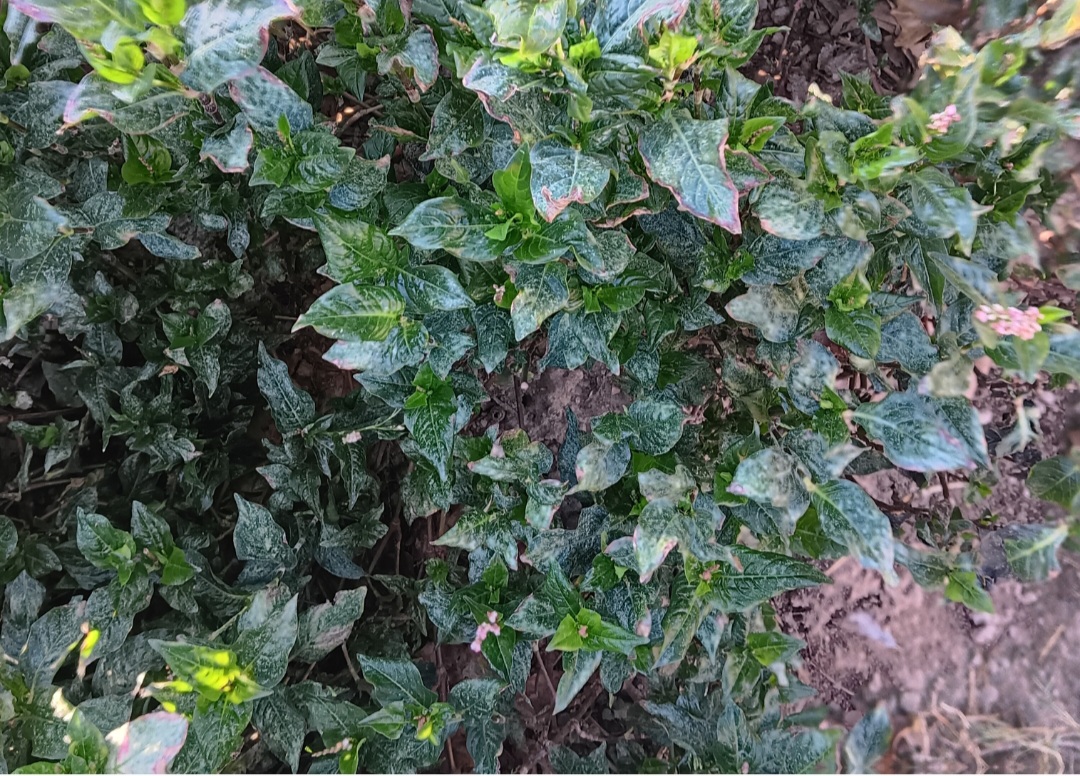
Japanese indigo is easy to grow from seeds. Here is the patch in mid July less than two months of sowing. Look how lush and  green the leaves are. Indican is synthesized from glucose and amino acid tryptophan. So when there are robust photosynthesis and plenty of nitrogen, the indican level is high. I should've done the extraction back then. Now after severe summer drought, the plants are very sad looking, despite regular irrigation. I wouldn't be surprised if yield is low from the final cut. These are planted in a less fertile spot. I have a few clumps for seed saving that are healthier.
Healthy-plants-in-mid-July.jpg
Two months old fast growing indigo plants
Sickly-plants-in-October-.jpg
Stressed and diseased at the end of the season
 
I think I'll just lie down here for a second. And ponder this tiny ad:
Permaculture Voices 1, 2 and 3 - all 117 hours of video!
https://permies.com/t/voices123
reply
    Bookmark Topic Watch Topic
  • New Topic