|

|

|

|

|

|
|
|
|
|
|
|
|

|

|

|

|

|


 6
6


- Tim's Homestead Journal - Purchase a copy of Building a Better World in Your Backyard - Purchase 6 Decks of Permaculture Cards -
- Purchase 12x Decks of Permaculture Cards - Purchase a copy of the SKIP Book - Purchase 12x copies of Building a Better World in your Backyard

Skill verified by gir bot")

Skill verified by Opalyn Rose") 3
3
- Tim's Homestead Journal - Purchase a copy of Building a Better World in Your Backyard - Purchase 6 Decks of Permaculture Cards -
- Purchase 12x Decks of Permaculture Cards - Purchase a copy of the SKIP Book - Purchase 12x copies of Building a Better World in your Backyard
1
- Tim's Homestead Journal - Purchase a copy of Building a Better World in Your Backyard - Purchase 6 Decks of Permaculture Cards -
- Purchase 12x Decks of Permaculture Cards - Purchase a copy of the SKIP Book - Purchase 12x copies of Building a Better World in your Backyard
7


- Tim's Homestead Journal - Purchase a copy of Building a Better World in Your Backyard - Purchase 6 Decks of Permaculture Cards -
- Purchase 12x Decks of Permaculture Cards - Purchase a copy of the SKIP Book - Purchase 12x copies of Building a Better World in your Backyard


 6
6
How Permies works: https://permies.com/wiki/34193/permies-works-links-threads
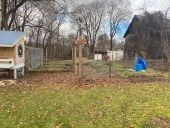
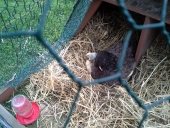
My projects on Skye: The tree field, Growing and landracing, perennial polycultures, "Don't dream it - be it! "
4
- Tim's Homestead Journal - Purchase a copy of Building a Better World in Your Backyard - Purchase 6 Decks of Permaculture Cards -
- Purchase 12x Decks of Permaculture Cards - Purchase a copy of the SKIP Book - Purchase 12x copies of Building a Better World in your Backyard
4
- Tim's Homestead Journal - Purchase a copy of Building a Better World in Your Backyard - Purchase 6 Decks of Permaculture Cards -
- Purchase 12x Decks of Permaculture Cards - Purchase a copy of the SKIP Book - Purchase 12x copies of Building a Better World in your Backyard
5
- Tim's Homestead Journal - Purchase a copy of Building a Better World in Your Backyard - Purchase 6 Decks of Permaculture Cards -
- Purchase 12x Decks of Permaculture Cards - Purchase a copy of the SKIP Book - Purchase 12x copies of Building a Better World in your Backyard
10
- Tim's Homestead Journal - Purchase a copy of Building a Better World in Your Backyard - Purchase 6 Decks of Permaculture Cards -
- Purchase 12x Decks of Permaculture Cards - Purchase a copy of the SKIP Book - Purchase 12x copies of Building a Better World in your Backyard
4
How Permies works: https://permies.com/wiki/34193/permies-works-links-threads
My projects on Skye: The tree field, Growing and landracing, perennial polycultures, "Don't dream it - be it! "

|
Hoo hoo hoo! Looks like we got a live one! Here, wave this tiny ad at it:
it's easier and more soul building than any workee-job
https://wheaton-labs.com/bootcamp
|