• Post Reply Bookmark Topic Watch Topic
  • New Topic
permaculture forums growies critters building homesteading energy monies kitchen purity ungarbage community wilderness fiber arts art permaculture artisans regional education skip experiences global resources cider press projects digital market permies.com pie forums private forums all forums
this forum made possible by our volunteer staff, including ...
master stewards:
  • Anne Miller
  • r ranson
  • Pearl Sutton
  • Jules Silverlock
stewards:
  • Nicole Alderman
  • Leigh Tate
  • paul wheaton
master gardeners:
  • Carla Burke
  • Nancy Reading
  • John F Dean
  • Jay Angler
gardeners:
  • Clay Bunch
  • Kristine Keeney
  • Christopher Weeks

building a Walapini greenhouse . opinions welcome .

 
Posts: 52
1
  • Mark post as helpful
  • send pies
    Number of slices to send:
    Optional 'thank-you' note:
  • Quote
  • Report post to moderator
Hi . (quick bio) . I'm knocking on 50 , with a bad back anoung other problems . Im not dirt poor , but I like a lot of familes are holding it together just about , so disposable cash is tight . Ive pritty much blown my meager budet on two clear tarps , 300 heavy duty , a matock and a heavy duty hoe. I have one bag of cement in reserve . I have a little left in the budget , but am saveing it for unforseen things later on in the build . So I have to make it with what I have and what I can scounge . But I only have a small car , so moveing large things is problermatic .
So the plan is to build a kinda Walapini greenhouse half in the ground and half earthbags . I already started a thread under rocket mass heaters , so when finished building outside , I plan to build a heater on the inside . Glenn and a couple of others have helped tremendusly with those plans . Once the greenhouse is built , ill be returning to the heater thread . But for now talking about greenhouses in the mass heater section seems wrong . Hence ive started this thread here . (link to first thread ill leave at the bottem of the post , along with pics) .

      THE PLAN......

  Dimentions ;-     the hole I have is 3m x 6m . I plan to slope the walls outwards to make the space up to 4m x 8m . but as is , I have given 2m space all around to build walls on . (ref.pic) .

How I see the end result ;-   2m thick earth bag wall to the north , banked up so a to be higher then the south wall , what will be 1m thick . The sides 2m thick , but lower as to let more light in. at least  3 bags high all round so that I can trap the clear tarps between layers of bags . One above the other with a earth bag size gap between the 2 . a couple of  2by1 beams across to suport the tarps. I have a 1m x 2m clear plastic greenhouse I plan to use as the doorway. Once I get to that stage , raised grow beds next to the side and south side.

Thats the plan . So far I have a hole dug and ive moved the topsoil to one side out the way. I have a couple of trees to deal with . But I can sort that out the deeper I dig . Right now im just finishing off the ground work , before I start laying bags .

Time for some questions about bagging . So I have 300 heavy duty plastic rubble bags . So wet dirt is better then dry , when filling the bags and then they dry out over time . But these are plastic so no water can escape . I want to fill the bags up(no waisted space) , but duck tape them down instead of sowing the ends up. So the damp cant get out there. So im thinking on making a ton of little steaks as long as a hand , pointed on each end . Used to connect two bags above with two below , that way the moister can flow through the bags, drying them out over time .
I know about laying bricks , linking them together to make the wall stronger and figure a simular method to laying bags would work . It seems to me this all will work ok . But im a little worried that over time the bags may slide off each other , distorting the wall .i was thinking of maybe putting a few planks across the layers as a kinda cross beem strengthening , but is the damp gets to them and they rot , it may become slippery stuck between plastic. I was also thinking of  using spray foam filler as cement and sealant between the bags (at least to enough to stop water getting between the bags) . Over all , I think this will work . Ill have to over come UAV light damage to the bags . The suction of the wind pulling up on a 6mx 10m tarp needs to be over come and a host of other little things that are more to do on the inside . There is what to do with the water run off from the tarps (got a couple of ideas on that once I get to it).
But right now I need to know im not over looking something that I cant foresee . Something about the plan that im not getting or should better work on . Am I heading for disaster becoz I didn't do some little thing I over looked at the start .

Ill drop a couple of pics below , to give perspective . But know that the size of the hole should by the end be a meter large all round . I just didn't want to dig out that what I may have to put back later and cant. Haven't really thought about ventilation yet beyond gaps around the door way and a vent leading from the highest place to the outside.
So please anyone with experiences of these matters or just plane anyone that's spotted a fail that ive over looked . Speak up , I think I am at about the most critical stage of the build . If other stuff goes wrong , it will not take to much work to set it right . But building the earth bag walls will be a real ass-ache in effort to fix if I get it wrong and find out later . The only problem I have right now is a pounder/tamper (ground hammer, bag flattener). What ever its called I don't got one of dem dair tings . I got a brick and some planks of wood. Still I figure its harder building the standard wall . Being as its one bag thick and 6ft more tall . I'm aiming for 2-3 bags thick and maybe 5ft tall at most on the north wall.
As for lighting . I got a couple of pie in the sky ideas . But I figure I got a couple of them solar garden lights. They are not much strong on there own , but together they give off enough light to see by if maybe not read by . That should do for the time being .
Oh yes the water run off from the tarps , couple of ideas . First one , I got a wheelie rubbish bin and a large plastic barrel I can fill up with run off . Works as a temp fix . But if they are some what filled and the heavens open it could over flow fast . Idea two . I got a 4mx3m tarp , I use it to make a run off pond . Problem is I want that pond space for raised grow beds (grow space/surround insulation). My last idea is a little more crazy . I make a hot tube inside . Run off water goes to hot tube and gets heated as thermal mass from the mass heater I got planned later . Ill worry about it more closer to putting the roof on , but views and opinions welcome . What is it that say “fail to plan , is planning to fail”.
As ive mentioned before ive chatted to Glenn and others about the mass heater and my plans have changed drastic from there experiences and knowledge . I was gonna put it in a stupid corner of the greenhouse , but they were like no centre and I was like wow that so makes sense. But now im wondering where to put the syphon . But that's another thread . ( https://permies.com/t/98267/relationship-riser-top-barrel ).

from start to now its taken me 3 months .  Not that I remember what day I first broke ground on this venture . At the end of all this if I can get a 10-15 degrees temp difference to outside . Ill be happy. That will be enough to stop my plants dieing each year (im a sap that feels guilty for planting things I know will die at the end of the year) and giving them some more time to ripen . That and at the same time giving me my own little temple of solitude. We love are families to bits , but sometimes we would trade it all just for a warm chair , a fav drink and a bit of peace and quiet . If only for a little while .

Well reader , that's da plan . (I hope) . Everything is open to change for the better . Just keep an eye on materials when volunteering ideas . Ill not be changing the plan because someone thinks it would be better using clear plastic sheets. Not meaning to be rude , it would be better . but I don't have the money for that . It would be better to buy a greenhouse , but whose got money for that. The way I see it is I am making this dirt cheap (pun intended , because a lot of this will be made of mud. Ha ha  move on ) so all the permies chaps and chaplets can say greenhouse for that cheap if you put the work in . Even a disabled dude can do it , if they have the time and determination .

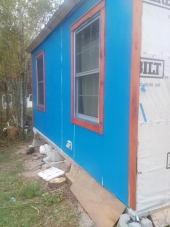
pictures are from east to west and back again . the others are close up of the dirt i have to work with . the trees in the hole will be easier to get out the deeper the hole gets . oh and the wheel barrow has a slow puncture .
Or at least point a finger and laugh while saying I told you so LOL . Then you can point it out to the next fool through the door .
IMG_20190106_153832.jpg
[Thumbnail for IMG_20190106_153832.jpg]
IMG_20190106_153907.jpg
[Thumbnail for IMG_20190106_153907.jpg]
IMG_20190106_153942.jpg
[Thumbnail for IMG_20190106_153942.jpg]
IMG_20190106_154000.jpg
[Thumbnail for IMG_20190106_154000.jpg]
 
pollinator
Posts: 1778
Location: Victoria BC
305
  • Likes 1
  • Mark post as helpful
  • send pies
    Number of slices to send:
    Optional 'thank-you' note:
  • Quote
  • Report post to moderator
My understanding is that barbed wire between courses helps keep bags from sliding, is that in your plans? There may be other aspects of anchoring, I haven't built withearthbags yet..
 
BoBo Jones
Posts: 52
1
  • Mark post as helpful
  • send pies
    Number of slices to send:
    Optional 'thank-you' note:
  • Quote
  • Report post to moderator
thats what most that are building a wall use . but barbed wire costs and the wall that i will be making will be a lot thicker then those single line walls . that and i plan to make the bags a little more flatter then those others that you have seen.also as time goes on , so long as moister dose not get in between the bags , the plastic up agains plastic should stick together (so long as its kept clean, when laying).
 
BoBo Jones
Posts: 52
1
  • Mark post as helpful
  • send pies
    Number of slices to send:
    Optional 'thank-you' note:
  • Quote
  • Report post to moderator
due to me getting another year older ive got a little bit more budget now . rather then an exspencive meal or a party . i picked my greenhouse . i was looking at getting a tamper(earth rammer) but best price £35 for something i will use on this and never have a chance to use again. barbed wire £8 an half , but do i realy need it ? wall is only gonna 5ft tall and at least a meter thick .
i was looking at bricks and slabs to build a syphon for the mass heater and it realy looks cheaper to make it myself by mixing concret . i can get 3 small bricks for a pound but a bag of cement is 5 an half pounds. i have a bag already but that will not last long , once i start useing it.i realy wanted to make the syphon out of cob , but i cant work out if the moister in the venting gasses will sink into the cob and weaken it or just plane end up with a damp mass to heat up . so i figure ill be able to make it from cob , with a lining of cement.
i have 8 2x3's i plan to use as cross beams . two nailed together will span the gap. but ill have to pay for two more plus the pipe insulation to stop it damaging the tarps .
also thinking about the north wall , should i build vents into it. its all good now . but come sommer im sure ill need vents . if so , then im going to need to buy some plastic piping.
the steps that will leed down to the door will have to be well made somehow. cant risk weak ass steps that could make me trip and fall at a later time , just becoz i was a cheap ass .
so there are planty of hiden costs coming i figure . so screw you tamper sellers . a brick and a plank of wood will have to do . i dont have a spirit level ether . i figure a couple of bits of wood and a plum line will work just as well out of the wind lol . in a couple of months i may well run out of my 300 bags and need some more . so sorry dillon and others if i sound like a doosh when i say i cant aford it . its just i have a limited budgit and i have to guard what funds i have to the essentials . we all know that we could price a job up and forget all the little hiden costs .
well im done digging to make a hole and im now digging to fill bags a the first bags will be going down soon . but not today . today is my birthday after ive done the washing up . that and its raining cats and dog outside . ive fed the wild birds(they keep the slug numbers down), im about to have an epic toilet pooping moment , then washing up and then maybe a small bourban and a smoke while watching and planning the garden. life is good , so long as you dont think about it .
 
D Nikolls
pollinator
Posts: 1778
Location: Victoria BC
305
  • Likes 1
  • Mark post as helpful
  • send pies
    Number of slices to send:
    Optional 'thank-you' note:
  • Quote
  • Report post to moderator
Happy birthday!

Scrounging and making do is very much part of the permie ethos, nothing to be sorry for..

I bet old rusty barbed wire would work fine, question is who has a bunch of old fence they would love to have go away... I don't think the barbed is very optional though! The inward thrust of the earth is a serious force albeit sometimes a slow one

A tamper... what about a log? Do you have the means to acquire a suitable chunk of tree? Windstorms around here leave plenty on the side of the road...


Ventilation... my first greenhouse was a scrounged 6x8 sunroom rebuilt to be freestanding. Even with a 4x8 door and a 2x2 floor level intake it overheats like mad in summer. But yours is dug in, this should help enormously... I'd put vents, easier now than later!
 
Posts: 329
19
  • Mark post as helpful
  • send pies
    Number of slices to send:
    Optional 'thank-you' note:
  • Quote
  • Report post to moderator
The narrower the better cuz there is a higher mass to air ratio and less roof material is needed.
 
BoBo Jones
Posts: 52
1
  • Mark post as helpful
  • send pies
    Number of slices to send:
    Optional 'thank-you' note:
  • Quote
  • Report post to moderator
what i mean is sorry i keep shooting peoples ideas down when they recomend something. like when i started the mass heater thread and someone was saying perlite . would be better . but if i can get by without it , the money spent on it can go to something more needed.
most earth bags are made of something other then plastic and let water pass through . ill be useing plastic bags(all be it thick heavy duty ). i think under presure the bags will stick together on there own , so long as i seal it against damp. ive kept all the stones ive dug up so far . i may well place them down between bags to help .
but saying all that . i checked , 25m for £8ish so im looking at £16 to do a proper job. i have £25 voucher and £40 left in the kitty .
from what ive seen on youtube, if you type in " cheapest greenhouse" , my one is coming in a lot cheaper.
a chuck of tree . lol .what size chuck were you thinking ? standard plank size ?
i figure so long as the plank is longer then the bag it should be fine. im building a thicker wall then the normal earth bag wall. so it should be a whole lot more stable then the one bag width walls . where you realy do need to make sure nothing mores an inch .
reason i mention venting is that if i think about it now , i can incorperate it into the building of the wall . it will look a lot better , then waiting for laster and having to cut a whole in the tarp. one of my golden rules with the tarp . "dont cut it or damage it". the tarp will be sandwiched into the earthbags. if i plan for vents i can have them go round the tarp or something to that effect. does anyone think i should make some vents for the space between the two tarps ??

as for bagging , my only worry is how to let the bag dry out if its sealed in a plastic bag . all i can figure is making small steaks (size of your hand (unless your Glenn who has small ladie hands lol).

Jeff narrow and long would be best . but im kinda fitting it to the space i have in the garden . the tarps have been delivered and the hole is being dug .

thing is, im excited about all of this . but for the digging and bagging hard work . once past that and i get a roof on , then we can have some real fun planning the layout of the inside ,
 
D Nikolls
pollinator
Posts: 1778
Location: Victoria BC
305
  • Likes 1
  • Mark post as helpful
  • send pies
    Number of slices to send:
    Optional 'thank-you' note:
  • Quote
  • Report post to moderator
I was thinking a 6ft chunk of log in the round for the tamper... Maybe 6-8" at the fat end would be nice, but it could be a lot smaller and still have some good heft. A couple convenient branch stubs for handles, and you're in business... might not be as easy to come by where you are!

If the tarps come to the top of the back wall and stop, I'd put the venting above them? Or am I picturing that part all wrong?

I get it, you don't want to buy barbed! I would seek a free replacement it you can't scrounge any... the stakes you mention may help. What about really tough thorny branches? Rocks and lumpy bag surfaces sound helpful too...

Will the wall be sloped to 'lean in' to the soil behind?

Bah. I've got crabapple and wild rose galore that would do as a barbed substitute... but if you were nearby you wouldnt need to substitute, you could have all the rusty barbed you need in exchange for the work of getting it out of my old fenceline!
 
Jeff Hodgins
Posts: 329
19
  • Mark post as helpful
  • send pies
    Number of slices to send:
    Optional 'thank-you' note:
  • Quote
  • Report post to moderator
I make circular pits 2³ feet to protect tropical plants at the bottom. I plan to make 3 foot wide trenches about 3 feet deep and put plastic on it and dirt on the edge of plastic. And poke some small holes for rain to drain through or in my situation I can just remove the plastic in the wet summer and put it on in November when it stops raining. Plastic sheets and dirt are the only materials used.
 
BoBo Jones
Posts: 52
1
  • Mark post as helpful
  • send pies
    Number of slices to send:
    Optional 'thank-you' note:
  • Quote
  • Report post to moderator
Dillon . a log like that would be somewhat hard to get here in the shires . but i see what your getting at . i was thinking of useing a palet(not sure spelling) plank and a brick , should think i would need to pound it any harder then that ?
i was thinking going up 5 layers there abouts (guess) . 6 to make it convenient . so the first tarp goes under the top layer . then another bag then trap the next tarp underneath that. so i got a bag hight between both tarps. so i vent from under the lower tarp into and up behind how deep into the wall the tarp is , up and out . may invest in a bit of plastic waist pipe and two L bends . that will give me two vents for each end of the green house . cut and block them up with a polistiarean block(soft plastic stuff tv's come with in a box to stop damage).
this was the plan from the start . buy a 6mx10m tarp . leave a meter all round to go into the wall. then another meter all round as 45 degree slope. the hole i dug so far from the pics is 3m x 6m . so whats left after what the wall has eaten will be 4m x 8m . to be fair , not total sure on the end dimentions . but as you can see , ive left a lot of wiggle room . i know i want the north face stepped . so i can place plants there it catch the rays . (North by the way is where the hedge is , east is the brick wall in the pics). south side i may just have it vertical wall to maximise space being as the ground abouve wont have as much load on it as the north wall or east . right now ill keep digging down a meter and a half stright sides till i get the walls and roof on , then ill see what place i have left inside and we can work from there.
funny you say that . i got a couple of spikey trees like that . i use them to make poles (another story) . was looking at them the other day as a wire substitute . i figured with wovern bags it could work . but with plastic that wood would sit there and just rot if it got even a little bit damp and im sure that would turn into some kind of lubricant inbetween the bags. when i was talking about useing steaks . i mean just little ones to make a hole in the bag and match it up to the hole above , letting the damp flow down through the bags , drying them out. do you realy think the barbed wire is realy that inportent with a wall this thick and low. my latest guess is the north and east wall will be 3 bags deep. criss crossing them like laying bricks as i go.

Jeff. i dont know what parts of the world your in , but in these here parts , the sun can get realy low. coser to the eqator it stays higher. i based my design greenhouse after seeing a paruvian greenhouse. the sun stays high there all year round . so all the do is a larger version of what you said and the sun just falls in. but where i am it will cast a shadow over most of the hole all day long. only the tips of the plants would get light. great idea and i would be doing it also but hardly a 1/3rd of it would ever get lit. steal a little from the south side and add it to the north side and a little slope will make all the difference. that is unless the sun falls into your hole ??  we are still talking greenhouses here ? ha ha ha
i found plastic sheets a bit pricey . i may remake it with sheets once the tarps are worn out and maybe ill still be poor and just buy more tarps . sheets worked out twice as much as tarps cost . but sheets let in more light. just a matter of priorities. cost is high on my list .

one lucky thing thats happened . so i dug the top soil and put it aside. i noticed a couple of paches of sand in the hole . so ive been digging depper now for wall mud and those pacths are growing larger. its turning into the perfict mud to use. good mix of sand and clay so i understand. who know all those years of complaining about the ground being hard to dig with a spade , turns out its just the thing. i figure many years ago when they were building all these houses thay must of use sand as ground filler. you know to flattern the land before building or something like that. im also geting a lot of flint and chalk . i plan to use the flint inbetween the bags and the chalk to paint the walls. chalk + cement + water = white hard surface. thin it out with water and paint it on. i use something simular before on cob to make it look smooth finish.
 
D Nikolls
pollinator
Posts: 1778
Location: Victoria BC
305
  • Likes 1
  • Mark post as helpful
  • send pies
    Number of slices to send:
    Optional 'thank-you' note:
  • Quote
  • Report post to moderator
Congrats on the soil results!

When I tamp something I want the weight of the tamper to do the work. I don't mind lifting a bit more weight for more results.

I do NOT want to grip that tamper hard is it hits the target, adding my own weight/muscle power to the tamping. I want to let go, or very nearly, so the force of the impact is not transmitted to my joints.
 
gardener
Posts: 1670
Location: Longbranch, WA Mild wet winter dry climate change now hot summer
375
2
goat tiny house rabbit wofati chicken solar
  • Likes 2
  • Mark post as helpful
  • send pies
    Number of slices to send:
    Optional 'thank-you' note:
  • Quote
  • Report post to moderator

Time for some questions about bagging . So I have 300 heavy duty plastic rubble bags . So wet dirt is better then dry , when filling the bags and then they dry out over time . But these are plastic so no water can escape . I want to fill the bags up(no waisted space) , but duck tape them down instead of sowing the ends up. So the damp cant get out there. So im thinking on making a ton of little steaks as long as a hand , pointed on each end . Used to connect two bags above with two below , that way the moister can flow through the bags, drying them out over time .  


I am not sure I understand your bag plan. What are the dimensions of the bags?  How thick will they be when pounded flat?  how high above the surface of the ground do you plan to build?
Sun will degrade the plastic within one year so they must be covered.  where they are below ground and dirt is banked up against them on the out side they should be fine. but on the inside they will break and spill the dirt out. Stakes should work fine to keep them from sliding.  Insulation is not in your budget so I see no advantage of making the north wall thicker below ground and above ground just pile dirt against them to protect them and make the wall thicker. To cover the top of the bags and the inside I recommend my favorite material which is discarded carpet.
You have not filled out your profile so we do not know your exact location. [click on My Profile at the top of the thread and fill it out for this thread your latitude would help, for example mine is 47.25] from your use of pounds as monetary measure indicates England which would have weather like mine. If you put your clear tarp on a roller you can role it back for ventilation and remove it when not needed. The thickness of the rafters is plenty of space for a double layer. My greenhouse has discarded glass doors and the north wall is just layers of carpet inside and out with the padding in between so I can role the whole north wall up in the summer time.
 
BoBo Jones
Posts: 52
1
  • Mark post as helpful
  • send pies
    Number of slices to send:
    Optional 'thank-you' note:
  • Quote
  • Report post to moderator
yes dillon . let gravety do the work . i use the same style when useing the matock . lift it up then drop it in a controlled method with a touch of force. good job im not a flat earther or the work would be doubly hard if i dont beleive in gravity. lol.

Hans , wow some good ideas there. let me work through what you typed .
dimensions of bags . all the bags i see people makeing earth walls (i.e. large rice sack) , they are about the same size . maybe slightly wider . well as in my picture. i have left about 2m ish from hedge to edge of hole . little bit more on the east side . the one with the brick wall. i figure laying them along wise i would get 3 bags width out of the north wall . i only plan to go up 2/3rds the way up the hedge/wall , the rest if the inside hirght will be made up of digging ddeeper. so i can stand up inside. the inside i figure will be one and a half to two meters deep . that should give me lets say 2 and  1/2 meters deep , make it up to 3 meters deep once ive built up the south wall a tad . at least half and a bit of the inside space i plan to ?terise? ( make stepped sloped up). then i can place my plants in pots on these steps . that way i can alway be moveing the taller plants down the steps and the smaller plants higher up as and how they grow.
as for the UAV light breaking down the bags . i only thought about it after i chose the bags . so yes , inportent. north side of north wall wont get much light hitting it as only an hour of light in the morning could hit it . that and the hedge will grow over the space between. as for the rest , inside north wall will be banked up to cover it all. low down on south and west side will be like two layers of bags at least . so i was going to keep bagging around the garden to the same level and make rasied grow beds in them . then i can dirt over all the bags and grow grass on top of the bags. but that only works on that level. as for the higher north and east wall , i know i need to cover them along with the bags seperating the layers of tarps. at the end i want the whole of the bottem of the garden covered , so i no longer have to enter gladitorial combat with the weeds and brambles . F.y.I. i havent always come out of that fight the winner. so where ive stacked the dirt along the side will end up raised bed. may or may not move compost heap inside . great idea with the carpet . in truth i had enough on my plate and so long as i rap them in something itll be fine. problem for later.

i thought the "coming from the shires" comment gave it away . im not a frigging hobbit . no . for all intent perposes lump me in as a londoner , but in truth im just north of there . i live right in the middle of shire land ( the countys ).
im looking a 0 to -10 max , even that seems to be changing.(back when i was a kid............... !

inspired idea haveing the roof roll back. i can imagine laying in my hole , looking up at the stars. sorry to keep saying it , but cost . also im trying to emply the K.I.S.S method of planning . Keep It Silmple Stupid . i may at a later time take you up on that idea for the second inside tarp. but the top tarp needs to be solid tight and streatched a little like a drum. i have to engineer it to be sight so as the wind wont flap it all over the place . this is one of my biggest worries. if a tarp flaps , it can strecht and become more flappy , then your on a downward spiral . i normaly combat that by ajusting ropes to keep it tight. but these are gonna be sandwiched into the bags. for sure when its nice weather its great . but when you get a windy storm , it so much different .
3 inchs gap between the tarps is what good double glazing will be . often with a 2rd layer of glass bewteen that. i want a proper gap between them . i was thinking maybe a foot between them . it does not matter what i do to stop it . the top tarp will always be moving in the wind and i forbid the two tarps from touching . its not like putting the tarps closer together will let in more light ??
the weather got down to 0 last night and everything froze . mid day now and its up to 4 . cold snap maybe , if it was a warm day i would exspect it to be about 7-10 degrees right now . its a wind thing where i live . wind blows from south and its warm , blows from the north and its cold kinda thing going. the weather where i live changes fast being as its an island (uk). the weather over most of europe is way different. this is what the mass heater would be for . as is the greenhouse should handle all weathers well for where i live . but when its realy cold like now or when im showing it off then i want to heat up that mass.
off hand thinking now why dont i make two rocket heaters in the same green house. one to do the work in winter time and a small bench type just for laying on and showing off. the get next door has a back up fireplace , house as got heating , but he has a little stove box thing . he told me/havent seen it . he liked the idea of the heated bench to lay on . but scoffed at the rocket part of it all and how clean it can burn. challenge accepted says i . so now ive gotta build a clean system . but i figure haveing the whole thing underground , insulated like , it should get up to high temps. look at me crancking on about heaters in the green house part , becoz i didnt want to talk greenhouses in the heater section .
 
BoBo Jones
Posts: 52
1
  • Mark post as helpful
  • send pies
    Number of slices to send:
    Optional 'thank-you' note:
  • Quote
  • Report post to moderator
reading back what ive typed . back in my day , i was kinda the last in the line of stupid kids at school . these days thay have a whole spectram of names now . i would be dislexic , by the by . not that anyone has picked me out on it . but typeing and forums , dont come easy to me and it takes me hour or more to type out everything in a manner that more then i can understand it. but just like the old jackson and livingstone paper backed game books ( turn to page 38 to turn left , turn to page 40 if you want to turn right) that made me excited to learn to read . all this greenhouse and heater lark hass me reved up enough to spend an hour or two typeing . if nothing just to hear peoples ideas and advise. so bear with me and ask me to exsplain better if needed and ask for pictures if helps . i was thinking of doing a sexy photo shoot with spade , matock and of course hoe , all laying down in my hole , the dirty little tools they are .
someone laugh with me so im not the only crazy one in the room. lol
 
BoBo Jones
Posts: 52
1
  • Mark post as helpful
  • send pies
    Number of slices to send:
    Optional 'thank-you' note:
  • Quote
  • Report post to moderator
sorry to post again so soon, not spamming . but since it was raining all yesterday and letting the mud drain today . so apart from typeing . i thought i would shoot a little vid on my phone to show you all with moveing pictures. so if there is anything spersific you wanted to see or know . ill vid it for you to better understand. help you better see what i got to work with and a 5 min vid is easyer for me then two hours typeing.
so hear is a link to my youtube channel striaght to the vid. oh and i say yer a lot its my version of errr while my brain catchs up with my mouth. sorry if it gets annoying.


Hans Quistorff
gardener
Posts: 1670
Location: Longbranch, WA Mild wet winter dry climate change now hot summer
375
2
goat tiny house rabbit wofati chicken solar
  • Mark post as helpful
  • send pies
    Number of slices to send:
    Optional 'thank-you' note:
  • Quote
  • Report post to moderator
As I suspected your climate is very close to mine. I also have a hedge to the north with a 1 meter wide path behind the north wall.  So you can do as I have make part of the north wall so it can be open in the summer to vent and closed with insulating materials in the winter. In stead of filling the top north wall bags with dirt fill them with dry leaves. Use your round poles to hold up the roof. Use the wood from the pallets to hold the clear tarp tight to the sides and ends of the rafters. I only had 2 rectangular pieces the rest were round  so I used the  lumber on the ends and the smaller diameter round ones in between and the whole roof is held up by 6 round posts. My east wall is solid because like you I don't get any sun from that direction and the mornings are usually foggy anyway. To make up for that my west wall lets light in. Can you find an old storm door with glass in it for your entrance on the west?  
With a gutter on the south edge of my roof I collect enough water to use in the greenhouse and the high tunnels further down the hill until June through September our dry months.
.
My secret to not have a lot of miss spelled words is Google spell check. Otherwise I tend to type what I hear in my head but Google catches it and underlines it in red and when I right click on it gives me suggestions for what I really mean.
 
D Nikolls
pollinator
Posts: 1778
Location: Victoria BC
305
  • Mark post as helpful
  • send pies
    Number of slices to send:
    Optional 'thank-you' note:
  • Quote
  • Report post to moderator
At the end of a lousy and overpriced cell phone connection here... so no video watching for me!

Pictures usually work, hope to see some more as you carry on.

I think you're dead right about the big airspace between the tarps.

I think I would dig a small hole to final depth first.. if you hit water you probably want to stop a bit above..

I really don't have any more suggestions that don't involve more money or more scrounging.. and with scrounging it's pretty well a rule that you can only find what you need, when you don't need it!
 
BoBo Jones
Posts: 52
1
  • Mark post as helpful
  • send pies
    Number of slices to send:
    Optional 'thank-you' note:
  • Quote
  • Report post to moderator
Hans , i can kinda see what you got in my minds eye .meter gap between wall and hedge and the sides built of wood then earthbag. not sure i quite get the vent part.  you left holes in the north wall that you block come cold weather? we had talked about it and i was thinking of useing some plastic ducting (about waist pipe size) and build two vents into the wall. as for the sides . could use the wood to make the sides . i see what you mean there. but the image i have in my head is the north east corner will be the highest point that everything slope down hill from. i want the tarp the slope gentle like inbetween the bags. i know if i do it this way i can make the tarp tight. if i switch from dirtbag to wood , first i figure it wouldnt look as nice, two it can be a assache to get tarps tight up against wood without damaging the tarp.even a little movement can damage the tarp.and three i may need the wood for something else.
i have been giveing the UAV damage to the bags a lot of thought . ive come to some solutions i want to run past everyone. so i gotta cover the bags . all round the inside i can cover with mud . outside low down , mud again . but up high if i mud there . the rain will wash it down no matter what if i grow grass on it , itll wash out the sides and down the tarp or back. part of the reason to make it this big was to stop stuff growing. if i mud to much of it the weeds will just come back. i liked the idea of old carpet and ill look into that more . but for all the rest of the places.
i hit on the idea of car spray paint . not very eco of me i know , but when needs must. cheapest canned car paint i can get . the bags are plastic and solid , the paint is designed to resist UAV light and if i spray the level just before i lay the next level the two layers of bags should stick together as the paint drys . still liek the carpet idea, itll stop the birds and cats pokeing holes in the bags as the walk over them. love the idea of rolling back the tarps to open it to the sky . but that will have to be a later effort . Hans a friend said i could have two double glazed windows for my build . had to turn him down , cant fit it in the car, cant move it.
you all know my budget , what cash i got left so if you recormend me spend it then fair be it . just know when its gone , there is little chance to getting more.

so i plan to start bagging and laying in the next week. ill be laying the bags full with top taped up . use steaks and flints inbetween the bags . spray paint the bags as i go up a level. make sure the wall is stright and flat . time to tell me what im missing  if i am missing anything .

Dillon , i hear you buddy . im a child from the 52k modem days . i got ya . not missing much in the vid that you cant see in the pics above. more an orientaion vid . look around the garden seeing stuff that i over looked to mention. ill remember to take stills for you to keep up.

thats about it . mostly solving the uav . i figure the paint would work . what do you all think ?

later edit.
temp is down to -4 this morning  and standing outside looking at my hole and pictureing that it will look like. i come to the conclusion that by making it out of plastic bags i dont need to be covering it from the weather while im building. ive seen vids of peoples builds , where they get half way up the wall and part of it falls down becoz it rained the night before.

for you Dillon , couple of shots .
 in the vid i was just pointing some things most notable in the pics was the gap between the hole headge and wall . showing how sandy the hole is getting . spreading and breaking up the soil from the deeper hole closer to the end brick wall. pointing out how i was gonna dig the trees out once i get deeper. closer look at the compost heap and bank of top soil. pointing out that i wanted it about 2/3rds the hight of the brick wall. what i cant tell you is all the little things dotted around that can be seen but not commented on. like i have twp brocken paving slabs and the exstent of my pallet supply. beyond that fella , your not missing out on much.
i know none of you can help be with the digging and bagging and such . but i am realy enjoying this combind planning effort. even if i know its kinda hard for you all , to plan without knowing the materials avalable .  kinda part why i wanted everyone to have a look around the garden with me.

agree disagree ? ill start laying the bags soon . ill seal the bags with duct tape . steak  each bag to let the damp drain . place flint in between laying bags 9till it runs out) and spray paint each bag , just befor i lay another ontop(so plastic on plastic sticks together).  are we all good with that before i start ?
ive been giving the patern of laying bags together some thoughts . 1. lines , east west, then north south next layer .  2 . picture a line from where the headge meets the brick wall , then traces a line to the corner of the hole. a diagonal line(east waest bearing).first layer NE to SW . then the next layer NW to SE alternating. 3 . half way on the north side length. two bags N to S . then i lean the bags agaist it (45 degrees). next layer flat lines and then repeat. (it has the effect that if the wall wants to move anywhere it will wal to fall towards the center). 4 . (i dont like this idea) first layer i stand all the bags up right with opening faceing down. then flat layer , then repeat. (it works , but i dont like it becoz there is way much more that can go wrong).
the one i like the most is No2 . i think its stronger , but the bottem of the bags will be faceing out . (oh take a picture of the bags you fool!!) . im not sure whats stronger , the sealed bottem(not the open bit you pore stuff in) of the bags or the sides that have no sealing .
let me know what you all think , i wouldnt say vote on it . but lets come to a consensis on this . best ideas win out . oh and comment on what you think of the paint on all parts i cant cover with soil.

quick price test . car spray paint £5.50  is cheapest . worth the spend ?
IMG_20190120_093720.jpg
[Thumbnail for IMG_20190120_093720.jpg]
IMG_20190120_094353.jpg
[Thumbnail for IMG_20190120_094353.jpg]
IMG_20190120_102843.jpg
[Thumbnail for IMG_20190120_102843.jpg]
IMG_20190120_102942.jpg
[Thumbnail for IMG_20190120_102942.jpg]
 
BoBo Jones
Posts: 52
1
  • Mark post as helpful
  • send pies
    Number of slices to send:
    Optional 'thank-you' note:
  • Quote
  • Report post to moderator
QUICK UPDATE
someone without checking said about digging the hole down to depth to see if i hit water . well i live on a chalk hill so no worry about ground water . but i have been digging (E.G. pics) deep and you know i said dirt was turning to sand . well i think sand is turning to clay. i took a photo with all 3 different earth types. there is the sandy soil left , the transition sand and mixed clay and then right is the somewhat pure clay but for chalk and flint. i think i may have found a little sand stone/lime stone , could just be a brick thats not seen the light of day in over 100 years .  dont know but its something different .

as for the paint thing . im kinda thinking paint and brush will be cheaper then spray can.
thats all , just update pics and the siol change .

i think ive found the cheapest paint to do a proper job . check it out    https://www.screwfix.com/p/no-nonsense-water-based-gloss-paint-black-1ltr/5233x
IMG_20190121_145905.jpg
[Thumbnail for IMG_20190121_145905.jpg]
IMG_20190121_145938.jpg
[Thumbnail for IMG_20190121_145938.jpg]
IMG_20190121_150029.jpg
[Thumbnail for IMG_20190121_150029.jpg]
 
Hans Quistorff
gardener
Posts: 1670
Location: Longbranch, WA Mild wet winter dry climate change now hot summer
375
2
goat tiny house rabbit wofati chicken solar
  • Mark post as helpful
  • send pies
    Number of slices to send:
    Optional 'thank-you' note:
  • Quote
  • Report post to moderator
I doubt brushed on paint will hold to the bags and even the spray on paint may come off with little abrasion.  I have seen some plastic bags used to mask edges hold some spray paints but others the paint just flaked off while removing the plastic.
Are you planning to remove the clear plastic during the summer?  If not you will need an opening at least the size of a door for the air to come in and another for it to go out to avoid overheating.
Myself I when nights are consistently above 10 degrees Celsius every night I leave the vent open so that it won't overheat before I get out there in the morning. Even with the north wall open my recording thermometer has registered over 100 degrees Fahrenheit during the summer. When that happens the tomatoes stop pollinating. Because of the water influence around me summer days often are only 70 [20C] and seldom above 80 [27C] so I keep the tomatoes and basil inside the greenhouse but put the rest of my plants in containers outside.
Having the roof slope diagonally to one corner is advantageous for ease of collecting the rain water.
Have you tried filling a bag with dirt to see if you can lift it into place with the dirt in it or will you have to fill each bag in place? I am guessing you will nt be able to lift half a bag.
 
D Nikolls
pollinator
Posts: 1778
Location: Victoria BC
305
  • Mark post as helpful
  • send pies
    Number of slices to send:
    Optional 'thank-you' note:
  • Quote
  • Report post to moderator
Hm. It's hard to tell from a pic but how would the bags respond to being lifted full? I've filled the strongest garbage bags I can find and *then* discovered that they are the weak link...

I think the paint warrants a test before counting on it... no sense smearing the not so nice stuff all over if it won't hold up...

What about cob? Since you've got clay now! Adhering to plastic.. hm.

I would be leaning the wall back, so the inner side would be a stepped/terraced effect. The more the better... but you're tight on space. If you dig down so that the second bag rests 70% on the first bag, 30% on outside soil, maybe you could slightly lower the level of the outside soil? So that not only is the wall leaning against the pressure of the soil, each bag is kind of keyed in on the outside of the bag below...
 
BoBo Jones
Posts: 52
1
  • Mark post as helpful
  • send pies
    Number of slices to send:
    Optional 'thank-you' note:
  • Quote
  • Report post to moderator
Dillon mate . im not picking those bags up full of earth no matter how much i try. so the plan was to ether A take the soil to the bag and filling where its gonna lay and then just wiggle it in. B take the bag to the soil and fill it then use a sack barrow to move the full bag to where i lay it. i favor A .
as for the paint . what else can i use . it reads like its the right stuff. its cheap and plentifull and it should do the job where i cant earth over.
cob would be good and ill do that on the inside where i can be sure its dry . but on top and north side of north wall to be mainly needed. plastic on plastic can let in damp , it may seal under presure. but i dont want to take the chance. that and the paint solve the UAV problem all be it in the short run. two birds with one paint can.

i think i understand . i get the stepped effect inside north wall and outside north wall is vertical. are you talking about from ground level or from the lowest part of the south end of the hole ?
i gotta say i had planned to just make a solid north wall , all vertical walls. at least 1.5m deep 2m/ish high and 12m/ish long . but for space for vents. i want to cover the end of the garden with greenhouse and a couple of raised beds. so nothing growns down there that i dont want growing.anyone thats picked a fight with a blackberry bush knows what im talking about. at the risk of sounding like a tart . i need it big and strong , with plenty of gerth and able to stay up for a long time. lol any how i need it thick at the top to weigh down the tarps.

thing is Dillon , i havent got that many cost effective solutions. other paints are 2 - 3 time more exspencive and at that price i could come back to it later and give it another coat.

sorry Hanns . didnt see your post till after i hit post . the outside north wall wont get hardly any light but for an hour in peak summer and thatll be filtered through the headge(more so once it grows over). what are my other options ? there is no space to slope the outside north face with earth. i know paint on plastic is hard , but if i get it in the cracks , lay it on thick and exspect to paint it again each year. i dont know what else to do.  carpet , i like . but only on the top . carpet can be realy heavy when wet and if its hanging down the side of the north wall. it may drag the top off .  off hand all i can think of is cement cob it up.  mix the cement with cly/mud and plaster the whole side up. hell may as well do the lot while im at it (outside that is).
i figure the bags will deform as they settle and paint will crack. if i repaint if often engough a think layer of paint will build up. as for sealing between the bags , any non water based paint would do .
ya know Hanns , i would like that . to roll the roof back when i liked . but for two reasons . first more comlexaty to the plan means there is more to go wrong and itll cost more. (with respect) and second , the space between the tarps i wanted sealed so air cant get in or out. the desiered effect of i hope will be . when the wind blows(more so in a storm) itll want to suck the tarp right off the greenhouse , any small motion if continues could damage the tarp. part of stopping it moveing i hope will be that if the will wants to lift the top tarp , it will also have to lift the bottem tarp . being as no air can rush in and fill the gap. maybe later i could set up some kind of power generator with it sucking and blowing air , but again pie in the sky ideas . for now i think solid roof is best.  couple of waist pipe sized vents going out north wall and an open door way will do. global warming aside . if it does get , i say if not when it gets realy hot weather . it does not tend to last long . also i alway for the most part plant in containers . so if i do get a coupel of weeks hot weather . i could alway move em outside.
as i type this . ive gone for a smoke and a ponder on the matter . the next thing i can think of after the paint is if i can some how get more pallets all the same size . so to know the bottem of a pallet has 3 planks . so i position the pallet with these planks horizontal. then i lay bags over the plank of wood tieing it to the wall . then when i get to the middle plank i do the same , so that all 3 planks are fixed in the wall. then i break some pallets and plank up the gaps in the top part of the pallet. but thats if i can get the pallets home.
the slopped roof thing was by design. i put a tarp up before and learnt it was the best way of getting it to all drain down to my water barrel. not realy thought much beyond that , got a couple of rough ideas.
ive been moving dirt for mounths now. if i were filling the bags with compost , i may stand a small chance of moving it . but not with the clay ill be filling it up with . i figure ill be filling my bucket with soil and taking it to the bag. as i told Dillon. i may try useing my sack barrow to move a full bag. but im worried about the wheels damaging the bags as it rolls up and over them. could break up the pallets i got and lay a plank path over the bags could help there.
good news , late birthday present . got given a brand new club hammer . so i dont have to pound bags with a brick.

all in all , give me some options , instead of the paint. remember there are plenty of other places where i cant earth over the bags. between the tarp layers for instence. (i got a vage idea for there).

also out of intrests , this is a pic of what i had before i desided to make a proper greenhouse . it looks like a gypsy site , worked just fine . but looked like  s..t  . hence me wanting something better.
old-garden.jpg
[Thumbnail for old-garden.jpg]
 
Hans Quistorff
gardener
Posts: 1670
Location: Longbranch, WA Mild wet winter dry climate change now hot summer
375
2
goat tiny house rabbit wofati chicken solar
  • Mark post as helpful
  • send pies
    Number of slices to send:
    Optional 'thank-you' note:
  • Quote
  • Report post to moderator
The outside of the east wall is protected by the brick wall [is it permissible to put the bags against the wall up to the window?] The north wall will as you said not get much degradation on the outside and the south side you mostly will have covered with the planting bed on the outside. So the main problem is the west wall. So I suggest making as much of it as possible with your wood and clear plastic. Make as much of it as practical so that it can be removed in the summer.  Can you get milk crates there? I have a lot of them here. they are very strong and can hold the weight of a dirt bag on top. They would make good ventilation in the top north east corner. Easily stuffed with a bag of leaves in the winter.
Working with unconventional materials, you will have to experiment and see what works. Your clay dirt should get very ard when dry and if kept dry be like concrete. At least that is what it is like under my 100 year old chicken barn.
 
BoBo Jones
Posts: 52
1
  • Mark post as helpful
  • send pies
    Number of slices to send:
    Optional 'thank-you' note:
  • Quote
  • Report post to moderator
hey Hans . the plan for the east bag wall is ..... place unbroken pallets up against the brickwork and then place earth bags up against pallets. if i put bags against wall. rain will hit the wall , drain down the wall to the bags and then not drain very well and possable soak into the brickwork . i figure and once done is v-hard to undo . placing pallets there will let the area drain and dry yet give a realy good area to place bags up against. as for the hight of the window . i figure same hight as the north wall till the window , then drop down to the bottem level of the window , then on to the end. but that does not let me sandwich the tarps in bages. so how it ends up will be the hight of the N-E corner then just step down a lvel every couple of bags . to give the effect that when it gets to the window . its level with the bottem of the window.picture this as a cross section of the west wall... so you got ground level , there will have to be 3 bags high to sandwich tarp between. then i make it two bags wide. then on the outside edge of the west wall . i make a raised no dig grow bed to the same level . then i mud over/grass over the earth bags.all bags covered from light and good insulation all round now that the ground level has been raise higher.
your realy set on this bigger vent arent ya fella lol . it'll be a while till i get there so plenty of time still to plan venterlation. i get what you mean with the milk/bottle crate.nice idea . like having one brick in a wall with a couple of holes in and even a bag filled with leaves works. i think we can do better then a hole on a wall filled with leaves. just to clarify . where i am summer lasts a month to a couple of weeks normaly. this last year has been the hotest on record and we had nearly two months . i remember a couple of years ago we didnt even have a summer. it wasnt realy , just not cold . that and if it does get realy hot in there . i could always move the plants outside in the summer(i do all my growing in containers). so venterlation is inportent to put in , it wont be needed much for most of the year and when it does i can just move the plants. i was going to build 3 holes in the north wall two are going to be for venterlation and the other will be for the mass heater. the later two in the N-E corner and the first in the N-W corner , all leading out the top of the north wall. im also reconsidering not putting venterlation between the tarps. sealed up most of the year . but those weeks that it can get realy hot . it would be nice to replace the air between them. rather then blocking it all up with leaves. i have plenty of solid polistiarean packing blocks i will cut to size of the holes , so they can be taken out when needed.

over the last week ive got myself one heavy and 3 light plus one light part broken pallets , they were outside the back of my corner shop some 700-800m away. took two trips with my sack barrow and i was still fealing the burn 2 days later from the effort . but i got them home unbroken. but in the effort of doing that , i noticed a skip . in said skip was 3 plastic tables and one thick plywood table. i asked permission and got those out and home today. not sure how im going to use them. may use them for covering the top of the north wall . not solid on where to use them . just know they will be usefull. if i can get a few more unbrocken pallets ill use them on the outside of the north wall , make it a bit more solid and cover it more from the light .
ill make another vid about it tommorrow and show you what i was thinking Hans. still going to use paint to seal the bags together. but a friend recormended accrilic paint. not sure if itll be cheap enough.
 
D Nikolls
pollinator
Posts: 1778
Location: Victoria BC
305
  • Mark post as helpful
  • send pies
    Number of slices to send:
    Optional 'thank-you' note:
  • Quote
  • Report post to moderator
Letting the brickwork breath is definitely a good idea!

What happens to the water that hits the brick wall above, and runs down? Will it pool between bricks and bags?

What happens when the pallets rot out?

Nice scrounging scores! I can't imagine trying to scrounge effectively without a vehicle that can handle it.. but then I've always been kilometers from useful junk.
 
BoBo Jones
Posts: 52
1
  • Likes 1
  • Mark post as helpful
  • send pies
    Number of slices to send:
    Optional 'thank-you' note:
  • Quote
  • Report post to moderator
hey Dillon . was just about to turn in for the night when i see your post come up .i thought so , letting the brickwork breath. itll just sink into the ground . we are not talking lots of rain . just enough for consern that if the owner reports damp coming through the wall. i dont get forced to take it all down. the pallets will rot . i guess they will break down and return to the earth. but by then the walls should be solid and unmoving. so long as the light does not break it down the plastic bags should last longer then me .
it tough on the scavaging front. but then there is an advantage. it show what can be done with the minimum of meterials. i would wager per squire of volume , my green house comes in cheaper and better then most of the so called cheap designs. what i mean is the more materials i scrounge up the less likly someone else can find the same . pallets are fine.but more exsotic finda may make people think its out of there reach.
i would say i will show you in a vid. but not with your 90's internet connection lol.
IMG_20190128_163141.jpg
[Thumbnail for IMG_20190128_163141.jpg]
IMG_20190128_163158.jpg
[Thumbnail for IMG_20190128_163158.jpg]
 
BoBo Jones
Posts: 52
1
  • Mark post as helpful
  • send pies
    Number of slices to send:
    Optional 'thank-you' note:
  • Quote
  • Report post to moderator
quick update about nothing . nothing as in not a lot has happened . i dont need to tell you guys that winter is biteing right now . so not realy had the chance to get out there without getting rained on or standing in snow .
from the pics above , i got some good stuff. there was some more pallets close by those ones . but when i asked , was told the deal was they have to send them back to there supplier.
so the state of play so far . i have everything i need to start laying bags. i got the pallets for between the east wall and the brick wall . but i dont have the pallets for the outside of the north wall. this worries me . i could go ahead with out them and put them in later . but it wouldnt be as strong as if i lay them both together. but im ready to go ahead. thing is im at a stage where i can pause without anything getting worse for the wait. i mean the moment i start laying bags open to the light , the clock is ticking. i know itll take a while for it to have an effect . but i would like that time to be more on the other end in a couple of years time when its falling apart. every month a bag is degrading is a month closer to me haveing to repair it. if that makes sence . that and the fact that i have no end game with covering up the bags . yes cover with earth where i can . but i dont want to be up on the north and east wall with my lawn mower. i know what and how i need to do it . but again i have no idea where the materials will come from.
after much thinking , what with the weather . i think its prudent to call a holt to this , while i go hunt down more stuff(pallets and carpets perhaps). i cant fit a whole pallet in my car . but i fugure i can saw a little half off and the better half should be good to build the wall with. keep meaning to test that paint . ill get round to it sometime.
such a blow not being able to get those pallets, that would of given me my north wall.
those plastic tables . they are 1.5m long . not long enough for the north wall , but good enough to use as a roof for the east wall as the east wall will drop lower after the window and can then earth over it. just an idea. they are to good to waist on the side of the north wall.
have a look at the frosty morning pic (ten pics up). as you see it , at its max reach the sun rises just at the left edge of the photo , travels very low to start. between the hedge and the garage wall and the earth bag wall(the gap between) ligh will only get down there when the sun is level with the wall faceing and then only for 30mins to hour best a day if sunny. as well as the hedge will want to grow into the gap.
SO QUESTION  , am i over worrying about covering the outside north wall. or push on reguardless and fix it later if it becomes more of a problem. i mean im ready to bags once the weather gets dry enough that im not picking up clods with the hoe.
 
D Nikolls
pollinator
Posts: 1778
Location: Victoria BC
305
  • Mark post as helpful
  • send pies
    Number of slices to send:
    Optional 'thank-you' note:
  • Quote
  • Report post to moderator
Given the weather, I think the wait and scrounge approach is bang on.

I often encounter situations where I think, wow, with a tiny bit more care in building/design this thing would have lasted 3x as long! I don't often encounter things overbuilt enough that it seems foolish... so no, I don't think you're worrying too much. People almost never do.

Have I mentioned my love for carrying unreasonable things atop vehicles by use of ratchet straps and old couch cushions? Beefy ratchet straps long enough to go right around the load and through the windows..
 
BoBo Jones
Posts: 52
1
  • Mark post as helpful
  • send pies
    Number of slices to send:
    Optional 'thank-you' note:
  • Quote
  • Report post to moderator
thank you Dillon . ether im right or we are both wrong lol . its like paint on wood . wood is fine without paint . but paint makes wood last longer. you get 3 planks to a plallet underside . if i cut on plank off , i can fit the other two planks solid in the back of my car. i realy would like to get the north side lenght covered with pallets . it will make it last longer as the bag plastic starts to fail at somepoint.
i hear you with putting things on top of cars like that . but have you seen the ytube vids of when that goes wrong . i it went wrong for me and the car got damaged , the wife will not let me forget about it.she still talks about the time i reversed into a pole . that was near ten years ago. good idea , not worth angering her that shall not be named . ha ha  
 
BoBo Jones
Posts: 52
1
  • Mark post as helpful
  • send pies
    Number of slices to send:
    Optional 'thank-you' note:
  • Quote
  • Report post to moderator
sorry chaps , if i havent posted in a while . fact is . i started on the bag wall . then i had a leg injury and have been layed up since. the moment i get back to it . ill post up pics and write about what why and how im doing .
 
BoBo Jones
Posts: 52
1
  • Mark post as helpful
  • send pies
    Number of slices to send:
    Optional 'thank-you' note:
  • Quote
  • Report post to moderator
hello everyone . its springtime and my legs weak but better , so ive been out digging .  i had already done a layer of bags. but now ive filled in mud on the inside of the bags to suppot them. i have the pallets in place and im just pileing up mud and getting it wet enough to go in bags for the next level . but before the bags go down i have to use washing line to lash the bags and pallets together at the bottem by feeding it back and round the bags and pallets . then i lay the next layer of bags . more stakes. then i fill all the cracks and gaps with a think mud slip walk all over it with flat souled shoes. then repeat without the lashing till i get close to the top.  wel thats the plan moving forward . i think i have a couple of pics to go with what im saying.
but its hard work , digging and then moving the mud . not to mention moving the full bags . ive taken to moveing the bags on a sack barrow(uk) . it seems to be working for me this way and seems most efficient .
IMG_20190414_115929.jpg
[Thumbnail for IMG_20190414_115929.jpg]
IMG_20190414_115745.jpg
[Thumbnail for IMG_20190414_115745.jpg]
IMG_20190414_115739.jpg
[Thumbnail for IMG_20190414_115739.jpg]
 
BoBo Jones
Posts: 52
1
  • Mark post as helpful
  • send pies
    Number of slices to send:
    Optional 'thank-you' note:
  • Quote
  • Report post to moderator
sorry for not posting for a while . but ive been ill for the last couple of months. but im back out there and digging away again. its been hard work for me . but ive made a vid exsplaineing what ive done so far and a little on how i plan it to look.

i remember dillion and his connection , so quick run down for you.
ive dug hole . put pallets out on rock , so not touching ground. stacked the pallets so not to move . then stacked ever half meter on the inside of the pallets then layed bags up against the stakes. heaped mud up agaist bags to the same level. have started second level bagging now. oh didnt mention each bag has a stake on the inside banged into the bag below. the only difference in the pics above is the ends have corners now and the hole is bigger and my wheel barrow has a flat tire.
so ill be bagging today and bagging tomorrow and then day after till i run out of mud and have to dig more out of the hole.
as for the you tube vid . no one need subscribe , im not linking it here for subs or nothing and as such ill just link any greenhouse vids to here any time i record greenhouse progress. i think it will be so much easyer to work out what im doing and give advice if you all can see what it looks like as it comes along.
well sll the best and look forward to hearing from you all again.
 
BoBo Jones
Posts: 52
1
  • Mark post as helpful
  • send pies
    Number of slices to send:
    Optional 'thank-you' note:
  • Quote
  • Report post to moderator
thank you hans. chears for that fella.
 
D Nikolls
pollinator
Posts: 1778
Location: Victoria BC
305
  • Mark post as helpful
  • send pies
    Number of slices to send:
    Optional 'thank-you' note:
  • Quote
  • Report post to moderator
Glad you're feeling better and back at er, thanks for the summary.

Sounds good to me if I've pictured it right!
 
BoBo Jones
Posts: 52
1
  • Mark post as helpful
  • send pies
    Number of slices to send:
    Optional 'thank-you' note:
  • Quote
  • Report post to moderator
ill get a couple of pics for you , to help the imagination of the words. so i dug a lot of mud out of the hole and put it to one side kinda . then im getting it wet . like making concrete , but more solid and not slushs . just enough so the mud can move and squish , but not sloppy so it sticks to the spade , in my case the hoe. helps a lot right now that we are getting rain. next month there may  not be so much water around. but i have a large barrel and a wheelie bin full of water for the drier times. fall back is getting water from the kitchin.
its all hard labour right now dillion . fill the hole by breaking the sides down , empty the hole , ether bag or mud up the inside of the wall and then repeat. ive left the lower side of the greenhouse wall so far . its only gonna be 3 bags min and 4 max haigh. its looking like the highest part may be 6 to 8 bags high. i did some humble maths and figured that if i were to double bag the wall with two layers of bags as i wanted , but i dont have enough bags . i think ill be buying more boxs of bags before i finish bagging. right now im just trying to keep everything simple and un complicated . when designing its easy to fall prey to over coming problems with complexity. so itll be bags , mud , bags ,mud , untill we end up at tarp. i got a new camera to film with so ive over looked the pictures some what .truth is dillion , it dont look much different to  my last picture , only there is a second layer of bags. not terribly exsiteing.
im still wresling witht he problem of covering the bags between the tarps and covering the bags on top. but itll be a while before i get there at my speed. i think there comes a time between planning and building where enough is in place and if i dont start ill just be stuck in the planning till i find an awnser for everything. so screw it . i deal with the problems as they come.
hope that helped dillion ,
 
BoBo Jones
Posts: 52
1
  • Mark post as helpful
  • send pies
    Number of slices to send:
    Optional 'thank-you' note:
  • Quote
  • Report post to moderator


and for dillion . i say for dillion , dillion is the reason . but i figure if there is a dillion out there , then there are proberbly a few dillions out there, just like him/you. so there is another reason.

so dillion . at great effort to myself . i lifted the mud out of the hole . my wheel barrow inner tube is dead beyond reasonable repare . so i cant wheel it into place . so i had to lift it into place. hell of a workout for my upper sholders . so tiered by the end of it . so anyway . i packed the mud up against the second layer of bags. then i made up a lot of mud slip and poured it all all over it , but mostly down the slope. i hope it helps fix the mud in place as it gets higher.  thats about it . does not sound like a lot . but a hell of a lot of digging made to look short. i plan to do some more bagging today to tidy up the ends and then on with the 3rd layer.  if i remember ill take a couple of pick and add them later .

hanns , my man . i think i have copied what you did with the vid . if i havent , drop me a word how you did it please .
IMG_20190517_154919.jpg
[Thumbnail for IMG_20190517_154919.jpg]
IMG_20190518_141800.jpg
[Thumbnail for IMG_20190518_141800.jpg]
IMG_20190518_141815.jpg
[Thumbnail for IMG_20190518_141815.jpg]
IMG_20190518_141824.jpg
[Thumbnail for IMG_20190518_141824.jpg]
 
BoBo Jones
Posts: 52
1
  • Mark post as helpful
  • send pies
    Number of slices to send:
    Optional 'thank-you' note:
  • Quote
  • Report post to moderator


ive got a roof for my earth bag wall . builder up the street was throwing away some corrigated roof sheeting. its like a man made slate molded into corrigated sheets. its old and beaten up . brittle as hell . but i have plenty enough for what i need and then some. so that problem is off my problem list . so its about time to sort out what the next problem is to solve and a few beyond there. some ideas that im still desiding and some engineering behind some of my thoughts. realy this vid is my team is reavaluating priorities and discussing ideas . when im a team of one lol . well look its a bit long . but it took that long to talk about all the different ways i can think of to sort out in what manner and shape im going to build.

ill pop up some photos for dillion. sorry matey . if i were to type everything i talked about , i would be here all night typeing. nut shell , stripped down and the v short version. i talk about what manner the beems will be to suport the tarps. why and how . should i join the tarps to the beems. what manner should i make the tarps and the bags join in order to capture the rain and have it run off where i want it to. still here are some picture so far and all are welcome to ask questions and give ideas.
IMG_20190529_130603.jpg
[Thumbnail for IMG_20190529_130603.jpg]
IMG_20190529_130237.jpg
[Thumbnail for IMG_20190529_130237.jpg]
IMG_20190529_130229.jpg
[Thumbnail for IMG_20190529_130229.jpg]
IMG_20190529_130220.jpg
[Thumbnail for IMG_20190529_130220.jpg]
IMG_20190529_130207.jpg
[Thumbnail for IMG_20190529_130207.jpg]
IMG_20190414_115920.jpg
[Thumbnail for IMG_20190414_115920.jpg]
 
Hans Quistorff
gardener
Posts: 1670
Location: Longbranch, WA Mild wet winter dry climate change now hot summer
375
2
goat tiny house rabbit wofati chicken solar
  • Mark post as helpful
  • send pies
    Number of slices to send:
    Optional 'thank-you' note:
  • Quote
  • Report post to moderator
Translucent roofing like you got is what I have on the roof of my greenhouse and I was able to save some roof gutters to collect the rainwater from the drip edge. The gutter empties into a tank with a faucet on the bottom to water with a hose. The roofing and beams have been taken apart and moved to new property three time.
 
I'm thinking about a new battle cry. Maybe "Not in the face! Not in the face!" Any thoughts tiny ad?
Explore the possibilities: Permies.com where you can work from home, on the road and on the farm
https://permies.com/wiki/209054/Explore-possibilities-Permies-work-home
reply
    Bookmark Topic Watch Topic
  • New Topic