• Post Reply Bookmark Topic Watch Topic
  • New Topic
permaculture forums growies critters building homesteading energy monies kitchen purity ungarbage community wilderness fiber arts art permaculture artisans regional education skip experiences global resources cider press projects digital market permies.com pie forums private forums all forums
this forum made possible by our volunteer staff, including ...
master stewards:
  • Carla Burke
  • Nancy Reading
  • John F Dean
  • r ranson
  • Jay Angler
  • paul wheaton
stewards:
  • Pearl Sutton
  • Leigh Tate
  • Devaka Cooray
master gardeners:
  • Christopher Weeks
  • Timothy Norton
gardeners:
  • thomas rubino
  • Matt McSpadden
  • Jeremy VanGelder

Restoring an old chicken coop

 
pollinator
Posts: 117
Location: 6.b.
31
forest garden chicken cooking
  • Likes 3
  • Mark post as helpful
  • send pies
    Number of slices to send:
    Optional 'thank-you' note:
  • Quote
  • Report post to moderator
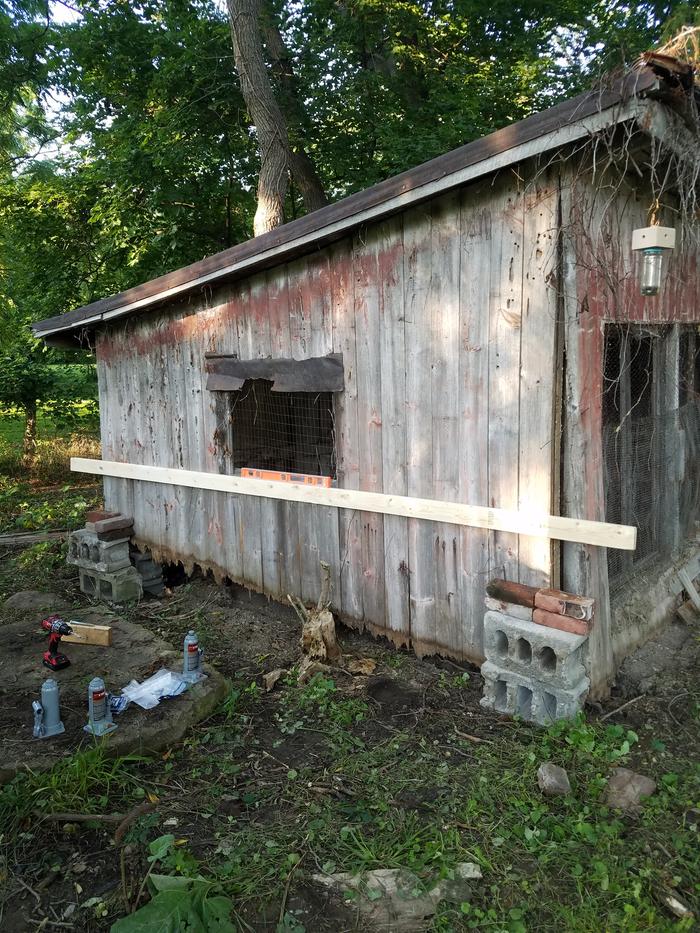
Not sure when this was built, but when I started this project it was rotting into the ground at an angle. Looking at the boards, everything may have been cut on site, and the construction was, while odd, very robust. Even if restoring the building didn't pan out, I would gladly have saved everything possible to build stuff out of later. I plan to catalogue what's been done in a few posts to keep things organized.

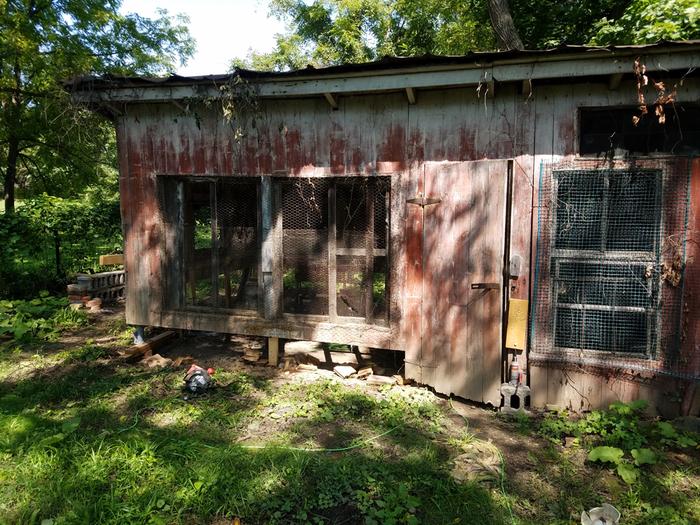
The attached picture shows the chicken run on the left, and the coop on the right. The coop has a rabbit hutch (rotten) attached to the back, and the adorable chimney on top is semi-fake. I suspect a propane heater was used at some point, and vented out the chimney, but there is not fireplace to go with it. The base is actually made of cinder blocks!

From this point in the photo journal, the goal was to lift the coop out of the ground, return it to some semblance of being level, then build up the base and fix whatever needs fixing so that we can eventually have chickens in there. I originally planned to install a floor on the left side as well (originally thought it used to have a floor but it rotted away), but not doing so save a ton of wood, time, and opens the option for a covered run area when needed. There's a hole in the roof, wall, and floor near the chimney due to water damage, the base of each wall has varying amounts of rot, but lots of the frame is still very sturdy due to the aforementioned robust construction.

I look forward to adding more entries, lots of photos have been taken I just need to get everything in order.

PS - does this qualify as an odd-job bade thingy? Not sure how the badge system works.

20200509_170329.jpg
Coop, May 2020, pre-work
 
Brian Holmes
pollinator
Posts: 117
Location: 6.b.
31
forest garden chicken cooking
  • Likes 4
  • Mark post as helpful
  • send pies
    Number of slices to send:
    Optional 'thank-you' note:
  • Quote
  • Report post to moderator
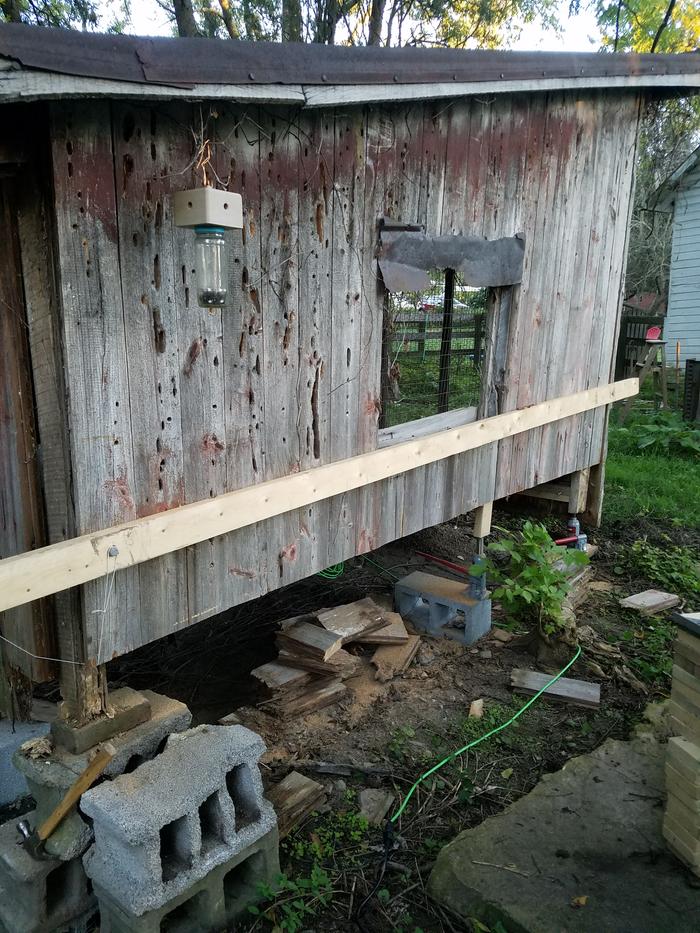
Not really knowing what to do first, I started by cleaning out the interior. The left side (run) was covered in vines, cast aside lumber, and odds and ends from over the years. I think I found part of a knife, a bunch of glass bottles, and an old spring-style wall thermometer among the debris. The whole thing was at an angle and research pointed to a couple of methods for lifting it off the ground. I settled on bottle jacks and lag screws (secure scrap lumber to the side of the coop with lag screws, then lift from the scrap with a 4 ton bottle jack). If you follow along the photos, you can see the coop slowly rise from the earth. Looking back, it was all pretty simple, but not having ever lifted a building before it was pretty nerve wracking; every creak and pop felt like I was breaking more than I was fixing, but it was just the creaking of a long-settled beast that was resigned to its fate.

The initial procedure was to lift the lowest corner (lowest by comparison to the slope of the structure) first, once it is level with the next lowest point, lift from both points at the same time, and keep adding points until it's either reasonable or problems come up. So far so good.

Doesn't end there, more on this next time :)
20200806_173044.jpg
Coop, right side (run side), before cleaning
Coop, left side (run side), before cleaning
20200806_181514.jpg
Coop, right side, after some cleaning (needs more)
Coop, left side, after some cleaning (needs more)
20200808_123346.jpg
Coop, right end, earth bound
Coop, left end, earth bound
20200808_134057.jpg
Coop, right end, first lift (use jack, add bricks, repeat)
Coop, left end, first lift (use jack, add bricks, repeat)
20200808_134115.jpg
Coop, right end, more lifting (now up to 2 cinder blocks and some bricks!)
Coop, left end, more lifting (now up to 2 cinder blocks and some bricks!)
20200808_134127.jpg
Close up, check out the rot!
20200808_134132.jpg
As punky as this part looks, the wood one foot up was solid.
20200808_190308.jpg
Right end, 2 lifting points. That crack in the wood on the right side might look bad, but it was just a pivoting board. It stuck back on just fine later.
left end, 2 lifting points. That crack in the wood on the right side might look bad, but it was just a pivoting board. It stuck back on just fine later.
 
pollinator
Posts: 554
Location: Northwest Missouri
214
forest garden fungi gear trees plumbing chicken cooking ungarbage
  • Likes 1
  • Mark post as helpful
  • send pies
    Number of slices to send:
    Optional 'thank-you' note:
  • Quote
  • Report post to moderator
Wow, I have a building just like that circa 1950. It also shows signs of being a former chicken coop. Ugly and covered with shingles. Wooden floor looks exactly the same except mine has a weird mounded rise in the middle. You may be in better shape since the posts in mine are literally small cut trees, bark and all (including lots of bug bore holes.) Looking forward to seeing what you do with yours!
 
Brian Holmes
pollinator
Posts: 117
Location: 6.b.
31
forest garden chicken cooking
  • Mark post as helpful
  • send pies
    Number of slices to send:
    Optional 'thank-you' note:
  • Quote
  • Report post to moderator
Thanks Matt! I need to get my pictures in order and write up more, we just hit a milestone and had the chickens moved in last night. The right side is now habitable and as predator-proof as we can make it, it's really nice having the chickens out of the house.
 
Brian Holmes
pollinator
Posts: 117
Location: 6.b.
31
forest garden chicken cooking
  • Likes 2
  • Mark post as helpful
  • send pies
    Number of slices to send:
    Optional 'thank-you' note:
  • Quote
  • Report post to moderator
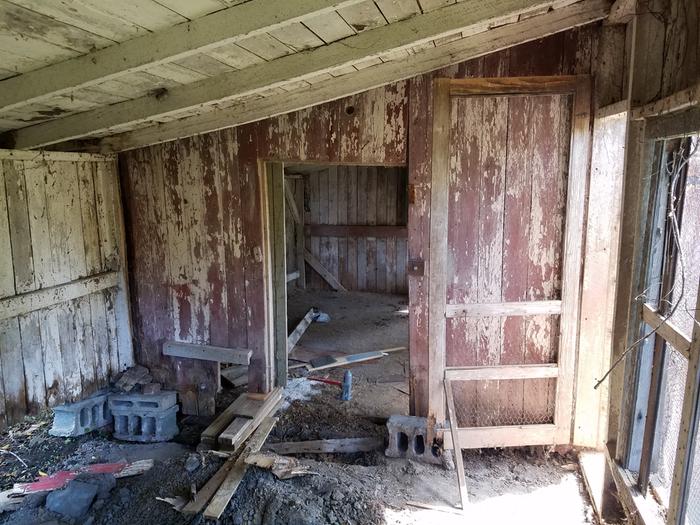
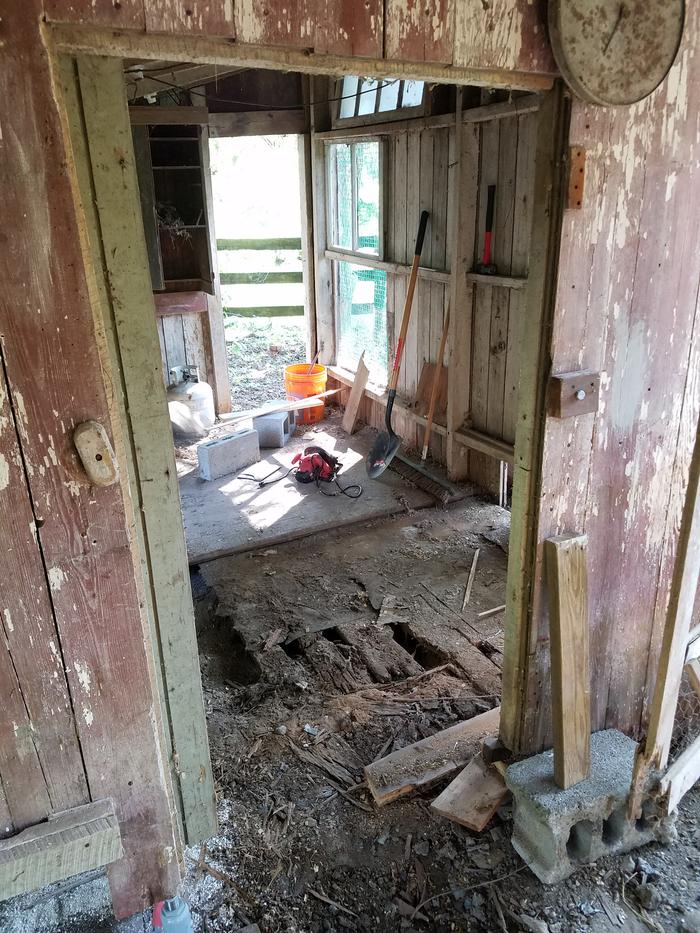
After lifting the left side of the coop sufficiently, it was time to start on the middle. In the first picture you can see a doorway into the coop-side, the door was removed for ease (goodness was it heavy), and a piece of scrap was lag-screwed through the current visual side to a beam on the other side that translated all the way to the roof. On the left side, another lift point was made outside that wall (see the cinder blocks? The inner ones are under the building, and the outer ones are supporting the ever-rising bottle jack). I assume the wall is part of the original structure (just the coop), and the run was added later as the roof is not continuous. Because of this I had to use side by side bottle jacks to lift each building separately, and I quickly ran out of patience for moving the four jacks I had, so I ordered three more.

One thing I didn't originally notice about the coop was that the walls are tied into the floor, suggesting the floor was built first and then the walls on top of it (instead of tying in the vertical supports to say the sub floor or foundation). Because of this, whenever I tried to lift the furthest right portions, the floor attempted to lift as well, and it became a battle between the walls bending outward, the floor bending upward, and everything trying to just break. I ditched that and decided to leave the right third or so of the coop be and just do what I could. This worked in the end, but created its own problems. Pictures on that later.

At this point I had everything lifted to where I was pretty happy with the balance so I installed some temporary posts and removed the bottle jacks so I could start cutting away the rot. The cut was made from the highest point where rot was seen, and then levelly across the entire side. I was reminded during my cut that all of the boards were tongue-and-groove, and was surprised when I got three boards into the cut and none of the pieces were falling. Turns out they had a great friction fit. I've kept every piece of wood that has a non-rotten portion to it and I think I'll either make some Christmas ornaments out of them, or maybe a small side table for the bedroom. Would be nice to reuse as much as possible, especially since the wood is much higher quality than my 2x4's.

Added some views of the outside at this point as well. Lots still to do, but it felt like a big step to me, and the new breeze was welcome. Cuts for the other sides went similarly.

20200830_114959.jpg
View from run into coop side. Lifting points outside wall on left, right side of inner door, and outside right door.
20200830_185648.jpg
Run side, wall lifted to full height, first supports in place
20200904_171811.jpg
First cut into wall
First cut into wall
20200905_190107.jpg
full cut, nice and breezy :)
20200905_191430.jpg
Outside view of first cut. You can see the string on the left set up for measuring the cut along the back.
20200905_191435.jpg
To-be-cut back wall, string in place for marking the cutting path.
20200906_122508.jpg
View from the front after cutting away more rot. Measured across with string, then worked slow with the circular saw.
 
Matt Todd
pollinator
Posts: 554
Location: Northwest Missouri
214
forest garden fungi gear trees plumbing chicken cooking ungarbage
  • Mark post as helpful
  • send pies
    Number of slices to send:
    Optional 'thank-you' note:
  • Quote
  • Report post to moderator
Man I continue to relate to you. I had a lean-to building (different from the previous mentioned) that had tongue and groove boards rotting into the dirt all around. Jacked it up, sawed them off, and replaced all around the base with treated 12x2's. Expensive but should last a damn long time and up my predator/rodent proofing.
 
Brian Holmes
pollinator
Posts: 117
Location: 6.b.
31
forest garden chicken cooking
  • Mark post as helpful
  • send pies
    Number of slices to send:
    Optional 'thank-you' note:
  • Quote
  • Report post to moderator

Matt Todd wrote:Man I continue to relate to you. I had a lean-to building (different from the previous mentioned) that had tongue and groove boards rotting into the dirt all around. Jacked it up, sawed them off, and replaced all around the base with treated 12x2's. Expensive but should last a damn long time and up my predator/rodent proofing.


How did you interface the old structure with the ground? Did you level it, then place wood down, and tie it into the old structure, or was there some kind of intermediary step? I'm looking to predator-proof the run side and am not sure how best to tie in the old structure to the ground while keeping longevity in mind. I don't want to dig an 18 inch trench and fill with concrete then tie down into that, lot of work and expensive (I'd imagine). Definitely looking for options.
 
Matt Todd
pollinator
Posts: 554
Location: Northwest Missouri
214
forest garden fungi gear trees plumbing chicken cooking ungarbage
  • Likes 1
  • Mark post as helpful
  • send pies
    Number of slices to send:
    Optional 'thank-you' note:
  • Quote
  • Report post to moderator
Well, this other structure I'm talking about still had a decent wood floor of joist and decking construction. So my treated "skirting" that replaced the rotten wall ends was screwed into the floor and the posts. Granted, the post bases were rotten at soil level so I lifted it an inch or two to cut off the rot and set it back down on blocks to level it. Which is a long way of saying I had a decent floor on grade to begin with.

You have a more tricky situation for sure since I gather you want to keep the dirt floor. And without the concrete you mentioned, something could dig in. Maybe a decent compromise would be the solid concrete blocks that are half the height of those cinder blocks. Line those up level around the perimeter to receive your posts and use 2 inch lumber to cover what you cut off. Maybe some dig guard outside it all for good measure.
 
Brian Holmes
pollinator
Posts: 117
Location: 6.b.
31
forest garden chicken cooking
  • Likes 5
  • Mark post as helpful
  • send pies
    Number of slices to send:
    Optional 'thank-you' note:
  • Quote
  • Report post to moderator
At this point in the project I was (and still am, at present) unsure of how to securely tie back down the new openings to the ground and create a predator-proof barrier. I've been tossing around some ideas for digging a "moat" (maybe 18 inches deep) and filling it with concrete, but that seems expensive and very labor intensive. I could also bury some fence (labor intensive, but cheaper), but I'm still trying to figure things out in that arena (suggestions are very welcome!). Once the structure was sufficiently shored up, I moved on to the actual live-in side of the structure and immediately ran into a circular problem.

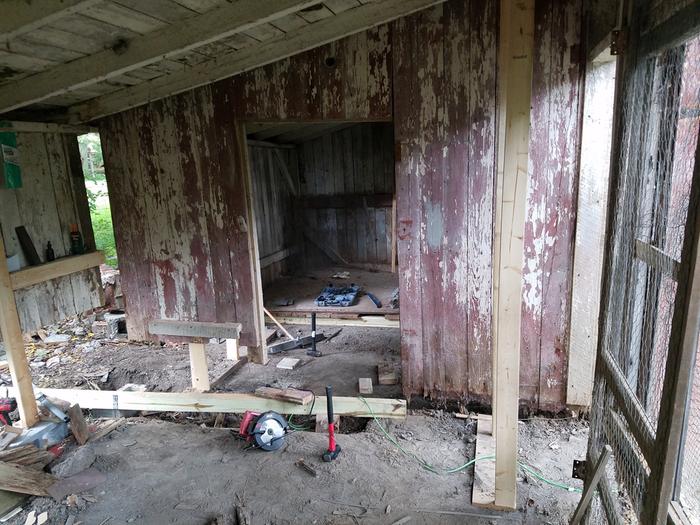
The problem looked like this: there's a rotten rafter, which needs to be sister-boarded and supported back to...a rotten cross beam which needs to be replaced and tied into a... currently free-floating (jacked up) center wall/corner post, which needs to be supported by... a non-existent base-board/foundation, which ties into.... the currently rotten floor which is attached to the vertical supports (back up to the cross beam). I sat there for a while, and tried to think through the options. Many days (a few hours of daylight after work) were spent fiddling with small parts trying to figure out what point could be propped up to start the overall process, but I couldn't figure it out. I removed part of the floor (everything until I hit a tied-in support beam that needed the floor to stay standing), and found a bit of luck in that THAT board and onward (what was left behind) was in good condition. I removed the floor, sub-floor, and the rotten vertical boards off the back wall, then re-assessed the situation. The final decision was that the roof had to be supported, and the wall had to stay floating so that I could rebuild the foundation and work my way up. Seems like a no-brainer looking back. My Dad came over for a day and we dug out some trouble sections and built temporary supports on either side of the wall (3 locations in total). We also jammed a new pressure-treated 4x4x10 under the old floor to give it something new to sit on. Looking back, I wish I'd wrapped that in tar paper as an extra barrier, but oh well. Live and learn.

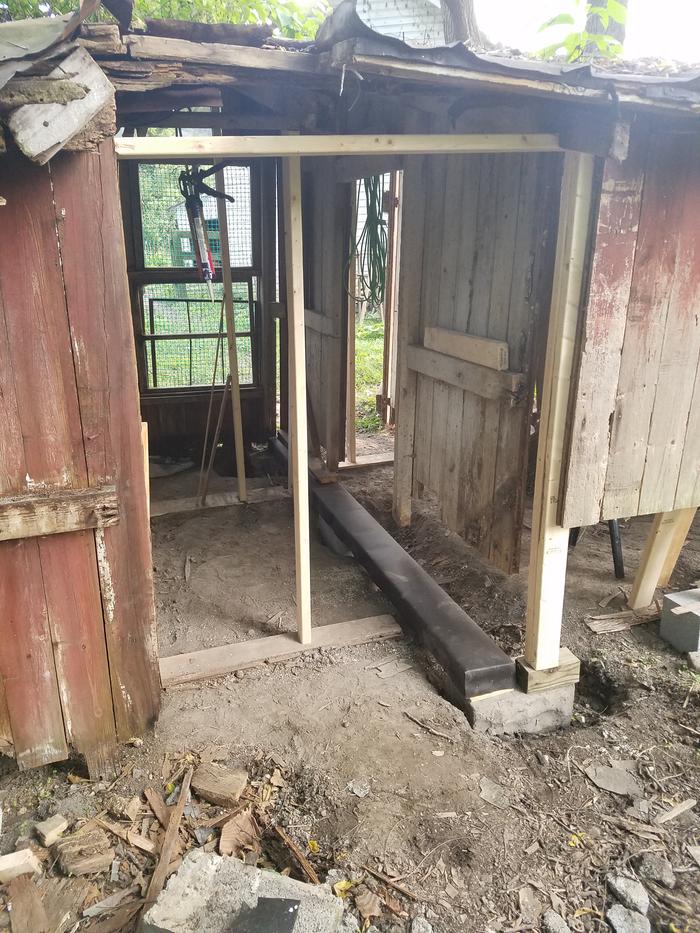
After adding the supports, the center wall was now free-floating to the point you could swing it easily. I dug out the ground under it, placed cinder-blocks with gravel under them at each end and the mid-point, and then painstakingly leveled them so I could place a pair of 4x4's wrapped in tar paper there as the new edge of the sub-floor. The beams turned out like black Christmas gifts, and I'm very pleased with them :). A new vertical post was also placed at the corner on the other side of the sub-floor beams, and a new board replacing the one the rafters sit on (I'm sure there are appropriate names for these parts, but hopefully it gets the point across).

The placement of the tar-papered beams was a major milestone for me, as the rest of the issues became approachable. I look forward to documenting more soon.
20200830_114959.jpg
Original floor in-tact, but partially-rotten due to water intrusion
20200907_113309.jpg
Rotten out sub-floor. Anything worth keeping was kept, the is sitting on a burn pile.
20200907_130229.jpg
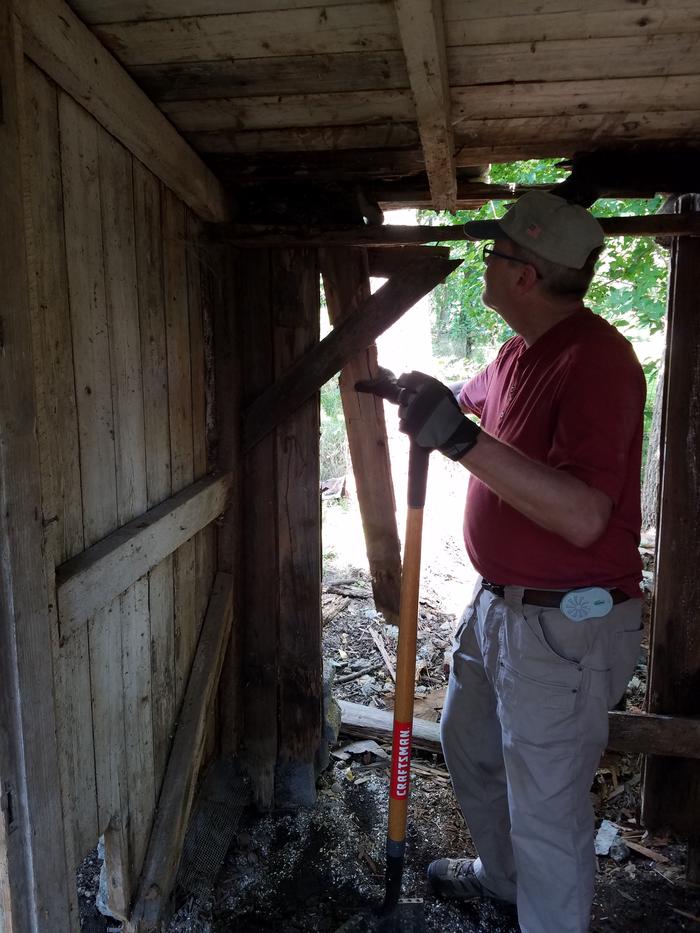
Dad helping out. That little anti-mosquito thing on his hip did a nice job in the confined space of the coop. No bites, no spray, good day.
20200907_181930.jpg
Temporary supports by the back wall
20200912_164745.jpg
temporary supports by front door. Can also see the new sub-floor beam jammed under the old floor. A lucky perfect fit
20200915_181239.jpg
Cinder blocks placed, pair of 4"x4"x10' beams wrapped in tar paper and placed as new sub-floor perimeter
 
Rocket Scientist
Posts: 4530
Location: Upstate NY, zone 5
576
5
  • Likes 3
  • Mark post as helpful
  • send pies
    Number of slices to send:
    Optional 'thank-you' note:
  • Quote
  • Report post to moderator
Nice work!
You might enjoy the Historical Timber Framing, Traditional Building and Architecture group on Facebook - members often have to repair centuries-old structures while keeping as much as possible of the original. There are lots of ideas for attaching new wood to old in structurally sound ways.
 
Brian Holmes
pollinator
Posts: 117
Location: 6.b.
31
forest garden chicken cooking
  • Mark post as helpful
  • send pies
    Number of slices to send:
    Optional 'thank-you' note:
  • Quote
  • Report post to moderator

Glenn Herbert wrote:Nice work!
You might enjoy the Historical Timber Framing, Traditional Building and Architecture group on Facebook - members often have to repair centuries-old structures while keeping as much as possible of the original. There are lots of ideas for attaching new wood to old in structurally sound ways.


Thanks, Glenn! I'll pay them a visit. I fear my amalgamation of new cheap lumber with the awesome old wood will turn their stomachs and have them shaking their heads, but at present I just want it to be functional. I definitely will seek their input for the other structures on the property!
 
Brian Holmes
pollinator
Posts: 117
Location: 6.b.
31
forest garden chicken cooking
  • Likes 4
  • Mark post as helpful
  • send pies
    Number of slices to send:
    Optional 'thank-you' note:
  • Quote
  • Report post to moderator
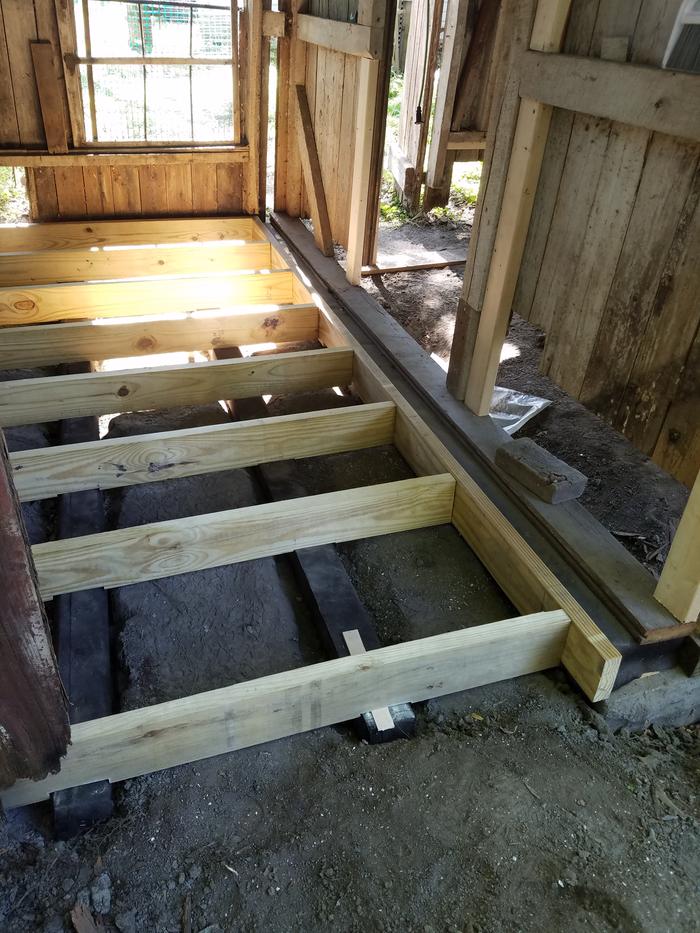
Looking back, I wish I'd taken a few more pictures around this point. Between the last photo and this first one you can see an original floor board was added over the tar paper wrapped foundation piece, vertical supports were added onto that and they feed directly to the rafter. With this change the middle wall now became structural once again, and the supports on the left side (in the view) were removed. From there, a pair of ditches were dug parallel to the middle wall, lined with gravel, and leveled with respect to a line from the original floor to the newly placed board along the middle wall. This was certainly not level in terms of a bubble, but it all worked out. I pulled a string from surface to surface wrapped around a pair of bricks and then measured from the string to the bottom of the ditch. This was then compared to the expected total stack height of the sub floor and floor and adjusted. It took me a long time, but once they were done I was mighty proud.

The foundation pressure treated 4x4's were wrapped in tar paper and placed in the ditches. The sides to the frames were cut and screwed in to the sides, then cross beams were cut to fit. Some required notches to fit levelly between the two sides (my leveling wasn't perfect), and then everything fit together nice and snug. From here I'll add 3/4" plywood for the floor and start building the back wall up.

More to follow, so far so good.
20200920_132227.jpg
Wall supported, foundation boards in place, sub floor in place
20200920_132215.jpg
Better view of foundation (gravel lined ditches with tar-paper-wrapped pressure treated 4x4's)
20200920_132244.jpg
Same thing, different angle
 
Brian Holmes
pollinator
Posts: 117
Location: 6.b.
31
forest garden chicken cooking
  • Likes 4
  • Mark post as helpful
  • send pies
    Number of slices to send:
    Optional 'thank-you' note:
  • Quote
  • Report post to moderator
In the first image the floor is staring to go in place. Each piece of plywood has a layer of tar paper attached to the bottom, and then is fitted in place. Because of the non-square angling, each piece was a bit fiddly. I learned a lot about cutting plywood really fast, and between the first cut (horrible edges) to the last one (square, clean, and happy) I picked up a lot of lessons. For me those were: the circular saw blade should be 1/8" deeper than the thickness of the plywood, cut the plywood while it's backed up (on top of) another board (used a 2x6 as a cutting board for everything after that), and go slow. More teeth on the saw blade would have helped as well, but use what you've got.

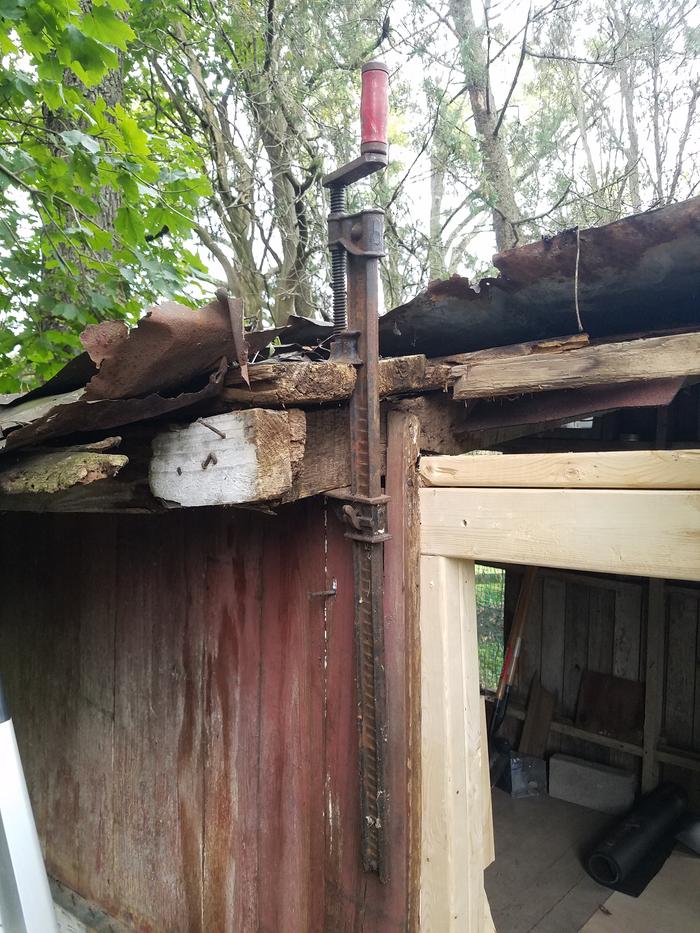
After the floor went in, the rotten part of the roof was addressed as well as the rotten rafter. Some of the roof beams were screwed back down (they were lifting away), the rafter was sistered with a pair of 2x4's, and the hole was patched with first tar paper and then a sheet of galvanized steel (what Lowe's had, slim pickings). After clearing off part of the roof, it was looking pretty decent.

The rafters went in easily, just cut, drill, and add a ton of the longest bolts/screws I have. I hung from it and it didn't budge; next hurdle will be snow. If you follow through the photos you can also see the completed floor. It rained hard the day after the roof was patched, and a bit of plastic and tar paper caught the back splash from the dirt.

Next up is to close in the back wall, add a support to the right of the hole (where the last jack was) to tie back into the floor, mount the door and close the rest of the holes.
20200925_170951.jpg
First board backed with tar paper for moisture protection
20200926_172239.jpg
Rotten roof section was lifting away from the rafters, so I clamped them together and drove some drills through.
20200926_174145.jpg
hole in roof, tar paper going in next
20200926_180722.jpg
Patched but dirty
Patched but dirty
20200926_185231.jpg
Patched and clean(ish)!
20200927_185656.jpg
New rafters and mounting points for the plywood (those random screwed-in bits)
20200926_185317.jpg
Floor's in, and did just fine against the rain. Thanks goodness :)
 
gardener
Posts: 814
Location: Durham, NC
338
hugelkultur gear urban cooking building writing woodworking
  • Likes 1
  • Mark post as helpful
  • send pies
    Number of slices to send:
    Optional 'thank-you' note:
  • Quote
  • Report post to moderator
What a great project!  Nice work.
 
Is that almond roca? Did you find it in the cat box? What is on this tiny ad?
Christian Community Building Regenerative Village Seeking Members
https://permies.com/t/268531/Christian-Community-Building-Regenerative-Village
reply
    Bookmark Topic Watch Topic
  • New Topic