• Post Reply Bookmark Topic Watch Topic
  • New Topic
permaculture forums growies critters building homesteading energy monies kitchen purity ungarbage community wilderness fiber arts art permaculture artisans regional education skip experiences global resources cider press projects digital market permies.com pie forums private forums all forums
this forum made possible by our volunteer staff, including ...
master stewards:
  • Carla Burke
  • John F Dean
  • Timothy Norton
  • Nancy Reading
  • r ranson
  • Jay Angler
  • Pearl Sutton
stewards:
  • paul wheaton
  • Tereza Okava
  • Andrés Bernal
master gardeners:
  • Christopher Weeks
gardeners:
  • Jeremy VanGelder
  • M Ljin
  • Matt McSpadden

Hardibacker question

 
Posts: 88
5
  • Likes 6
  • Mark post as helpful
  • send pies
    Number of slices to send:
    Optional 'thank-you' note:
  • Quote
  • Report post to moderator
I want to mock up a j core to test a sugarcane juice evaporator contraption I’m planning to build. I want to use Hardibacker to create the shell of the core. The entire j shell from end to end would be lined with 1 1/4”fire brick. I need this to be moveable and somewhat adjustable/reworkable to get the bugs worked out for the final build.

I understand the hardi will not hold up long term but would it suffice for a few prolonged burns to test evaporation rates?
 
master rocket scientist
Posts: 6734
Location: latitude 47 N.W. montana zone 6A
3605
cat pig rocket stoves
  • Likes 8
  • Mark post as helpful
  • send pies
    Number of slices to send:
    Optional 'thank-you' note:
  • Quote
  • Report post to moderator
Hi Greg;
Yes,  Hardi board protected by firebrick splits will hold up fine for testing purposes, just not long-term.
Be sure to stick with the published dimensions for your J-Tube OR consider using an L-Tube.
Do not extend the burn tunnel on a J-tube  
 
Rocket Scientist
Posts: 4645
Location: Upstate NY, zone 5
635
5
  • Likes 9
  • Mark post as helpful
  • send pies
    Number of slices to send:
    Optional 'thank-you' note:
  • Quote
  • Report post to moderator
I agree with Thomas. I would suggest an L-tube for evaporator use, which requires long intense fire. A 30-32" long burn tunnel with similar heat riser gives space for a lot of wood to keep the fire consistent. I would not use anything smaller than 8" x 8"; an 8" wide by 9" high burn tunnel is extremely easy to build with standard firebricks.

I have found that using mostly larger logs allows them to keep their shape until they are mostly burned up, so that air can get to all sides. Small wood quickly collapses into a mound of coals and chokes off air to the bottom, building up a heap of charcoal. I can run a 10 hour evaporator session and with attention to loading, never have to rake out ash/coals, and have just a couple inches of powdery mineral ash in the bottom after finishing.
 
Greg B Smith
Posts: 88
5
  • Likes 7
  • Mark post as helpful
  • send pies
    Number of slices to send:
    Optional 'thank-you' note:
  • Quote
  • Report post to moderator

thomas rubino wrote:Hi Greg;
Yes,  Hardi board protected by firebrick splits will hold up fine for testing purposes, just not long-term.
Be sure to stick with the published dimensions for your J-Tube OR consider using an L-Tube.
Do not extend the burn tunnel on a J-tube  


Thank you!  

Is there a significant difference in J and L when it comes to heat produced? I understand the J is probably easier to feed. Where can I find the published dimensions?

I have ordered Ernie and Erica’s book But I haven’t received it. I purchased and watched the full series on rocket mass heaters and rocket stoves here. I’m sorry for all the questions that have been asked a thousand times. I have tried searching this site but I’m not familiar with the terminology enough to get reliable answers.

 
thomas rubino
master rocket scientist
Posts: 6734
Location: latitude 47 N.W. montana zone 6A
3605
cat pig rocket stoves
  • Likes 8
  • Mark post as helpful
  • send pies
    Number of slices to send:
    Optional 'thank-you' note:
  • Quote
  • Report post to moderator
Hey Greg;
They both produce the same temperatures.
J-Tubes are self-feeding but a  J-Tube only lasts around 45 minutes and the temps will start dropping quickly.
L-Tubes use long wood and require you to push it farther in as it burns. But it's pretty easy to do.
Running an evaporator requires constant high heat.
Either will work but I would build an L-Tube.
 
Greg B Smith
Posts: 88
5
  • Likes 9
  • Mark post as helpful
  • send pies
    Number of slices to send:
    Optional 'thank-you' note:
  • Quote
  • Report post to moderator

Glenn Herbert wrote:I agree with Thomas. I would suggest an L-tube for evaporator use, which requires long intense fire. A 30-32" long burn tunnel with similar heat riser gives space for a lot of wood to keep the fire consistent. I would not use anything smaller than 8" x 8"; an 8" wide by 9" high burn tunnel is extremely easy to build with standard firebricks.

I have found that using mostly larger logs allows them to keep their shape until they are mostly burned up, so that air can get to all sides. Small wood quickly collapses into a mound of coals and chokes off air to the bottom, building up a heap of charcoal. I can run a 10 hour evaporator session and with attention to loading, never have to rake out ash/coals, and have just a couple inches of powdery mineral ash in the bottom after finishing.


Wow! Yall are amazing!
Sounds like you have lots of experience with rocket evaps. On some of the videos it was mentioned that consulting is available. These videos are a few years old so that may no longer be the case. If it is, how do I go about that. I’m guessing a consult would drastically reduce my learning curve.
 
thomas rubino
master rocket scientist
Posts: 6734
Location: latitude 47 N.W. montana zone 6A
3605
cat pig rocket stoves
  • Likes 8
  • Mark post as helpful
  • send pies
    Number of slices to send:
    Optional 'thank-you' note:
  • Quote
  • Report post to moderator
Ha Ha, Well Greg you are talking to northern boys.
We know all about maple sap... and in my case virtually nothing about sugar cane.
Glenn is by far the more knowledgeable about this subject,  Montana has no natural Maple trees or any sugar cane at all.

As far as consulting goes you could continue to ask and receive answers right here at Permies.
I am always open to a scheduled phone call but my evaporator knowledge is limited. (No charge) you can contact me at dragontech@blackfoot.net


Greg B Smith
Posts: 88
5
  • Likes 4
  • Mark post as helpful
  • send pies
    Number of slices to send:
    Optional 'thank-you' note:
  • Quote
  • Report post to moderator

thomas rubino wrote:Ha Ha, Well Greg you are talking to northern boys.
We know all about maple sap... and in my case virtually nothing about sugar cane.
Glenn is by far the more knowledgeable about this subject,  Montana has no natural Maple trees or any sugar cane at all.

As far as consulting goes you could continue to ask and receive answers right here at Permies.
I am always open to a scheduled phone call but my evaporator knowledge is limited. (No charge) you can contact me at dragontech@blackfoot.net

Thank you. That is very kind and I may take you up on the offer.


Greg B Smith
Posts: 88
5
  • Likes 3
  • Mark post as helpful
  • send pies
    Number of slices to send:
    Optional 'thank-you' note:
  • Quote
  • Report post to moderator
Because sugarcane syrup needs to be skimmed for long periods of time, standing close to the stove will be hot work unless it’s cold outside. Here in the south that doesn’t happen often.

To concentrate the heat on the pan and shield the workers from heat, here is what I’m thinking:
L in a barrel extending to a couple of inches (actual height to be determined) from the top to concentrate the heat on the pan bottom. Diverting plate to spread heat across the bottom of the pan (this is hard to explain but would not affect the direct flow from the riser). Vent stack inserted below pan and heat diffuser to exhaust and possibly shielded to insulate radiant heat from workers. Vent stack can be as long as needed for better draw.

The questions I need to figure out is how much insulation for shielding workers can I add before the internal heat equalizes and draft and draw of air decreases or worst case stops.

Im thinking layers of mineral wool against the barrel and/or possible partially filling the barrel with perlite. Whatever to minimize the radiated heat.

 
thomas rubino
master rocket scientist
Posts: 6734
Location: latitude 47 N.W. montana zone 6A
3605
cat pig rocket stoves
  • Likes 3
  • Mark post as helpful
  • send pies
    Number of slices to send:
    Optional 'thank-you' note:
  • Quote
  • Report post to moderator
Hey Greg;
Well, you are boiling sap so it's going to be hot.
If I'm understanding correctly, the barrel is open top and there to help shield the heat.
I would consider using an insulated riser, it would concentrate the heat inside the riser giving the most out of the top under your pans.
Yes, I think a diverter to spread the high heat across all your pans is a good idea.
Consider, using a steel box as a stratification chamber that collects the heat, and then have your vent pipe leave from the lower part of the box.

For the workers, you could use 4x8 sheets of the rigid foil face insulation board standing on the edge to block quite a bit of the radiant heat.
Lots of fresh cold water, maybe misting fans, start before dawn and quit after lunch?
 
Greg B Smith
Posts: 88
5
  • Likes 1
  • Mark post as helpful
  • send pies
    Number of slices to send:
    Optional 'thank-you' note:
  • Quote
  • Report post to moderator

thomas rubino wrote:Hey Greg;
Well, you are boiling sap so it's going to be hot.
If I'm understanding correctly, the barrel is open top and there to help shield the heat.
I would consider using an insulated riser, it would concentrate the heat inside the riser giving the most out of the top under your pans.
Yes, I think a diverter to spread the high heat across all your pans is a good idea.
Consider, using a steel box as a stratification chamber that collects the heat, and then have your vent pipe leave from the lower part of the box.

For the workers, you could use 4x8 sheets of the rigid foil face insulation board standing on the edge to block quite a bit of the radiant heat.
Lots of fresh cold water, maybe misting fans, start before dawn and quit after lunch?


I’m not following on the stratification box.

What I was thinking was an air tight system with the exception of the firebox intake and exhaust. Heat would go through the riser to the pan bottom which would be gravity sealed to the top of the drum with firebox rope. Hot air would flow between the diverter and the pan bottom out to the barrels edge. The air would then flow around the edge of the diverter and down into the void/chamber underneath the diverter. From there it would exhaust out the stack.

The diverter would be attached to the top of the riser and extend to the edge of the barrel but not connected to the barrel. Air could pass between the side of the barrel and the edge of the diverter. Think of the diverter as paper plate with a hole in the center to slip over the riser. Air would be forced between it and the pan and over the edges of it. Hope that makes sense. If I have to draw it we are screwed. My art skills suck!

And when I say workers I really mean me! lol


thomas rubino
master rocket scientist
Posts: 6734
Location: latitude 47 N.W. montana zone 6A
3605
cat pig rocket stoves
  • Likes 6
  • Mark post as helpful
  • send pies
    Number of slices to send:
    Optional 'thank-you' note:
  • Quote
  • Report post to moderator
Ok;
You have a much smaller pan than I have seen in northern sugar shacks.

If it will fit over a barrel then that will work.

You may need to play with the diverter gap, it can't be too close.

For your "Work" force a 4x8 sheet of rigid insulation would work.

Be sure to use a good size exhaust stack.

 
Greg B Smith
Posts: 88
5
  • Likes 6
  • Mark post as helpful
  • send pies
    Number of slices to send:
    Optional 'thank-you' note:
  • Quote
  • Report post to moderator

thomas rubino wrote:Ok;
You have a much smaller pan than I have seen in northern sugar shacks.

If it will fit over a barrel then that will work.

You may need to play with the diverter gap, it can't be too close.

For your "Work" force a 4x8 sheet of rigid insulation would work.

Be sure to use a good size exhaust stack.


This pan will be a stainless square pan 24”x24” on bottom with sloped sides. The top of the pan is 30”x30”. Just shy of 12” tall for a total of 30 plus gallons. It’s a batch pan.

This one will be used for small batches of syrup when testing new varieties of cane and or sorghum. I currently have 10 varieties of cane planted. In the future it will be used as a bottling vessel for a 200 gallon pan which will be 3’x8’ on the bottom and a much larger furnace to fire it.

This is a pan I am modeling mine after.

IMG_0845.jpeg
[Thumbnail for IMG_0845.jpeg]
 
Glenn Herbert
Rocket Scientist
Posts: 4645
Location: Upstate NY, zone 5
635
5
  • Likes 10
  • Mark post as helpful
  • send pies
    Number of slices to send:
    Optional 'thank-you' note:
  • Quote
  • Report post to moderator
For an evaporator, especially in a warm climate where heat radiation to the workers is bad, there is absolutely no point to a stratification chamber. You just want the heat to hit the whole bottom of the pan and flow off to the side where it is taken away by a chimney (which aids draft for a strong fire).
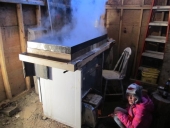
My current 6 square foot setup is shown in an early stage here. I rebuilt it in the shell of an old chest freezer.

My first evaporator (8 square feet) used the shells of a dead stove and a freezer door for the structure, with firebrick burn tunnel and riser inserted.
IMG_1526.JPG
preparing evaporator shell/base
IMG_1534.JPG
firebrick burn tunnel lining
IMG_1535.JPG
heat riser from top
heat riser from top
IMG_1545.JPG
pan base from old freezer door shell
IMG_1543.JPG
chimney connection end of pan base
IMG_1572.JPG
sealing gaps at pan edges
IMG_1618.JPG
pan side closure
pan side closure
IMG_1621.JPG
operating
operating
IMG_1622.JPG
sap boiling
sap boiling
 
thomas rubino
master rocket scientist
Posts: 6734
Location: latitude 47 N.W. montana zone 6A
3605
cat pig rocket stoves
  • Likes 6
  • Mark post as helpful
  • send pies
    Number of slices to send:
    Optional 'thank-you' note:
  • Quote
  • Report post to moderator
Outstanding job Glenn, and it looks like it works perfectly!!
 
Glenn Herbert
Rocket Scientist
Posts: 4645
Location: Upstate NY, zone 5
635
5
  • Likes 5
  • Mark post as helpful
  • send pies
    Number of slices to send:
    Optional 'thank-you' note:
  • Quote
  • Report post to moderator
That first one was a bit undersized for the 8 sf pan. I added a couple of bricks to the L-tube length and it seemed to work better, but I never got the chance to really test it. It would work great for a 4 sf pan like the OP's, and could be built entirely in/on a base of a dead kitchen stove.
 
Greg B Smith
Posts: 88
5
  • Likes 3
  • Mark post as helpful
  • send pies
    Number of slices to send:
    Optional 'thank-you' note:
  • Quote
  • Report post to moderator

Glenn Herbert wrote:That first one was a bit undersized for the 8 sf pan. I added a couple of bricks to the L-tube length and it seemed to work better, but I never got the chance to really test it. It would work great for a 4 sf pan like the OP's, and could be built entirely in/on a base of a dead kitchen stove.


So I need a metal box with a shallow channel that can funnel exhaust across the pan bottom and out the other end to the vent. I’ll be on the lookout. That’s much easier than the  55 gallon drum I had planned.

Looks like you used just plain galvanized vent pipe and accessories for your stove pipe. Is that correct?
 
Greg B Smith
Posts: 88
5
  • Likes 3
  • Mark post as helpful
  • send pies
    Number of slices to send:
    Optional 'thank-you' note:
  • Quote
  • Report post to moderator
This is a friends setup.

The furnace is built entirely out of fire bricks with a 16” drill case for stove pipe. There is a dirt berm inside the brick that funnels the flames to within 3” of the pan all the way to the chimney. Flames were going all the way past this 8’ long pan. The stack was producing NO smoke at all. Completely clean burn. They use split pine for the wood as it burns fast, hot, and nearly ash-less. They added about 10-12 sticks every 10 minutes. This is a 200 gallon pan that produces around 30 gallons of syrup every batch. Yeah, brix  on sugarcane juice is a little higher than maple sap. LOL. He also has a 12’ “worm” pan that is continuous flow but he said it would work you to death. LOL. If it was any worse than keeping up with the 200 gallon pan then I don’t want any part of it.

I have another friend that cooks in a 30 gallon sugar kettle with propane. The funny thing is, other than the time it takes to grind extra juice and bottle the extra syrup, the labor it takes is the same on the actual cooking. 200 gallons wood fired verses 30 gallons propane. Kinda crazy to me.  

IMG_0848.jpeg
Fire box
Fire box
IMG_0851.jpeg
Juice boiling
Juice boiling
IMG_0852.jpeg
Syrup coming up
Syrup coming up
IMG_0853.jpeg
Clean burn
Clean burn
IMG_0859.jpeg
Burn inside the box.
 
Greg B Smith
Posts: 88
5
  • Likes 5
  • Mark post as helpful
  • send pies
    Number of slices to send:
    Optional 'thank-you' note:
  • Quote
  • Report post to moderator
This is the pic of the syrup coming up.
IMG_0856.jpeg
[Thumbnail for IMG_0856.jpeg]
 
pollinator
Posts: 5520
Location: Canadian Prairies - Zone 3b
1518
  • Likes 1
  • Mark post as helpful
  • send pies
    Number of slices to send:
    Optional 'thank-you' note:
  • Quote
  • Report post to moderator
Very cool. Thanks for the pics!
 
Glenn Herbert
Rocket Scientist
Posts: 4645
Location: Upstate NY, zone 5
635
5
  • Likes 2
  • Mark post as helpful
  • send pies
    Number of slices to send:
    Optional 'thank-you' note:
  • Quote
  • Report post to moderator
I used materials I had on hand except for the 8" duct and 8" x 10" reducer from a hardware store, so yes, galvanized and even plain painted or enameled steel. There is a lot of sheetmetal in an old stove or freezer.
 
Skool. Stay in. Smartness. Tiny ad:
Learn Permaculture through a little hard work
https://wheaton-labs.com/bootcamp
reply
    Bookmark Topic Watch Topic
  • New Topic