

|

|

|

|

|

|
|
|
|
|
|
|
|

|

|

|

|

|


![[Thumbnail for IMG_6990.jpg]](/t/52769/a/35259/IMG_6990.jpg "Filename: IMG_6990.jpg
Description:")
![[Thumbnail for IMG_6991.jpg]](/t/52769/a/35260/IMG_6991.jpg "Filename: IMG_6991.jpg
Description:")
![[Thumbnail for IMG_6992.jpg]](/t/52769/a/35261/IMG_6992.jpg "Filename: IMG_6992.jpg
Description:")
![[Thumbnail for IMG_6994.jpg]](/t/52769/a/35262/IMG_6994.jpg "Filename: IMG_6994.jpg
Description:")
![[Thumbnail for IMG_6995.jpg]](/t/52769/a/35263/IMG_6995.jpg "Filename: IMG_6995.jpg
Description:")
![[Thumbnail for IMG_6996.jpg]](/t/52769/a/35264/IMG_6996.jpg "Filename: IMG_6996.jpg
Description:")
![[Thumbnail for IMG_7002.jpg]](/t/52769/a/35265/IMG_7002.jpg "Filename: IMG_7002.jpg
Description:")
![[Thumbnail for IMG_7001.jpg]](/t/52769/a/35266/IMG_7001.jpg "Filename: IMG_7001.jpg
Description:")
![[Thumbnail for IMG_7003.jpg]](/t/52769/a/35267/IMG_7003.jpg "Filename: IMG_7003.jpg
Description:")
 1
1
![[Thumbnail for IMG_7009.jpg]](/t/52769/a/35268/IMG_7009.jpg "Filename: IMG_7009.jpg
Description:")
![[Thumbnail for IMG_7012.jpg]](/t/52769/a/35269/IMG_7012.jpg "Filename: IMG_7012.jpg
Description:")
![[Thumbnail for IMG_7007.jpg]](/t/52769/a/35270/IMG_7007.jpg "Filename: IMG_7007.jpg
Description:")
positively optimistic 🙂 https://www.youtube.com/@613Builds


Success has a Thousand Fathers , Failure is an Orphan
LOOK AT THE " SIMILAR THREADS " BELOW !

God of procrastination https://www.youtube.com/watch?v=q1EoT9sedqY
1
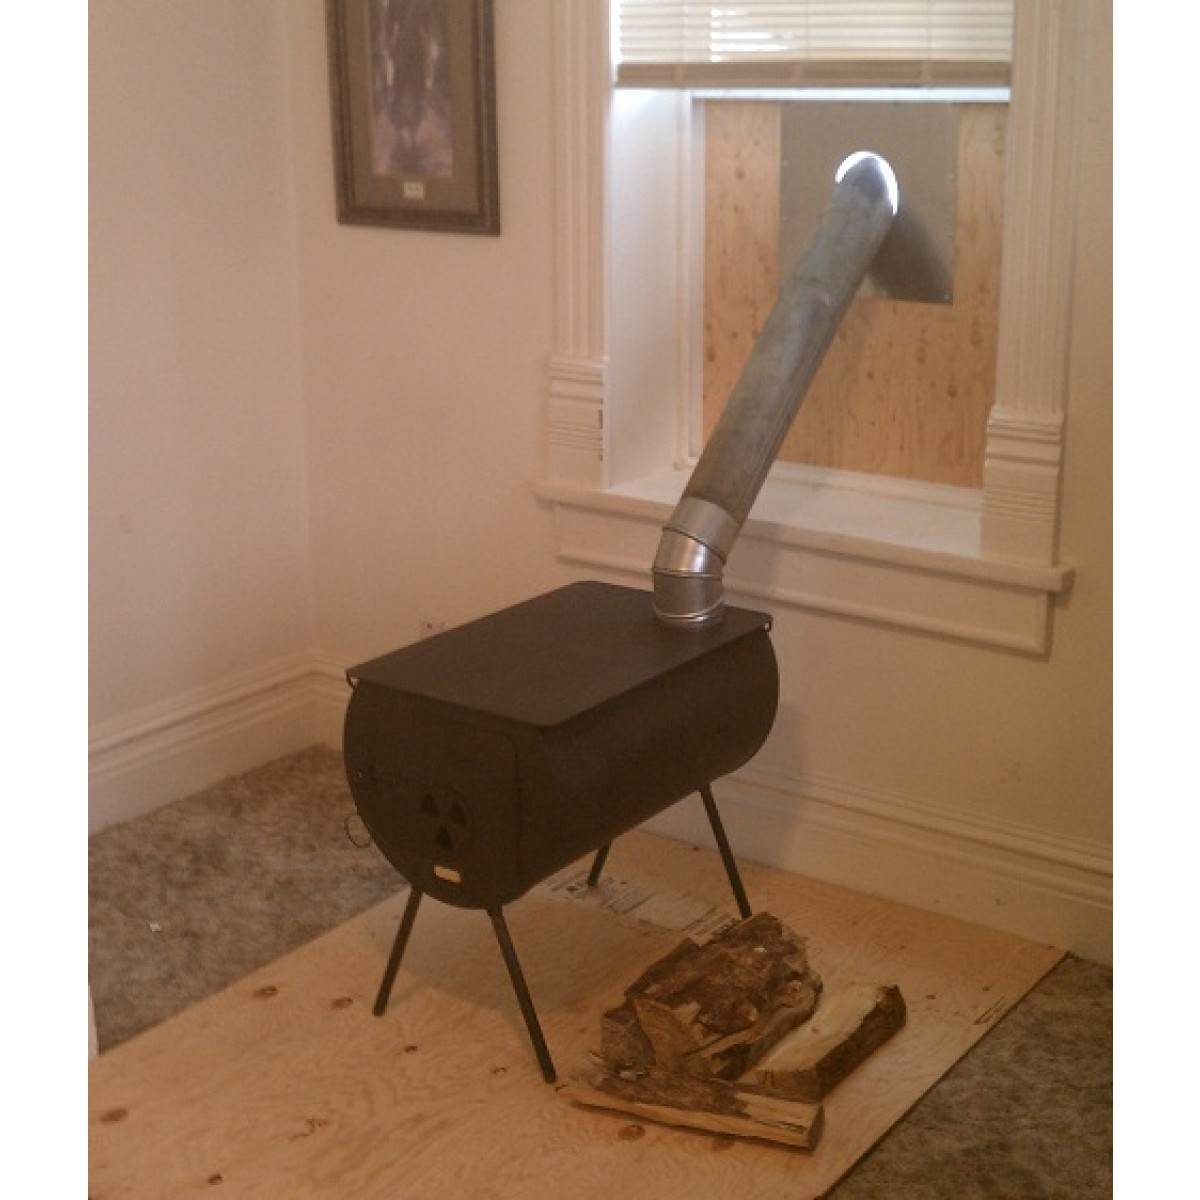
Rocket Mag evolution timeline: http://www.permies.com/t/52316/rocket-stoves/Rocket-stove-heats-water-pics
Rocket Mag Thread: http://www.permies.com/t/54074/rocket-stoves/Rocket-Mag-heater-Rocket-Mag
Rocket Mag evolution timeline: http://www.permies.com/t/52316/rocket-stoves/Rocket-stove-heats-water-pics
Rocket Mag Thread: http://www.permies.com/t/54074/rocket-stoves/Rocket-Mag-heater-Rocket-Mag
1
![[Thumbnail for IMG_7016.JPG]](/t/52769/a/35288/IMG_7016.JPG "Filename: IMG_7016.JPG
Description:")
![[Thumbnail for IMG_7019.jpg]](/t/52769/a/35289/IMG_7019.jpg "Filename: IMG_7019.jpg
Description:")
![[Thumbnail for IMG_7017.JPG]](/t/52769/a/35290/IMG_7017.JPG "Filename: IMG_7017.JPG
Description:")
Rocket Mag evolution timeline: http://www.permies.com/t/52316/rocket-stoves/Rocket-stove-heats-water-pics
Rocket Mag Thread: http://www.permies.com/t/54074/rocket-stoves/Rocket-Mag-heater-Rocket-Mag

|
You are HERE! The other map is obviously wrong. Better confirm with this tiny ad:
It's a bit like "run away to the circus" but for gardeners
https://wheaton-labs.com/bootcamp
|


