• Post Reply Bookmark Topic Watch Topic
  • New Topic
permaculture forums growies critters building homesteading energy monies kitchen purity ungarbage community wilderness fiber arts art permaculture artisans regional education skip experiences global resources cider press projects digital market permies.com pie forums private forums all forums
this forum made possible by our volunteer staff, including ...
master stewards:
  • Carla Burke
  • Nancy Reading
  • r ransom
  • John F Dean
  • paul wheaton
  • Jay Angler
stewards:
  • Timothy Norton
  • Pearl Sutton
  • Tereza Okava
master gardeners:
  • Christopher Weeks
  • M Ljin
gardeners:
  • Jeremy VanGelder
  • Matt McSpadden
  • thomas rubino

Do you have an old-fashioned sawbuck? Do you have ANY sawbuck? How'd you make it? Let us see it!

 
pollinator
Posts: 164
Location: Utah
55
3
composting toilet bike building writing wood heat rocket stoves greening the desert
  • Likes 8
  • Mark post as helpful
  • send pies
    Number of slices to send:
    Optional 'thank-you' note:
  • Quote
  • Report post to moderator
I recently built a sawbuck following the instructions here: diy sawbuck

I altered he design a little.

First, as many in this thread have suggested you want the middle legs closer to one side.

Second,  I put the lower crosspieces near the ground.  It seemed to make it more stabel. Also, I found with my old sawbuck that I would put my foot on the lower piece to keep it steady when cutting by hand. Finally, in the interest of stacking functions, I can fold it up, lay it on the ground, and use it to rip short pieces of plywood.

Speaking of stacking functions,  I cut dimensional wood more than logs, so I cut out notches to hold 2x4s and 1x4s. This, I hope, will be easier for doing cross-cuts than sawhorses are.
20250907_131946.jpg
A folding sawbuck that can be used to cut dimensional lumber as well, in a garage
20250907_131635.jpg
Side view of a sambuck made from dimensional lumber in a garage
20250907_131605.jpg
looking down the working end of a sawbuck with notches cut to hold dimensional lumber
20250907_131251.jpg
a sawbuck folded up and laid on the floor
 
Posts: 1
4
  • Likes 12
  • Mark post as helpful
  • send pies
    Number of slices to send:
    Optional 'thank-you' note:
  • Quote
  • Report post to moderator
I know that this is an old post but I just wanted to thank everyone who posted for the ideas, which are surprisingly scarce elsewhere on the interwebs. I've also gotten ideas from Mr. Chickadee on youtube and Jim Thode's video's where he's single bucking much biger PNW timber than I come across in the Colorado rockies. I've picked up a few one man crosscut and bucksaws over the past couple of years and recently got out to cut some firewood, but realized beforehand the importance of proper workholding.

The obvious play was rolling a chunk of log underneith and hammering in a log dog, but picking up and/or rolling heavy logs requires either a lot of physical effort or carring a high lift jack and chain into the woods, which is heavy extra equipment. I'm in a situation where driving off a forest service road with motorized equipment is not allowed, so that means moving stuff with a wheelbarrow, so I wanted to keep weight low.

As other posters have noted, the top arms of the 'v' of my sawbuck are much longer than necessary, and will soon be cut down based on the wear I notice. I also use a rope loop with a board through the loop that is stepped on with one foot as a clamp to keep both hands free for running the saw, which makes a big difference in speed and power. That said, the sawbuck I only use for small stuff to avoid lifting heavy logs solo. I like the folding design because I can fold it up and carry it into around on the wheelbarrow, and its easier to stow in my truck when the bed is full of rounds.

My first workholding is a log jack, although it doesnt hold light matedial solid enough, but when the log is heavy and cutting the first rounds from the base of the tree its stable. The log jack only lifts the log six inches off the ground though, so I have to finish my cuts kneeling on the ground to keep the saw out of the dirt.

As soon as I can pick one end of the log up (helped by an old ice tongs) I place it on a small three leg x brace and can saw standing. In the photo you can see I made this out of dimensional lumber as well because I'm a carpenter and thats what I have lying around. A couple of pieces of metal rafter strapping keep the legs from spreading when a log is dropped in. Once again, the arms of the v the log rests in are too long and will be cut shorter so that I dont have to lift the log as high to place it in the cradle.

Lastly the buck saw resting against the sawbuck is one I made from a piece of 1095 spring steel and copies a four cutter to the raker pattern copied from a swede saw, the frame is white ash. Metal bowsaws are awesome if you dont sharpen your own saws, but I never liked the flex in the blade of a bowsaw so I made my own. Plus having a handle for the saw placed below the tooth line helps the teeth dig in when pulling back on the return stroke, which is something you see on vintage swede saws and modern racing bow saws but is absent from the modern ones bought today. Since these saws cut on both the push and the pull stroke it tends to make for a faster easier to use saw, though it necessitates holding the saw with two hands.

As others have noted the sawbuck is handsaw era technology. When I run a power saw the only tool I carry is the log jack. I'm lucky to only have a 5 minute drive to where I'm cutting firewood so going out for an afternoon every weekend is fun for me with the crosscuts, and between that and hand splitting is my gym at this point. In a full afternoon I can buck about a half cord. With all the beetle kill pine in my part of the world I don't have to fall any trees either, just limbing with the axe and get to sawing.
20260103_133734.jpg
[Thumbnail for 20260103_133734.jpg]
20260103_125820.jpg
[Thumbnail for 20260103_125820.jpg]
20260103_131647.jpg
[Thumbnail for 20260103_131647.jpg]
 
gardener
Posts: 3629
Location: Western Slope Colorado.
832
5
goat dog food preservation medical herbs solar greening the desert
  • Likes 5
  • Mark post as helpful
  • send pies
    Number of slices to send:
    Optional 'thank-you' note:
  • Quote
  • Report post to moderator
Here is my sawbuck. It is in my greenhouse because in the greenhouse the Fire Wood is pre warmed ( compared to outdoor temperatures), if it got snowed on or was wet, it can dry.

It is a new use for the greenhouse, which has its long axis east to West. I’m using the north side to store Wood. The greenhouse got torn up by hail last summer. I did not get the roof replaced. I threw a tarp over it and then chicken wire completely covering the tarp. The chicken wire is weighted down. The point of the chicken wire is to keep the tarp from flapping because we get a lot of wind here.  It seems like maybe half inch chicken wire installed with an inch gap over the replacement glazing might protect future greenhouse from future hail storms.

And back to the sawbuck, right now it is collapsible, and I am reluctant to put permanent boards, holding the legs a set distance apart. I am thinking I will just tie string around them.
IMG_3956.jpeg
[Thumbnail for IMG_3956.jpeg]
 
author and steward
Posts: 59665
Location: missoula, montana (zone 4)
hugelkultur trees chicken wofati bee woodworking
  • Likes 4
  • Mark post as helpful
  • send pies
    Number of slices to send:
    Optional 'thank-you' note:
  • Quote
  • Report post to moderator

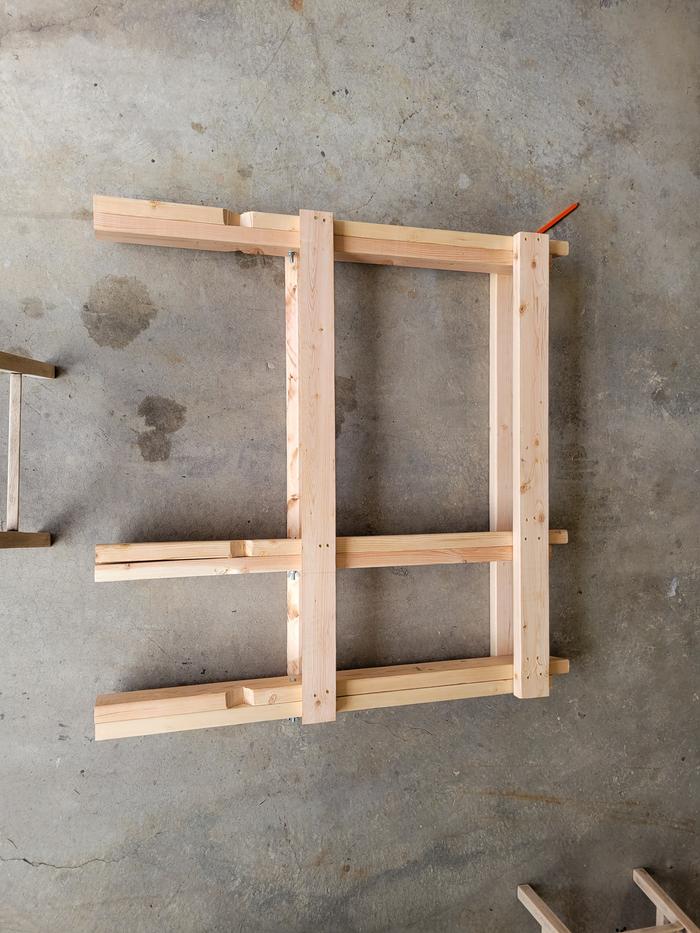
Thekla McDaniels wrote:Here is my sawbuck. It is in my greenhouse because in the greenhouse the Fire Wood is pre warmed ( compared to outdoor temperatures), if it got snowed on or was wet, it can dry.

It is a new use for the greenhouse, which has its long axis east to West. I’m using the north side to store Wood. The greenhouse got torn up by hail last summer. I did not get the roof replaced. I threw a tarp over it and then chicken wire completely covering the tarp. The chicken wire is weighted down. The point of the chicken wire is to keep the tarp from flapping because we get a lot of wind here.  It seems like maybe half inch chicken wire installed with an inch gap over the replacement glazing might protect future greenhouse from future hail storms.

And back to the sawbuck, right now it is collapsible, and I am reluctant to put permanent boards, holding the legs a set distance apart. I am thinking I will just tie string around them.


Two suggestions:

suggestion-1:  move the middle bits closer to one edge.  It helps when cutting smaller chunks.

suggestion-2:  add a rope or wire to the bottom so that the sawbuck footprint is limited.  This keeps the sawbuck from getting lower and lower to the ground.
 
Thekla McDaniels
gardener
Posts: 3629
Location: Western Slope Colorado.
832
5
goat dog food preservation medical herbs solar greening the desert
  • Mark post as helpful
  • send pies
    Number of slices to send:
    Optional 'thank-you' note:
  • Quote
  • Report post to moderator

paul wheaton wrote:

Thekla McDaniels wrote:Here is my sawbuck…..
And back to the sawbuck, right now it is collapsible, and I am reluctant to put permanent boards, holding the legs a set distance apart. I am thinking I will just tie string around them.


Two suggestions:

suggestion-1:  move the middle bits closer to one edge.  It helps when cutting smaller chunks.

suggestion-2:  add a rope or wire to the bottom so that the sawbuck footprint is limited.  This keeps the sawbuck from getting lower and lower to the ground.


Yeah, string rope wire something

And “middle bits” is the center uprights, so one end is longer than the other?  I had trouble figuring that out so I just made it symmetrical, but now, I could probably un screw the screws on the center and adjust it.  As it is I am cutting inside the end uprights, and while the horizontal cross pieces are not in the way, I worry about saw chain coming in to contact with the bolt that holds the X.

Even with the current configuration, it is a very handy piece of equipment!
 
paul wheaton
author and steward
Posts: 59665
Location: missoula, montana (zone 4)
hugelkultur trees chicken wofati bee woodworking
  • Likes 5
  • Mark post as helpful
  • send pies
    Number of slices to send:
    Optional 'thank-you' note:
  • Quote
  • Report post to moderator
middle bits ... take a look at these


Thekla McDaniels
gardener
Posts: 3629
Location: Western Slope Colorado.
832
5
goat dog food preservation medical herbs solar greening the desert
  • Likes 2
  • Mark post as helpful
  • send pies
    Number of slices to send:
    Optional 'thank-you' note:
  • Quote
  • Report post to moderator
Much better!  

I need the outside dimension of one side of the sawbuck to be smaller than the firebox on my wood stove so that a piece of wood that is small enough for my firebox will rest between the cross pieces.

Thank you
 
Posts: 9
Location: Liberty, Maine
4
  • Mark post as helpful
  • send pies
    Number of slices to send:
    Optional 'thank-you' note:
  • Quote
  • Report post to moderator
I knew I should have placed stones under the feet to keep mine off the ground as it sat in my yard for a few years. It rotted away quickly.
 
Do you pee on your compost? Does this tiny ad?
Learn Permaculture through a little hard work
https://wheaton-labs.com/bootcamp
reply
    Bookmark Topic Watch Topic
  • New Topic