• Post Reply Bookmark Topic Watch Topic
  • New Topic
permaculture forums growies critters building homesteading energy monies kitchen purity ungarbage community wilderness fiber arts art permaculture artisans regional education skip experiences global resources cider press projects digital market permies.com pie forums private forums all forums
this forum made possible by our volunteer staff, including ...
master stewards:
  • Nancy Reading
  • Carla Burke
  • r ranson
  • John F Dean
  • paul wheaton
  • Pearl Sutton
stewards:
  • Jay Angler
  • Liv Smith
  • Leigh Tate
master gardeners:
  • Christopher Weeks
  • Timothy Norton
gardeners:
  • thomas rubino
  • Jeremy VanGelder
  • Maieshe Ljin

Make a kill cone for processing chickens

 
steward
Posts: 4837
Location: West Tennessee
2438
cattle cat purity fungi trees books chicken food preservation cooking building homestead
  • Likes 7
  • Mark post as helpful
  • send pies
    Number of slices to send:
    Optional 'thank-you' note:
  • Quote
  • Report post to moderator
My wife and I raise layers and we have one too many cockerels from a batch of chicks we got six months ago. We have two in with ten pullets, and that's too many. He's destined for chicken stock.

Since we'll be doing this again many times in the future as we homestead, I decided to make a kill cone instead of buying one. The only sheet metal I had on hand was some 16oz copper leftover from making a moonshine still eight years ago. I since quit drinking and gave away my still to a friend, but now I wish I still had it to make hydrosol's among other things with herbs, but that's another thread. So using what I had on hand, I made a kill cone this morning. Any sheet metal that's thin enough to shape will work. It's pretty easy to do and here's how I made it:

I made a trapezoid stencil on paper and cut it out. The short side is 12 inches, the long side is about 28 inches, and the height is 16 inches. This will make a small opening of a little over 3 inches, and a large opening of around 9 inches.
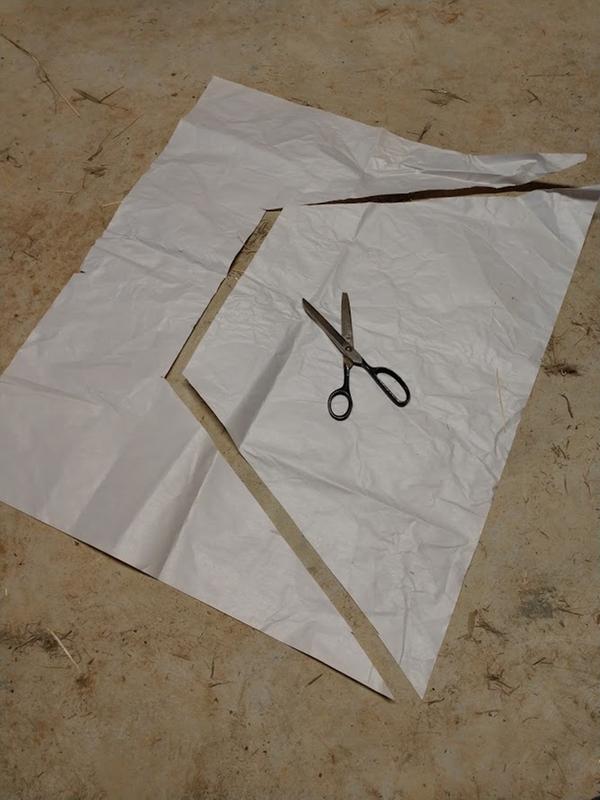


I rolled up the paper to see what it looked like and figured it'll work.
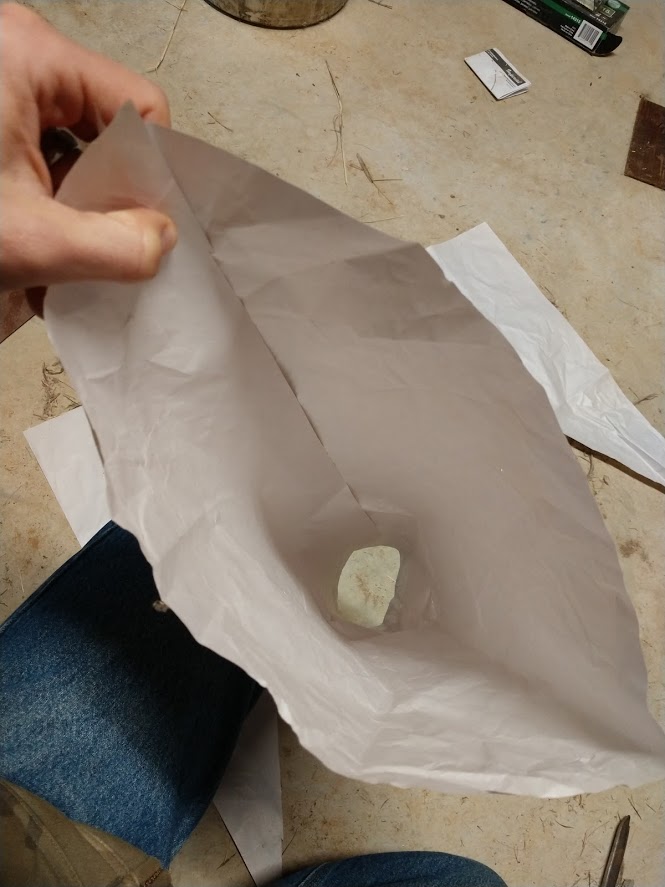


I placed it on my leftover copper sheet and realized it didn't fit, so my cone shrunk to 13 inches tall to get it to fit.
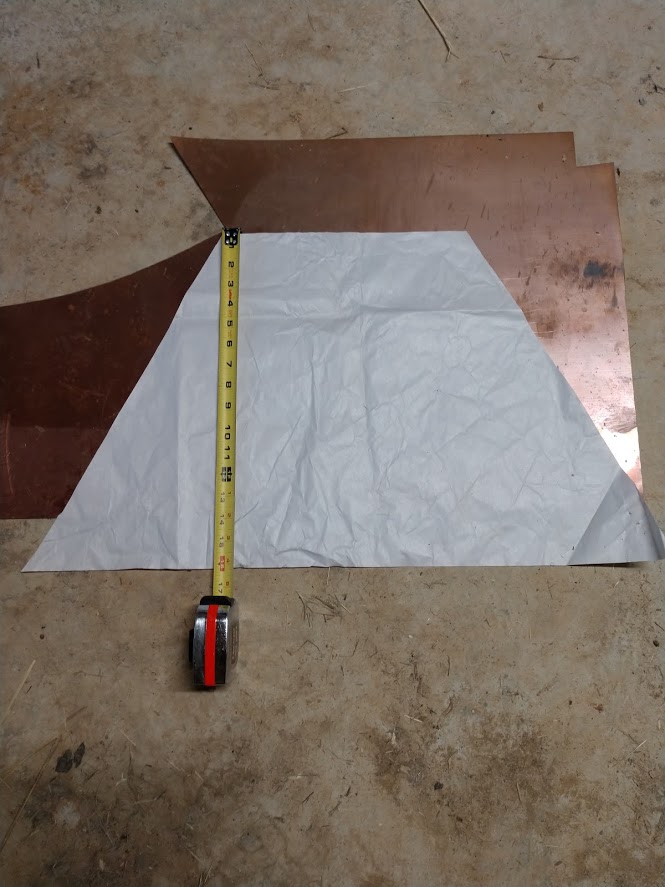


I then used my framing square to scribe straight lines and cut it out with my shears.
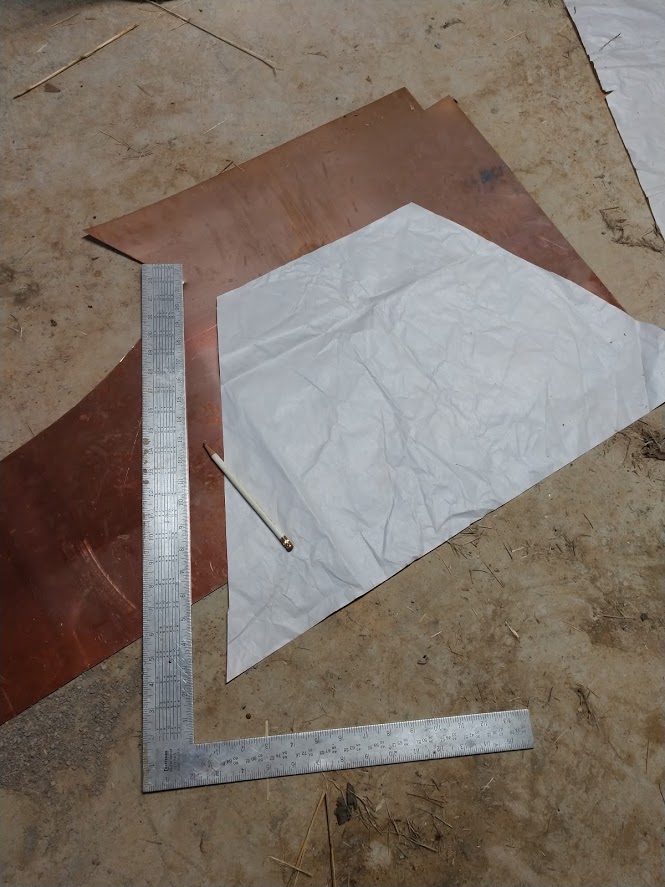


After gently rolling the copper trapezoid back and forth working it towards its final shape, I drilled pilot holes down one side. I realized I needed more than two hands to line things up and fasten it together so vise-grips to the rescue.
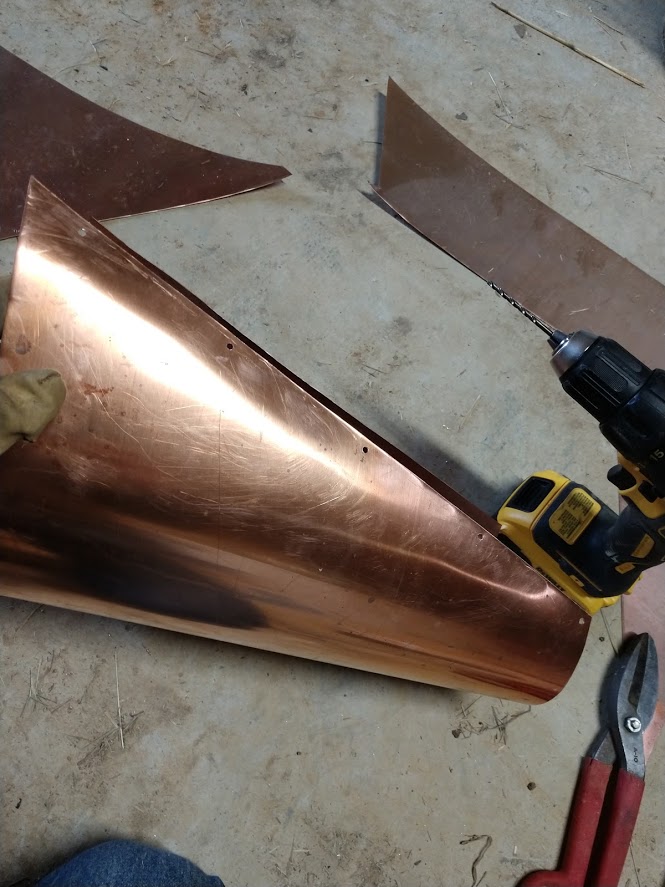
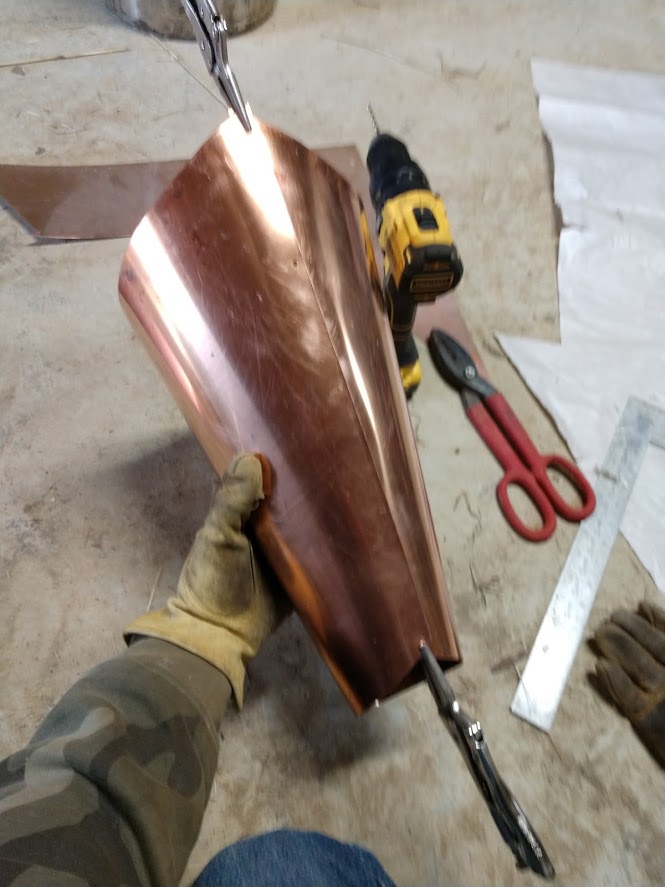


I have leftover rivets from installing a metal roof on my home, so after using the pilot holes to drill the other side, I proceeded to fasten the ends together with pop rivets.
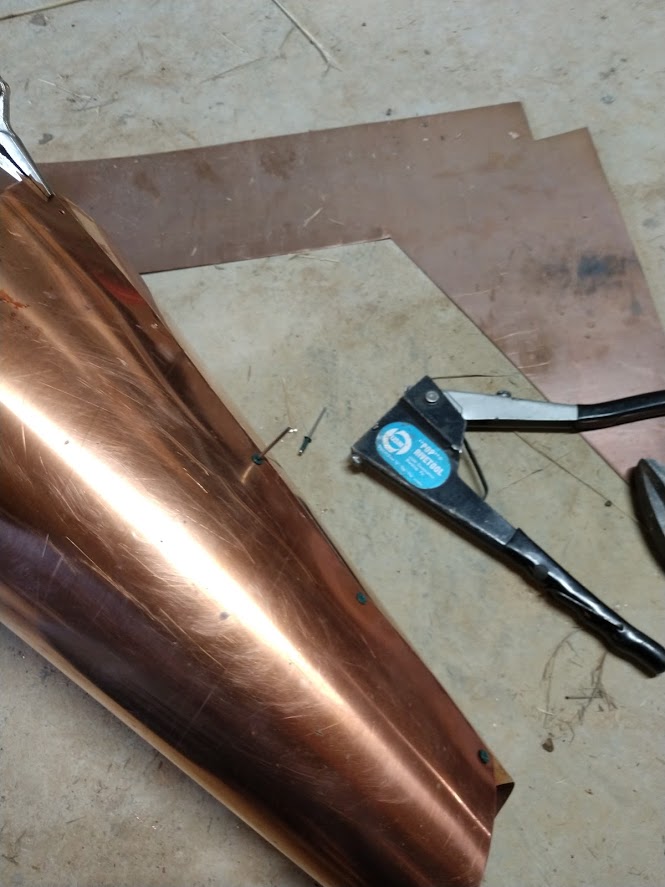


All fastened together, I removed the vise grips and looked things over and said to myself "that'll do".
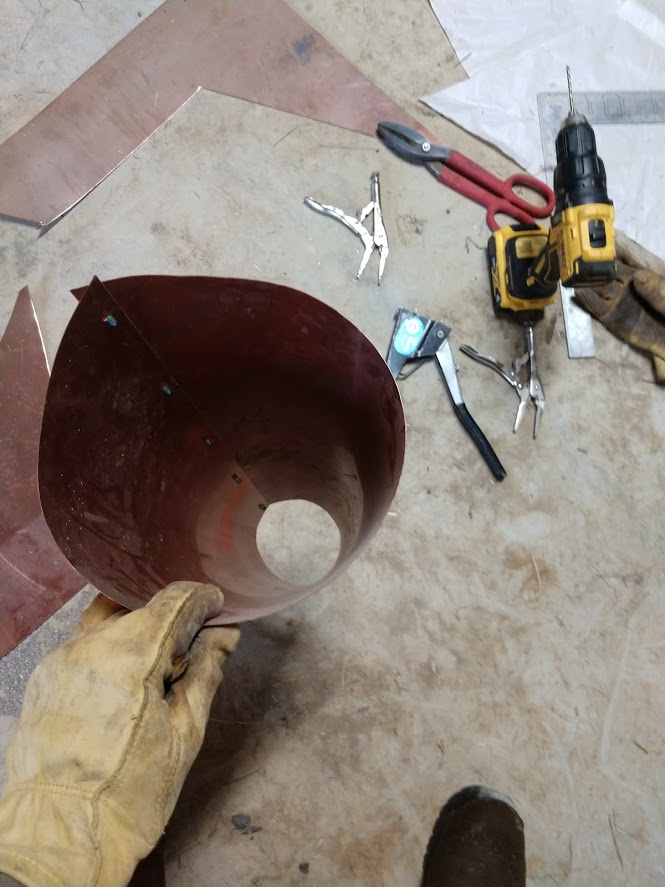
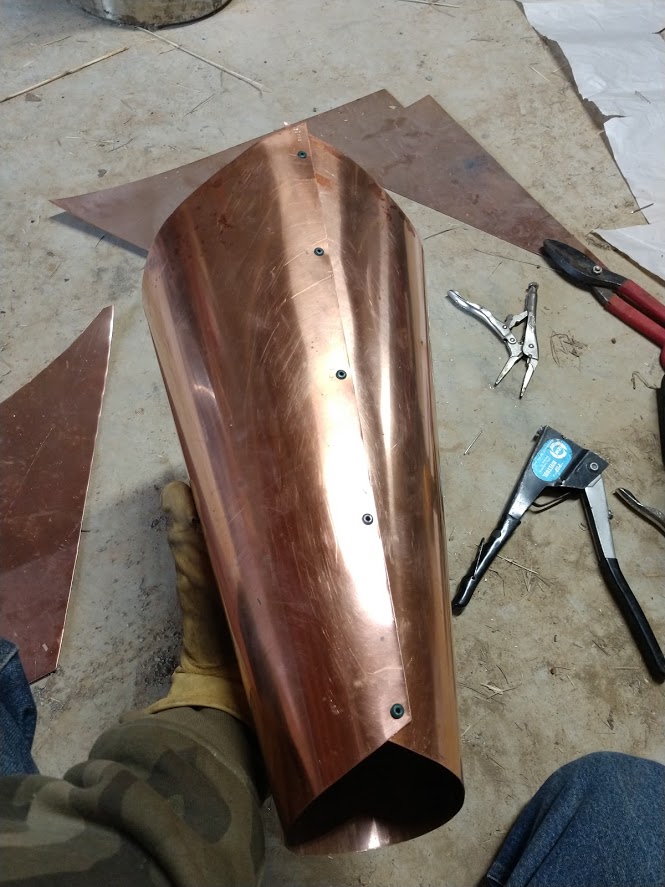


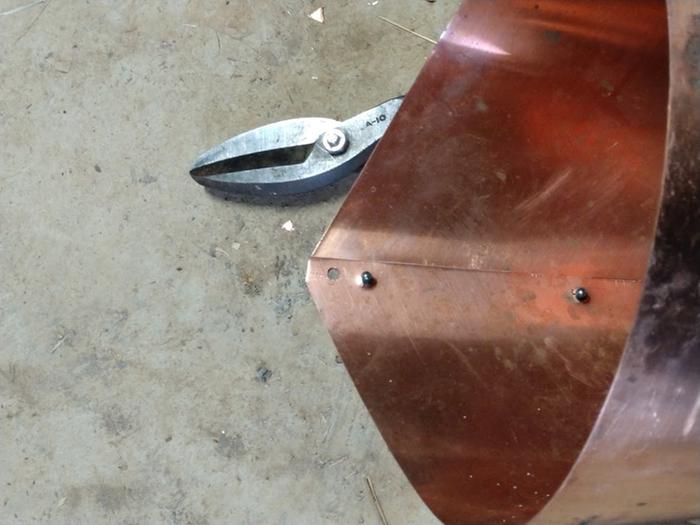
I trimmed off the sharp pointy corners on the top end and drilled a pilot hole for a screw to hang it.


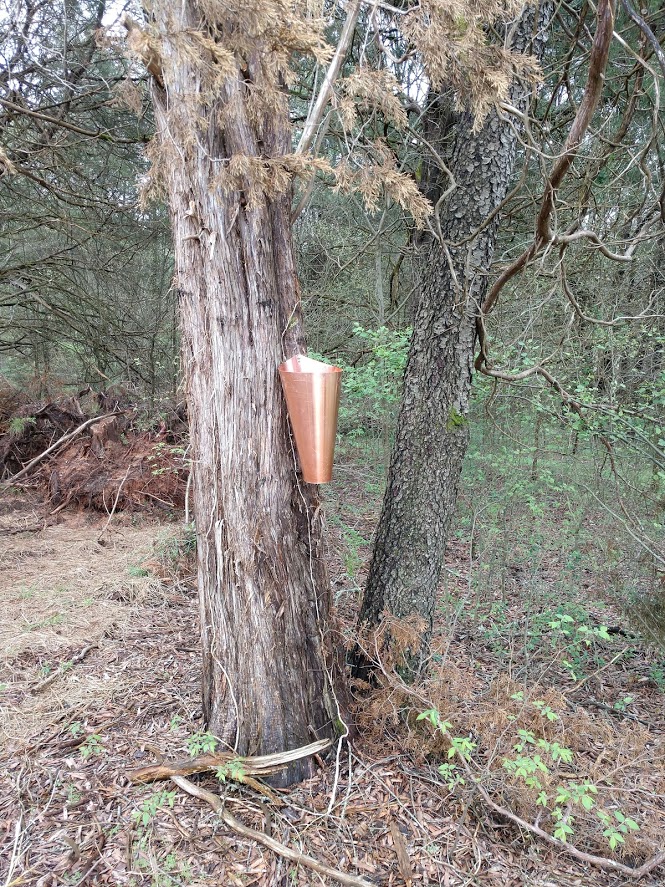
All finished I placed it on a cedar tree. I'm looking forward to see what kind of patina it will develop sitting outside as the years go by.


James Freyr
steward
Posts: 4837
Location: West Tennessee
2438
cattle cat purity fungi trees books chicken food preservation cooking building homestead
  • Likes 5
  • Mark post as helpful
  • send pies
    Number of slices to send:
    Optional 'thank-you' note:
  • Quote
  • Report post to moderator
We wasted no time putting it to use. Here's what I've learned:

I think the cone is on the small side. I've only ever processed chickens once before, and I recall the cones at the farm where I learned how to process chickens being about this size, or at least the 7 or 8 pound broilers we were processing fitting in the cones similarly to my experience today. This scrawny 6 month old cockerel fit snugly in the cone. I have another 3 year old black astralorp rooster that is twice the size of this cockerel, and he's just not going to fit when the time comes. I have some big ol' round brahmas that are getting old, but still laying, and I doubt they'll fit in the cone enough for their head to protrude out the bottom. I think I need to make a second larger cone. I did find the 13 inch depth of the cone to be plenty, and I am glad it didn't end up 16 inches like the original paper stencil, I doubt the head would've made it out the bottom.

chicken-becoming-food.jpg
[Thumbnail for chicken-becoming-food.jpg]
 
pollinator
Posts: 653
Location: South West France
254
  • Likes 6
  • Mark post as helpful
  • send pies
    Number of slices to send:
    Optional 'thank-you' note:
  • Quote
  • Report post to moderator
Hi James.

It's a really good cone you've made here.  Looking at the last picture, I assume that the blood is going into that bucket filled with straw and I was wondering what you do with it.

Here in France we let the blood drip into a ready made bowl of soft, finely crumbled bread (no crust) well seasoned with garlic, parsley, salt and pepper.  Mix and fry it till crispy - quite delicious when you tweak it to your own taste.
 
James Freyr
steward
Posts: 4837
Location: West Tennessee
2438
cattle cat purity fungi trees books chicken food preservation cooking building homestead
  • Mark post as helpful
  • send pies
    Number of slices to send:
    Optional 'thank-you' note:
  • Quote
  • Report post to moderator
Hi Olga!

I did not consider using it fresh in a meal and that sounds pretty good. The blood in the straw, along with the head, all the feathers, skin from feet and entrails went into my compost pile.
 
Olga Booker
pollinator
Posts: 653
Location: South West France
254
  • Likes 1
  • Mark post as helpful
  • send pies
    Number of slices to send:
    Optional 'thank-you' note:
  • Quote
  • Report post to moderator
Well, it's a rural kind of thing and actually, not many people do it any more since their chicken is usually bought sanitised in a plastic wrapper these days.  But it was very common when I was a child, many moons ago. Give it a try, it's almost like an instant black pudding!
 
pollinator
Posts: 391
Location: NW Montana, USA
130
goat purity foraging rabbit chicken food preservation pig bee medical herbs solar ungarbage
  • Likes 3
  • Mark post as helpful
  • send pies
    Number of slices to send:
    Optional 'thank-you' note:
  • Quote
  • Report post to moderator
We save blood and let the dogs and cats eat it.  I prefer to dislocate the neck, personally, and bleed the bird out after it's done thrashing.  Works like a charm, and no thrashing blood spraying everywhere!  Nice cone though!
 
pollinator
Posts: 604
Location: Northern Puget Sound, Zone 8A
110
homeschooling kids trees chicken cooking sheep
  • Likes 2
  • Mark post as helpful
  • send pies
    Number of slices to send:
    Optional 'thank-you' note:
  • Quote
  • Report post to moderator
I measured the kill cones when I rented the processing equipment last time.  My hope was to have a friend make one for incidental needs, but he hasn't had time or lacked appropriate scrap or something.  

Anyway, dimensions I took were 16" long on the back side, 15" on the front.  8" top diameter, 4.5" bottom diameter, which given they're not circles means I also measured circumference of 25.75" top and 14.75" bottom.

That size worked really well with my Freedom Ranger broilers.  Average dressed weight was a hair under 5lbs, so live weight was probably 6.5-7lbs, give or take.
 
steward
Posts: 21553
Location: Pacific Northwest
12040
11
hugelkultur kids cat duck forest garden foraging fiber arts sheep wood heat homestead
  • Likes 3
  • Mark post as helpful
  • send pies
    Number of slices to send:
    Optional 'thank-you' note:
  • Quote
  • Report post to moderator
I thought I'd mention this for those looking for a quick kill cone, or who aren't skilled to do amazing things with copper sheeting. Traffic cones are pretty easy to cut, and make decent kill cones. It's not something I would have thought to do, but my husband thinks outside the box, and realized the traffic cone would do nicely for the purpose.
 
steward
Posts: 15505
Location: Northern WI (zone 4)
4846
7
hunting trees books food preservation solar woodworking
  • Likes 2
  • Mark post as helpful
  • send pies
    Number of slices to send:
    Optional 'thank-you' note:
  • Quote
  • Report post to moderator
Be sure to take pictures as you build your cone (before, during, after) because there's a PEP BB in metalworking for that project.  Check it out here: https://permies.com/wiki/134239/PEP-BB-metalworking-sand-funnel
 
James Freyr
steward
Posts: 4837
Location: West Tennessee
2438
cattle cat purity fungi trees books chicken food preservation cooking building homestead
  • Likes 3
  • Mark post as helpful
  • send pies
    Number of slices to send:
    Optional 'thank-you' note:
  • Quote
  • Report post to moderator
I made a bigger cone so I'm ready to process larger birds when the time comes. Same process as before, but using a 26ga sheet of galvanized steel. The steel was awfully springy when trying to bring the two ends together to rivet. It would begin to form a nice roll, then suddenly a crease would appear in the sheet metal. It's full of creases which are kinda visible in the 3rd picture but what matters more to me is function instead of form, and this will work. This one is the same 16 inches deep as the other, but the top opening has a 36 inch circumference and the bottom a 16 inch circumference or in other words those were the lengths on the trapezoid I cut out. I think it is large enough to accommodate some big burly brahmas that are no longer laying and the 12 or so pound black astralorp rooster that I have.
Steel-cone-measuring.jpg
[Thumbnail for Steel-cone-measuring.jpg]
steel-cone-cutting.jpg
[Thumbnail for steel-cone-cutting.jpg]
steel-cone-riveting.jpg
[Thumbnail for steel-cone-riveting.jpg]
finished-steel-cone.jpg
[Thumbnail for finished-steel-cone.jpg]
 
Story like this gets better after being told a few times. Or maybe it's just a tiny ad:
12 DVDs bundle
https://permies.com/wiki/269050/DVDs-bundle
reply
    Bookmark Topic Watch Topic
  • New Topic