• Post Reply Bookmark Topic Watch Topic
  • New Topic
permaculture forums growies critters building homesteading energy monies kitchen purity ungarbage community wilderness fiber arts art permaculture artisans regional education skip experiences global resources cider press projects digital market permies.com pie forums private forums all forums
this forum made possible by our volunteer staff, including ...
master stewards:
  • Nancy Reading
  • Carla Burke
  • r ranson
  • John F Dean
  • paul wheaton
  • Pearl Sutton
stewards:
  • Jay Angler
  • Liv Smith
  • Leigh Tate
master gardeners:
  • Christopher Weeks
  • Timothy Norton
gardeners:
  • thomas rubino
  • Jeremy VanGelder
  • Maieshe Ljin

Rocket Stove Maple Syrup Evaporator

 
Posts: 42
9
  • Likes 9
  • Mark post as helpful
  • send pies
    Number of slices to send:
    Optional 'thank-you' note:
  • Quote
  • Report post to moderator
Thought some of you here might be interested in this. I set up a rocket stove syrup evaporator this year. For those of you that don't know about making syrup it takes about 40 gallons of maple sap on average to produce 1 gallon of maple syrup, needless to say that takes a lot of boiling and therefor a lot of heat. Most of the guys with backyard rigs have something along the lines of an oil tank or 55 gallon drum turned into a brick lined fire chamber. Its not uncommon to go through 1/4 to 1/2 cord of wood in a good days run. I don't have that kind of wood to use so I took a stab at creating a rocket stove version. Sugaring season came early here in Vermont this year so the rig is currently in a very rough prototype state but it works pretty well all in all. Once its up and running I can keep the boil going with 1 scrap of pallet wood at a time. At my work we are constantly getting broken pallets so there is an almost unending supply of these slats in various states of broken pieces so I don't even have to spend the time breaking down pallets.

Anyway the stove itself is made from 8" square steel tubing 1/4" thick. This is placed in an old 275 gallon oil drum cut both horizontally about 2/3 up and shortened up lengthwise. The majority of this space is filled with either stone wool insulation or perilte. on top of this sits a stainless steel body which holds the pans. the pans are common hotel pans. The front two pans are 2.5" deep pans and the rear pan is a 4" deep pan. the stove comes up so that about 2/3 of the riser is under the first pan and 1/3 under the second pan. The third deeper pan never fully boils but acts as a warming pan. I ladle sap across from here to the center pan then the front pan. The front pan is closest to syrup as I pull from the middle pan the middle pan then gets filled with warm sap (this pan will get up to about 180 degrees usually) then the rear pan is topped back off with more cold raw sap. When I run out of raw sap I pull the back pan all the way out of the rig it cant run dry as it will warp. Eventually the second pan gets too low too and this gets dumped into the front pan. At this point I slide the front pan back so that its directly over the heat riser and boil it down to about one inch. This it gets dumped into a pot and finished on the stove in the house as I have greater control.

There is an 8" stack at the far end of the rig that is about 10' high. The stove drafts well and is easy to light. Generally the flames will get pulled to about as far as the start of the warming pan. I have seen flames all the way into the bottom of the exhaust stack but only once. This is not really needed anyway as I don't really need the warming pan boiling anyway. I get smoke out the stack so I am not getting complete combustion I am not exactly sure why but I think it may have something to do with the flames contacting a cold (212 degree) surface immediately after coming out of the riser. Smoke is thickest when adding new wood and almost non existent after new wood is burning well. Like I said once fully fired up one stick or pallet scrap at a time keeps it fired. Yesterday a boiled down about 10 gallons of sap into about 3 pints of syrup, this sap started out at a higher sugar concentrate than normal as some of the water had frozen out overnight, but to boil 10 gallons down to less than a half gallon took about 4 hours, and maybe a pallet or pallet and a halfs worth of wood. This is a bit hard to judge as it was already broken up but I started with a bundle maybe 18" in diameter of pallet sticks. This amount of wood probably would have fed a conventional rig for about 20 minutes.

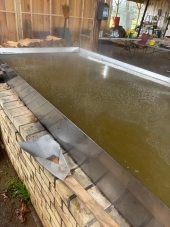
Let me know if you have any questions or tips. Like I said its a work in progress but sugar season is here so this works for now and I am quite happy with it. I attached a couple pictures the first is the stove section out of the stove body. then a picture with the pans off so you can see the pan body. The last picture is of the stove up and running boiling away happily.
IMG_7744.PNG
[Thumbnail for IMG_7744.PNG]
Stove Heart
IMG_7669.JPG
[Thumbnail for IMG_7669.JPG]
Stove Body
IMG_7730.JPG
[Thumbnail for IMG_7730.JPG]
Stove Running
 
Jeff Watt
Posts: 42
9
  • Likes 2
  • Mark post as helpful
  • send pies
    Number of slices to send:
    Optional 'thank-you' note:
  • Quote
  • Report post to moderator
A few more pictures

The first is the stove burning being fed one piece of wood. This piece is particularly wide most of the pieces I get are about half this width if I really wanted to conserve wood I could split pieces like this down as the boil is about the same with a half width piece or a wide one but the wood is free so I don't care.

Second picture shows the rig running with the warming pan removed you can see the flames pulling through under the second pan. They were actually feathering out about a foot past this pan but the camera didn't really capture it well. When up and running the whole riser glows bright red, things are very hot in there.

I do have some short video clips if anyone wants to see them I could post
IMG_7732.JPG
[Thumbnail for IMG_7732.JPG]
IMG_7738.JPG
[Thumbnail for IMG_7738.JPG]
 
Posts: 617
Location: ontario, canada
15
transportation fungi tiny house
  • Mark post as helpful
  • send pies
    Number of slices to send:
    Optional 'thank-you' note:
  • Quote
  • Report post to moderator
Yes post the videos !

We have sugar maples here and i was also debating on tapping a few- i could reduce it on my rocket also - but im new to tapping.

nice work
 
Jeff Watt
Posts: 42
9
  • Likes 5
  • Mark post as helpful
  • send pies
    Number of slices to send:
    Optional 'thank-you' note:
  • Quote
  • Report post to moderator
Here's a couple videos this one shows the only the time I got the flames to fully wrap across all pans not sure what the difference was this time around. You can also see good clear heat waves with little to no smoke in this.


The second shows with the warming pan removed.


The final one shows typical running. This had just been loaded you can see the smoking I get typical of loading new wood also it's burning a piece of cardboard which burn very smokey however it will maintain a boil on just cardboard if you want.


By the way don't mind the mess this is up at the adjacent lot I recently aquired(my new work shop/barn property), after sugaring season is over and everything thaws the massive cleanout begins.
 
out to pasture
Posts: 12489
Location: Portugal
3361
goat dog duck forest garden books wofati bee solar rocket stoves greening the desert
  • Mark post as helpful
  • send pies
    Number of slices to send:
    Optional 'thank-you' note:
  • Quote
  • Report post to moderator
I've fixed the video links in the first post and tidied up the thread a bit. Great videos - thanks for sharing them!
 
steward
Posts: 3718
Location: Moved from south central WI to Portland, OR
985
12
hugelkultur urban chicken food preservation bike bee
  • Likes 1
  • Mark post as helpful
  • send pies
    Number of slices to send:
    Optional 'thank-you' note:
  • Quote
  • Report post to moderator
This is so cool. I hope many more people discover they can make syrup using less wood with just a slighty different design.
 
Posts: 26
Location: Marquette county Michigan's upper peninsula
4
  • Mark post as helpful
  • send pies
    Number of slices to send:
    Optional 'thank-you' note:
  • Quote
  • Report post to moderator
Congratulations on you're newly acquired shop/barn. Thanks for posting this, I'm very interested in building one of my own with my neighbor who is an excellent welder. Im not to familiar with rocket stoves so we would be getting the DVD. Is there any special considerations for using rocket stove fore sap boiling?
 
Rocket Scientist
Posts: 4527
Location: Upstate NY, zone 5
575
5
  • Mark post as helpful
  • send pies
    Number of slices to send:
    Optional 'thank-you' note:
  • Quote
  • Report post to moderator
One major consideration is that the steel tube combustion core will not last forever at the temperatures a rocket stove reaches. I have seen reports of such systems corroding and needing to be replaced within one heating season, or 14 burns in one case.

The layout and overall design looks excellent, and with modest syrup production, may last a number of years.

However, I would advise building the actual combustion zone from brick (firebrick if available) rather than steel, for durability.
 
Jeff Watt
Posts: 42
9
  • Likes 2
  • Mark post as helpful
  • send pies
    Number of slices to send:
    Optional 'thank-you' note:
  • Quote
  • Report post to moderator
As far as special concerns I think you want a way to remove the syrup pan from heat as there is no easy way to quickly shutdown this system if your getting to far past the syrup stage.
I originally had all 3 pans welded together but found out after one boil this was not ideal. Now I can remove one pan at a time and once you have the first two pans out you can just move the final one out of the way of the direct heat.

Even if you scrape all the coals out of it, the entire combustion chamber glows bright orange/red after a couple hours of running so that itself holds heat for a while. Other possibilities might be adding some sort of cold air intake that could be dampered to cool off the pans a bit.

Glenn is correct the metal core is not going to last forever its 1/4" but at the temperatures I am achieving this wont last forever. I did not have time to make a castable core but this is my ultimate plan. Unlike a conventional home heater this will see a much shorter season so the metal may last a bit longer than in say a RMH. After the season is over I will post pictures of the heat riser and measure it with calipers to see how much it has degraded.
 
gardener
Posts: 1292
Location: Okanogan Highlands, Washington
397
4
hugelkultur cat dog books food preservation
  • Likes 3
  • Mark post as helpful
  • send pies
    Number of slices to send:
    Optional 'thank-you' note:
  • Quote
  • Report post to moderator
Cool project!
While you're using it this year, think about whether this is your perfect scale - just the right amount of heat - or whether you'd like something with more power.
The amount of wood you can burn roughly corresponds to power output - IF the wood and its heat are being used efficiently; wasted wood doesn't correspond to anything.

Whether you like it or want to change to a bit bigger size, you could re-make the fire box with a refractory liner (fire brick, kiln brick, or one of the castable refractories, with an insulation such as duraboard or rock wool). The metal-framed fireboxes that Tim Barker has been making for the Innovator events seem useful - easily protected from weather, moved, and stored between seasons. He makes them plug-and-play for outdoor ovens, griddles, smoker/BBQ pits, etc, so if you want to you could have different seasonal appliances that use the one fire box if it's a good durable one.

We favor the J-style fire box, wood self-feeds by gravity, but the proportions are different and it ends up being a bit taller. taller heat riser might take care of some of that smoke issue. Fire brick with good insulation might help too - the metal conducts heat away from the fire, which could effectively be cooling it too fast if it's a small fire.

Look up "barker" and "innovator," I don't have the exact thread handy just now.

-Erica
 
Jeff Watt
Posts: 42
9
  • Likes 3
  • Mark post as helpful
  • send pies
    Number of slices to send:
    Optional 'thank-you' note:
  • Quote
  • Report post to moderator
Thanks Erica,

I am definitely scaling up to a larger unit next year this is my first year sugaring and I didn't want to get ahead of myself. Also as the evaporator design was unproven I wanted to make sure things worked as I envisioned they would before dropping to much time and energy into the project. Currently I have 23 taps I am looking at doing 60-80 next year and building a system that would have a capacity of keeping up with maybe 120 taps down the road. I am thinking that I will be doing something along the lines of a 3'x4' pan (12 square feet) Currently I have a little under 4sq ft so we are talking roughly a 400% size increase. For this second generation build I am thinking I will use two rockets one on either end and have the pan sit on bricks that create a channelway forcing the flames to wrap up and around a wall to a shared center chimney. I attached a quick picture to help visualize this.

The amount of wood you can burn roughly corresponds to power output - IF the wood and its heat are being used efficiently; wasted wood doesn't correspond to anything.

I have to slightly disagree here. I understand what you are saying and I agree this is true on some levels especially in a RMH however in an evaporator I believe there is a drop of point at some point where more wood doesn't gain you much more boiling rate. Water can only boil so vigorously and release heat into steam so quickly and at some point more heat does not any longer give you more boiling and I believe you risk burning your product. If you built in such a way that the unit could somehow store the excess heat in reserve like a rocket mass heater then this principle might work but you would be talking about needing to store heat in excess of 219 degrees (the boiling point of syrup). I seem to be getting a boil rate of about 1 gallon per square foot of surface area per hour which is right on par with what the big oil fired professional rigs run at so I am fairly happy with that. I am not sure how much adding more heat would help increase this. I am friends with some guys with large operations (9000+ taps) basically they seem to say they can do lots to increase efficiency (use less oil) but very little to decrease boil time as that is fairly well fixed based on surface area.

Generation 2 will likely be built with a cinder block outer shell. The rockets will be built probably out of fire brick or possibly red brick although I haven't ruled out castable yet.

As for J style firebox I thought long and hard about J vs L before this first build. I liked the idea of filling it and being able to better tend the syrup while it self fed, but ultimately I went with an L shaped fire box because it gave me greater control of heat. I have a small coal rake which is basically a 5/16 rod welded to a 1"x3"x3/16 piece of steel. If I need to quickly shut the system down for some reason I can pull out any wood still burning and then rake out the coals. The riser still remains glowing red for quiet a while but this effectively shuts down the hard boil almost immediately. I have found through experience that needing to tend the L style more often than the J is really a non issue on a sugaring rig you are always almost actively standing right next to the unit anyway and there is quite a bit of time spent just watching the steam rise where you can easily find several seconds to push the wood in or reload.

Thanks for you input
rocket-2.jpg
[Thumbnail for rocket-2.jpg]
 
pioneer
Posts: 233
Location: Temperate hardwood forest (NW Michigan) - zone 5b, 38" precip/yr
40
7
trees tiny house solar
  • Mark post as helpful
  • send pies
    Number of slices to send:
    Optional 'thank-you' note:
  • Quote
  • Report post to moderator

John McDoodle wrote:Yes post the videos !

We have sugar maples here and i was also debating on tapping a few- i could reduce it on my rocket also - but im new to tapping.


John, we started tapping a few years ago, I'd like to share a few things. After hanging buckets on old-fashioned metal taps we have moved to smaller plastic taps with surgical tubing attached and led into collection buckets. Instead of open 1.5 gallon buckets that collected bugs, bark, and dirt the tubing can be led through holes drilled in bucket lids. We use 6 gallon food grade buckets (should be free ones available from restaurants or food processors near you) but you could use even larger collection buckets/tanks. Check here for the number of taps you can put in a single tree, it varies by tree size: http://www.maplemadness.com/backyard.html We still filter the sap collected before we boil but-- we no longer boil it ourselves.

There are many medium and large-scale syrup producers in my area, the Driftless region of Wisconsin which is home to Maple Valley, an organic syrup producers co-op that has members in Canada and New England as well. We take our sap to a friend with a large wood-burning evaporator set-up. He measures the brix level/sugar content of the sap we bring, runs it through a reverse-osmosis filter which eliminates over 20% of the water thus shortening the boiling time, and cooks and bottles the syrup for us. He calculates our yield from the sugar level and quantity of sap we bring, and we get half the syrup. Easy! His evaporator pan is about 42" x 96" and that is considered small.

If you want to boil your own, you need hours to tend a single boil. I think a purpose-built rocket-fired evaporator would be great. A single stovetop is too slow. I've done that using two burners at home and it takes much longer. Evaporator area is the limiting factor.


Posts: 5
Location: Thickwood Hills, Saskatchewan
  • Mark post as helpful
  • send pies
    Number of slices to send:
    Optional 'thank-you' note:
  • Quote
  • Report post to moderator
Very, very cool! Before seeing this, I put together a "quickie" rocket stove after boiling down a batch of syrup on a campfire setup. This is our first year sugaring, and in Saskatchewan, so not a whole lot of neighbours to share ideas with on this topic. I'll try to upload a video of my setup, which is built around the dimensions of a 3 gallon canner. 11" diameter heat riser, which can keep a rolling boil with our soft Trembling Aspen firewood. Lots better on dead Maple branches.
I agree that the L-shape is fine for sugaring. You don't want to leave the sap for long while boiling, so tending the fire isn't an issue. It'd be interesting to see what the increase in efficiency is for your setup. Mine is basically uninsulated, although the 11" diameter heat riser sits in an 18" diameter barrel, so there's air space there that hopefully holds a bit of heat otherwise lost. I've got the 120 taps as a goal as well, and definitely feel a lot closer after seeing your 3 pan setup! 3 gallon canners wouldn't cut it without having a dozen or so separate stoves. I'm keeping up with 11 taps with the stove now, usually having reduced a day's worth of sap by lunch or early afternoon.
I've been boiling pretty well flat out (sometimes the 3 gallon canner is boiling over with 1 1/2 gallons of sap in it!). That was based on the idea that faster is better for reducing, though I feel I've oversimplified too much, there. I like your ideas on being able to regulate temperatures to some extent.
Any advice or ideas on collection systems on the cheap? We've used quart Mason jars (too small), 2 liter glass bottles (large enough for trees close to house, but not those farther away), and 2 gallon plastic bags meant for wine 'must' (Can be left 2 days or more on our trees). I've heard milk jugs work well - I cleaned one up with metabisulfate; I certainly don't want milk residue. We've been using taps rolled out of tin cans/lids that seem to work well enough. Maybe 20% dribbles down the tree, 80% through tap.
Thanks for sharing all the info so far.
 
Glenn Herbert
Rocket Scientist
Posts: 4527
Location: Upstate NY, zone 5
575
5
  • Likes 1
  • Mark post as helpful
  • send pies
    Number of slices to send:
    Optional 'thank-you' note:
  • Quote
  • Report post to moderator
If you're trying to go with cheap/homemade equipment, try sumac spiles - a common method in the days before metal spiles were available.

Maple Sugaring from Scratch: Sumac Spiles

If there is no sumac in your area, any wood that has a pithy center and does not taste bad will probably work.
 
Posts: 101
Location: Minnesota
14
3
trees
  • Likes 2
  • Mark post as helpful
  • send pies
    Number of slices to send:
    Optional 'thank-you' note:
  • Quote
  • Report post to moderator
an easy/cheep source of containers for collecting sap is to talk to any local bakeries. They get toppings and fruit syrup in 3+ gallon buckets. Cleaning them and using them to collect the sap has worked REALLY well for me.

Don't limit the bakery to just a bakery but also most grocery stores that have a small bakery also get frosting and fruit stuff.
 
Posts: 1
  • Likes 1
  • Mark post as helpful
  • send pies
    Number of slices to send:
    Optional 'thank-you' note:
  • Quote
  • Report post to moderator
Jeff, are you still using this design?  This is my second year evaporating on an institutional rocket stove with 60L pot.  I've rebuilt the burn chamber a couple times with steel and I'm just starting to test mixtures of insulated castable refractory.   I'm also looking to redesign for next year to increase the evaporation rate which for me is 2.5gal/hr. The 60L pot holds over 10 gallons but there isn't enough surface area.  I'm curious to hear if you have any updates and what you've learned since this build.  

Thanks
 
Jeff Watt
Posts: 42
9
  • Likes 1
  • Mark post as helpful
  • send pies
    Number of slices to send:
    Optional 'thank-you' note:
  • Quote
  • Report post to moderator

Jim Peabbles wrote:Jeff, are you still using this design?


I am currently using a 2.0 design of this stove you can see the thread on that

https://permies.com/t/63218/Maple-Syrup-Shop-Heater-Update

It's working adequately I plan to make some improvements before next season probably a fire brick or cast rocket with a taller burn tunnel. This one is working but I want a J tube for ease of use and I also think I will benefit from a taller tunnel. The steel is holding up so far but will eventually burn out I get some flaking every burn. Anyway let me know on the other thread if you have some follow up questions.

 
Posts: 1
  • Mark post as helpful
  • send pies
    Number of slices to send:
    Optional 'thank-you' note:
  • Quote
  • Report post to moderator
Hey Jeff. I make syrup as well. My current setup is a concrete box that I burn wood in. It's very simple but uses a lot of wood. I'd like to redesign it into a rocket stove. It measures 2' wide 3' ling and 2' tall roughly. I know this is vague but could you give me some insight on how to redesign it? Currently the air comes in below the wood. You might be able to see it below the door. I'm about to figure it out, if my box is 36" deep how long should my fuel shelf be? Im sure I'll keep adding questions to this. Thanks, Kirk
15504326676581207964140.jpg
[Thumbnail for 15504326676581207964140.jpg]
My syrup cooker
1550432712204318976097.jpg
[Thumbnail for 1550432712204318976097.jpg]
 
Glenn Herbert
Rocket Scientist
Posts: 4527
Location: Upstate NY, zone 5
575
5
  • Likes 2
  • Mark post as helpful
  • send pies
    Number of slices to send:
    Optional 'thank-you' note:
  • Quote
  • Report post to moderator
What is the size of your pan? That is the part you need to design around. Do you have any bricks available? Concrete block will not stand up to the heat generated in a good rocket stove. Old red bricks will work and be reasonably durable, firebricks will work and last a very long time.

What you do is build an L-shaped combustion chamber; I find that at least 2' horizontal is needed for this, 2 1/2' is better. The vertical part of the L can be 2 1/2' tall and work fine. You can use the existing concrete block shell to support the whole core and pan. The top of the combustion core should be a few inches below the pan, ideally off center so the heat can flow across underneath the pan to the chimney. A flaring top to the core so the hot gases can spread out a bit before hitting the pan may be beneficial. Then a chimney close to the size of the internal L and at least 5', preferably 10', tall will give fierce draft and make the core rocket. You need to seal the the edges of the pan reasonably tight to the base so the draft isn't diluted. A layer of fiberglass will probably do the trick and be easily removed for maintenance.

For sizing, I have an 8" wide x 9" high horizontal channel 2 1/2' long total, and the same vertical, about 2 1/2' from floor to top, flaring near the top to over a foot wide crossways to the flow direction under the pan to the chimney. My pan is 8 square feet, and this core seems a bit undersized for it. Your pan looks smaller, so a core like mine may be just right. (I started with a 2' long horizontal tunnel, and found that increasing it 6" made quite a difference in heat generation.)

Finally, you need to insulate around the L-tube core to keep it freaky hot inside. Perlite works well for this as Jeff's original build had, and rockwool or fiberglass batting will also do the job. A well-burning rocket core will have yellow-white areas at the back of the L, with some purple flames occasionally visible.
 
Glenn Herbert
Rocket Scientist
Posts: 4527
Location: Upstate NY, zone 5
575
5
  • Mark post as helpful
  • send pies
    Number of slices to send:
    Optional 'thank-you' note:
  • Quote
  • Report post to moderator
With my 8 square foot pan, I find that I use about a 2' x 3' stack of 2' long sticks and logs to boil down 40 gallons of sap. They have to be good and dry to burn well; damp wood will not rocket. You don't have the huge volume of burning wood to dry out new damp wood put in.
 
pollinator
Posts: 920
Location: Central Ontario
171
kids dog books chicken earthworks cooking solar wood heat woodworking homestead
  • Mark post as helpful
  • send pies
    Number of slices to send:
    Optional 'thank-you' note:
  • Quote
  • Report post to moderator
Nice boiler,
I built mine to take a 2x4 pan using an airtight stove as the base with the top cut off and insulating the heck out of it everywhere else. Its installed in the greenhouse now for early season warming up and adding moisture after the long dry winter in there and making charcoal. For fuel consumption using soft wood only I can boil down 160 litres of sap using a stack about 2ft by 4 ft by 16" so its efficiency is pretty good. Im sure the rocket outperforms it but probably at the cost of constant tending of the fire. I think the box design allows you to walk away for longer periods of time. That does have drawbacks as you can't leave it when you start getting close to finished because the coals keep it chugging along for hours.
cheers,  David
installed in the greenhouse


Before it was finished
 
Posts: 1
  • Mark post as helpful
  • send pies
    Number of slices to send:
    Optional 'thank-you' note:
  • Quote
  • Report post to moderator
I'm new to rocket stoves. Came across this post when researching building a sap evaporator using a rocket stove.

Is there a significant difference is performance when the flue pipe is a different size?

Everything else being equal, what would be the difference between a 6" flue and a 8" flue? (By flue I mean the final exhaust pipe).

I see your model here is built with 8" pipe.

I happen to have 6" pipe available. Does it make a difference?

Thanks
 
Glenn Herbert
Rocket Scientist
Posts: 4527
Location: Upstate NY, zone 5
575
5
  • Mark post as helpful
  • send pies
    Number of slices to send:
    Optional 'thank-you' note:
  • Quote
  • Report post to moderator
Yes, it would make a difference. I think 6" flue pipe is too small to handle the output of a rocket core like mine (8" x 9" cross section). The most important base factor is the size of your sap pan. How big is it? I built a very similar core for my second evaporator which has 6 square feet of surface, and it boils madly over much of the surface. The 8 square foot pan would only boil over maybe half of its surface.
 
Won't you be my neighbor? - Fred Rogers. tiny ad:
permaculture and gardener gifts (stocking stuffers?)
https://permies.com/wiki/permaculture-gifts-stocking-stuffers
reply
    Bookmark Topic Watch Topic
  • New Topic