• Post Reply Bookmark Topic Watch Topic
  • New Topic
permaculture forums growies critters building homesteading energy monies kitchen purity ungarbage community wilderness fiber arts art permaculture artisans regional education skip experiences global resources cider press projects digital market permies.com pie forums private forums all forums
this forum made possible by our volunteer staff, including ...
master stewards:
  • Carla Burke
  • John F Dean
  • r ransom
  • Nancy Reading
  • Timothy Norton
  • Jay Angler
stewards:
  • paul wheaton
  • Pearl Sutton
  • Eric Hanson
master gardeners:
  • Christopher Weeks
  • M Ljin
gardeners:
  • thomas rubino
  • Megan Palmer
  • Benjamin Dinkel

A wicking bed for a high tunnel

 
steward and tree herder
Posts: 11864
Location: Isle of Skye, Scotland. Nearly 70 inches rain a year
5986
5
transportation dog forest garden foraging trees books food preservation woodworking wood heat rocket stoves ungarbage
  • Likes 11
  • Mark post as helpful
  • send pies
    Number of slices to send:
    Optional 'thank-you' note:
  • Quote
  • Report post to moderator
I get plenty of rain, but I'm putting up a new polytunnel soon and am thinking about making a wicking bed. I want to try and make it using materials I have to hand, but also want it to function well. I'd rather not have to rebuild it with new soil every year! I'd also rather do without plastic in my beds. I just don't like mixing them with soil, although I do have woven plastic weed membrane spare if that really is the best option. The polytunnel will be set into the hillside, so I'm hoping to use the rock as one side of the bed and capture the water off the plastic roof to irrigate the bed.

So this is the concept:


I have several large polythene containers that supplied eco-cleaning products (laundry liquid/washing up liquid) that I was thinking of cutting down to form the water reservoir. These would be linked together - probably with syphon tubing over the top if I can't find adaptors to fit the existing fill/air holes. These would be filled automatically when it rained from a water barrel, that fills from the gutter and overflows first into the wicking bed and then if necessary to a leaky pipe on the rest of the polytunnel beds. If I need to provide more water in dry times (at the moment I wish) then I can top up into this barrel. The beds would have an overflow at the far end which also would irrigate the rest of the polytunnel.
To avoid the plastic membrane, keep the soil out of the water, and provide a wick, I'm proposing to use sheeps' fleece. There is plenty in my area that is just a waste product and I have already put the word out that I would like some this year. I do have a little from my 'uses for dag end fleeces' project, but I think I will need more. This would be used to line the buckets. They could then be filled inside with broken rock as a support and the fleece turned over the top and tucked around the edges - topping up if neccessary.
On top of this to grow in, I would put topsoil - probably mixed with some bought compost to give it a good start. I'm thinking I could put a thin layer of sand (we have some dirty building sand spare) between the fleece and soil to make a boundary. The front of the bed would be corrugated galvanised steel - I have lots of sheets left from the roof of an old Byre. I will need to construct a wooden support frame outside that.
I know you need a thick mulch on top of the soil . Not sure what will come to hand here, but I don't suppose it matters too much - a thick organic layer of straw and big leaves. A mulch used to develop in my old polytunnel from chop and drop, and crop debris pretty quickly. I'm wondering whether pushing kitchen vegetable scraps underneath this layer would be too much of a good thing? I struggle with m worm bin - it is just too small for my waste stream, and I am worried the worms will get neglected.

Anyway, that is most of my thoughts on the subject. Sorry for the essay, but this is something I have no experience on, so I'd like to find out if there are pitfalls I have missed. Thank you!
 
master gardener
Posts: 5521
Location: Carlton County, Minnesota, USA: 3b; Dfb; sandy loam; in the woods
3078
7
forest garden trees books chicken food preservation cooking fiber arts seed woodworking homestead ungarbage
  • Mark post as helpful
  • send pies
    Number of slices to send:
    Optional 'thank-you' note:
  • Quote
  • Report post to moderator
I don't know if it'll work, but it sounds like a neat project!
 
Nancy Reading
steward and tree herder
Posts: 11864
Location: Isle of Skye, Scotland. Nearly 70 inches rain a year
5986
5
transportation dog forest garden foraging trees books food preservation woodworking wood heat rocket stoves ungarbage
  • Likes 6
  • Mark post as helpful
  • send pies
    Number of slices to send:
    Optional 'thank-you' note:
  • Quote
  • Report post to moderator
Thanks Christopher!
Shearing time is here and I've got three bags full (and more to come)

natural soil membrane

I've got them in the workshop at the moment as the dogs like to eat fleece. Hopefully next week the weather is better and we can make more progress on the polytunnel....

I'm concerned that the wool may smell or rot in the wicking beds. Mind you, maybe the nutrients washed off the wool will give my plants an extra boost!
 
Nancy Reading
steward and tree herder
Posts: 11864
Location: Isle of Skye, Scotland. Nearly 70 inches rain a year
5986
5
transportation dog forest garden foraging trees books food preservation woodworking wood heat rocket stoves ungarbage
  • Likes 7
  • Mark post as helpful
  • send pies
    Number of slices to send:
    Optional 'thank-you' note:
  • Quote
  • Report post to moderator
Finally I'm starting construction on my wicking beds, or at least preparing to!

First step is cutting the plastic buckets down: I used my little reciprocating saw with a metal blade and it cut through easily with little swarf. In fact it took much less time to cut them than to rinse the last of the laundry liquid out before cutting!

reusing plastic containers as buckets
Cutting down the buckets


I still need to rinse any swarf out of the buckets, but they're otherwise good to go.

So the next stage is to lay the buckets out in situ and check my plans: They are to go against the rock wall of the tunnel (shown below during frame construction) on the right hand side. I'm thinking that I'll excavate a little more rock to square off the corner so that they can sit underflush to the general compacted rock floor (to be covered with soil). Instead of metal sides I have been given some narrow gabion basket frames, which I think will make a nice stone facing to the beds, although I may line them with more wool to keep the soil in.

wicking bed location


Since I cut the buckets to give me a wider bed, I lost the nozzles that would have given me a suitable spout. I wonder how easy it would be to cut and weld one to the side of the bucket? Since I'll want to direct the overflow through the gabion bed side, I think I need some sort of extension so it doesn't just dribble.

I'm not sure what hose bits I've got to make the syphon tubing from to link the buckets. Doubling up seems like a good idea - if one springs a leak I don't want to have to dismantle the whole bed to keep the water flowing. I also need to think about where the overflow is going to be. By linking the buckets in a different order I can put the 'end' wherever I want it, not necessarily right at the end of the bed.
 
Nancy Reading
steward and tree herder
Posts: 11864
Location: Isle of Skye, Scotland. Nearly 70 inches rain a year
5986
5
transportation dog forest garden foraging trees books food preservation woodworking wood heat rocket stoves ungarbage
  • Likes 6
  • Mark post as helpful
  • send pies
    Number of slices to send:
    Optional 'thank-you' note:
  • Quote
  • Report post to moderator
I made a bit more progress on the bed over the last couple of days.

First I rinsed out the buckets and laid them out in the tunnel. It looks like I will have enough to do about half the length of the tunnel. I wanted to set them below the general level of rock in the tunnel, so that the gabions are able to make a deep enough bed. The gabions will sit on top of, or raised slightly above the general rock floor level. The gabion baskets I have are only 1/2 metre tall, so extra inches are worthwhile to get a reasonable soil depth above the buckets. I used a ladder and spirit level to get the base fairly level.

checking for level


Mostly I just needed to square off the corner of loose rock, which I could do with a shovel and mattock, but there were a couple of outcrops of denser rock that took a bit of breaking out. This one I managed to remove with a hammer and chisel, but a larger one I just had to leave. I'll probably put the buckets around the other way there and backfill to the side of them with broken rock and have a dry part of the bed.

breaking rocks


A few more 'dragon egg' nodules.

dragon egg removal


Refining the plans slightly, I decided to put the bed right into the rock corner at the South West of the tunnel. I was thinking originally that the corner might be useful for overwintering potted plants, as the shelter and thermal mass of the rock corner would keep things slightly warmer. However, I'm not intending to overwinter much in the tunnel that won't stand a bit of cold. The bed will also stabilise the corner, and stop the rock face from falling down. I think it will look more natural, with the bed ending in the rock face rather than a gabion wall and a gap. In addition, I'm not sure I will have plenty of gabions, so this will save a short length gabion for use on the main support face.

not treacle, but definitely a seam of 'cheese' in the corner


I'm contemplating buying more gabion baskets to make a retaining wall for a small pond next to the raised bed, so can add another basket to that project if I need to.
 
Nancy Reading
steward and tree herder
Posts: 11864
Location: Isle of Skye, Scotland. Nearly 70 inches rain a year
5986
5
transportation dog forest garden foraging trees books food preservation woodworking wood heat rocket stoves ungarbage
  • Likes 5
  • Mark post as helpful
  • send pies
    Number of slices to send:
    Optional 'thank-you' note:
  • Quote
  • Report post to moderator
Made a little more progress... I modified one of the buckets to be an overflow. I cut the air bleed out of the discarded top of one bucket which is the right diameter to fit my garden hose. I had to trim the thread slightly, but the hose pushed on pretty firmly.

checking for size


Then I fixed it with self tapping screws about 2 inches down from the top of the bucket. I had a small piece of closed cell foam which I was able to cut down as a gasket. To check that the system worked, I filled the bucket and confirmed that it overflowed, and it seems to do so with no leaks:

checking overflow works...


The surface under the bed is quite uneven, due to the rock strata, so I spread some of the smallest rocks down for the buckets to bed into. The overflow I have positioned slightly off centre in the bed so that it is more central in the tunnel (I'm hoping that the overflow will sort of create a wicking bed of the polytunnel beds themselves...)
I cut down some of my old hose for syphon tubes, but I need to find some more....They are also a bit old and brittle, so I definitely need to double them up. I don't want to have to dismantle the whole bed if the syphon breaks!

placing water reservoir buckets in position


Hopefully will be able to get the gabion baskets in position soon. The weather is pretty foul now, so it may not be tomorrow...
 
Christopher Weeks
master gardener
Posts: 5521
Location: Carlton County, Minnesota, USA: 3b; Dfb; sandy loam; in the woods
3078
7
forest garden trees books chicken food preservation cooking fiber arts seed woodworking homestead ungarbage
  • Likes 2
  • Mark post as helpful
  • send pies
    Number of slices to send:
    Optional 'thank-you' note:
  • Quote
  • Report post to moderator
I get that you're trying to get all the possible use out of old scrap material, but the idea that you present of losing the siphon under the bed seems like a real bummer. I'd be inclined to invest in some copper pipe and elbows or something to stave off the need to rebuild.
 
steward
Posts: 18192
Location: USDA Zone 8a
4627
dog hunting food preservation cooking bee greening the desert
  • Likes 1
  • Mark post as helpful
  • send pies
    Number of slices to send:
    Optional 'thank-you' note:
  • Quote
  • Report post to moderator
I feel you can do the same thing without the plastic containers if you have enough rock and gravel.

This approach is similar to the Ellen White method of tree planting.

You might try it for half of the bed to see what works best.
 
Nancy Reading
steward and tree herder
Posts: 11864
Location: Isle of Skye, Scotland. Nearly 70 inches rain a year
5986
5
transportation dog forest garden foraging trees books food preservation woodworking wood heat rocket stoves ungarbage
  • Likes 3
  • Mark post as helpful
  • send pies
    Number of slices to send:
    Optional 'thank-you' note:
  • Quote
  • Report post to moderator
Christopher, Copper would be nice but yes, I'd quite like to use what I've got lying around. I do have a bit of Polypropylene drinking water pipe which I've been feeling is too precious for this project. Silly really when I have spent quite a bit on the tunnel itself! I will think on it.....I don't really know how often the bed will need significant refurbishing. I'm hoping to keep the soil healthy by feeding the surface....
Theoretically there could be quite a water flow when it rains, thinking of the surface area of the tunnel, otherwise one could look at smaller diameter automotive pipe (like brake/fuel lines) I suppose. I will have to make sure I have a good buffer to hold a potential surge till it trickles through...
 
Nancy Reading
steward and tree herder
Posts: 11864
Location: Isle of Skye, Scotland. Nearly 70 inches rain a year
5986
5
transportation dog forest garden foraging trees books food preservation woodworking wood heat rocket stoves ungarbage
  • Likes 3
  • Mark post as helpful
  • send pies
    Number of slices to send:
    Optional 'thank-you' note:
  • Quote
  • Report post to moderator
Anne, the idea of the plastic buckets is to contain water so that I don't have to water from the top.... labour and water saving (hopefully). I've not tried it before, but will let you know how it works out. I'll be growing annual veggies in here mostly, so no deep roots to get established over years unlike trees.
 
Nancy Reading
steward and tree herder
Posts: 11864
Location: Isle of Skye, Scotland. Nearly 70 inches rain a year
5986
5
transportation dog forest garden foraging trees books food preservation woodworking wood heat rocket stoves ungarbage
  • Likes 1
  • Mark post as helpful
  • send pies
    Number of slices to send:
    Optional 'thank-you' note:
  • Quote
  • Report post to moderator
I've had another thought - I'll need a water level indicator! If the water gets too low then the syphon will break and it would be impossible to restart without dismantling the bed again 
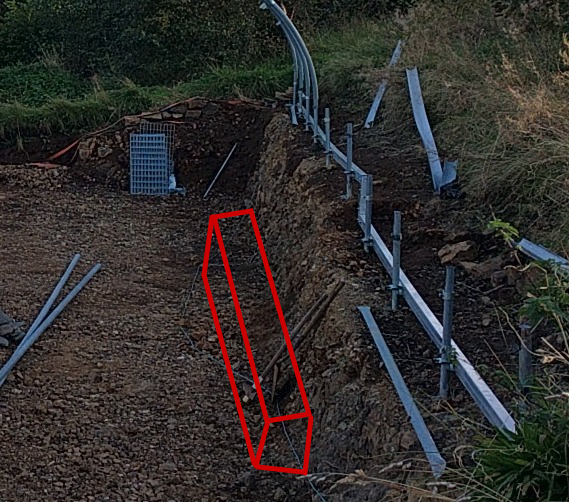
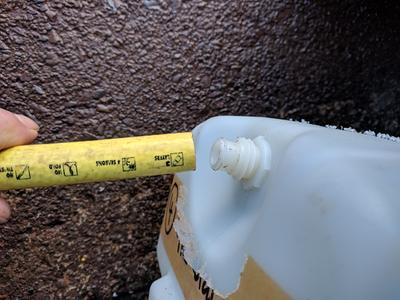
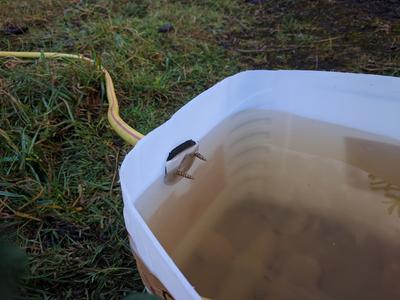
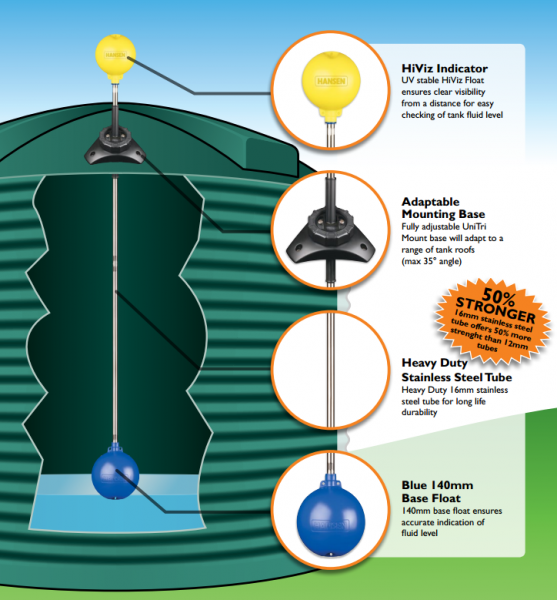
In the short term I can put a tube with a dipstick in it. I'll have to think about some sort of float indicator to make it easier to spot it there is a problem.

Also I'm wondering about the stability of the gabions. Since I am making them 1/2 the thickness, I'm going to end up with quite a long thin wall (6m (18ft) x 25cm (about 8in))....I think I'm going to need to put some internal butresses into the bed, which may mean I don't have enough gabion panels. I do have some galvanised inch mesh left over from another project which may make some butresses. Alternatively, I could make the whole wall the 1/2m (18in) they are supposed to be which would need more rock fill - more to think about! I suppose if I did that, and the height was right, they might double as seating....
 
Christopher Weeks
master gardener
Posts: 5521
Location: Carlton County, Minnesota, USA: 3b; Dfb; sandy loam; in the woods
3078
7
forest garden trees books chicken food preservation cooking fiber arts seed woodworking homestead ungarbage
  • Likes 2
  • Mark post as helpful
  • send pies
    Number of slices to send:
    Optional 'thank-you' note:
  • Quote
  • Report post to moderator
I wonder if it's possible to leave a narrow gap between the corrugated and gabion (if I'm understanding where everything goes) walls so that you could get eyes on the outside of just one of those plastic tubs. If you did leave some way to do that, you could just shine a light into that to see what the level was doing and then top it up manually as needed to protect the siphon.
 
Nancy Reading
steward and tree herder
Posts: 11864
Location: Isle of Skye, Scotland. Nearly 70 inches rain a year
5986
5
transportation dog forest garden foraging trees books food preservation woodworking wood heat rocket stoves ungarbage
  • Mark post as helpful
  • send pies
    Number of slices to send:
    Optional 'thank-you' note:
  • Quote
  • Report post to moderator
Christopher, I'm now not planning to use the galvanised sheeting, just gabions; they were a present, and this seems a good use for them. I'll maybe line them up with sheep fleece (which I have plenty of) to stop the soil washing into the rocks too much. But it means there won't be a gap. I'm assuming that the thickness of the gabions will be enough to stop the soil drying out too much through the walls and I think they will look much nicer.
 
Christopher Weeks
master gardener
Posts: 5521
Location: Carlton County, Minnesota, USA: 3b; Dfb; sandy loam; in the woods
3078
7
forest garden trees books chicken food preservation cooking fiber arts seed woodworking homestead ungarbage
  • Likes 2
  • Mark post as helpful
  • send pies
    Number of slices to send:
    Optional 'thank-you' note:
  • Quote
  • Report post to moderator
You could install a pipe or something through one gabion to facilitate that view. I'm imagining a section of large drain-pipe so that you could see more than just one little spot of the plastic wall. But I'm also open to not quite seeing your vision and there being reasons that won't work.
 
Nancy Reading
steward and tree herder
Posts: 11864
Location: Isle of Skye, Scotland. Nearly 70 inches rain a year
5986
5
transportation dog forest garden foraging trees books food preservation woodworking wood heat rocket stoves ungarbage
  • Likes 2
  • Mark post as helpful
  • send pies
    Number of slices to send:
    Optional 'thank-you' note:
  • Quote
  • Report post to moderator
Christopher, I think a window through the gabion wall could work. My only hesitation would be that it would be quite low down, so not so easy to see from any distance; I'd have to go and look. I was thinking of something more like this:


source

I'd love a 'happy plant' and 'sad plant' level, but I guess that could be adjacent to the indicator visual end. I think I should be able to make something like this - a float ball on a stick in a tube.....

It will be easy to check the syphon - add more water, does it over flow? but if it is broken it will be too late to just top it up; I think I may leave part of te bed open until I think it through properly. Mind you with the weather we've got at the moment I've got plenty of thinking time! Just wintry showers, but not weather for working outside.

On a related note, I have found some better hosepipe I can use. The main one I used for watering in the old tunnel is surplus, so I can use that I think.
 
I agree. Here's the link: http://stoves2.com
reply
    Bookmark Topic Watch Topic
  • New Topic