gift
Unofficial Companion Guide to the Rocket Oven DVD
will be released to subscribers in: soon!
  • Post Reply Bookmark Topic Watch Topic
  • New Topic
permaculture forums growies critters building homesteading energy monies kitchen purity ungarbage community wilderness fiber arts art permaculture artisans regional education skip experiences global resources cider press projects digital market permies.com pie forums private forums all forums
this forum made possible by our volunteer staff, including ...
master stewards:
  • Nancy Reading
  • Carla Burke
  • r ranson
  • John F Dean
  • paul wheaton
  • Pearl Sutton
stewards:
  • Jay Angler
  • Liv Smith
  • Leigh Tate
master gardeners:
  • Christopher Weeks
  • Timothy Norton
gardeners:
  • thomas rubino
  • Jeremy VanGelder
  • Maieshe Ljin

6" prototyping J stove running, variables welcome.

 
Posts: 46
Location: interior Alaska
1
  • Mark post as helpful
  • send pies
    Number of slices to send:
    Optional 'thank-you' note:
  • Quote
  • Report post to moderator
I have the pdf, and I believe it. I am not a rocket scientist, just testing variables one at a time to see what works. I don't have a lot of lab equipment, just workshop style common sense.

Iteration number one

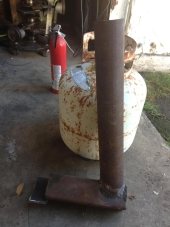
I started with four pieces of six inch diameter stove pipe, 2 two footer and 2 one footers. Added two 90 degree elbows. So I have assembled a 12" feed tube into a 90, a 12" combustion chamber into a 90, and then a 48" stack.

*I'll insert a picture here of complete unit when the sun comes out so I can take one.

This arrangement had good draft, but that is about all.

No secondary burn, but both Evans/Jackson pdf and E&E dot org talk about introducing turbulence in the heat riser to force mixing and encourage secondary combustion. So round elbow not ideal at burn chamber/ heat riser junction. I think I'll change that next.

I think the round elbow is also a problem at the feed tube/ combustion chamber junction. What kept happening was my burning sticks would slide down the slope of the elbow into the combustion chamber, making the effective feed tube longer and the effective combustion chamber shorter.

*second pic of highlighted problem areas here*

_____________________________________________

Thankfully I have a couple 6" stove pipe T fittings sitting around the garage. The next burn test will be with one T fitting and one round elbow, them two T fittings for the burn after that. Hopefully I'll be getting good secondary burn by then, after that I want to start choking down the combustion chamber to see how flexible that dimension is.

Other variables to suggest for testing are welcome, I am working towards a good understanding of these relationships before I start cutting bricks.

 
Michael Scott
Posts: 46
Location: interior Alaska
1
  • Mark post as helpful
  • send pies
    Number of slices to send:
    Optional 'thank-you' note:
  • Quote
  • Report post to moderator
iteration number two


I replaced one of the 90 degree elbows with a T fitting, under the heat riser. Hopefully this will introduce enough turbulence in the riser to get secondary combustion going. I hope to light it up in a few hours.

EDIT: Just finished a burn in IT two. No secondary combustion. Oddly it sounded more "rockety" and the exhaust plume was more uniform I think, better mixed. There was one point where a piece of spruce in the feed tube exposed a glob of sap that burnt fast and hot, but not quite enough to light off the smoke.

_____________________________________________________

One thing I notice is my fuel density is probably low. With that elbow on there my 16" wood sticks are sitting at an angle, meaning the biggest charge of wood I can fit has to fit through an elliptical hoop with major diameter of 6" and minor diameter of perhaps 4". (pi*r sub one squared + pi* r sub two squared)/2 gives me an effective feed tube CSA of 20.4 sqin in a air tube with CSA 28 sqin.

For iteration #3 I am going to switch the verticals, that is have a T fitting at the bottom of the feed tube and the elbow under the heat riser. I figure I have about a 50-50 shot of lighting off secondary combustion, but I bet it is real finicky. I suspect I will be done with an elbow at the bottom of the feed tube after that and anticipate moving to 2 T fittings and no elbows for future iterations.

If I can't get secondary ignition with two T fittings I'll look into insulating my heat riser. I should be able to get the secondary lit off in a 6" system with two T fitting; at least you guys can, my test wood is running 7-18% moisture content. It might be partly that my single wall stove pipe is just not getting hot enough with ambient outdoors temps well below zero. Once I am up on two T fittings I'll get the secondary lit before I fool with choking down the diameter of the combustion chamber in future experiments.
 
pollinator
Posts: 4154
Location: Northern New York Zone4-5 the OUTER 'RONDACs percip 36''
67
hugelkultur fungi books wofati solar woodworking
  • Mark post as helpful
  • send pies
    Number of slices to send:
    Optional 'thank-you' note:
  • Quote
  • Report post to moderator
Michael Scott : You are going in foe some expensive Prototyping, but have at it ! Due to the Freakishly High Temps your Rocket made up of metal 'T's will see- you will at least
warp your Metal pieces!
Just to save you a little time insulate the Feed Tube, Burn Tunnel and The Last 'T' forming the base of the Heat Riser, and use fine split very dry wood, filling 65%-85% 0f your
Feed Tube !

Your heat riser will not need to be insolated be for you put on the barrel ! also remember when the barrel goes on, the vertical chimney goes up This is a test- if your
rocket will not burn well with an exterior vertical chimney right off of the barrels lower manifold your problem is isolated to everything befor the Chimney- But you Know it is not
any of the horizontal ducting! Hope this is Timely and helpful, for the good of the Craft !
 
Michael Scott
Posts: 46
Location: interior Alaska
1
  • Mark post as helpful
  • send pies
    Number of slices to send:
    Optional 'thank-you' note:
  • Quote
  • Report post to moderator
Thanks Allen. At this point I am running 6" single wall stove pipe that I had laying around, don't have an immediate need for; giving it up to prototyping deepens my knowledge of the material.

Appreciate the commentary about putting on a chimney with the barrel to make sure all that is functioning well before ducting the stove into a thermal mass. Makes good sense. I am on course to build Zero's rocket stove this winter. If I can get it to behave my wife and I are talking about installing it in the garage to take some of the chill off the ground floor and maybe lower our oil bill a little more.

What I am doing right now is fooling with the proportions so when my brick gets here I can start with something that should work pretty good and have a good idea why.

Iteration number three


Still no secondary burn, but I was able to get a lot more little sticks of wood into the fireball at the bottom of the feed tube. When I really got it rolling with a good charge of wood it thumped a couple times like it was trying to light off, but it didn't catch. My local ambient right now is -25dF .

______________________________________________

Next I am going to rotate the T 90 degrees so the blind stump forms the bottom of the feed tube. This will maximize the fuel charge I can get in there. As pictured in "It 3" the bottom of the feed tube is still round, but only in one dimension instead of three dimensions like it was for It 1 and It 2.

I am not going to put an elbow back at the bottom of the feed tube. It sucks, don't waste your time.
 
allen lumley
pollinator
Posts: 4154
Location: Northern New York Zone4-5 the OUTER 'RONDACs percip 36''
67
hugelkultur fungi books wofati solar woodworking
  • Mark post as helpful
  • send pies
    Number of slices to send:
    Optional 'thank-you' note:
  • Quote
  • Report post to moderator
Michael Scott : I find it a curious turn of events that for the ''Invitational style'' wood stove test recently held in Washington D.C., that No vertical J-Bend type Rocket Mass Heaters
were Actually invited !

Due to the way the final rules were written and implemented ( In the judges efforts to be Fair ) The Batch-loaded Horizontal Feed Rockets placed low with - (It is my understanding)
high particulate numbers. This does not mean they were inefficient, merely that they could not run as efficiently as they were designed to and follow the 'Judges rules - ' .
This shows an unfortunate bias, and that the judges did not understand the way those two Rocket-types were made to be fired ! Unfortunately the test equipment is so damed
expensive, and is subject to creating variables in test results through/because of their presence that the Testing Periods probably should have been over days rather than hours
and as near perfect days were available during the test (I Think) no poor weather conditions were part of any testing !

I would like to see the Wash. D.C. tests become yearly ! ( I Think no Tax dollars were fronted for this project ! )

I definitely want to see more of Zeros type of Rocket Mass Heater RMH built, I would strongly encourage you to follow his build as close as you can for your first build, there is
an element of 'Luck' involved in all First builds and any sub- 6'' RMH system is a lot like a miniature pony cute but- !

Mostly for the numbers of Fellow Members following this Thread, and future members - I will occasionally repeat that the Firebrick you want is both highly insulating and reflecting,
and in the 28-30 OUNCE range rather than the much denser Fire brick that weigh 7-8 POUNDS each, And soak up so much of the heat that they actually retard the quick generating
of the freakishly high Temps that give our rockets their great efficiencies ! As You are going to be paying a premium for any bricks you get this seemed like a good time to mention
it again !

For the good of the craft, Think like Fire, flow like gas, Don't be a marshmallow! As Always, your comments and/or questions are solicited and Welcome! PYRO - Logically Big AL !
 
Michael Scott
Posts: 46
Location: interior Alaska
1
  • Mark post as helpful
  • send pies
    Number of slices to send:
    Optional 'thank-you' note:
  • Quote
  • Report post to moderator
Thanks for that Allen, once again.

I have been thinking about my experimental biases the last couple days and was planning to post them, this seems a good place.

1. I am not a rocket scientist. My formal academic background is in biology. I do enjoy recreational physics as a hobby in many ways, but I am loathe to stray too far from the beaten path in this particular field. There are a disheaterningly large number of threads in this section with the general theme, "I didn't spend the $15 bucks for the Evans-Jackson .pdf, my stove dimensions are outside the parameters specified in the pdf and my stove doesn't work, why?"

2. I live in Alaska. There are three main woods available to me for my stoves, Alaskan poplar (nothing like North Carolina poplar) at a lousy 14 million BTUs per cord, I have access to both white and black spruce that average about 18 million BTUs per cord, and the king of my local forest, birch at a "whopping" 23 million BTUs per cord- all pretty lightweight cordwood compared to the lower 48. I think, but can not yet experimentally prove, that I will _probably_ need to choke my combustion chamber down towards the low end of the accepted scale to get a good burn.

3. I think, but cannot yet prove the insulation on the heat riser is to keep the stove from stalling. Without insulation the riser will radiate heat to the outer drum- leading to a largish hot zone at the top of the drum - stopping the draw and causing smoke back. I was once upon a time thinking I might skip the insulation, but I suspect it is a very very bad idea.

4. What I am doing with this J stove in throw-away six inch pipe is learning what does work with the wood available to me. I still expect to get a roaring secondary burn in bare single wall stove pipe with outdoor ambients in the -20dF range.

5. Once I know what works for me and my local wood - and once my pumice based refractory brick gets here- sourced through my local pottery guild - then I can start building prototypes in brick for the Zero stove build. I want a set up that gives me a good secondary burn across the widest fuel/air mixture possible, but I also want to minimize cutting brick into odd shapes. I expect Zero's build as written will "work" for me, but I also expect the ideal dimensions for my local wood are similar but not exactly the same.

I plan to set up a sheet metal box and then place sacrificial wood blocks here and there outside the bricks but inside the sheet metal to find the J stove proportions that work for my wood so the first as built Zero based stove works as well as possible from the beginning.
 
Michael Scott
Posts: 46
Location: interior Alaska
1
  • Mark post as helpful
  • send pies
    Number of slices to send:
    Optional 'thank-you' note:
  • Quote
  • Report post to moderator
Sweet!! I got it!

Iteration number four

For this one I rotated the T fitting under the feed tube 90 degrees from It 3:


Detail view with commentary to follow:


I had to re-arrange my pipe to assemble It4. The horizontal combustion chamber in this version is already heavily heat damaged, but it isn't burnt through just yet. Before feed tube duty this same piece of metal got heated red hot end to end in my pocket rocket a time or three.

Notice especially there is a gap at the 12 oclock position where the combustion chamber meets the T fitting. In previous iterations this heat damaged pipe was my feed tube, with the gap closest to the combustion chamber. There is a thread on here somewhere of a user who built a metal plate that creates an air gap on the edge of the feed tube closest to the combustor. I know, I know, combustion chamber, I think of it as the combustor - fewer letters to type and I think just as accurate. In any event, my findings agree with that individual that choking off the feed tube closest to the combustor is bad, keeping some free air flow down the face of the feed tube closest to the combustor is good. For this burn I blocked the gap with a small piece of wood just sitting near there while the burn was getting established, and then removed it.

Notice also my "ash pit" capped with galvanized (I know, I know - I am outdoors with limited funds here) is quite deep compared to most published plans. I almost dropped half a brick in there to fill some of that yawning space, but decided against it - added unknown variable, more complex assembly, maybe next time.

I will say this was the easiest yet to start burn. I dropped a lit piece of fire starter in the bottom of that ash pit, dropped a lit wad of news paper down the heat riser, and then dropped a couple handfuls of kindling into exactly the right spot with out having my kindling scatter down the combustor as previously was its wont.

Ambient temp was -26d Farenheit:

Above is a partial screen capture from my local newspaper online at www.newsminer.com .

Pre burn, I still had the UPC label at the top of my heat riser after three previous burns:


In previous iterations I have typically run a mix of my local poplar, spruce and birch. I bring about a face cord of 16" splits into the garage every Saturday for the box stove upstairs, and pick through that for things to split small for the prototype. This week I don't have pretty birch to split small, I got knots and curves - so I ran mostly poplar today - but it was enough.

Victory dot jpg:


If you look real close in the top left corner of the pic one of neighbors has a house painted green, but the corner of his house is kinda wavy from all the heat running out my stack. Likewise the blue shed of my backyard neighbor, the white trim kinda fuzzy from samey-same. A bit to the right of that, the man door on the back of the blue house is sharp, straight and out of the billowing heat. No visible smoke coming out the stack. I got this in higher resolution if you doubt me, and I'll get one of the kids to stand behind the riser on a future burn.

During the burn, the riser got too hot to touch even with ambients below -20dF. Never found that before during a burn. No glow yet, but I bet if I get a load of pretty birch in there I can get this thing glowing red hot all the way up. Also, I could not hold my bare cold hand in the exhaust stream within four inches of the stack outlet for more than a fraction of a second.

Also, after the burn, I finally got enough heat in the stack to do this:


So experimental conclusion NUMBER ONE: The insulation on the heat riser is not there to to cause the secondary burn. I can get a complete secondary burn going in bare single wall stove pipe using Alaska poplar (14M BTUs per cord) in ambient temperatures below -20d Farenheit. With a leaky stove, and a relatively smooth elbow between the combustor and heat riser.

It could very well be the insulation on the heat riser gets the secondary burn started -faster- than it would in un-insulated pipe, but that isn't why "they" call for insulating the riser. I hypothesize, but can not yet prove the insulation called for on heat risers is in place to keep heat flowing up to the top of the riser and then down the bell rather than radiating directly from the middle of the riser to the middle of the bell. Sort of do not pass Go, do not collect $200. Or rather, in this case, the heat must pass go and must collect the $200.

For It5 and It6 I am going to replace the elbow under the heat riser with a T fitting in the two possible permutations.

Be advised Ice Fog season (http://en.wikipedia.org/wiki/Ice_fog ) is going to start any day now. When I am under ice fog unnecessary burning is both prohibited by law and likely injurious to the lungs of small children and the elderly. Running the prototype is unnecessary and will have to wait until the ice fog has dissipated.
 
Michael Scott
Posts: 46
Location: interior Alaska
1
  • Mark post as helpful
  • send pies
    Number of slices to send:
    Optional 'thank-you' note:
  • Quote
  • Report post to moderator
Iteration five
A better burn than #4. Second T fitting added under heat riser...


I got secondary burn going on this configuration with a smaller charge than was required for It 4. This is the feed tube right as it was cooling off enough to start falling out of secondary burn:


___________________________________________

From here, for It 6 I am going to rotate the T under the heat riser so I have basically another ash pit like the one under the feed tube. I suspect it6 will get into secondary even easier than it5, but I am not sure why. From there I will start fooling with choking down the combustion chamber CSA by setting a brick or two in it. I looked into buying more black pipe so I could run an 8" combustion chamber with 6" vertical pipes; but it isn't supposed to work and I can test it just as well -and more cheaply- in the upcoming brick arrangements I have planned.
 
gardener
Posts: 3471
Location: Southern alps, on the French side of the french /italian border 5000ft elevation
194
  • Mark post as helpful
  • send pies
    Number of slices to send:
    Optional 'thank-you' note:
  • Quote
  • Report post to moderator
Michael, it ain't a rocket without insulation.

Oh, and by the way, metal is doomed!

 
Michael Scott
Posts: 46
Location: interior Alaska
1
  • Mark post as helpful
  • send pies
    Number of slices to send:
    Optional 'thank-you' note:
  • Quote
  • Report post to moderator

Satamax Antone wrote:Michael, it ain't a rocket without insulation.


It is a perfectly fine rocket without insulation on the riser. My sons and I will probably split about five cords for winter 2014-15 over Xmas vaca 2013. it is going to be pretty nice out there spliiting wood in the back yard at -20dF with that thing running nearby.

We might be on semantics here. A J stove does not need insulation to get a perfectly wonderful secondary burn going, this I have demonstrated. If I am going to put a bell over it, or a drum if you must, then yes, I believe insulation on the heat riser will be mandatory.

Satamax Antone wrote:Oh, and by the way, metal is doomed!


Yes, this I know. But I am right on the edge of the my contest entry for maximum heat extracted from least amount of wood with cheapest stove possible. Once I find my best configuration for most efficient secondary burn with poplar I am going to see how far up the riser I can get red glow using very dry birch and somewhat sappy spruce.

 
Satamax Antone
gardener
Posts: 3471
Location: Southern alps, on the French side of the french /italian border 5000ft elevation
194
  • Mark post as helpful
  • send pies
    Number of slices to send:
    Optional 'thank-you' note:
  • Quote
  • Report post to moderator
Michael, a rocket isn't only about the sound, or secondary burn. It's also about emissions. If your tube is not insulated, it will cool down, so it won't be as cleanly burning as an insulated one.

Well, about steel, as long as you know
 
allen lumley
pollinator
Posts: 4154
Location: Northern New York Zone4-5 the OUTER 'RONDACs percip 36''
67
hugelkultur fungi books wofati solar woodworking
  • Mark post as helpful
  • send pies
    Number of slices to send:
    Optional 'thank-you' note:
  • Quote
  • Report post to moderator
Michael Scott : What you want for working out of doors is a Pocket Rocket, you already have all the stove pipe you need a 30 gal barrel will provide all of the heat that you want
especially with any kind of a wind break !

The pocket rocket stars working from the bottom up glowing red hot at the base ! I have actually seen it set fire to black top and Spall wet concrete ! The kids will love feeding it,
I usually make a triangle of iron stakes drove into the ground put the P Rocket in the center and wrap the outside with chicken wire as a stand off,, then if they are tall enough to
look down into the feed tube, they are allowed to feed it Hope this is timely and helps ! Big AL !
 
Michael Scott
Posts: 46
Location: interior Alaska
1
  • Mark post as helpful
  • send pies
    Number of slices to send:
    Optional 'thank-you' note:
  • Quote
  • Report post to moderator
Iteration number six I was expecting from the get go this would be my cleanest fastest burn.


It6 light right off, I was getting a clean secondary burn with this charge:


And I got this much glow (looong handheld exposure):


I was thinking from here I would fool with choking down the combustuion chamber diameter. However, as the burn progressed it seemed like It6 wasn't getting enough air. Ambients are above zero today, +5 or maybe +6 dF, a relative heat wave for me.

_____________________________________

Iteration number seven

So with six burning I tried this configuration twice:


And seven isn't the best answer either.

_______________________

From here my plan is to take the feed tube off and cut 4" off it. Then I will have an eight inch feed tube, and a scrap I can make into an air bleed at the combustion chamber side of the feed tube.

It seemed like six did great on a full charge. As the fuel charge was running down it seemed like the stove was running out of suction. taking off the feed tube riser -making the feed tube shorter- should have given the heat riser more of an advantage. Helped some, but I want more of a happy medium.

With and without the air bleed that will be It8 and It9, before I start fooling with combustion chamber diameter.
 
Satamax Antone
gardener
Posts: 3471
Location: Southern alps, on the French side of the french /italian border 5000ft elevation
194
  • Mark post as helpful
  • send pies
    Number of slices to send:
    Optional 'thank-you' note:
  • Quote
  • Report post to moderator
Michael, do you know what is a "Petter channel" ? Or P channel
 
Michael Scott
Posts: 46
Location: interior Alaska
1
  • Mark post as helpful
  • send pies
    Number of slices to send:
    Optional 'thank-you' note:
  • Quote
  • Report post to moderator

Satamax Antone wrote:Michael, do you know what is a "Petter channel" ? Or P channel


Yes and no. I got the idea of an air bleed leading straight down the feed tube into the combustion chamber from an old thread here.

I managed to search the old thread out again, and sure enough the air bleed I am talking about is called a "Peter channel"

This old thread: https://permies.com/t/12203/rocket-stoves/Rocket-Stove-rockety

Posts 24 and 25 give or take if I am counting correctly this morning.

Props to user Kirk Mobert.

 
Satamax Antone
gardener
Posts: 3471
Location: Southern alps, on the French side of the french /italian border 5000ft elevation
194
  • Mark post as helpful
  • send pies
    Number of slices to send:
    Optional 'thank-you' note:
  • Quote
  • Report post to moderator

Kirk Mobert wrote:I think Ernie's said this already, but..
If the feed box is larger than the burn tunnel, it WILL smoke back.

If you want to fool with the feed at all, make a reducer cap that fits over the top. Reduce the intake to somewhere between 1/4 - 1/3 system size, you'll have to play with it a bit here to get it right. You'll have to cut yer firewood short enough to fit under the cap. The reduction will accelerate incoming air, it will blow on the fire harder, making it burn hotter and giving it more whoosh.. There's a balance here.. On one hand, as Ernie said, it will move things through faster giving it less time to burn completely. On the other hand, it will burn hotter, shortening the time you need for total combustion. Timing is everything. A smaller opening will blow faster (up to limits) but allow a smaller volume of air into the fire per time unit.
Going too far in either direction (of opening size) will fail the stove, the goal is to find the sweet spot for your particular situation.

Another feed modification is the "Peter Channel", which is an air channel at the front of the feed that is the entire width of the feed box, it should be quite thin and made out of something that will conduct heat well like metal. The area of the channel should be between 5% and 7% of system size, the bottom of the separating piece should protrude down (into the burn tunnel/feed junction) the same depth as as the gap width of the channel. Also, the top should stick out a bit to separate the air flows.

In a stove without the Peter Channel, when wood in the feed box leans forward it will choke off the air a bit causing a relatively dirty burn. Also, the first brick of the burn tunnel gets really hot and will crack but more than that, when you experience "flame creep" (when fire climbs up the wood and out the feed, usually experienced burning soft-woods.) it's usually comes from right in front where the wood is ignited (I think) by touching that first brick. The Peter Channel solves all that by cooling the front brick, keeping the wood off said brick and always providing a quantity of air downwind, right into the path of combustion.

I made the one in my shower house from a chunk of an old water heater tank..


I beat it flat over an anvil, bent the tabs in a vice (with convincing hammer blows), then ground to size and fit.
You can see there's some kind of baked on enamel that coated the inside of the tank. It's quite resilient stuff, only really comes off when it's banged HARD between sledge and anvil.

Notice how the wings are bent? The way they set, makes it fall tight against the face of the brick and keep it there. You can accentuate the effect by notching out the underside of the wings a little at their "arm-pits".

Perfect explanation, that was invented by Peter van den Berg. It's an air channel which, even if you have most of the feed tube blocked by sticks, will let air in to help for a better combustion.
 
Michael Scott
Posts: 46
Location: interior Alaska
1
  • Mark post as helpful
  • send pies
    Number of slices to send:
    Optional 'thank-you' note:
  • Quote
  • Report post to moderator
So I made a Peter channel or P channel. I cut four inches off my feed tube pipe, straightened out the scrap and then bent it down the middle to about 90 degrees. Like a piece of angle iron made out of hand shaped stove pipe. Then I stuck my new shorter feed tube back on the J stove, measured to the combustion chamber opening and cut a pair of notches in the air channel so it would hang about an inch down past the junction.

Here is the P channel assembled to the feed tube on my work bench:


Iteration 8:


Woo-hoo! This thing took right off, got up on to secondary burn more quickly than any previous version - and I was able to cram a bunch more wood in there than usual without choking it off. The P channel is a valuable accessory I think. Biggest fireball yet.

______________________

Iteration 9

With It 8 running like a small locomotive I pulled the P channel piece out, so I was running a 10" feed pipe on a 50" riser, but with a monster fireball in the feed tube already and no P channel. The burn slowed down a lot, and it wasn't drawing enough air to burn off all the smoke from the smoldering bits. I waited I dunno, 30 seconds before I gave up on It9 and put the P channel back in- returning to configuration It8.
____________________

I am going to fool with this a little more before I commit one way or the other to a P channel. I was running some spruce tonight that smelt vaguely of turpentine when I split it smaller. The surface exposed in Mar 2013 when the round was originally split measures 14-13-14 % moisture content, the freshly split face I exposed tonight measured 15-15-15%. Pretty darn dry. Coming up with an entire cord of 14.x % MC is going to require pretty dry summers for us year after year.

I think I want the best running stove I can make with regular wood in the classic 16-20% MC range, and see how much better it will run with a Pchannel on it. I am also curious to find out what happens if I move the Pchannel 180 degrees around to the back of the feed chamber, and what happens if I run two Pchannels. And I know I got some birch around 23-24%...
 
Michael Scott
Posts: 46
Location: interior Alaska
1
  • Mark post as helpful
  • send pies
    Number of slices to send:
    Optional 'thank-you' note:
  • Quote
  • Report post to moderator
I screwed up. I mounted a stack thermometer at the top of my riser. But i didn't notice until it had cooled back down that the indicator needle is supposed to float above the dial, but was actually stuck under the dial.

Going by the hand test of charcoal-

http://www.finecooking.com/articles/how-to/judge-temperature-charcoal-grill.aspx?pg=0
and
http://www.weber.com/weber-nation/grill-skills/mastering-basics/charcoal/measuring-heat-the-hand-test

-my actual stack outlet temperature was between 375 and 600 dF, but the needle on my thermometer was stuck at 200.

So I get to do that over.

I did test burn some mesquite chunks from the BBQ aisle of my local Kroger. Jealous of y'all that can get it I am, I looked it up after the burn, 28M BTUs per cord, that's like jumping from spruce up to birch, only one more step higher. My chunks were too dry to measure 7% moisture content, the lowest my meter will read. With some longer sticks in the feed tube to aerate the pile of BBQ chunks it burnt Ok, but kinda fussy to get started.

Also been looking at air density. I have been doing test burns around -25dF, today it is +25dF.

http://www.engineeringtoolbox.com/air-density-specific-weight-d_600.html

I dunno how much a slug weighs, not much.

But at -25df air weighs about .090 pounds per cubic foot.
At zero F it's about .086
At +25dF it's about .082 pounds per cubic foot.
At +50dF it's about .077 pounds per cubic foot.

And if I build an outside air intake, at -40dF the stove will be sucking .095 pounds per cubic foot.

Getting the coldest possible air into the engine of a hot rod or race car is worth a fair bit of trouble, colder air is more dense, therefore more oxygen per unit volume; with more oxygen in the cylinder each time you can increase the duty cycle of the fuel injectors and make more power. Works for rocket stoves too, going from -25df to +25dF slows the burn down considerable.

I am pretty curious to know what my stack outlet temperature really is. If i can get it up to 600df or so and mount a grate on it I can grill my wife a steak in midwinter, for which I will receive many husband points.
 
Satamax Antone
gardener
Posts: 3471
Location: Southern alps, on the French side of the french /italian border 5000ft elevation
194
  • Mark post as helpful
  • send pies
    Number of slices to send:
    Optional 'thank-you' note:
  • Quote
  • Report post to moderator
So, now that you discovered temp differential, when will you insulate?
 
Michael Scott
Posts: 46
Location: interior Alaska
1
  • Mark post as helpful
  • send pies
    Number of slices to send:
    Optional 'thank-you' note:
  • Quote
  • Report post to moderator

Satamax Antone wrote:So, now that you discovered temp differential, when will you insulate?


I am not planning to insulate my beta tester in 6" single wall stove pipe.

I am planning to upgrade to a metal tray made of 1/8" steel plate, on legs; and move to testing 4" nominal J stoves made of firebrick next.
 
allen lumley
pollinator
Posts: 4154
Location: Northern New York Zone4-5 the OUTER 'RONDACs percip 36''
67
hugelkultur fungi books wofati solar woodworking
  • Mark post as helpful
  • send pies
    Number of slices to send:
    Optional 'thank-you' note:
  • Quote
  • Report post to moderator
Michael Scott : I have,followed your experiments with interest, mostly nodding my head in a self satisfied way as you get the expected results, tho you have exceeded my
expectations for getting good secondary burns .

Two things, we generally say that a clay mortar is not to hold the bricks together, but to hold them far enuf apart to make for easy leveling ! Ordinarily I would just recommend
A very quick dip in water followed by a dip in Clay Slip (think a good pancake batter !) as a good way to 'Dry stack' your bricks and get good seals around them. For you this
should be a make indoors, roll out doors project !

The other thing I would do is use a 6'' system as a practice piece rather than a 4'', you can always come back to a 4'', My housing plans are evolving and I will be going to less
space, so a 4'' is in my future, but this is basically as small as practical, and some people have given up on the 4'', It is like a .22, valuable but limited in its usefulness !

Keep plugging on and reporting, the numbers at the bottom of this thread prove many people are following your evolution ! Big AL !
 
Satamax Antone
gardener
Posts: 3471
Location: Southern alps, on the French side of the french /italian border 5000ft elevation
194
  • Mark post as helpful
  • send pies
    Number of slices to send:
    Optional 'thank-you' note:
  • Quote
  • Report post to moderator
I've made few iterations of a 4, worthless. May be with a core designed by Peter, sold by Dragonburners. But otherwise. I had one working well, that is the first cyclonic. But that melted and wasn't heating much!
 
Michael Scott
Posts: 46
Location: interior Alaska
1
  • Mark post as helpful
  • send pies
    Number of slices to send:
    Optional 'thank-you' note:
  • Quote
  • Report post to moderator

Satamax Antone wrote:So, now that you discovered temp differential, when will you insulate?


Very disappointing results with today's test burns, with a working thermometer in the stack outlet this time. I am rethinking insulation.

I mentioned coldest intake air possible for maximum power in a post above. When caring for high dollar racing engines the crew boss will tend to run a lower than optimum thermostat temperature to give the driver a little time to shut the motor down without hurting anything. For maximum efficiency, you want the coldest possible air in the hottest possible engine. If you got $30k in a single racing engine you can afford to give away a little efficiency in pursuit of peak power.

I'll come back to this after the data du jour.

allen lumley wrote:We generally say that a clay mortar is not to hold the bricks together, but to hold them far enuf apart to make for easy leveling ! Ordinarily I would just recommend
A very quick dip in water followed by a dip in Clay Slip (think a good pancake batter !) as a good way to 'Dry stack' your bricks and get good seals around them. For you this
should be a make indoors, roll out doors project !

Big AL !


I am closing in on that pretty quick. Given the layout of my property and the location of my garage, mortaring a brick prototype together with clay slip and then letting it dry indoors before rolling it outdoors to my test burn area isn't going to work for me. However, when I find my best system I can probably slip clay it together once and deal with moving it once. Once I have done that, is it possible to take the brick apart to make minor adjustments, or am I pretty much committed?


______________
I should mention that my climate zone according to the National Gardening Association is "1", the white part in the middle of Alaska. According to the National Arbor Day Foundation my climate zone is "2". Do I put a "1" or a "2" in my user info? I could write "Lawrence Welk" as in "a one and a two" I guess. We average about 14,000 heating degree days annually if you work in that system.
______________

My house is four star energy rated. Around about zero to +10dF I lose about 1/4 to 1/2 of one degree per hour with the doors closed over night. Below -20dF I lose about two degrees per hour, I don't have data yet for -30dF and lower this winter - I did sling some more caulking over the summer. I am self motivated here looking to capture all the heat I can out of every piece of wood I burn. I am not getting any younger, my shoulders aren't getting any stronger and that maul is getting heavier. When it is really really cold out my oil furnace will run 50-75% duty cycle, 30-45 minutes out of every hour. Seven thousand bucks worth last year with no wood stove in operation, at +62dF inside temperature.
 
Michael Scott
Posts: 46
Location: interior Alaska
1
  • Mark post as helpful
  • send pies
    Number of slices to send:
    Optional 'thank-you' note:
  • Quote
  • Report post to moderator
First instrumented burn

From here I am running Iteration 8 as pictured above unless specifically otherwise explicated. Its the best I can do with that set of materials.

Contestants du jour today are 1) Alaska poplar out of my own woodpile, uniform MC 15%, 14M BTU per cord, 16" long and split about as small as I am willing to fool with. Contestant 2) is mesquite barbecue chunks from either Lowes or Home Depot, about 2x2x2" in the bag. I split most of these a little smaller. The freshly exposed faces of the mesquite did not register on my moisture meter at all, so less than 7% MC.


Ambient air temp was +30dF, I'll be using this calculator for future air density reference: http://www.denysschen.com/catalogue/density.aspx

The Fairbanks airport reports an altitude above sea level of 434 feet, I am within 50 feet of that.

434 feet at +32dF my air density is .0793 pounds per cubic foot, at zero humidity. I am actually at 96% humidity, but cold air doesn't hold much water, for this burn I am claiming air density of .0792 pounds per cubic foot.

Here is the flue probe, installed. I only got one heat riser and one probe type thermometer, so this isn't going to vary much. Note it is 3-4 inches below the heat riser output. The instructions say to mount it 18" above the firebox on a box stove. Measuring in an orderly, workmanlike way down the centerlines of my round pipe this probe is 62 inches away from the junction between the feed tube and combustion chamber.


Here is the biggest charge of poplar I could run clean in my setup today. Eight lousy sticks, and the stove ran like a dead skunk...


But it was at least a clean burn. When I was holding the sticks just right I got the stack outlet temp up to 400dF indicated, by the time I got back from the garage with my camera the sticks had shifted and it was back to the running average I pretty much saw burning poplar today, about 300dF at the riser outlet:


The mesquite didn't burn well at all. I am chalking that up to sticks of the wrong shape and size. My options are to pay shipping on firewood from Texas and then split it, or split my stuff smaller, get out my drill and make shishkabobs. I bet by the time I am done making shishkabobs I'll wish I had paid the shipping...
 
Michael Scott
Posts: 46
Location: interior Alaska
1
  • Mark post as helpful
  • send pies
    Number of slices to send:
    Optional 'thank-you' note:
  • Quote
  • Report post to moderator
Instrumented burn number one discussion.

I am very disappointed with the poplar burn today. Even five degrees cooler yesterday at +25dF the stove was running noticeably better. Eight sticks at +30dF, I know I was running at least 11 sticks around 0dF and at -25df I can load standing room only spruce in the same hardware. At -25F my stove is an entirely different critter (athletic predator) from what I was running today (dead skunk). I can't load standing room only birch at -25df and get a clean burn, but I can sure get the riser output hotter in colder weather.

Subjective data:

Today I could hold my bare hand in the riser output for 7-10 seconds before my hand started feeling hot. At 25 below with standing room only spruce in the can a fraction of a second was all I could stand.

There is a pipe junction in my heat riser. Today I could rest my knuckles on the outside of the riser just above the junction for about 5 seconds. At 25 below with standing room only spruce it was too hot to touch in the same point. I have a magnetic mount flue thermometer on the box stove in my house I may borrow for future burns, I'll put it right there.

Hypotheses:
1. Insulation must make a huge difference on these. Are not most of you running these skipping an outside air intake and letting the stove draw heated air out of your living room to run the stove? Yes. But they don't run like dead skunks, you are happy with them? Yes. So you must be getting much better throughput out of your insulated stoves than I am out of my un-insulated beta. I shudder to think how poorly my stove would run if I brought it into the house, hooked it up to my existing 6" chimney and fired it up. I am not sure how it would really do, feeding it intake air at +62dF would be bad, but adding I think about 16 vertical feet to my heat riser might help a little bit.

I am willing to believe insulation is more important to a good install than cold intake air is --- but if you are going to all this trouble anyway cold air is -seat of the pants- very very desirable.

What I am going to do next is make some shishkabobs out of my mesquite chunks, and find some kind of insulation for my stove pipe. Like aluminum based bubble wrap or something. When it gets back down to -25dF - likely this week sometime- I'll run it again, uninsulated and instrumented. Then I'll insulate it and run it instrumented again. Insulated and -25df feed air ought to be impressive.


Michael Scott
Posts: 46
Location: interior Alaska
1
  • Mark post as helpful
  • send pies
    Number of slices to send:
    Optional 'thank-you' note:
  • Quote
  • Report post to moderator

allen lumley wrote:Keep plugging on and reporting, the numbers at the bottom of this thread prove many people are following your evolution ! Big AL !


Thanks Allen.
 
allen lumley
pollinator
Posts: 4154
Location: Northern New York Zone4-5 the OUTER 'RONDACs percip 36''
67
hugelkultur fungi books wofati solar woodworking
  • Mark post as helpful
  • send pies
    Number of slices to send:
    Optional 'thank-you' note:
  • Quote
  • Report post to moderator
Michael Scott : There is insulation, when properly installed it gives you a consistent R value ! Then there is Ceramic Refractory materials, many of the People who post to these threads
treat ceramic materials as though they were the same thing as regular insulation, just able to withstand exposure to Uber high temps without falling apart !

Ceramic Refractory Materials also have the amazing ability to Reflect or Refract most of the heat back into the Combustion chamber this allows New Modern and improved Rocket Mass
Heaters RMHs- to come up to maximum efficiencies within 1/2 a minute, of course the other side of that coin is the ability to use or store for later use that heat energy!

I mentioned that there are two types of fire brick, the heavy ons that soak up a lot of heat and release it slowly so that you can more easily have a sustainable heat range- and the
lighter ones that can not absorb heat energy quickly, as such they are considered insulating the same way a bucket of sand with lots of trapped air spaces is considered insulating.

Even with 100 year old, soft, red or red orange, house brick eventually there is enuf heat absorbed after feeding your Rocket over an hour or so that when you go to put in they next
chunk of Dry firewood it seems to spontaneously burst into Flame ! Well planned you should reach the end of your evenings burn of allotted wood and see very few coals, but a good
healthy red glow in there.

Cold air is Just a cheep mechanic's trick to cram in denser/more air, Your rocket stove will suck in all the air it needs, some times you may find that you will have to partially close off
the mouth of your feed tube to channel the air to flow more directly past your fuel wood, with practice you can eyeballing and slide a brick into place faster than most other wood stove
types can reach for the poker !

I Know that you have a local source for the brick you are planning to use for your Rockets fire brick, as it is unknown to me I can not say what will happen after you have clay slipped
and fired your bricks also depending on the type of clay you are using and how hot he fire, you may get a little glazing after you have run it a while ! Your bricks will probably just pop
apart into individual bricks with just firm twisting!

Probably your best plan is to plan your bricklaying out some people get real anal and color code the levels and number the bricks, I try and get by with planing, practicing, and
planning and having special piles for special places before I mix up my Clay slip ! Hope this helps, we are having a heat wave here it is almost up to freezing ! Big AL !

Oh yes, I figured you would want to try to fire the Brick core Feed Tube, Burn Tunnel and Heat Riser with out any insulation at all just to see what it will do ! for that you only need to
let it set up as the whole thing is just a mechanical fit very little bonding occurs even with firing and again I Was not thinking about the temperatures!

I may have already mentioned this Insulation around the Heat riser before you fit your barrel, and then test it with a nice tall vertical chimney, before you hook up your horizontal
piping, you should get a good strong rocket-y fire with out any smoke back immediately and this will tell you you can move on to the next step !

late note you snuck in a couple of posts while I was typing, but i don't see any thing other than you making sure you understand what other people are willing to take on faith, just
keep doing what you are doing ! A. L.
 
Satamax Antone
gardener
Posts: 3471
Location: Southern alps, on the French side of the french /italian border 5000ft elevation
194
  • Mark post as helpful
  • send pies
    Number of slices to send:
    Optional 'thank-you' note:
  • Quote
  • Report post to moderator
Well, Michael, i did some prototyping few years back, and this autumn. Based on Peter's research and coments.

http://www.youtube.com/watch?v=dM-GbmlVGXo

http://www.youtube.com/watch?v=lDDrmaMGURQ

http://donkey32.proboards.com/thread/849/green-machine-inch-tube-help
 
allen lumley
pollinator
Posts: 4154
Location: Northern New York Zone4-5 the OUTER 'RONDACs percip 36''
67
hugelkultur fungi books wofati solar woodworking
  • Mark post as helpful
  • send pies
    Number of slices to send:
    Optional 'thank-you' note:
  • Quote
  • Report post to moderator
Satamax : I just want to clear up part of what we are seeing in these videos, In the first one you are showing a nice rocket-y effect and your fire box appears to be a simple Terra Cotta
fired clay tile ! I know I am not the only one who has had problems with cracking and spalling with these tiles specially while trying to use recycled pieces . Also your horizontally Fed,
batch loaded, Rocket Mass Heater RMH, Seems to be made up by shaping bricks to work inside of a Terra Cotta Chimney Tile also! So I guess my Questions are have they held up well
for you ? And Do you think that you mitt have a better grade of chimney tile than is available here in the states?

As a last thought I am now ready to accept the general superiority of the more Heat Energy reflective Aluminized Steel over Stainless Steel, unfortunately, I have to buy the stuff over
here that is sold as Automobile body repair panels and I can get that stuff in panels big enough for 7'' pipe and I would like to experiment with its reflectivity around the Heat Riser
Iam just sharing here I need to start a new thread to discuss this more ! BIG AL
 
Satamax Antone
gardener
Posts: 3471
Location: Southern alps, on the French side of the french /italian border 5000ft elevation
194
  • Mark post as helpful
  • send pies
    Number of slices to send:
    Optional 'thank-you' note:
  • Quote
  • Report post to moderator
Guys, i'll reply my tomorow, about all you want. Now i'm knackered, having done a 250 miles or so, in the mountains, Twice the 7000ft pass above my home, 14h round trip, Fetching a 300kg safe, an oxy acetylene torch, bottles and all. A plasma cutter. and 32 plastic boxes. I work at 8.30 tomorow, so i might not reply in the morning.

Seeya!
 
Michael Scott
Posts: 46
Location: interior Alaska
1
  • Mark post as helpful
  • send pies
    Number of slices to send:
    Optional 'thank-you' note:
  • Quote
  • Report post to moderator
Introducing heavy fuel A: mesquite on bamboo skewer.


To make up some kabobs I am going to need to bring a round into the garage so I can split my mesquite smaller. This is going to be a major pain in the neck, but that is what hot rodding is all about. I was going to use finish nails, but I have to drill to use those anyway - with the bamboo skewers cleaning up the yard next spring should be easier.

More snow in the forecast for the next 36 hours or so before the temp starts dropping. I am planning to get one data point running the instrumented uninsulated stove at zero dF give or take, and then again at -25dF. Once I have all those burns instrumented in the uninsulated version, then I will slap on some insulation at -25df and run it again. That should be the last burn in this prototype unless I have some free time at -40 put another data point on the chart.

Mulling over the "cheap mechanics trick" comment above I ass/u/me the author meant no personal offense and was able to muddle out that I am in indeed hot rodding yet another motor. The fastest car in the quarter mile I ever owned ran high elevens. The fastest dependable car I have owned runs the quarter in low 13s. The fastest car I ever crewed for could do the quarter in 8.2 seconds on a good day, but we raced in a 9 second class; that is 9.000 was a perfect score, at 8.999 we would be disqualified ~ we typically ran 9.050 to 9.015. A couple years later with a lot of crew turnover the car was running consistent 9.002s to 9.007s. EDIT: FWIW according to the internet my 1990s ford Ranger pickup should have been able to do the quarter mile in 16 and change seconds back when it was brand new.

To be clear, all I did on that crew was change tires while three or four other mechanics wear working on the rest of the car. In exchange for beer. But I learned a lot.

I have never been invited to crew a turbine engined vehicle. Now I have not only a rocket engine to tinker with in my back yard, but once I get it figured out I can heat my home more efficiently with it.

No matter what, all other things being equal engines are air pumps. The engine that pumps the most air can burn more fuel and make more power. It just is. If you want to look at pretty boats instead of fast cars, google up Miss Budwieser the unlimited/ open hydroplane race boat, from about the mid 1960s forward. You'll see the turbine intake moving further forward and higher every time they build a new tub. What they are doing - now heavily regulated by class rules- is positioning the air intake to get fewer water droplets and more air so they can burn more fuel...

Looking at Kirk Mobert's pics above in this thread, quoted by Satamax, it is self evident that insulating the J stove creates grand performance increases. Look at all the wood in that firebox. Wow. It may very well be that having good insulation is so important that cooling (making more dense) the intake air is of secondary importance, though the potential gains are quite noticeable.

One piece of the puzzle is total system performance. I am pretty confident I could burn through the top of a 55 gallon drum in under a month for sure with cold air and good insulation. What that tells me is the complete systems as published in the Evans/Jackson .pdf are SIGNIFICANTLY detuned from the maximum performance of the J stove. But if you increase the power output of the J (easy) you have to come up with a stronger better more expensive top for the drum (hard). How hot do I want my house really? Is going from 5 cords a year to half a cord a year enough, or do I really want to burn just a third of a cord, or a quarter of a cord- after I spend $1000 on a super duty drum lid?

Ongoing from here:

Three more burns in the 6" SWSP as explicated above.

Mesquite kabobs need to be ready for burn #2 and #3.

I need to come up with some firewood at 20% moisture content. The low teens stuff I have available this year is an anomaly directly related to an unusually dry summer. 20% I can plan on getting in my wood shed every year, I need to build a stove that will run good on that, knowing that it will run better on dryer wood.

My friend with the welder is working on the metal prototyping table I need to start building in brick.

I need to get some bricks in here and figure out what cuts I have to make to build brick prototype number one.

I need a round out of next winter's wood pile in the garage so i can split my chunks of mesquite small with a hatchet and not lose those little pieces in the fresh snow we got today.

I need one of my sons to get over here and start splitting my wood for next winter. Somewhere in that pile are some spruce rounds with golf ball sized globs of sap showing. I wanna melt some of that and drizzle it on my mesquite kabobs, cause I ain't fooling around here.

I need to find that CD I made years ago of racing music so I can stay pumped and focused running my drill press making mesquite kabobs.

And I need to pick an insulation product for Iteration #8. Went to both H-D and Lowes after work today, it looks like the foil back 2" thick fiberglass stuff at R =6 is the bang for buck option. The metallic bubble wrapped stuff can only be in contact with things up to 180dF, I know I am going way over that. Suggestions very welcome on this one. I expect to see -25dF in the next five days and want to move on to my second rocket engine tout suite.

 
Michael Scott
Posts: 46
Location: interior Alaska
1
  • Mark post as helpful
  • send pies
    Number of slices to send:
    Optional 'thank-you' note:
  • Quote
  • Report post to moderator
Two instrumented burns tonight at +1 Farenheit.


Humidity is 65%, air density is .0843 pounds per cubic foot.

I have a bit of wind, a new variable for me. The flue exhaust was running at about 100dF average for both burns, trhough it did creep up almost to 200dF once during the spruce burn. I think I lose a lot more heat through the SWSP in light winds then I do in calm winds.

First I gathered 8 sticks of poplar, twice, and weighed them.


I am real comfortable desribing instrumented burn one above as the stove being charged with one pound of fuel and it running like that was all the fuel it could take at +30dF.

Tonight I got the stove lit and kindled with unweighed kindling - and then I was able to load all my poplar, 2 pounds, 0.2 ounces worth. The burn took 17 minutes and 37 seconds, and the stove was acting like it wanted more fuel.

I was at standing room only on the poplar, so I split some spruce while I was waiting for the poplar to finish and found the top load the stove could handle was 2 pounds, 8 ounces. What I did was weigh all the spruce I split, loaded the stove to all it would take (just shy of standing room only) and then I weighed the wood that wouldn't fit. Pics on request. Burn took 19 minutes and 9 seconds.


Michael Scott
Posts: 46
Location: interior Alaska
1
  • Mark post as helpful
  • send pies
    Number of slices to send:
    Optional 'thank-you' note:
  • Quote
  • Report post to moderator
instrumented burn two discussion

There's something rotten in Denmark. No way can changing the air density alone from .0793 to .0843 lbs/ cubic foot ( a six percent change in air density) be the only factor that lets the stove handle more than double the fuel charge, from 1 pound to 2.5 pounds. Its just not reasonable. 19:09 is a little bit longer than 17:37 and 18:00, but not 2.5x.

It could be the heated exhaust gas is making better suction thus drawing in more volume of air per unit time at the colder temperature.

I went ahead with the burn tonight in spite of the wind because it is supposed to keep cooling off and I might not see ambient temps above zero again until late February.

Other hypothesis very welcome. How can this be?

 
Legend has it that if you rub the right tiny ad, a genie comes out.
GAMCOD 2025: 200 square feet; Zero degrees F or colder; calories cheap and easy
https://permies.com/wiki/270034/GAMCOD-square-feet-degrees-colder
reply
    Bookmark Topic Watch Topic
  • New Topic