|

|

|

|

|

|
|
|
|
|
|
|
|

|

|

|

|

|


For all your Montana Masonry Heater parts (also known as) Rocket Mass heater parts.
Visit me at
dragontechrmh.com Once you go brick you will never go back!
thomas rubino wrote:Scott; If you don't have enough room for a mass then look into using "bells" instead. They take up much less room, and weigh less. A search here at permies will give you a lot of different bell options to look at. (A) a rmh without the mass is a rocket stove. (B)Trying to use a 6-8" rmh with a 3-4" vent is not going to work. Your horizontal pipe in the mass can run back & forth and over top of itself if your floor space is limited, but your floor needs to be strong enough. (C) Use that barrel to make a charcoal retort in the backyard. (D) That charcoal your wanting to make is wood you could be burning and it may rob to much temp from your indoor rocket, making it burn smoky. By the way ,don't know how long you have lived here but... be prepared last winter was mild compared to what it can be. Locate some clay & sand now before freeze up and get it home. locate a source of fireclay & fire brick or old red brick, should be easy in missoula. Get a copy of ianto evans book rocket mass heaters & read it .Tell all your friends about rmh,s they really work !
 .
.
 . Been in Hamilton since '05, and last winter was by far the worst I've seen since we moved here..really hoping this winter isn't as bad.
For all your Montana Masonry Heater parts (also known as) Rocket Mass heater parts.
Visit me at
dragontechrmh.com Once you go brick you will never go back!


Success has a Thousand Fathers , Failure is an Orphan
LOOK AT THE " SIMILAR THREADS " BELOW !
thomas rubino wrote:Scott; look at matt walkers cast riser using fireclay & perlite with a 16 gal grease barrel and a piece of sonotube for an inner form. Its cheap / easy and will work oh so much better than metalbestos.
allen lumley wrote: Scott : You could try Contacting a few friends you used to work with ! There are A lot of 5'', and a few 6'' oil fired water heaters still out there! Also check out
Craigs' List .
While I would never attempt to build a system smaller -the 5'' is do-able! The fine people at Dragon Heaters Dragionheaters.com have a few 4'' RMHs
available for sale to that part of the general public that understands RMHs but lack skills, or Time or Space ! At least check them out !
Good luck with your future Dragon ! For the crafts! Big AL
Late note ; It is only probably the angle that the picture was taken at, but as such it might confuse another member, I like to have my reflector shield 4'' off
of the wall I am protecting, and the Gap at the bottom more like 6'' Y.M.M.V. A.L.
 ? I would think 66 bricks would be enough to make the whole thing if I wanted to, but without making a mockup I don't really know. Maybe someone with more experience can chime in. I think I'm going to make the rest of it from a 55 gallon drum. Depending on how tall I need to make the heat riser, I could always cut off a section of another barrel and weld it on top to make it taller (if need be). Then make the water tank into a bell, and vent that up to the roof with black pipe. Sound like a good plan?
For all your Montana Masonry Heater parts (also known as) Rocket Mass heater parts.
Visit me at
dragontechrmh.com Once you go brick you will never go back!
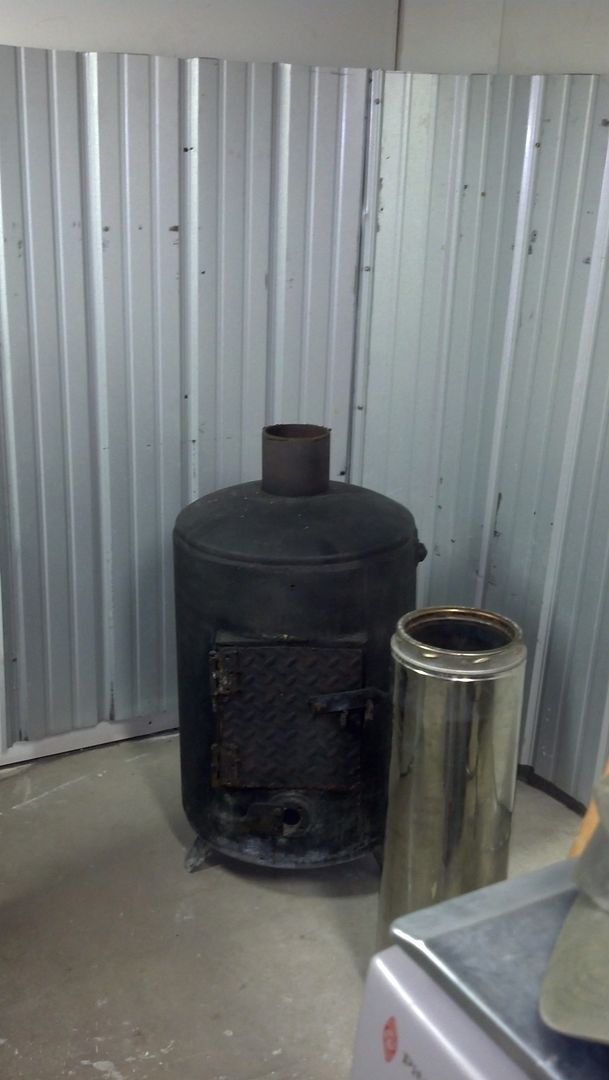
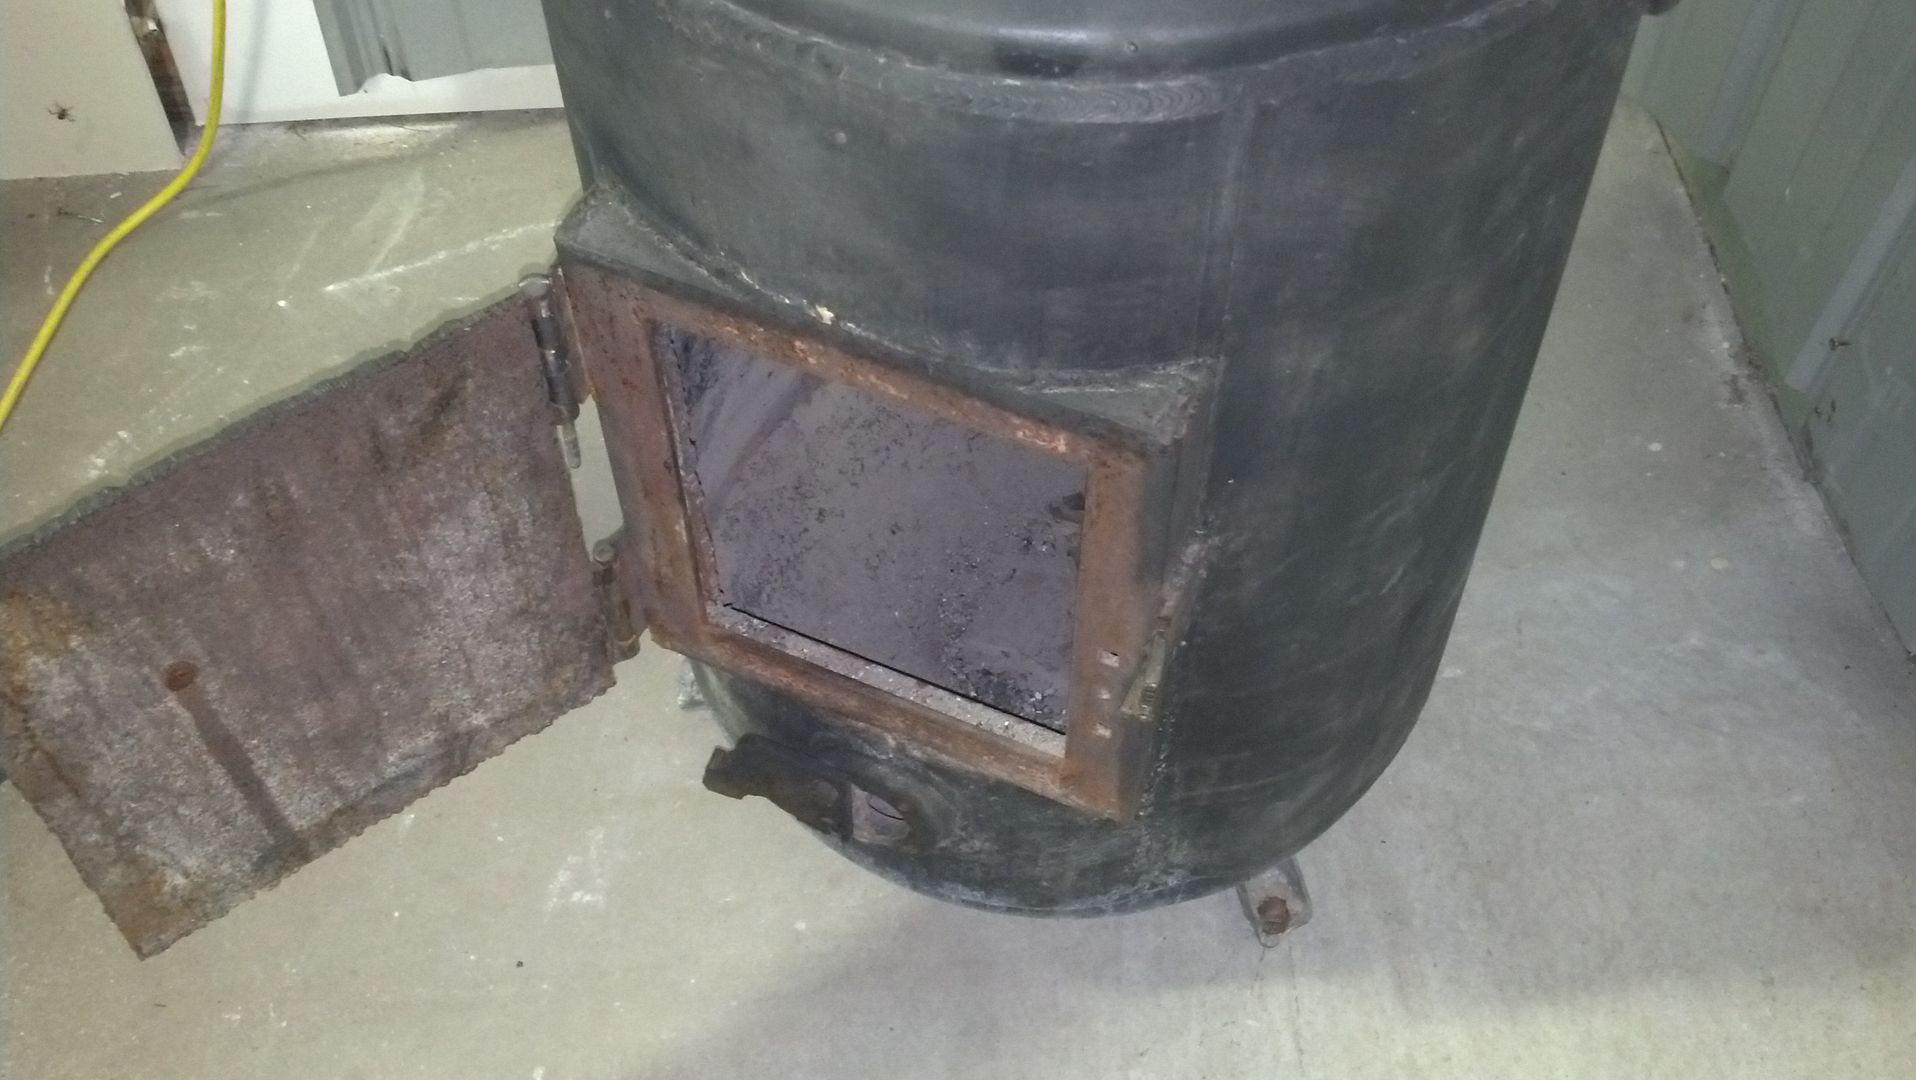
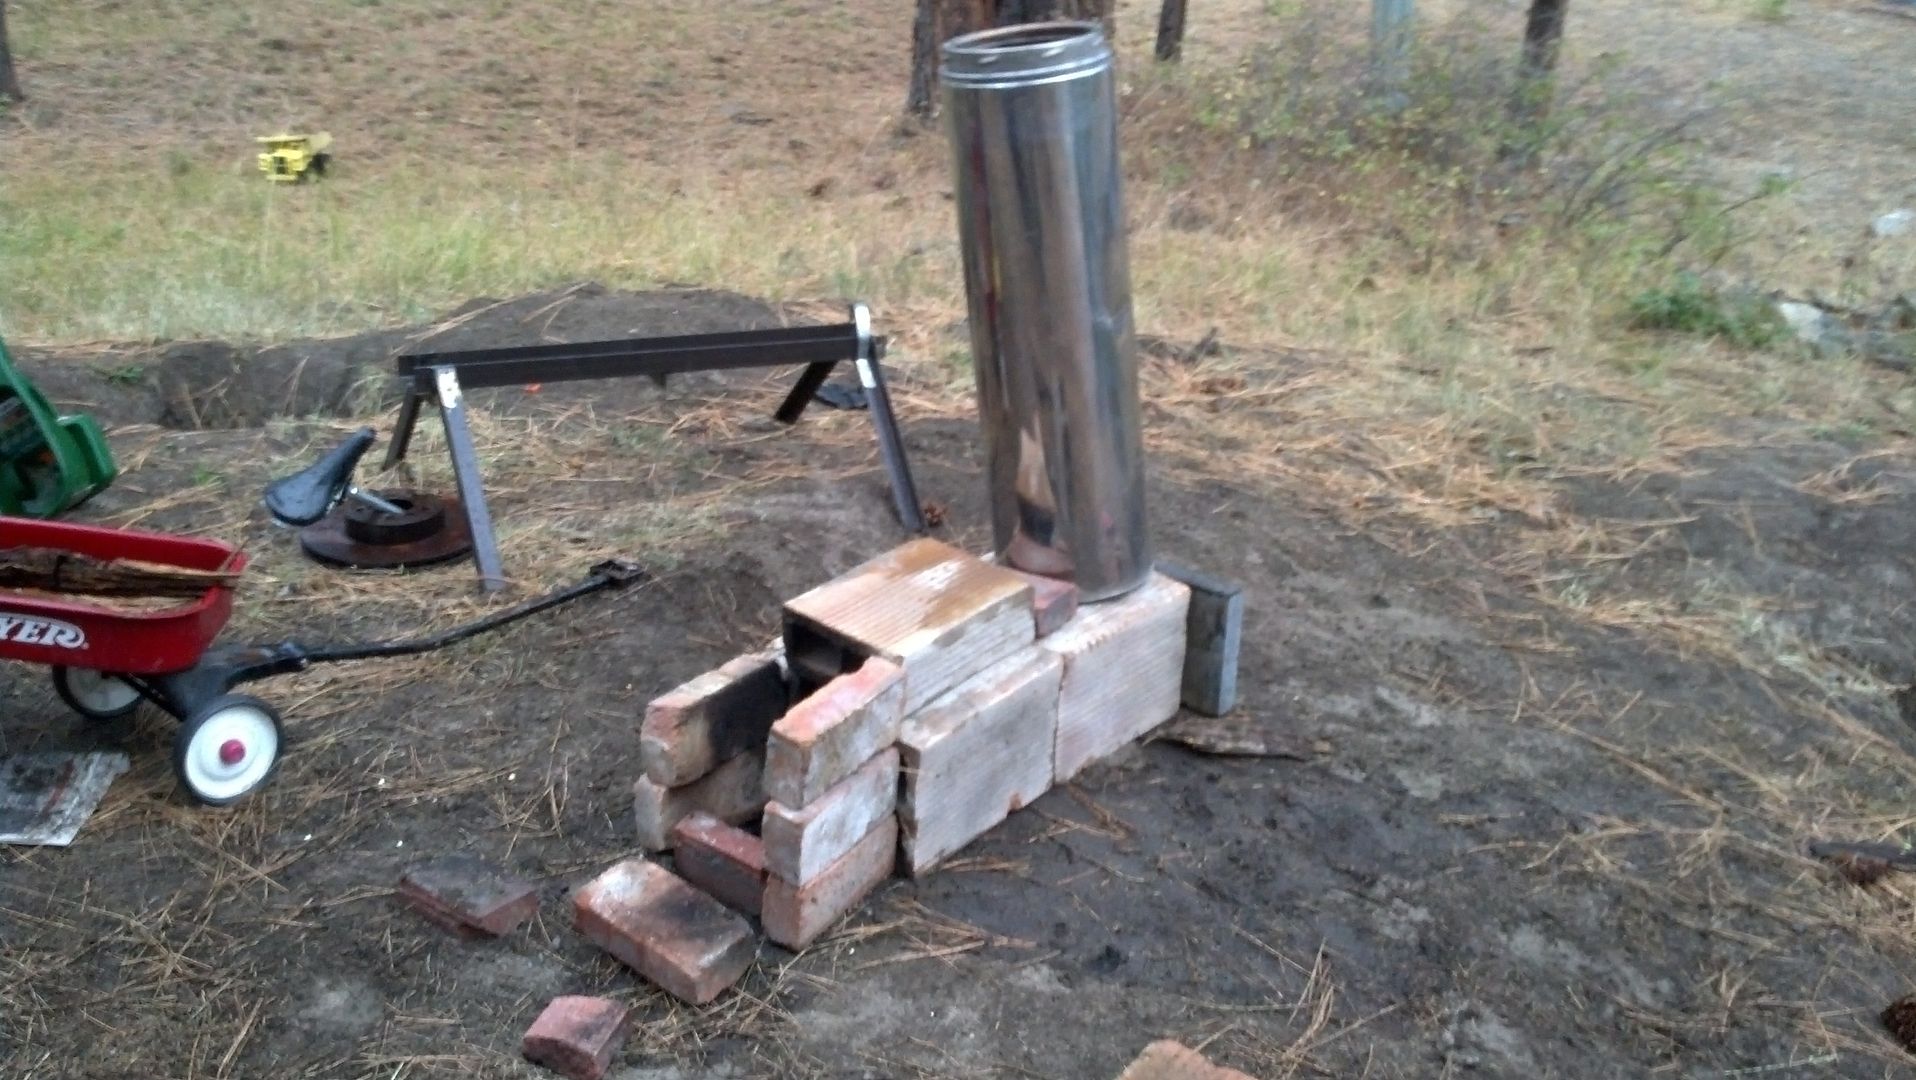
Scott Clark wrote:Here's what I have in there now:
That's a 7" piece of class A chimney that I was thinking about using as a heat riser...and yes, I know that metal will eventually die a slow death
The stove is a heavy little thing...approx. 1/4" thick steel.

God of procrastination https://www.youtube.com/watch?v=q1EoT9sedqY
thomas rubino wrote:Compared to firebrick , I'm guessing not as long . Mine is in its second season and its good as new ,including a removal this summer. Heres the differences I see ,they can be gently lifted off and moved ,they are round instead of square. With an 8" you have a 3" insulated riser. Getting the exact gap to top of barrel is a piece of cake. Would I build a fire brick riser ,sure if i couldn't get the materials to cast one. Either one works longer than a metal one.
Satamax Antone wrote:
Scott Clark wrote:Here's what I have in there now:
That's a 7" piece of class A chimney that I was thinking about using as a heat riser...and yes, I know that metal will eventually die a slow death
The stove is a heavy little thing...approx. 1/4" thick steel.
That little stove just calls for a retrofit!
http://donkey32.proboards.com/post/11503/thread
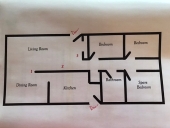
Nice job! I keep looking at that stove and going back and forth about using it for this first project... On the one hand, if you built a firebox in it, and surrounded everything in there with some sort of insulation, you'd have a super hot burn tube and heat riser. Put a barrel on top, and you've got a rocket stove... The bottom of it would radiate almost no heat, making it a good setup for connecting to a large mass...which I don't have room for where this is going. I'm sure I'll find a way to resurrect it as something else, just not sure exactly what that is just yet lol.
Just to give you an idea of what can be done!
God of procrastination https://www.youtube.com/watch?v=q1EoT9sedqY
For all your Montana Masonry Heater parts (also known as) Rocket Mass heater parts.
Visit me at
dragontechrmh.com Once you go brick you will never go back!
Satamax Antone wrote:https://permies.com/forums/posts/list/10653#100285
thomas rubino wrote:Scott; A 10" outer and a 6" inner only gives you 2" insulation , you would want a 12" outer tube to have at least 3" insulation . The 16 gal grease barrel is 14 "and would give you 4" insulation. most quick lube shops / mechanic shops / dealerships, have these and usually will give them for free, especially after you tell them what you want it for!
For all your Montana Masonry Heater parts (also known as) Rocket Mass heater parts.
Visit me at
dragontechrmh.com Once you go brick you will never go back!
 1
1
thomas rubino wrote:Scott; Your living on top of the perfect mass material. doesn't matter what shape, if you can lift it ,it will work in a mass! Cobb is hard work to make ! The more dense solid rock you have , the less cobb you make ! You just need to locate your clay & sand and your RMH is practically built ,lol
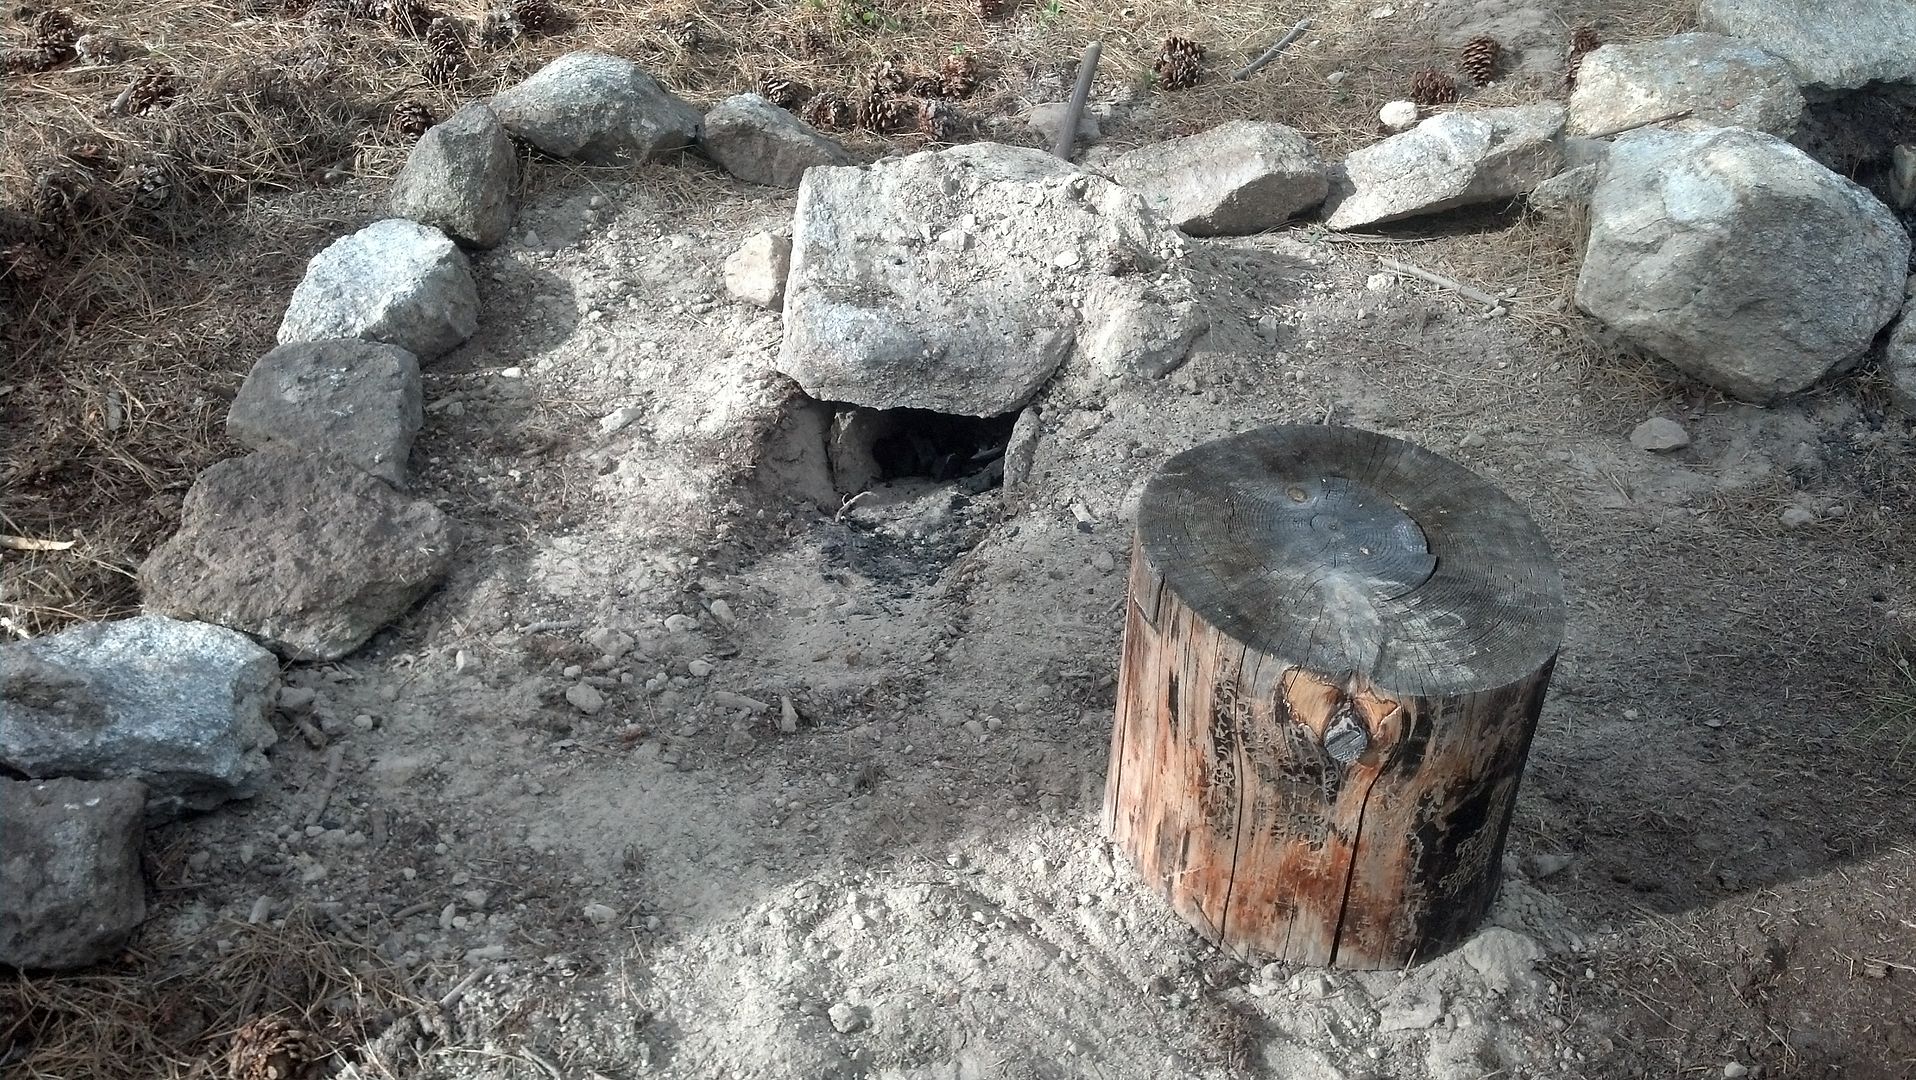
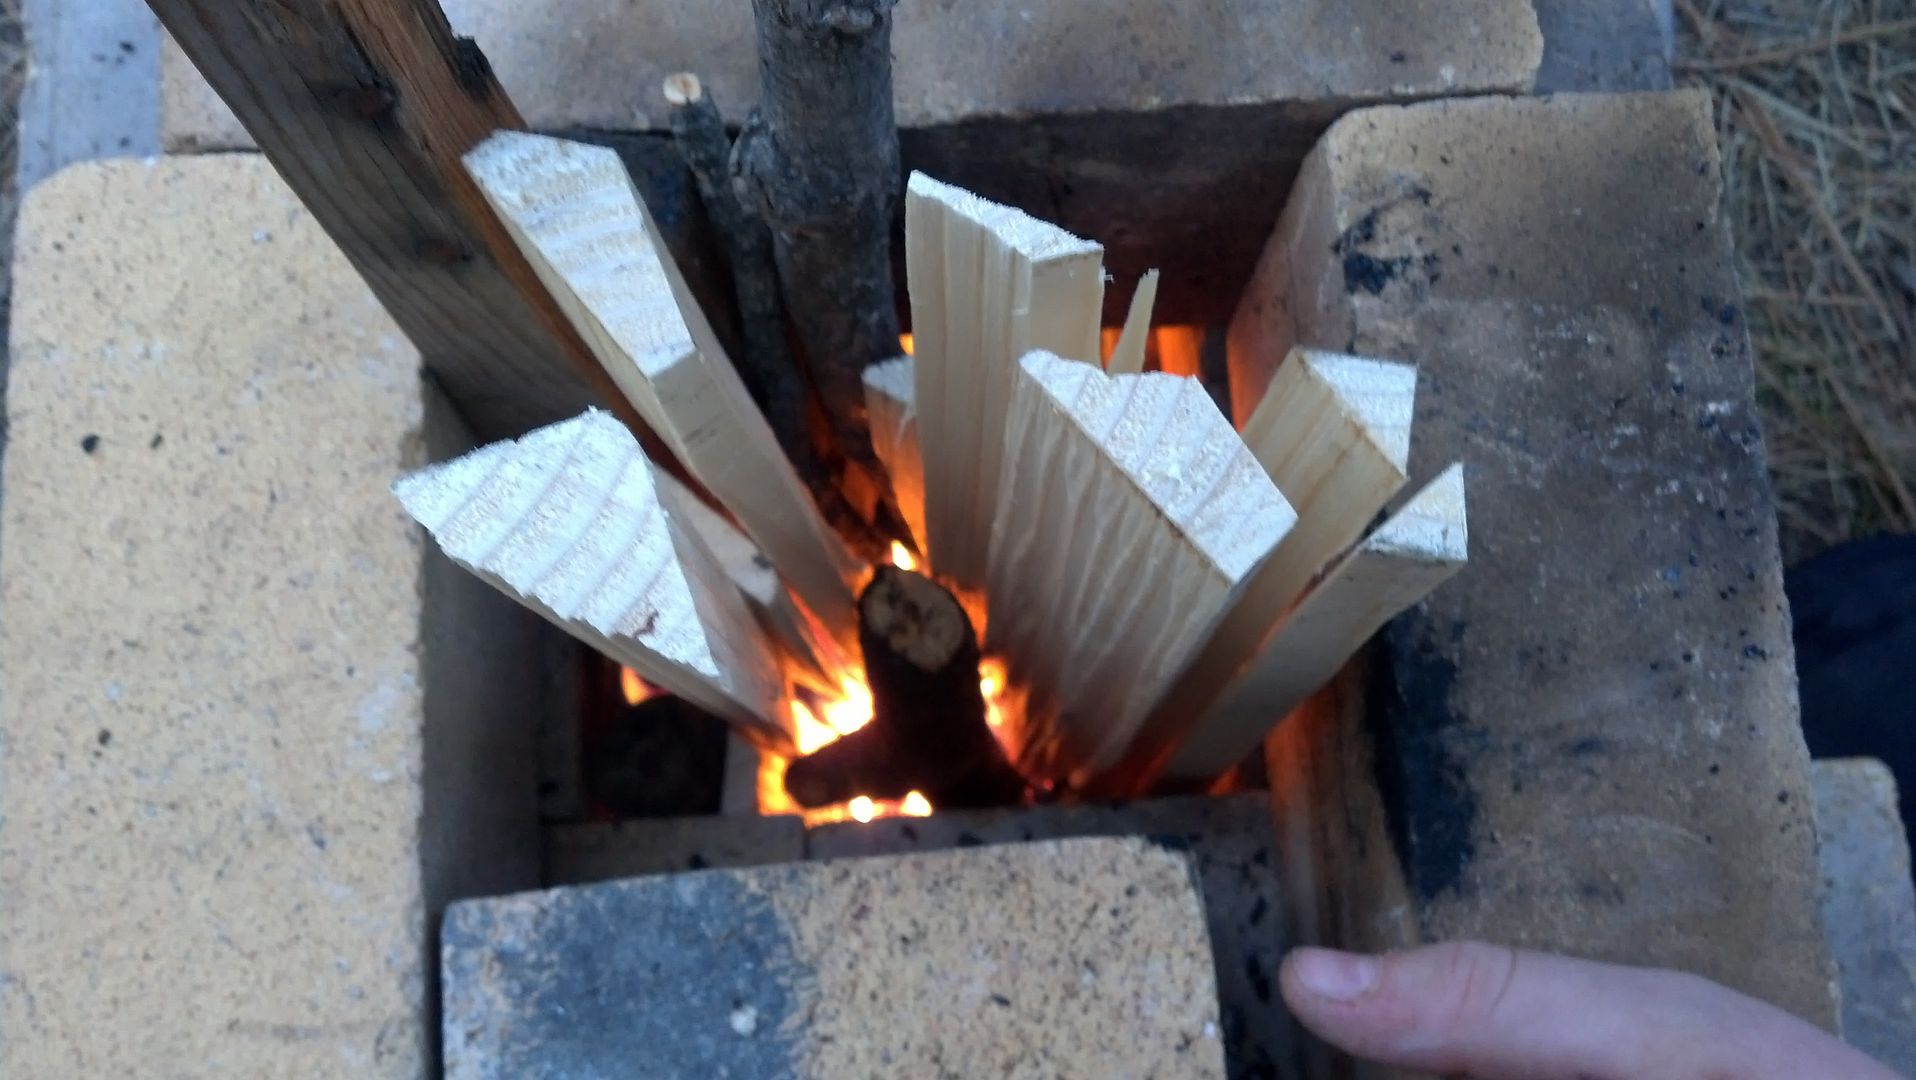
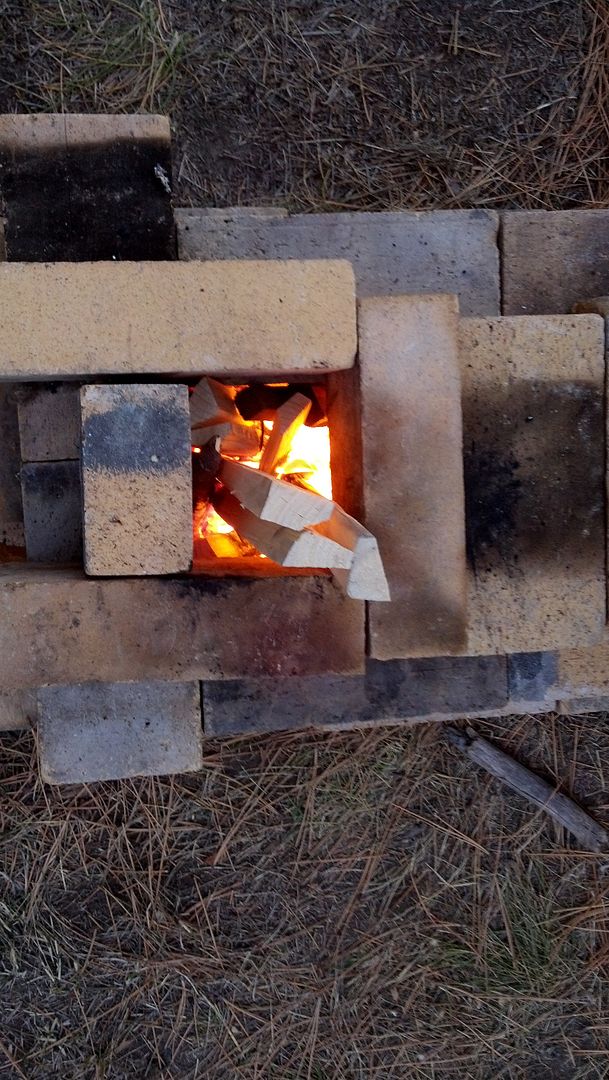
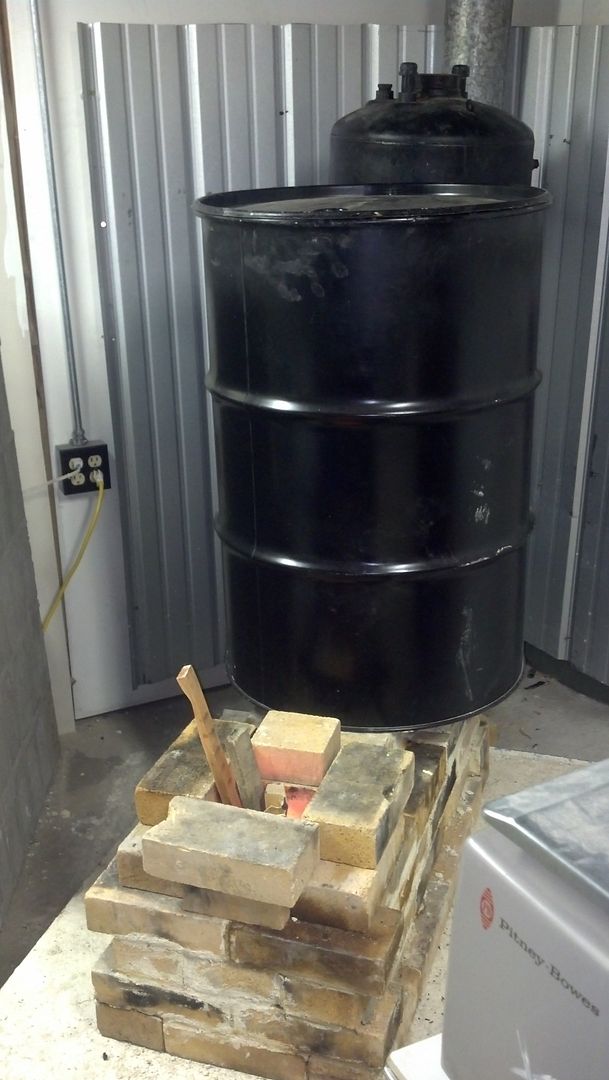
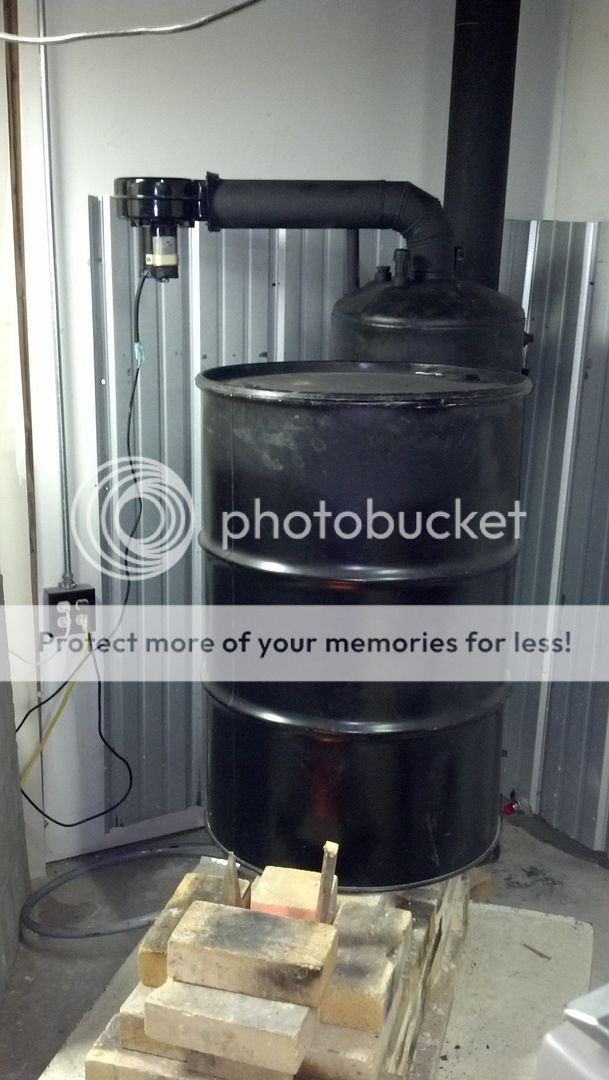
. Here it was under construction...

 .
.

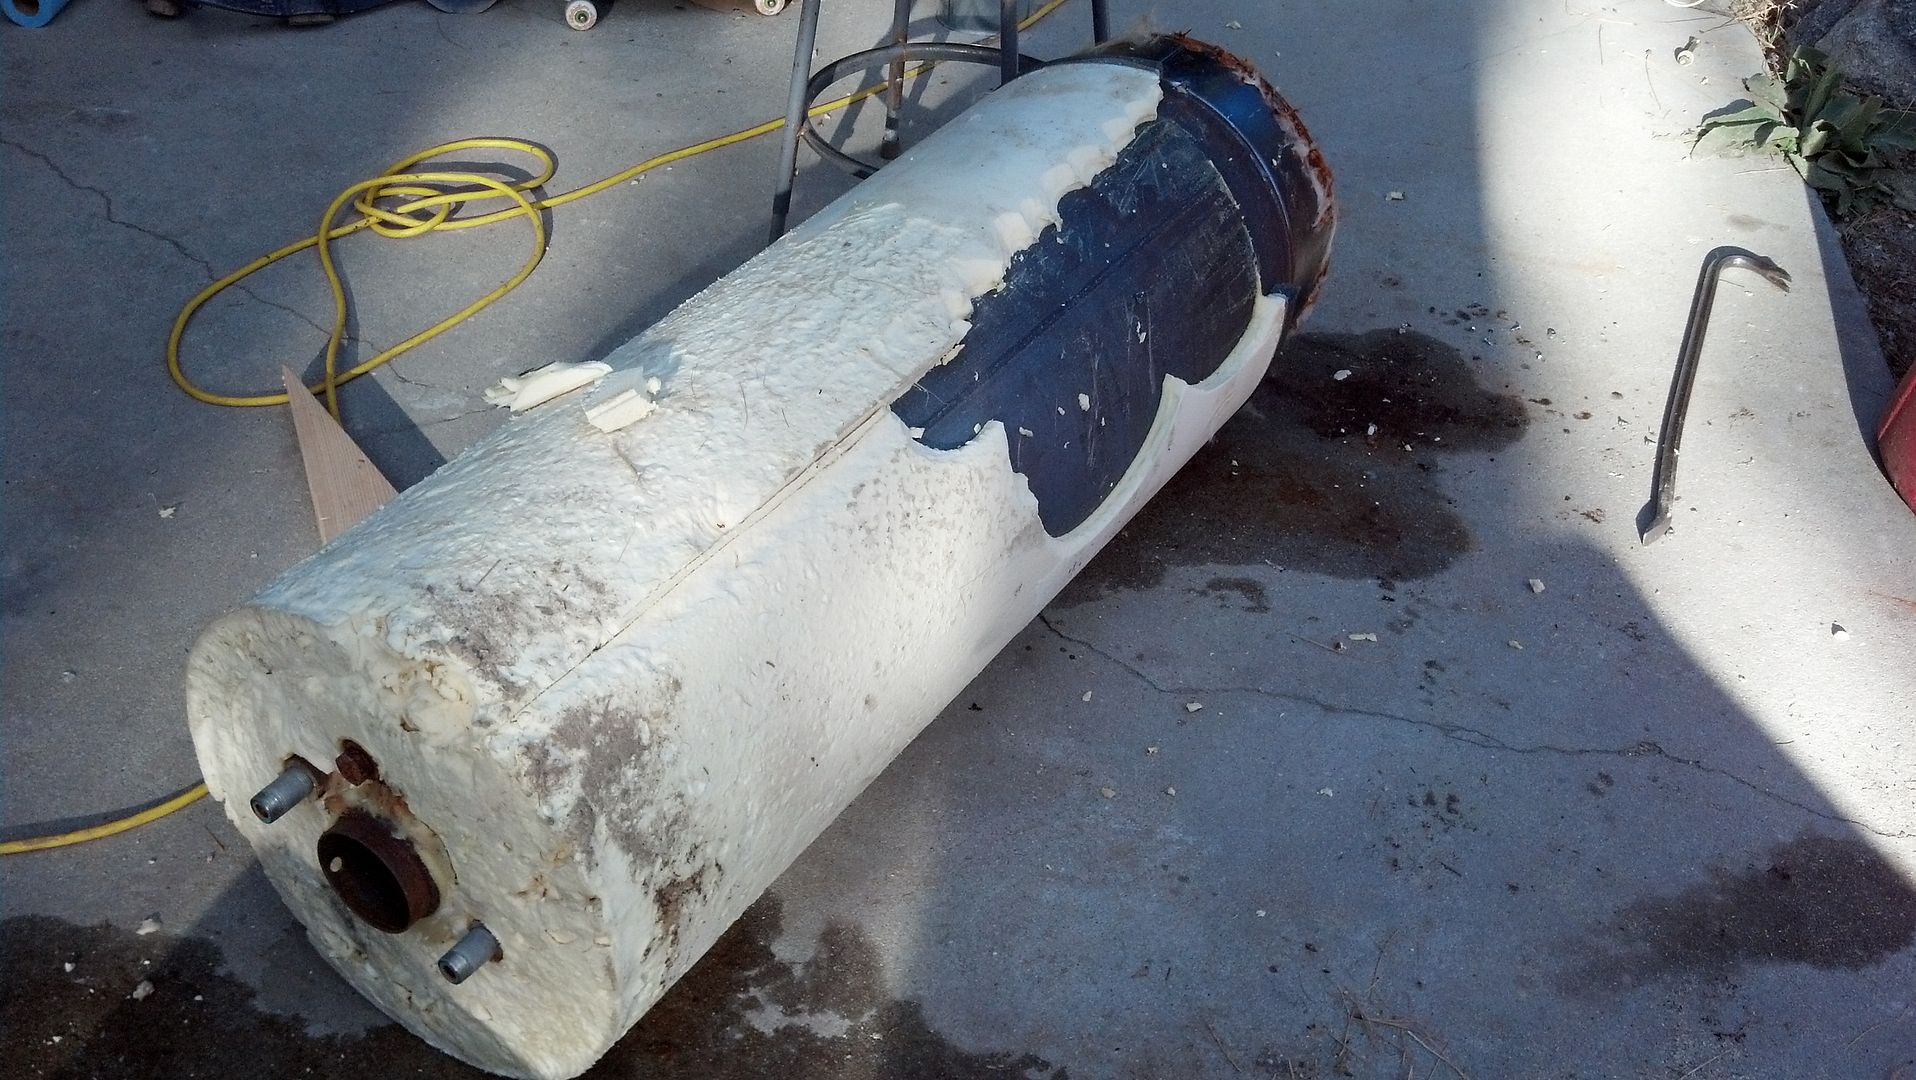
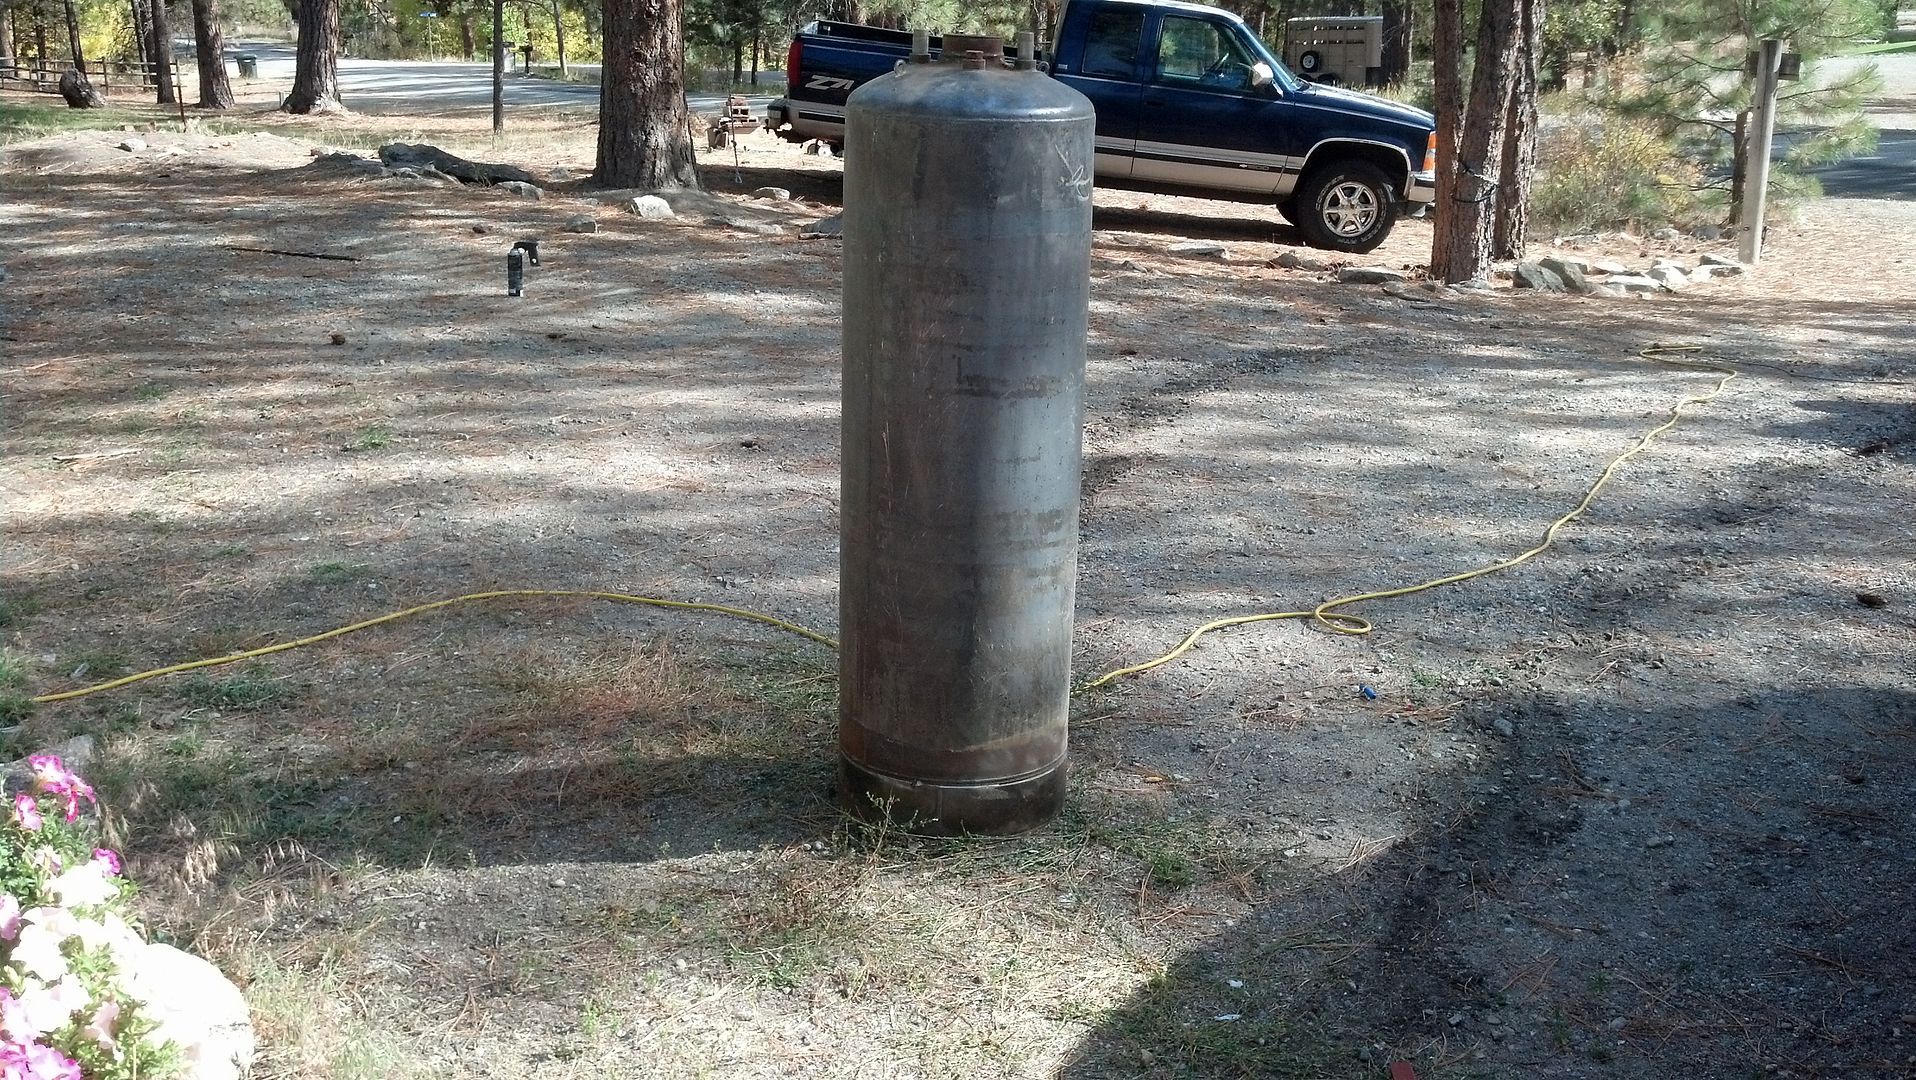
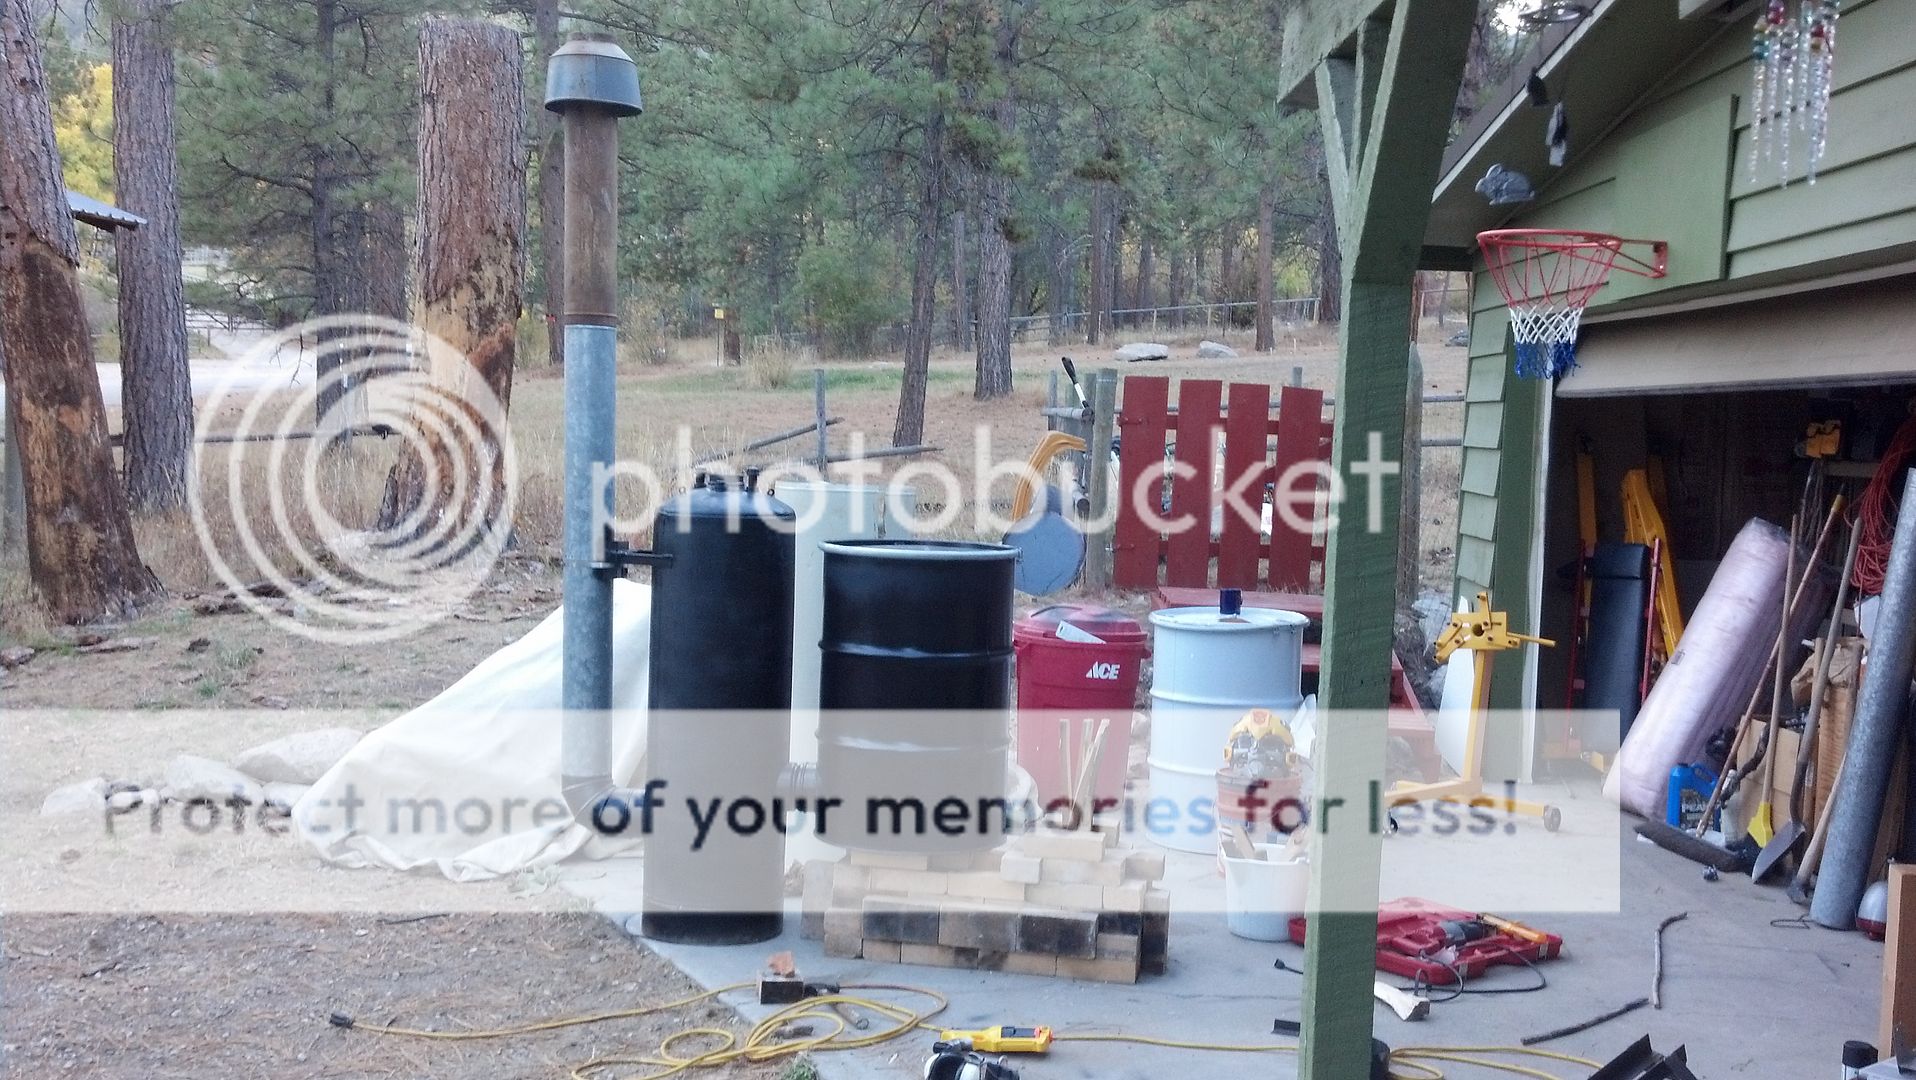
 . If they're all like this, I'm probably not going to deconstruct another water heater any time soon...it would be easier and faster to weld a couple of barrels together to make bell.
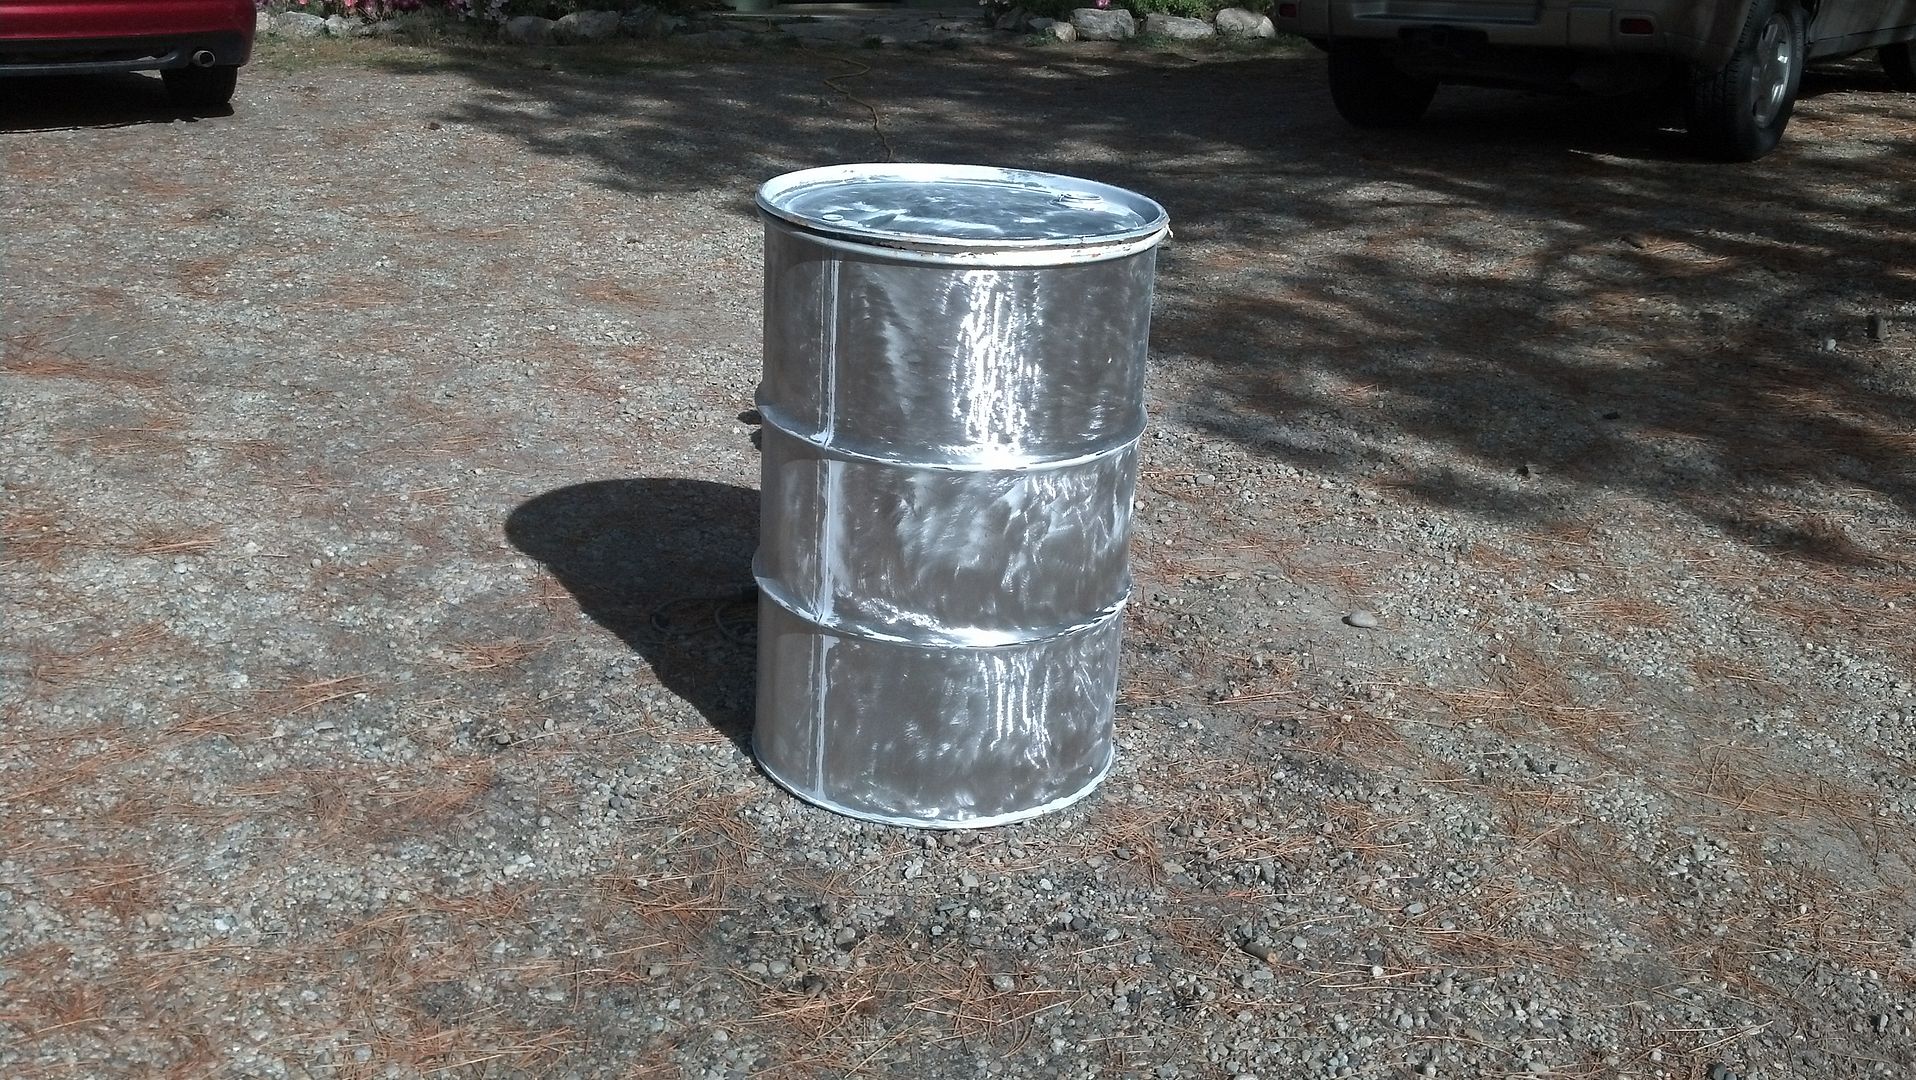
 . First, got the paint ground off one of my barrels...a 40 grit sanding disk will cut through just about any coating like a light sabre lol. Here it is all shiny and new looking.
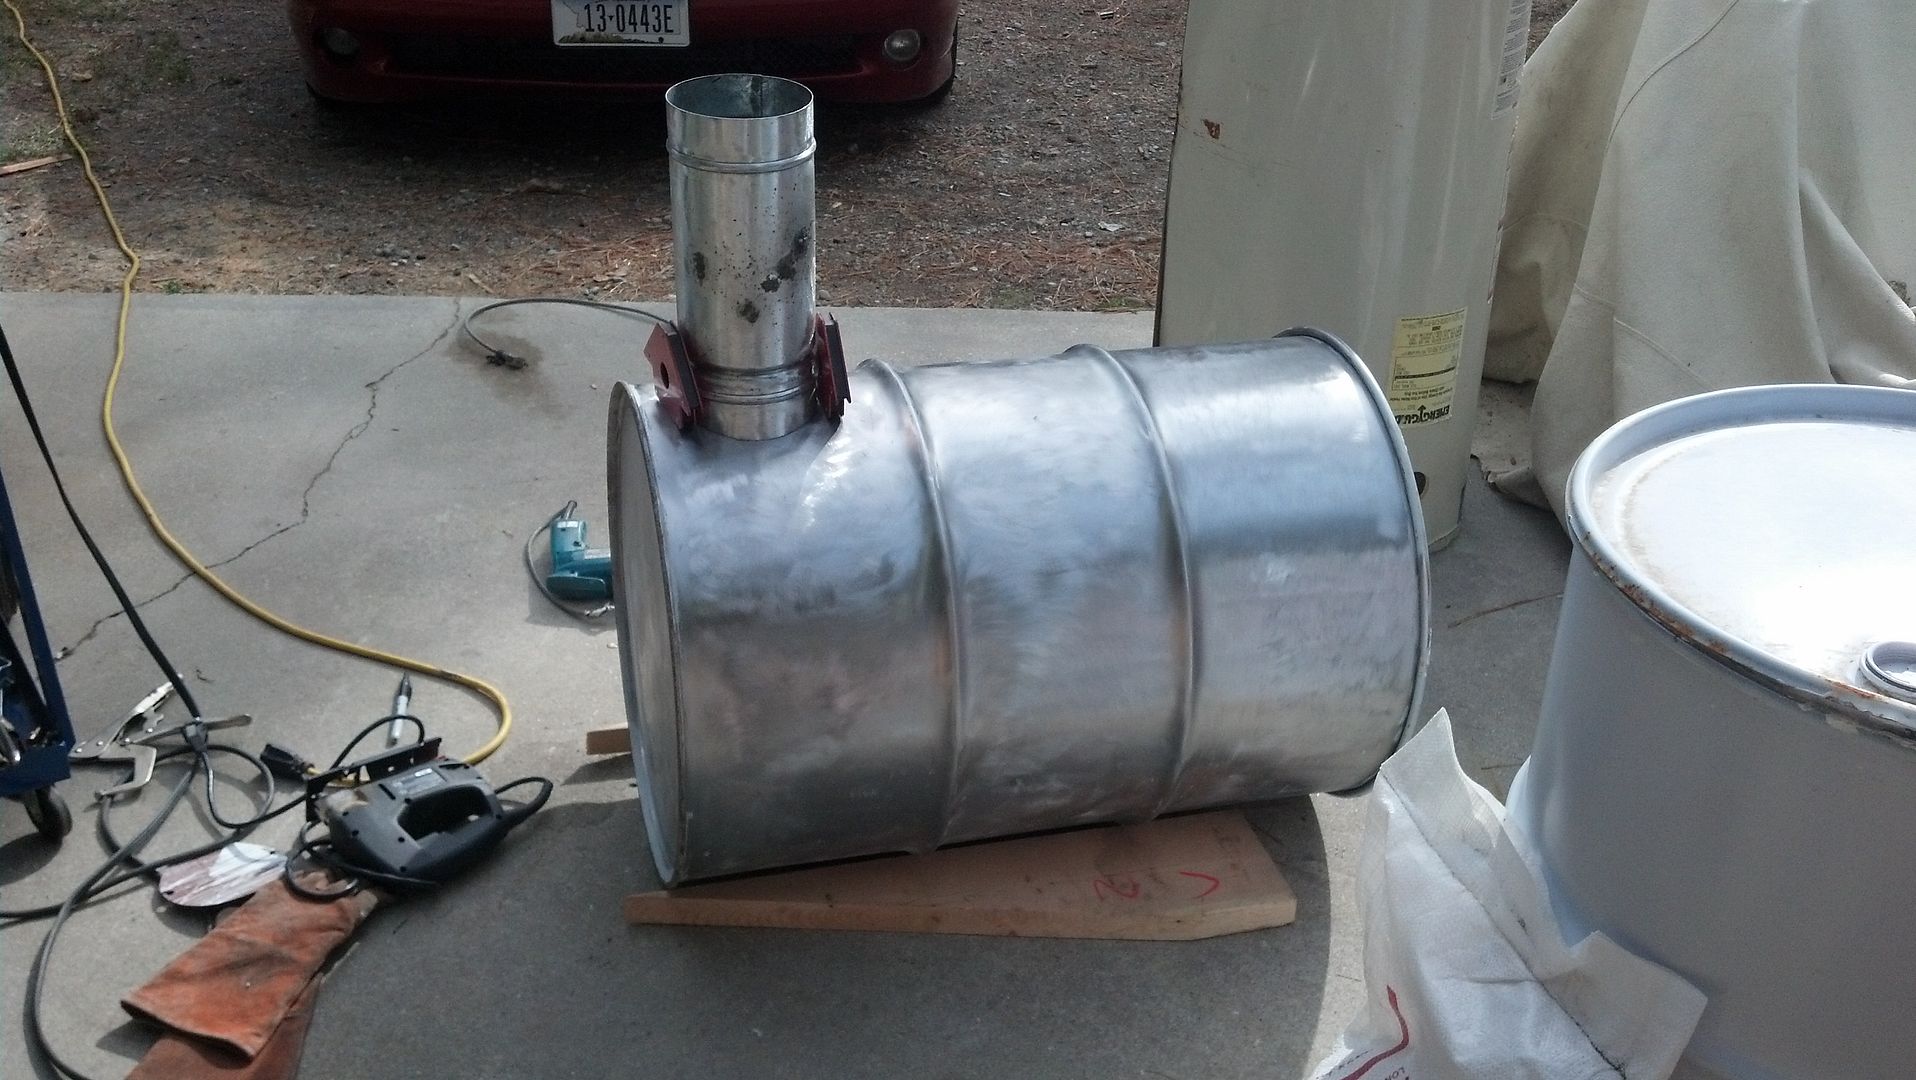
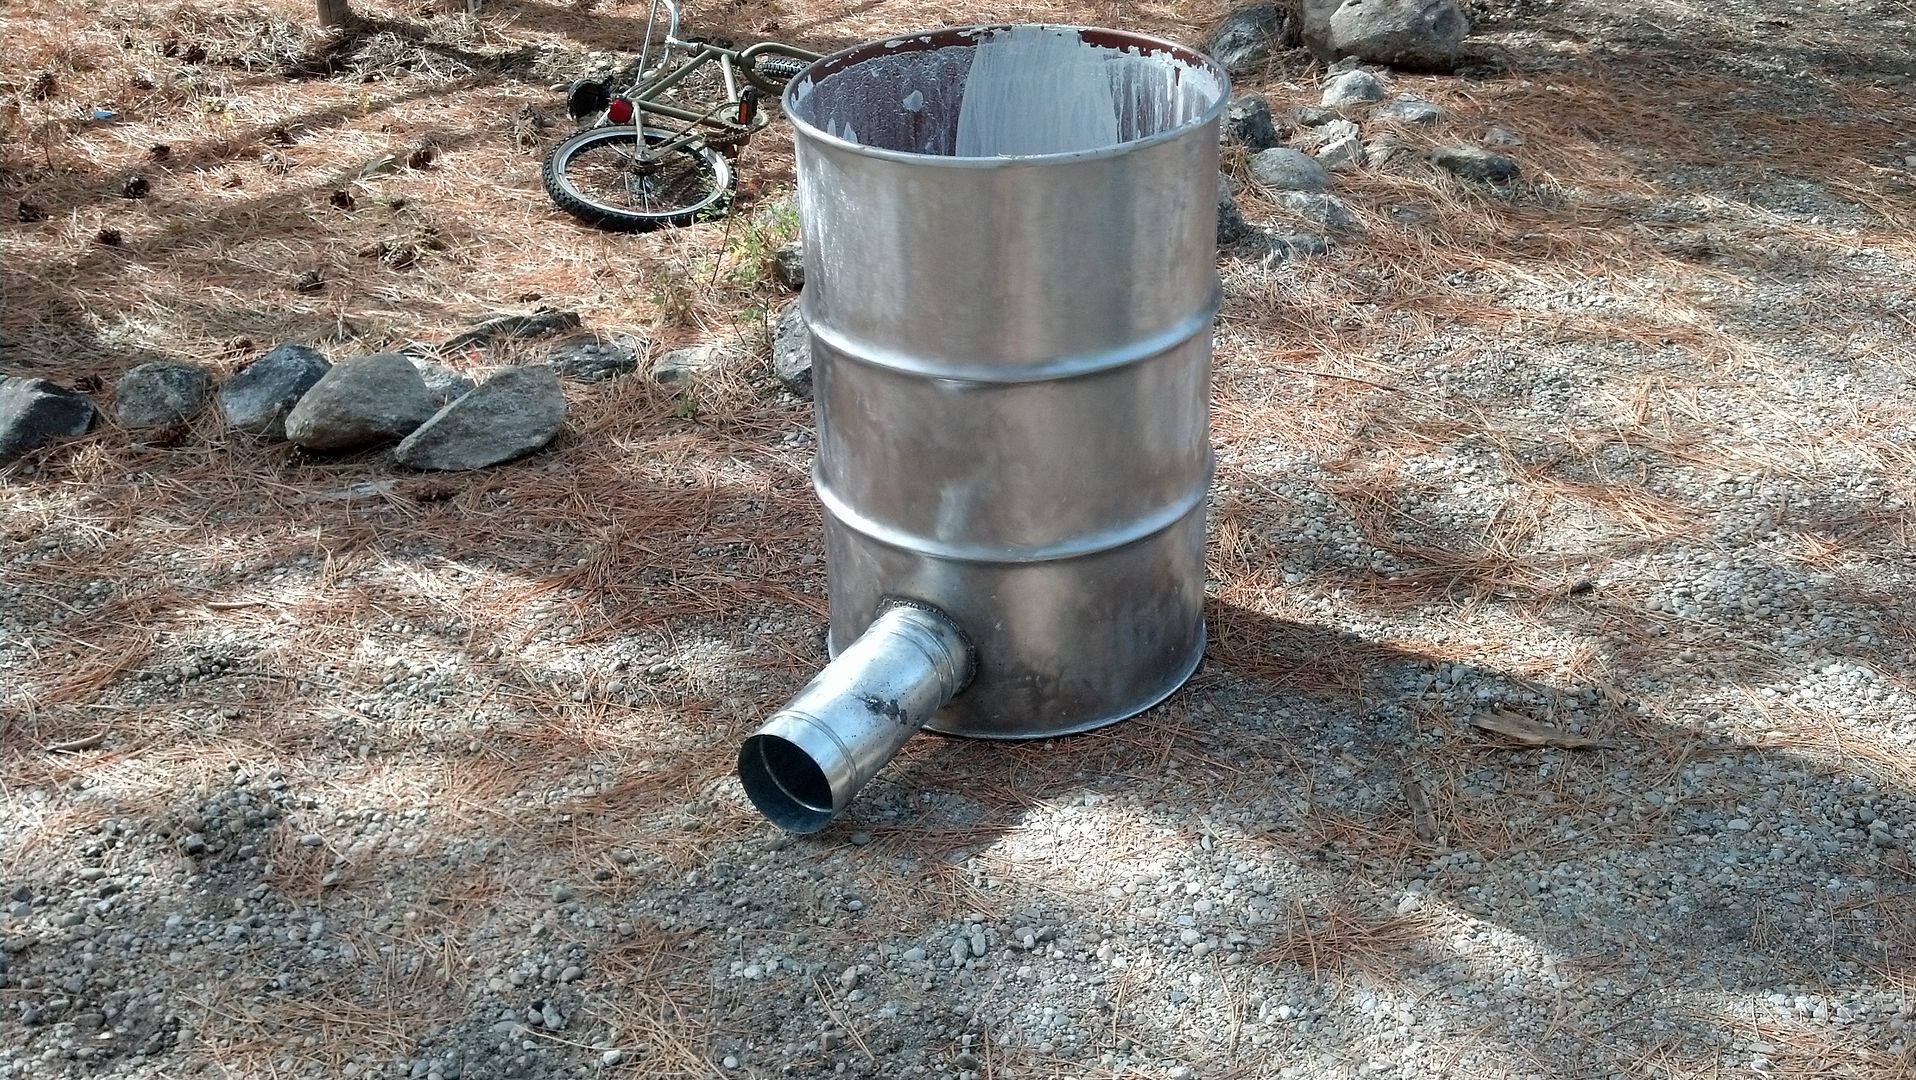
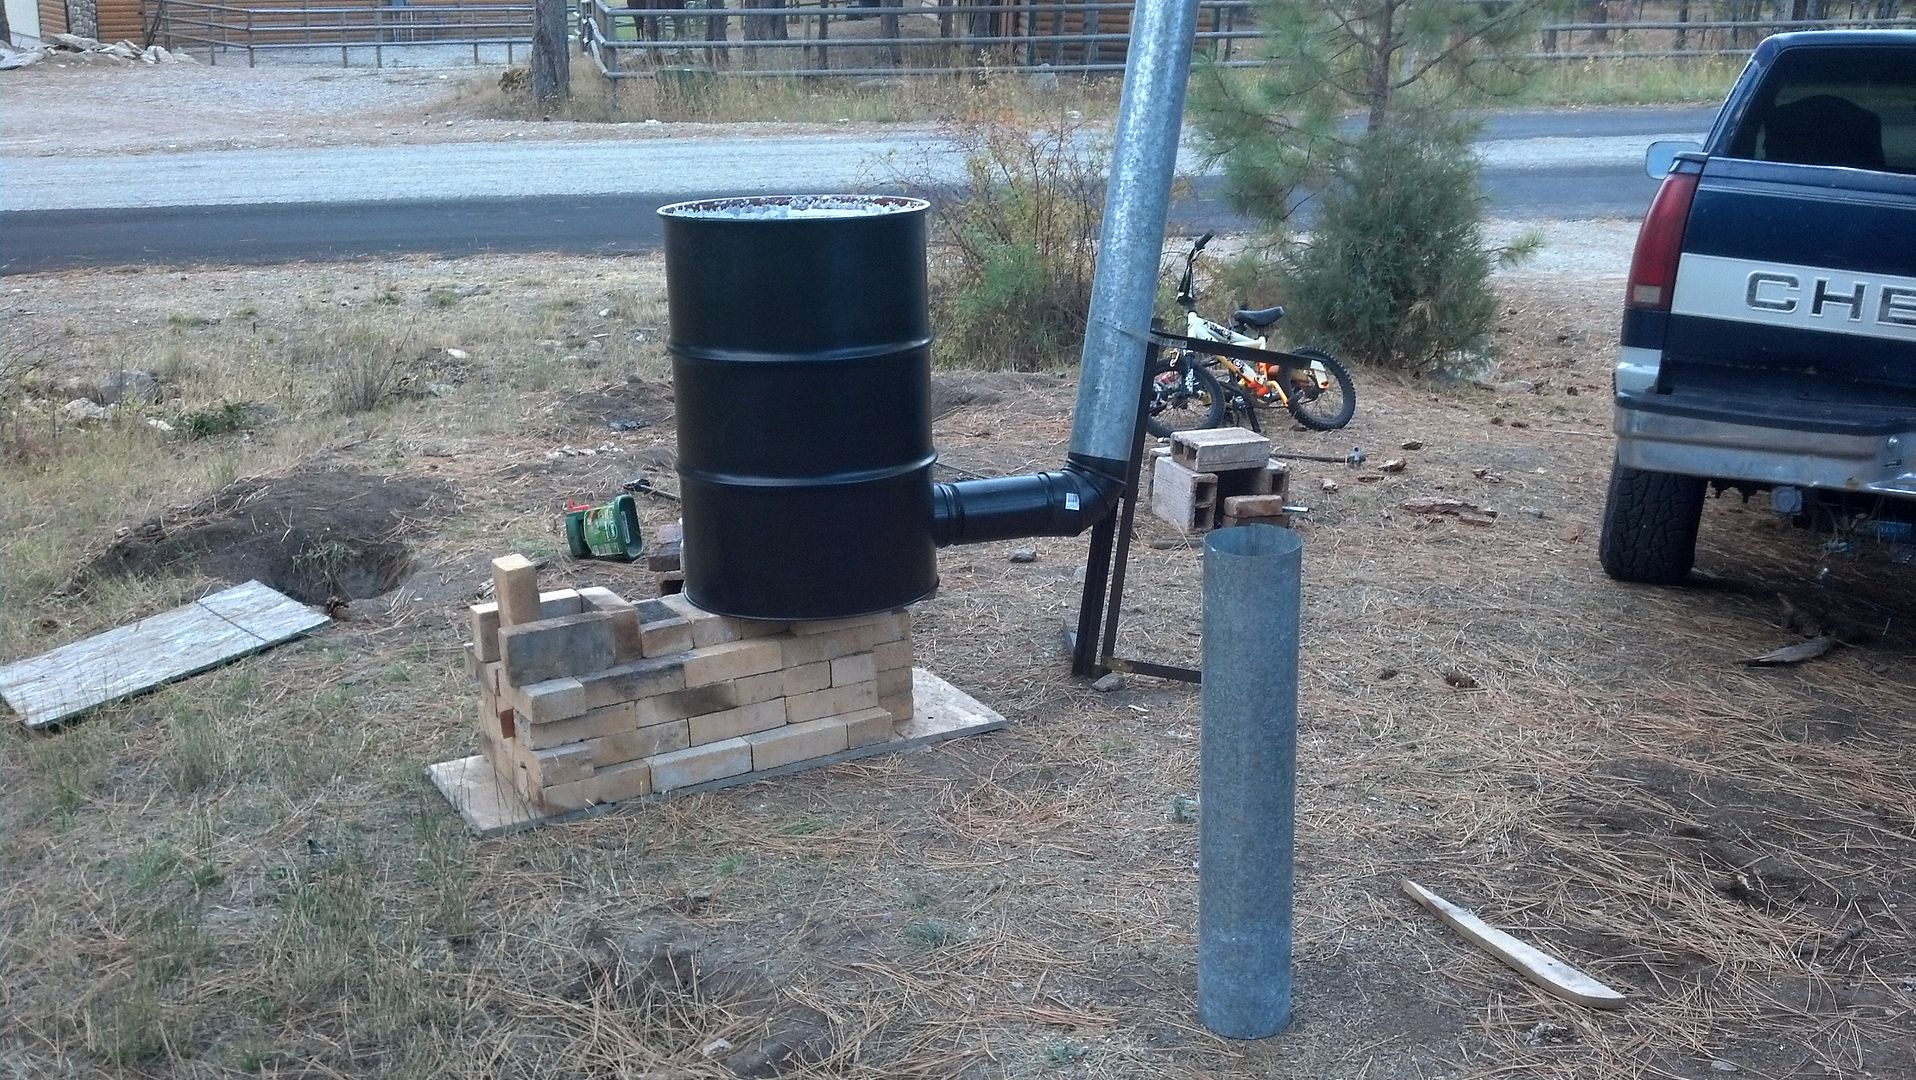
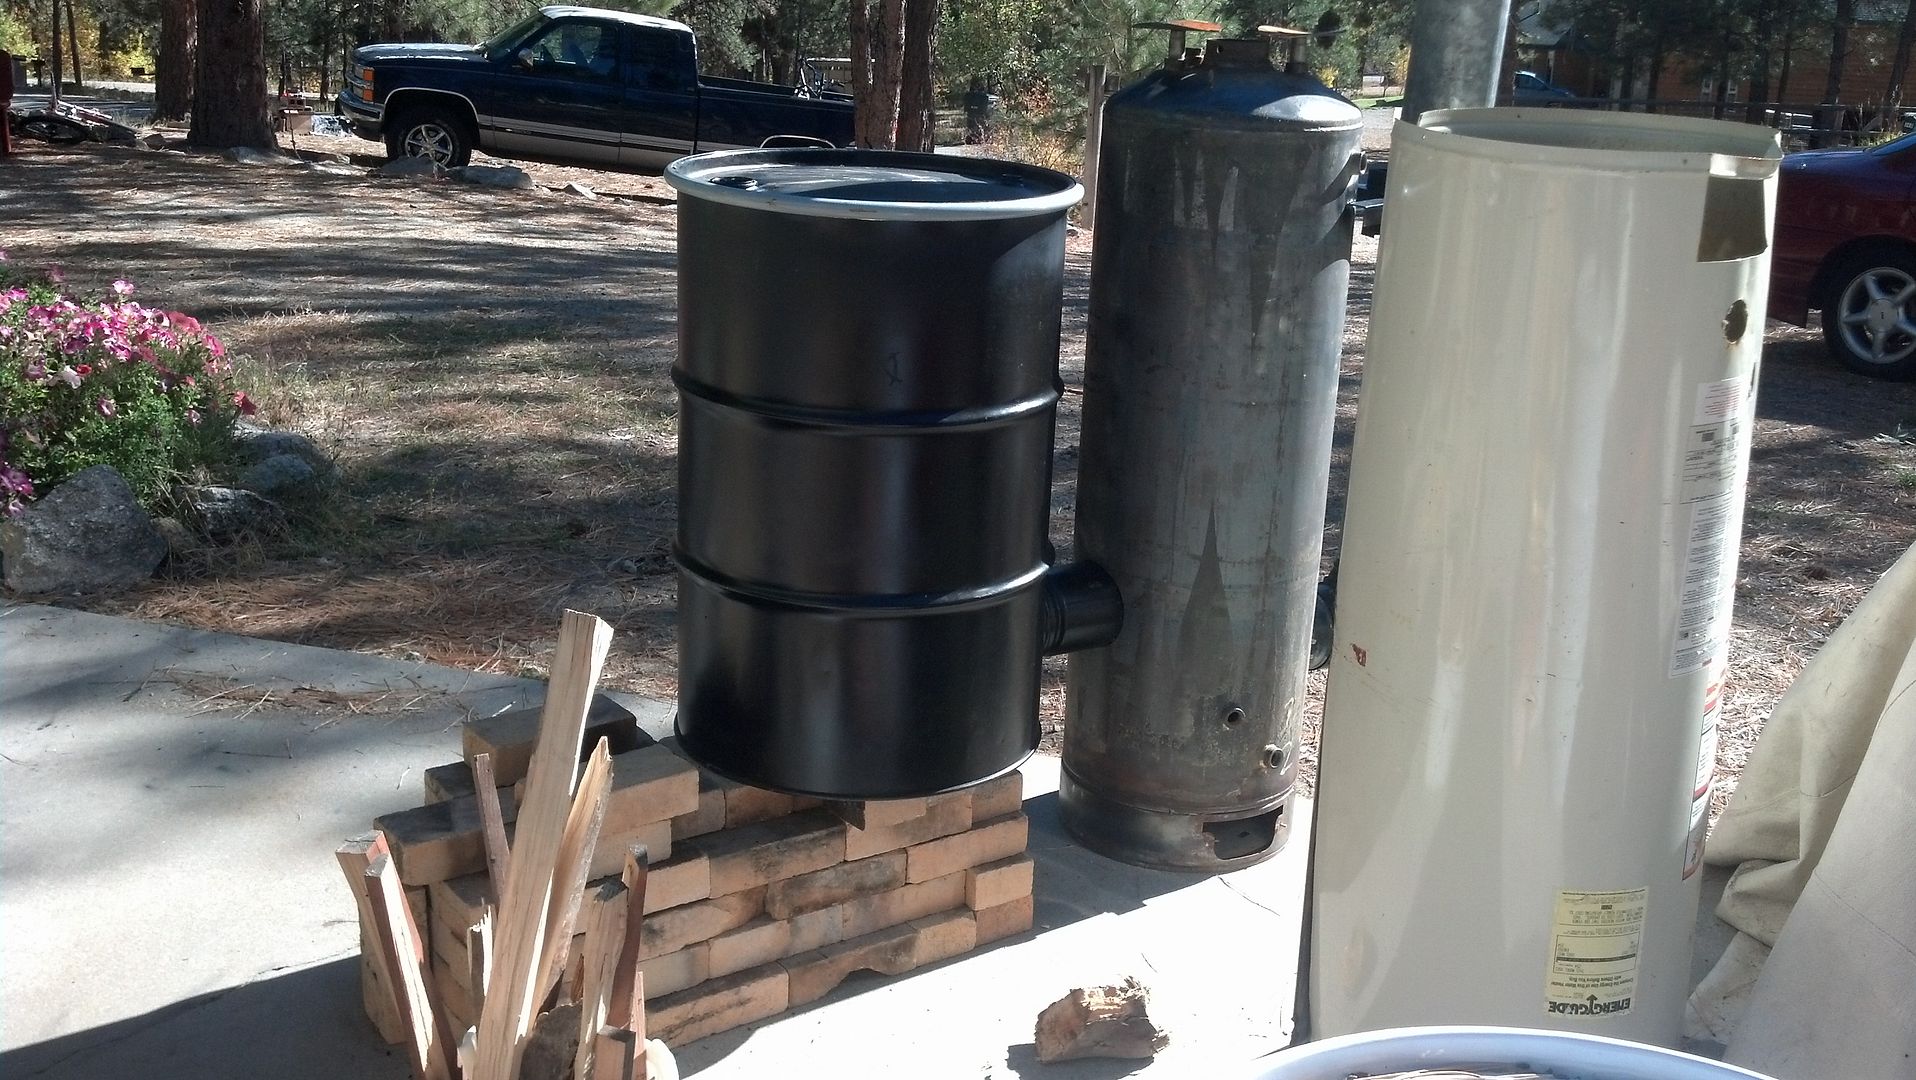
 . Finally...after a lot of sweat, cutting, and welding, I have a full mockup of the rocket stove sitting in my driveway. Here she is...
 .
.
regards, Peter
Peter Berg wrote:Just a remark: Your bricks are stacked dry as far as I can see. So there are small leaks all over the thing, hampering it big time. When moving into the garage, make sure everything is sealed properly. Moreover, when you add insulation around the tunnel and the bottom of the feed this will kick the thing into high gear. Maybe you could replace the final exhaust out of the bell to a lower location? I would recommend about 3" above the bottom of the bell. It's a 6" system isn't it?
God of procrastination https://www.youtube.com/watch?v=q1EoT9sedqY
Success has a Thousand Fathers , Failure is an Orphan
LOOK AT THE " SIMILAR THREADS " BELOW !
allen lumley wrote:'Max' : Sorry, I feel like I dosed off there for 6 months ! Big transitional area CSAs is clear, but is is the 1st time I picked up on the term Ring Projection,
a simple explanation and a picture or two for for the un-informed would probably help more than just me !For the Good of the Craft ! Big AL
God of procrastination https://www.youtube.com/watch?v=q1EoT9sedqY
Success has a Thousand Fathers , Failure is an Orphan
LOOK AT THE " SIMILAR THREADS " BELOW !
allen lumley wrote:
At exit from the Top of the Heat Riser the gases should all equally flow through the area of the perimeter of that system Xs the calculated height go the Barrel Gap.

God of procrastination https://www.youtube.com/watch?v=q1EoT9sedqY
Success has a Thousand Fathers , Failure is an Orphan
LOOK AT THE " SIMILAR THREADS " BELOW !
Success has a Thousand Fathers , Failure is an Orphan
LOOK AT THE " SIMILAR THREADS " BELOW !
1
God of procrastination https://www.youtube.com/watch?v=q1EoT9sedqY

|
A nature documentary filmed entirely in a pet store. This tiny ad was in an aquarium
it's easier and more soul building than any workee-job
https://wheaton-labs.com/bootcamp
|