• Post Reply Bookmark Topic Watch Topic
  • New Topic
permaculture forums growies critters building homesteading energy monies kitchen purity ungarbage community wilderness fiber arts art permaculture artisans regional education skip experiences global resources cider press projects digital market permies.com pie forums private forums all forums
this forum made possible by our volunteer staff, including ...
master stewards:
  • Nancy Reading
  • Carla Burke
  • r ranson
  • John F Dean
  • paul wheaton
  • Pearl Sutton
stewards:
  • Jay Angler
  • Liv Smith
  • Leigh Tate
master gardeners:
  • Christopher Weeks
  • Timothy Norton
gardeners:
  • thomas rubino
  • Jeremy VanGelder
  • Maieshe Ljin

Newbie build

 
Posts: 8
Location: Eastern Central OK
  • Mark post as helpful
  • send pies
    Number of slices to send:
    Optional 'thank-you' note:
  • Quote
  • Report post to moderator
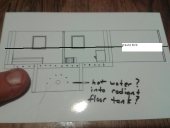
I'm about to begin starting my build, the only supplies I lack are the straight runs of flue, sand, and perlite. I've attached my plans below. I do have a few questions though. In the 2007 version of Rocket Mass Heaters Page 25 (placing the pipe), it mentions 30ft of pipe performs well, but what about 42 ft of pipe with 2 180' turns. This house has a very large open floor plan so I figured I would need plenty of thermal mass. The floor beneath is currently laminate that we will remove to expose concrete slab, should I insulate that from the burn chamber at all or just leave it open to the slab? And how should I exit the house with the flue, at bench height or 90' up and 90' out a few feet below soffit height? I'm also open to suggestions for cheap flue runs. I've looked everywhere and all I can find is brand new stuff (I've looked at junkyards, asked contractors, dumps, commercial projects etc.)...any online sources recommended? I'll buy new if necessary though, just wondering if that's a good place to splurge a little for quality materials or money is better spent on other parts.
image.jpg
[Thumbnail for image.jpg]
image.jpg
[Thumbnail for image.jpg]
 
pollinator
Posts: 293
Location: US, East Tennessee
34
  • Mark post as helpful
  • send pies
    Number of slices to send:
    Optional 'thank-you' note:
  • Quote
  • Report post to moderator
Nice placement plans for your future RMH.

You're probably not going to want to hear this, but the best way for the exhaust to exit the house is via a tall (insulated against outside air) vertical chimney that extends up above the highest point of your roof by several feet. One can never have to much natural draft afforded by a tall vertical chimney.

With the planned amount of 180 turns and etc., 42' of horizontal flue run may well end up being problematic. Obviously, a singe "U' out and back horizontal run would be a better approach.

Have a look at the photos of a recent E&E Wisner workshop built 8" cob rocket here:

https://permies.com/forums/posts/list/1000/26232

And yes, the combustion unit will need to be well insulated, all around it, and underneath as well.

You may find Rocket Mass Heater Builder's guide exceptionally valuable and informative, as I take it this is your first RMH build? -->

http://www.scubbly.com/item/93600

Edit-1: Most folks are sourcing thin inexpensive HVAC pipe from local big box stores, and using that for the horizontal flue pipe. Experienced RMH builders tend to recommend using a piece of steel stove pipe for the first section of flue out of the barrel/manifold, then go with the cheap HVAC pipe for the rest of the thermal bench. Each 180 turn should have a clean out, and for those regular 8" stove pipe clean outs are the better choice over thin HVAC "T's".

Edit-2: Another thing worth considering, given the amount of square footage to be heated, is to elevate the thermal bench so that it has channels underneath. Air passing through these channels and up the back of the bench (~4" air space between the bench and wall) will give a highly beneficial convection heating to the living space.
 
Chase Anderson
Posts: 8
Location: Eastern Central OK
  • Mark post as helpful
  • send pies
    Number of slices to send:
    Optional 'thank-you' note:
  • Quote
  • Report post to moderator
I had thought about the single loop as well as the air channels underneath. The problem with the "u" is that it would create a huge 19' pipe (ceiling is 16' high) that my wife would consider an eyesore. However, if I were to elbow it through that wall just behind the stove, it would enter a water heater closet in the master bath and I could take it up from there out the ceiling (might be able to heat the hot water somehow in the future too!) FYI, I know you would probably warn of off gassing of the wall studs, but my house is steel framed, no wood in walls. But what about damage to drywall?

As far as the channel idea, I can think of how to do it except for how to raise the base off of the ground, meaning what would make up the foundation that the channel-creating bricks would support? (I hope that makes sense)

And thank you for the quick response
 
pollinator
Posts: 4154
Location: Northern New York Zone4-5 the OUTER 'RONDACs percip 36''
67
hugelkultur fungi books wofati solar woodworking
  • Mark post as helpful
  • send pies
    Number of slices to send:
    Optional 'thank-you' note:
  • Quote
  • Report post to moderator
Chase Anderson : Welcome to permies.com/richsoil.com and a Big Welcome To the Rocket and Wood stoves Forum Threads and the Cob Forum. With
over 28,000 Fellow Members World Wide you can come here 24 / 7 to find someone who Wants to talk about what you want to talk about !

Actually the 30 foot quoted was for the minimum distance to allow you to extract and store the majority of the Heat Energy your 8'' system will produce, without
losing a lot to the outdoors ! For a first time build you are right at the limit, which is usually figured as 50' - 5ft for every 90º elbow in your system. an inside
Final vertical chimney would make a big difference in Your Chances of success,any way I do the math you have a minimum of 5 90º elbows !

It is important that you share with us at least the county that your house is in so that we have an Idea of Your Climate and your heating requirements ! This will
also get you out there to make possible connections with a fellow member who is a near neighbor and has Rocket Mass Heater RMH, or Cob experience !

Having some construction experience and a 30 year fire fighter, I am perpetually on the look out for the house with windows and doors covered up with
Plywood and a big Construction debris dumpster on the lawn, often the water damage that accompanies a house fire means the basement Forced-air
furnace is a Totaled ! A talk with the crew boss will he is still setting in his Truck drinking coffee in the morning often gets me lots of salvage stove pipe
and the HEVAC hot and cold air runs ! Y.M.M.V

Speaking of Ernie and Erica Wisner who are the moderators of Our RMH and Wood stove Forums, check out the Eye candy in the Partial DVD below!


http://youtu.be/30rPCRB5e-s?list=PL0bZy202ImXP7NpLUJMtKJOjpjPPv59b-

For the good of the Craft ! Big AL !
 
Byron Campbell
pollinator
Posts: 293
Location: US, East Tennessee
34
  • Mark post as helpful
  • send pies
    Number of slices to send:
    Optional 'thank-you' note:
  • Quote
  • Report post to moderator

Chase Anderson wrote:I had thought about the single loop as well as the air channels underneath. The problem with the "u" is that it would create a huge 19' pipe (ceiling is 16' high) that my wife would consider an eyesore.


Sorry, I appear to have given the wrong impression. The single out and back loop of ducting would only be in the thermal bench, submerged in cob.

For the exhaust flue, on my stoves I use a straight vertical run of single wall stove pipe directly up to the ceiling where it then transitions to insulated stainless steel pipe the rest of the way (using a ready made chimney kit).
 
Rocket Scientist
Posts: 4526
Location: Upstate NY, zone 5
574
5
  • Mark post as helpful
  • send pies
    Number of slices to send:
    Optional 'thank-you' note:
  • Quote
  • Report post to moderator
The archway in your picture leads to the bedroom, right? A U-turn system would put the barrel and chimney right about under the highest part of the ceiling, which is prime placement for extracting the most heat out of the chimney while maintaining good draft. There is no reason it has to be an ugly black stovepipe; given that it will be maybe 150 degrees at most, you can paint it any way you like... bright red or soft blue or... even swirly like smoke Having the chimney exit straight up there would require a roof penetration, but it would be at the top where there is less water flowing to want to leak in.

If the chimney exits the sidewall, it still really needs to be about as tall to avoid the possibility of downdrafts in certain wind conditions, and that would be a big pipe sticking up loose in the air, with guy wires or struts needed.

The "channel-creating bricks" (spaced some distance apart) would support a layer of concrete pavers or cement board, or any other noncombustible rigid material. If you have a huge supply of old bricks, you could use them as the next continuous layer. It's not until you get near the base of the combustion unit that you need to worry about using refractory (high-heat-resistant) materials or insulation.

The chimney is not likely to have enough residual heat for water heating, and it would be intermittent at that, so I wouldn't even think about that use.
 
Chase Anderson
Posts: 8
Location: Eastern Central OK
  • Mark post as helpful
  • send pies
    Number of slices to send:
    Optional 'thank-you' note:
  • Quote
  • Report post to moderator
Thank you all for the replies and suggestions. Good insight on the exit location. Ok well I'll make some modifications and see what I can come up with. As requested previously, and in hopes of meeting locals, I live in sequoyah county, OK near the Arkansas border. Wind is typically very strong year round due to living on top of a mountain.
 
Chase Anderson
Posts: 8
Location: Eastern Central OK
  • Mark post as helpful
  • send pies
    Number of slices to send:
    Optional 'thank-you' note:
  • Quote
  • Report post to moderator
I'm back with a few more questions. I have been tirelessly attempting to convince my wife that we should have the main vertical portion of stovepipe in the living room up to near the peak of the ceiling as suggested. The problem is that the whole idea of installing this RMH is a large compromise on my wife's part, as she would prefer to have a normal wood burning stove or perhaps even a good old fashioned fireplace (I'm all about efficiency, and I just can't bring myself to settle for that old age innefficient garbage!) She is mortified at the idea of a large vertical flue in the living room. I had previously mentioned running it through the wall near the heat riser and into a water heater closet located in the master bathroom and up from there, but there are some pipes and wires in the way that will have to be moved and modified. With 42' of horizontal flue, is it absolutely necessary to have a long vertical flue in order to have success? As long as the mass and flue on the inside of the house is a higher temperature than the outside, it seems that I shouldn't have a problem if it just exits horizontally out of the wall. This would save many hours of grouchiness and conflict if it is possible. Your thoughts?
 
Posts: 226
Location: S.W. Missouri, Zone 6B
8
  • Mark post as helpful
  • send pies
    Number of slices to send:
    Optional 'thank-you' note:
  • Quote
  • Report post to moderator

Chase Anderson wrote:I'm back with a few more questions. I have been tirelessly attempting to convince my wife that we should have the main vertical portion of stovepipe in the living room up to near the peak of the ceiling as suggested. The problem is that the whole idea of installing this RMH is a large compromise on my wife's part, as she would prefer to have a normal wood burning stove or perhaps even a good old fashioned fireplace (I'm all about efficiency, and I just can't bring myself to settle for that old age innefficient garbage!) She is mortified at the idea of a large vertical flue in the living room. I had previously mentioned running it through the wall near the heat riser and into a water heater closet located in the master bathroom and up from there, but there are some pipes and wires in the way that will have to be moved and modified. With 42' of horizontal flue, is it absolutely necessary to have a long vertical flue in order to have success? As long as the mass and flue on the inside of the house is a higher temperature than the outside, it seems that I shouldn't have a problem if it just exits horizontally out of the wall. This would save many hours of grouchiness and conflict if it is possible. Your thoughts?


My first question would be how is it that either a fireplace or wood burning stove is going to avoid having a flue?

Talk to her about the visuals, as this seems to be her primary concern, not money, and not efficiency and cost of buying firewood. You may also want to address the visuals of a burning fire. I would suspect that is why she wants a fireplace. They are pretty to look at.

An image comes to my mind, of a RMH properly designed and all that. But built into it's thermal mass somewhere is a small Rumsford or Franklin fireplace. Just a small thing, and one that you can seal off, to keep from it sucking heated air out the chimney all the time. Fuel's not likely to get cheaper in our life times.
 
allen lumley
pollinator
Posts: 4154
Location: Northern New York Zone4-5 the OUTER 'RONDACs percip 36''
67
hugelkultur fungi books wofati solar woodworking
  • Mark post as helpful
  • send pies
    Number of slices to send:
    Optional 'thank-you' note:
  • Quote
  • Report post to moderator
Chase Anderson : Like you many people are turning down their present whole house Fossil Fuel Fired Forced-air Furnaces and are trying to make do with space heaters.

Many are switching to wall mounted propane and wood pellet models designed to mount on an outside wall, because they were not installed properly,i.e.located on the
lee or downwind side of the house, and these units are trying to be direct vent horizontal exhaust, out of any ten of these units 3 are leaving black carbon soot deposits
on their outside walls, 3 work well most of the time, 2 don't work at all and 2 have truly ugly lash-ups of 3'' or 4'' pipe running up the side of the house, something you
would quickly dismantle if you del going to sell your house !

After a short break a history lesson ! Big AL
 
allen lumley
pollinator
Posts: 4154
Location: Northern New York Zone4-5 the OUTER 'RONDACs percip 36''
67
hugelkultur fungi books wofati solar woodworking
  • Mark post as helpful
  • send pies
    Number of slices to send:
    Optional 'thank-you' note:
  • Quote
  • Report post to moderator
Chase : A long tome ago in a strange place . . . . After a series of re-discoveries of certain localized regional practices were noted -the Creation of the Rocket Mass
Heater or RMH, from the Rocket stove became possible!

At that time Ianto Evans transported himself to a new home, a Shangri-La with a magically stable, pleasant, year round agreeable climate with steady winds blowing
during a short Heating season ! Into this near idyllic hanging valley he introduced the Rocket Mass Heater RMH, and built around them small, mostly 1 story, button
mushroom shaped, structures of Cob. Further, He made sure to bless the exhaust stream with a generous bulky Thermal Mass battery near perfectly designed
to provide stable core temperatures !

With both the Thermal Mass and the House built around the RMH and discharging its exhaust only on the Lee or downwind side of the House, in such a Favorable
climate there was little need for a final vertical exhaust chimney! Unfortunately, we do not all live in such a climate, nor do the winds always blow from one direction
only, the storm of the decade now seems to get here every other year, with different winds out of different directions, a 2-3 day storm with widespread power loss
is a poor time to find out your chimney was marginal at best ! We are not trying to ''keep up with the Jones's'' we want hem to be jealous of us !

On paper, I can prove that there is a sweet spot below the roofs peak, close to the leeward sides eves, Unfortunately local winds rarely follow paper charts! This is
Why the ''Conventional Wisdom'' is for a final vertical exhaust chimney venting through a storm hood 4' -5' above the peak of the roof and 10' away from anything
bigger than a TV Antenna !

Yes, there is a Large Helping of ''We have always done it this way!" generally this is much more palatable, and easy to swallow than the attempt to add several
feet of final Exterior vertical chimney during a ''Polar Vortex"

I hope this helps and is timely ! For the Good of the Crafts! Big AL
 
Chase Anderson
Posts: 8
Location: Eastern Central OK
  • Mark post as helpful
  • send pies
    Number of slices to send:
    Optional 'thank-you' note:
  • Quote
  • Report post to moderator
Thank you all for the helpful advice, wisdom, insight, and food for thought. I've been a follower of this site for a while now, but this is my first posting, and you all have been a very proactive and helpful group of people.

So after a long period of hard negotiation and brainstorming with my wife, I think we may have come up with a winner solution. Although it is still contingent on the answer to a question I have and the review from the wise men and women here. As you'll see in the revision below, we plan to make an L shaped mass. The short leg of the L will be used as functional seating (with a loop of flue inside), something we really couldn't do with the last model. It will also put the barrel in a corner which I imagine will help to direct the heat from the barrel toward the crowd better. The question however is that we would like the exit flue and the long end of the L to then make a 90' turn through the drywall (non insulated and steel framed) and into a hot water heater closet on the other side of the wall in a bathroom and from there go vertical into the attic and out the roof. The long vertical flue in the living room was a no-go for my wife as that is the main wall we look at everyday and if we were going to do it she wanted to wrap it with brick like a chimney and I don't want to box in 16' of vertical chimney, not to mention the cost. The difference now is that instead of just making one hole through the vaulted ceiling and out the roof, now we will potentially make three holes (one to go through the wall, then going vertical and a hole through that 8' ceiling, then through the attic and a hole through the roof). So how will these holes need to be negotiated? Double insulated pipe? Heat shields? Please note that we live in Rural Oklahoma and there are literally no building permits required of any kind for any work. I've seen some really weird construction out here ha ha ha. We can do whatever we want without complying with code regulations, but we still want to be safe, and we don't want to get ourselves into a situation where we have a fire and the insurance company won't cover it because we were grossly unsafe or something. Also we will make sure that if we ever do sell this house that nobody uses these pipes for a regular wood burning stove with much higher flue temperatures (obviously). So, is that a viable option? It would at least give us the long vertical exit flue mostly in the interior of the house as recommended, and the attic is very well insulated.

Also note that in the crook of the L, we have thought about doing two 45' angles instead of one 90', in order to give us a seating spot right in front of the barrel as well as to potentially use it to dry out the next batch of wood, or wet clothes or whatever. Are two 45's less restrictive than one 90' elbow?

Build-Plan-Revision-2.jpg
[Thumbnail for Build-Plan-Revision-2.jpg]
 
Erik Weaver
Posts: 226
Location: S.W. Missouri, Zone 6B
8
  • Mark post as helpful
  • send pies
    Number of slices to send:
    Optional 'thank-you' note:
  • Quote
  • Report post to moderator
If you do an Internet search for document ASTM-E1602-03, a 9-page resource, you'll get some good ideas about how to safely situate some of these clearances. ( I think I got that number right. )

Eventually you can find it for free, or you can order it for $45.

Also search for fire place and chimney code. These too are online. I *think*
http://www.rumford.com/contents.html
has some of this material

http://dnr.mo.gov/pubs/pub781.pdf is also of interest.

Also, look into heat shielding. This tends to be sheet metal with an air gap at all sides and ceramic mounts. This is one way to reduce clearances around the barrel, which I think one should treat as if it's a wood burning stove.

I suspect you'll find the penetrations you are planning are fairly normal.

Plus your flue temps will be low.

I'd think 2" non-combustible clearance to the pipe from any structural members, be they wood or metal stud, and 12" metal support around that would do it. But it's been a while since I looked at fire safety code. Seems to me it's something on these lines.

As to future buyers venting a hot wood stove, I have several thoughts....

Is this RMH a permanent or temporary installation? Permanent is less troubling, and I would guess only needs proper disclosure, and I'd suggest an operating manual ( I saw the Wisner's sell such an item for cheap )

Hang info / warning tags on the stove pipe. Nurseries sell aluminum plant tags that could work. Hang these out of sight, but where connections and modifications might be made.

Or most expensive, pipe to wood burning stove standards. That's the safest too, but overkill for the temps of the RMH.

Or, if the install is portable, buy cover plates and remove the stove pipe when you leave. Explain to the buyer it is not designed for hot wood burning stove and a unwanted liability if you sell it in place.

All that said, going through the roof I'd just pay for the expensive triple wall. I'd leave that in place if I moved because it's top shelf chimney pipe, and you've waterproofed the opening, so you don't really want to disturb it when you sell.

Plus, wandering eyes of neighbors and fire marshals will be comforted. And you won't need a lot of it, being so close to the peak of the roof. ( This is my own plan. )

Your runs and turns and chimney rise all seems doable. Should look very nice and be toasty warm
 
Erik Weaver
Posts: 226
Location: S.W. Missouri, Zone 6B
8
  • Mark post as helpful
  • send pies
    Number of slices to send:
    Optional 'thank-you' note:
  • Quote
  • Report post to moderator
Here is another resource you may wish to browse:

http://extension.missouri.edu/p/G1731

If you look along the left-hand column of the web page, you'll also see links to related documents and topics.

Also, if you search the Internet for "international building code chimney" and "international building code fireplace" and "international building code chimney fireplace" I think you'll find some useful resources. You may have to go through a few pages of results and trace a few dead end links, but there are some nice drawings and illustrations to be found, such as:

http://www2.iccsafe.org/states/seattle/seattle_residential/PDFs_residential/Chapter%2010.pdf
 
Chase Anderson
Posts: 8
Location: Eastern Central OK
  • Mark post as helpful
  • send pies
    Number of slices to send:
    Optional 'thank-you' note:
  • Quote
  • Report post to moderator
Hey guys! I've made some progress on the RMH! I was really excited with how it was turning out. See below!


However we've hit a hiccup. My wife just can't bare the thought of having a steel drum in the living room to look at all day so I've been forced to reevaluate our options (compromise). I think I've come up with a viable solution. Instead of using the drum for the bell, we have decided to go the direction of a masonry bell similar to the picture below. We have a source of good paver bricks at .25 cents a piece that we've used to create the air channels under the bench. I would like to use those bricks for the bell. There's a picture below of them. Now I've read in the book somewhere that covering the steel drum with cob completely can create draft problems due to loss of heat transfer. What about if the bell is made of masonry? What other effects will we see? I already assume a loss in fast radiant heat due to the time required for heat to travel through the thick brick as opposed to the thin steel drum? That sucks, but tolerable. Do we need to try to round the internal corners out somehow to help with restrictive corners for the downdraft? I also came up with internal dimensions of 22" x 21" with some wiggle room added in, trying to match the area of a 23.5" diameter barrel. Is my math right? Should I add in more for rounding the corners if that is advisable.

And lastly for the top of the masonry bell. We were thinking of options for supporting the brick top, which seemed problematic, then my wife suggested a square piece of sheet metal. I liked that idea but thought it might be even cooler to get some type of cook top up there. Cast iron would be nice but I thought about the newer residential stove tops that are usually black/see-through that glow red when heated up. That would be awesome if we could have something on top that could give off a glow from the flames below in the heat riser turning the corner but still have the ability to transfer enough heat to boil water for tea. Is there something available that I could salvage that could withstand the heat of the RMH at the top of the heat riser yet still look somewhat modern and give off a glow, even if it's somewhat dim? Any other thoughts or suggestions?
image.jpg
[Thumbnail for image.jpg]
image.jpg
[Thumbnail for image.jpg]
image.jpg
[Thumbnail for image.jpg]
 
Erik Weaver
Posts: 226
Location: S.W. Missouri, Zone 6B
8
  • Mark post as helpful
  • send pies
    Number of slices to send:
    Optional 'thank-you' note:
  • Quote
  • Report post to moderator
Be very careful of using regular bricks in the bell. My guess it is going to get too hot in there and they will break or rapidly expand, perhaps even shatter, depending upon how quickly they come apart and under what stress/pressure.

I would use fire brick to line the masonry bell. Then you lay up a sheet of corrugated cardboard as an expansion spacer, and face the fire brick with whatever brick you think is pretty enough to use.

The metal top will need expansion and air gap / gas sealing, to make sure you are not venting toxic gases into the house, so read up on that too. People make masonry bells all the time, although not so common with RMH designs, so hopefully someone will be able to speak from experience regarding the changes. But certainly researching masonry heater designs will supply the info you need, eventually.

There is another option.

Paint that barrel with heat-resistant paint (like for engines or wood stoves or BBQs) so that it no longer stands out, and then screen the offensive visual impact of the barrel. I would be tempted to use brick, although I also like being able to get at the insides of the barrel for annual inspection, so I'd plan on that too. It looked to me like the barrel has a removable top -there is not top on the barrel in the first image is there?- and if that is the case, you could go ahead and build the brick screen all the way around, and just leave the top free of brick, going high enough not to see the barrel, and low enough to be able to get the lid off the barrel for inspection.

Another concern I have is changing things on your first build. There are already going to be things to figure out to get the thing tuned and running right. If you go about changing the design, it both complicates the build, and analysis of problems, but it also diminishes the number of people that will be able to really help you identify problem areas.

Thus, my suggestion:

Pain the barrel black and screen it from view

(metal or masonry, due to the high heat so near the barrel - got to treat it like you would a wood stove in terms of clearances).

 
Erik Weaver
Posts: 226
Location: S.W. Missouri, Zone 6B
8
  • Mark post as helpful
  • send pies
    Number of slices to send:
    Optional 'thank-you' note:
  • Quote
  • Report post to moderator
Screen options are many.

Copper artwork (copper gets deceptively hot, by the way)

Full brick face

Broken brick courses (leaving open gaps between each brick, or every couple bricks) which I find visually interesting, and like to think helps to promote heat circulation..

Tile (look at traditional tile stoves from Europe, some are stunningly beautiful!)

3-Dimensional metal and/or masonry artwork (I'm assuming everyone has seen this kind of artwork somewhere in the world, there are many examples; the design is done is layers, but the design only comes out at you when see from the proper angle).
 
Every snowflake is perfect and unique. And every snowflake contains a very tiny ad.
the permaculture bootcamp in winter (plus half-assed holidays)
https://permies.com/t/149839/permaculture-projects/permaculture-bootcamp-winter-assed-holidays
reply
    Bookmark Topic Watch Topic
  • New Topic