• Post Reply Bookmark Topic Watch Topic
  • New Topic
permaculture forums growies critters building homesteading energy monies kitchen purity ungarbage community wilderness fiber arts art permaculture artisans regional education skip experiences global resources cider press projects digital market permies.com pie forums private forums all forums
this forum made possible by our volunteer staff, including ...
master stewards:
  • Nancy Reading
  • Carla Burke
  • r ranson
  • John F Dean
  • paul wheaton
  • Pearl Sutton
stewards:
  • Jay Angler
  • Liv Smith
  • Leigh Tate
master gardeners:
  • Christopher Weeks
  • Timothy Norton
gardeners:
  • thomas rubino
  • Jeremy VanGelder
  • Maieshe Ljin

Su Ba’s Community Farm Project - Adding Permaculture

 
pollinator
Posts: 2142
Location: Big Island, Hawaii (2300' elevation, 60" avg. annual rainfall, temp range 55-80 degrees F)
1064
forest garden rabbit tiny house books solar woodworking
  • Likes 4
  • Mark post as helpful
  • send pies
    Number of slices to send:
    Optional 'thank-you' note:
  • Quote
  • Report post to moderator
No-till experiment :

I started this little no-till project a couple on months ago. I’ve never had success with no-till before, but perhaps it was due to the soil type. So I was willing to try again.

Step 1 - pick the site. I didn’t have much choice in what site to use, but there were some considerations to take in. First, I wanted it to be easily accessible to myself. And it had to have water for irrigation.  I know myself, so if the site wasn’t in my face every day, I’d most likely put off working at it regularly. And I needed water. So I opted for a place on the ranch where OKK has its garden, but not at the garden site itself. Right outside the greenhouses were grassy areas not being used, so that is where I decided to place the no-till garden.
Step 2 - get rid of the grass. Not using a herbicide, I opted to cover the ground with weed block for a couple of months.  Pulling the weed block off, I saw some grass still struggling to survive, but much of it was gone. Keeping in mind that only the vegetative top growth had disappeared, I needed to stay aware that since the roots might still be alive, some of the grasses might resprout. So getting a mulch atop the soil was a priority in order to stop the regrowth.
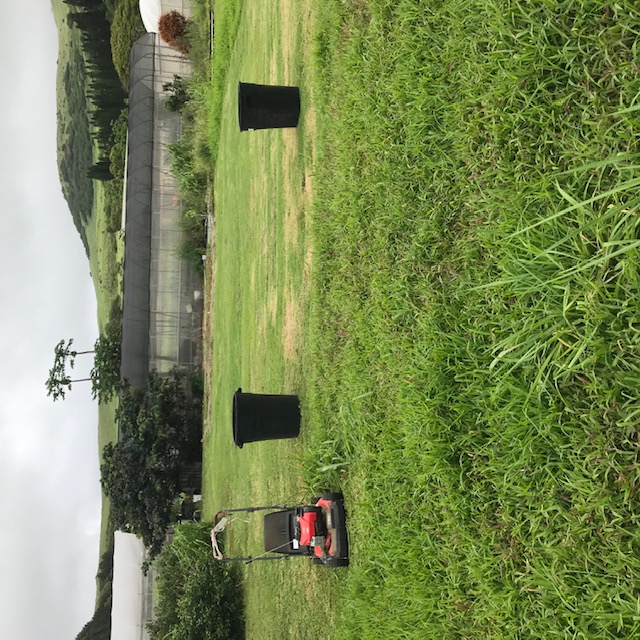
Step 3 - mulching. Out came the lawnmower that has a bag, and importantly for me, has the self propel feature. I could have harvested grass clippings a variety of ways, but I had the lawnmower and besides, the exercise would do me good. So evey day I could (at least 3 days a week),  I mowed the "lawn" around the greenhouses to collect 5 trash a full of clippings.
Step 4- seeding and planting prior to initial mulch application. The first thing I did after removing the weed block covering was to scrape out a shallow trench and drop bean seeds into place. I then transplanted several tomato seedlings. Everything got watered in well with a weak fertilizer = compost tea.  For this initial planting I prepared the soil using a small mattock. The soil was rather hard and needed loosening. The mattock work went quickly, since it was a small area, plus the soil had stayed moist due the weed block.
Step 5- apply mulch. I put down a 6 inch thick layer of fluffy mulch. Over the course of the week, it settled down to about 1 inch thick.
Step 6- 2 weeks later reapply mulch. I walked the area, checking the plants, tying up the tomato plants as needed, pulled the few grasses that were sprouting.  Then I reapplied more mulch.  


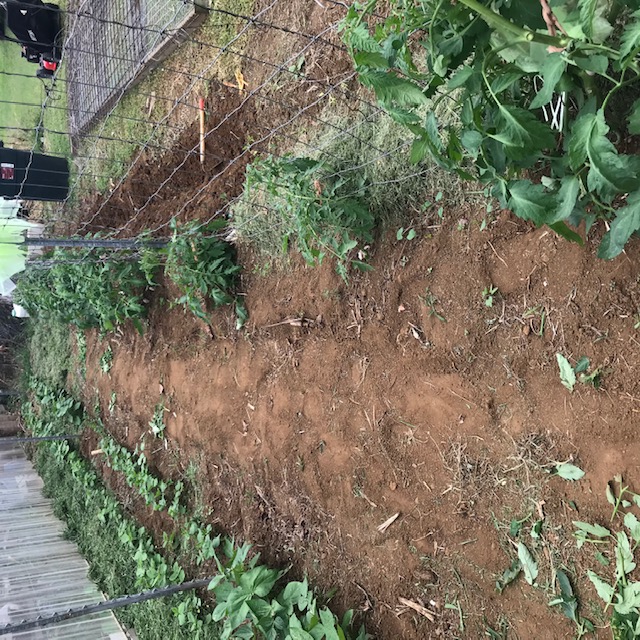
IMG_7396.jpeg
Two rows of beans to the left, tomatoes along the trellis fence, and a trench to the right for more beans.
IMG_7391.jpeg
Applying the first layer of grass mulch. More was applied 2 weeks later,
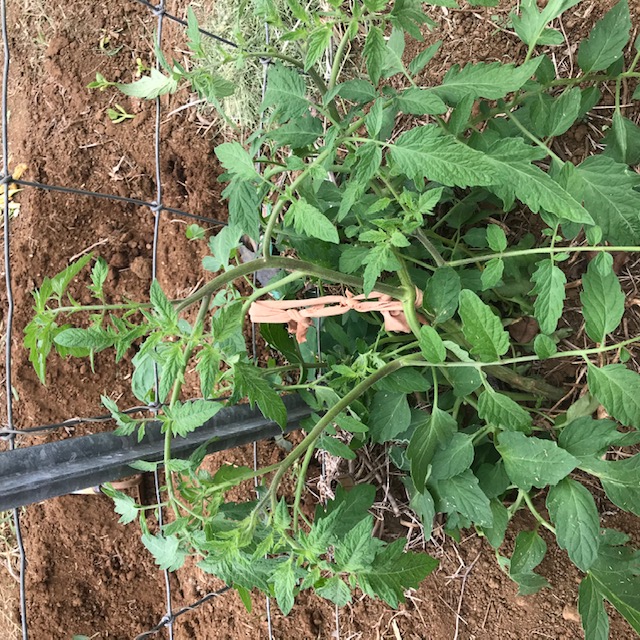
IMG_7395.jpeg
Tying the tomato branch to the trellis fence.
IMG_7393.jpeg
[Thumbnail for IMG_7393.jpeg]
 
Su Ba
pollinator
Posts: 2142
Location: Big Island, Hawaii (2300' elevation, 60" avg. annual rainfall, temp range 55-80 degrees F)
1064
forest garden rabbit tiny house books solar woodworking
  • Likes 4
  • Mark post as helpful
  • send pies
    Number of slices to send:
    Optional 'thank-you' note:
  • Quote
  • Report post to moderator
At this stage now it’s been 2 months since I started this no-till experiment. I have already applied mulch twice, and it’s ready for another light application. I am seeing a bit of weeds popping through the mulch here and there. Before applying more mulch, I’ll walk the garden and pull out anything big enough to easily grab. I’ll leave the tiny weeds, figuring that the mulch will smother them. Maybe I’m just being hopeful, but heck, I’m an optimist by nature. So I’ll just  cover those baby weeds.

I have gradually been planting more rows into the garden area. This area had been mulched twice already. Now that I’m ready to plant, I pulled the mulch aside and used my mattock to prepare a row to plant more bean seeds. I’m finding that the soil is far softer and easy to work than when I first started. The mattock is actually overkill now. A small hand hoe would probably work just as well. I’m impressed that the soil is as soft as it is. Not as soft as my garden soil at my home farm, but still much an improvement over the soil generally found on this farm.

I have been keeping the tomato plants trimmed, something I never bothered to do in the past. The trellis fence is rather flimsy, so it won’t support heavy plants. I’m finding that trimming the plants is keeping things under control better. I can open up the plants for better air circulation, and I can have access to the baby tomatoes. Access is important because I am bagging the tomatoes to keep out fruit fly. This area of Hawaii is infested with several varieties of fruit fly, and they destroy certain fruits and veggies….tomatoes being one of them. I’m bagging, thus eliminating the need to use chemical sprays. The bagging process is easy and goes quickly. And the bags are reusable.
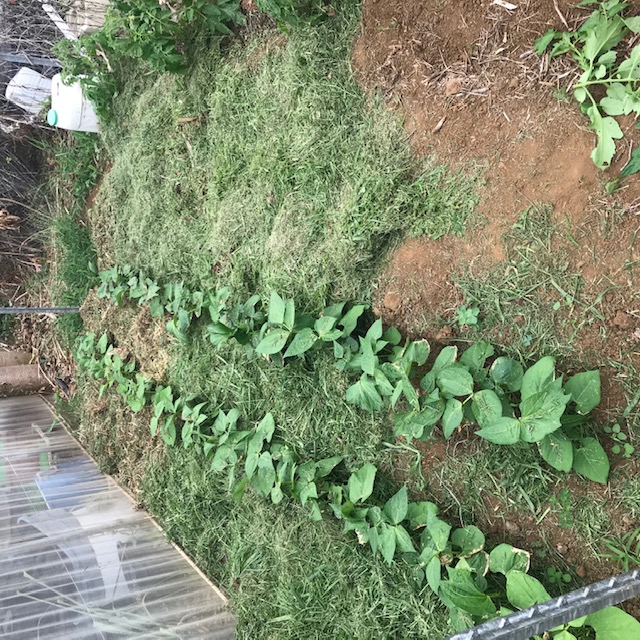
IMG_7453.jpeg
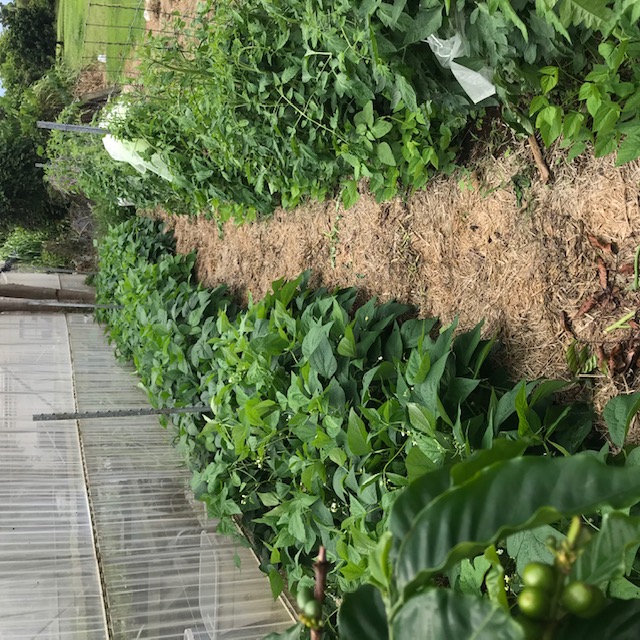
Beans on the left, tomatoes on the right. This area is ready for another application of mulch.
IMG_7454.jpeg
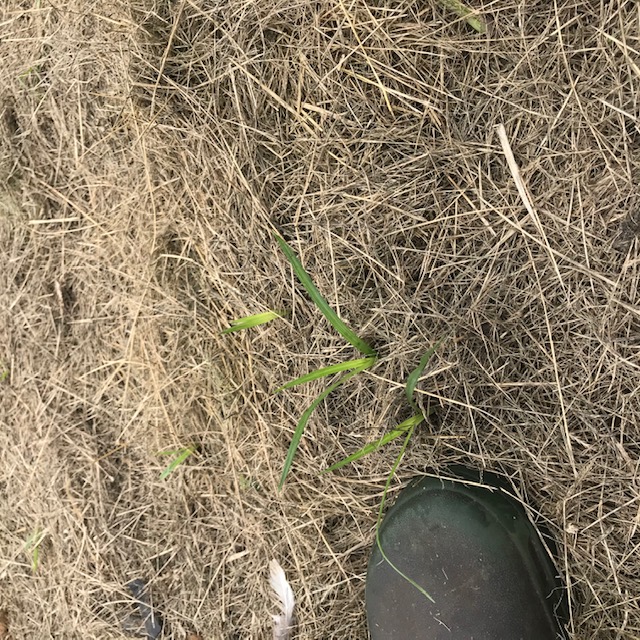
Small weeds, mostly grasses, are popping up through the mulch here and there.
IMG_7398.jpeg
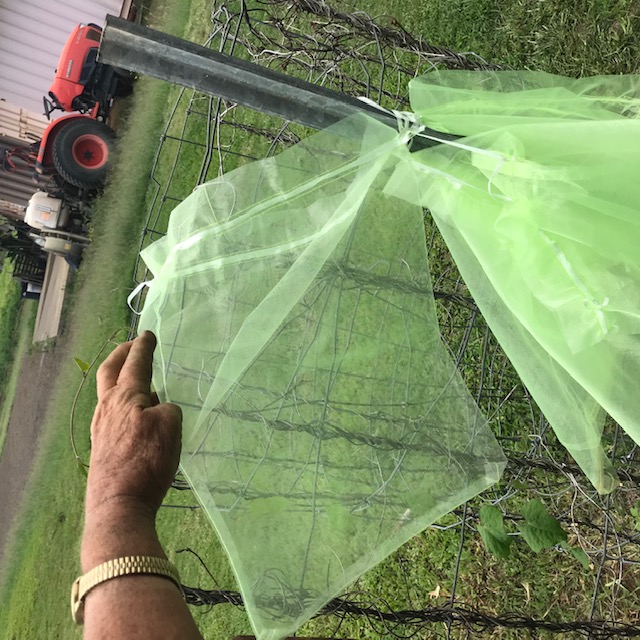
These are the fine mesh bags I am using to bag the tomatoes.
IMG_7397.jpeg
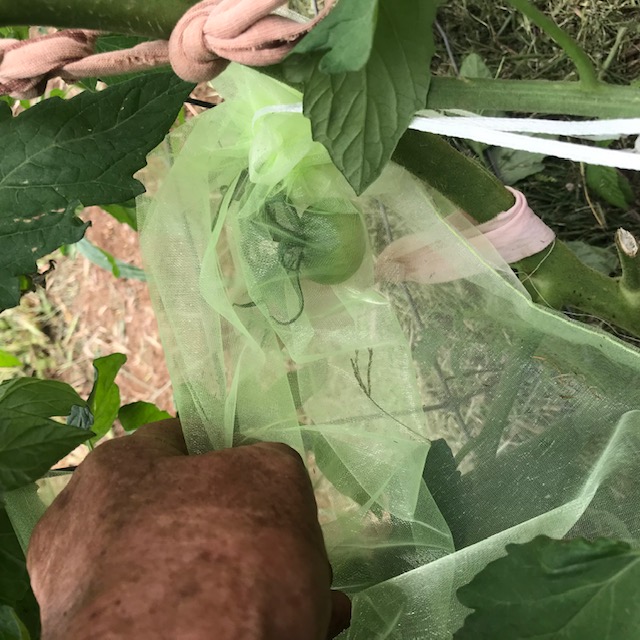
Bagged.
Bagged.
IMG_7450.jpeg
Using a light mattock to open up a new row.
 
Su Ba
pollinator
Posts: 2142
Location: Big Island, Hawaii (2300' elevation, 60" avg. annual rainfall, temp range 55-80 degrees F)
1064
forest garden rabbit tiny house books solar woodworking
  • Likes 4
  • Mark post as helpful
  • send pies
    Number of slices to send:
    Optional 'thank-you' note:
  • Quote
  • Report post to moderator
Kilauea Volcano erupts —- once again

Awoke this morning to news that our resident volcano is once again erupting. It’s in a safe area and won’t result in any danger. So it’s pretty cool, without the fear and worry  !!!

Volcanos are actually part of permaculture. I use the lava rock to make protective rock walls. Old Hawaiian farmers knew that moisture was banked under rock walls, thus built walls and grew crops adjacent to them. I also use this technique for some of my own crops.

Volcanos provide a fresh source of minerals. Knowing this, I have added lava dust and lava cinder to my growing areas.

This volcano initially brought me to Hawaii, so I thank it every time it erupts.
CC6F6635-F6A3-42B6-AD11-62C5DC593B66.png
Erupting in the distance. Photo taken at 5 am today.
 
Su Ba
pollinator
Posts: 2142
Location: Big Island, Hawaii (2300' elevation, 60" avg. annual rainfall, temp range 55-80 degrees F)
1064
forest garden rabbit tiny house books solar woodworking
  • Likes 3
  • Mark post as helpful
  • send pies
    Number of slices to send:
    Optional 'thank-you' note:
  • Quote
  • Report post to moderator
..
65B60434-498F-4943-AA4F-98273FFEB5B3.jpeg
Homerun Bean
Homerun Bean
71CA0651-8D76-4F4E-A4A5-83FDC95E66AB.jpeg
Doubke cropping. Wing beans climbing a tomato plant.
Double cropping. Wing beans climbing a tomato plant.
A72CD14A-706E-46B0-9CEC-DBCF140A48D2.jpeg
Young tomatillo plants. The older is full of blooms.
97FC5D79-3749-4D91-AD31-0A841AB8BE29.jpeg
A second néw area beside the greenhouses
2151B1E0-6728-42CB-B91D-143F7130C35E.jpeg
Right, two rows of beans. Left- peas and cowpeas.
8D700CB2-E14B-41F6-9C10-89D82CCA74FA.jpeg
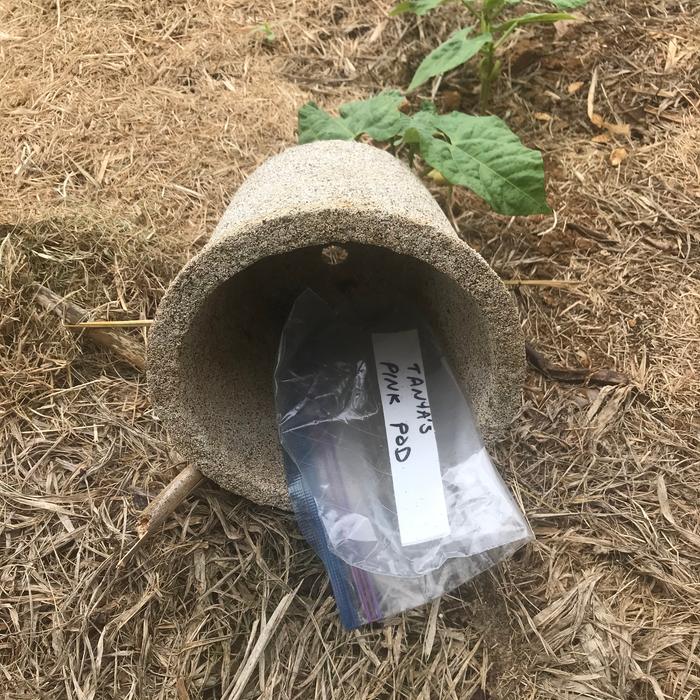
What’s under to pot? The label for the row. If just stuck into the dirt, the farms puppies would steal it. So I hide it under a heavy pot.
 
Su Ba
pollinator
Posts: 2142
Location: Big Island, Hawaii (2300' elevation, 60" avg. annual rainfall, temp range 55-80 degrees F)
1064
forest garden rabbit tiny house books solar woodworking
  • Likes 5
  • Mark post as helpful
  • send pies
    Number of slices to send:
    Optional 'thank-you' note:
  • Quote
  • Report post to moderator
The Unusual or Less Common

Besides the common veggies, which by the way are the most popular for sales, I’m growing less common ones. There are always a few folks who are looking for something unusual or new. Let me think what is on this list…….

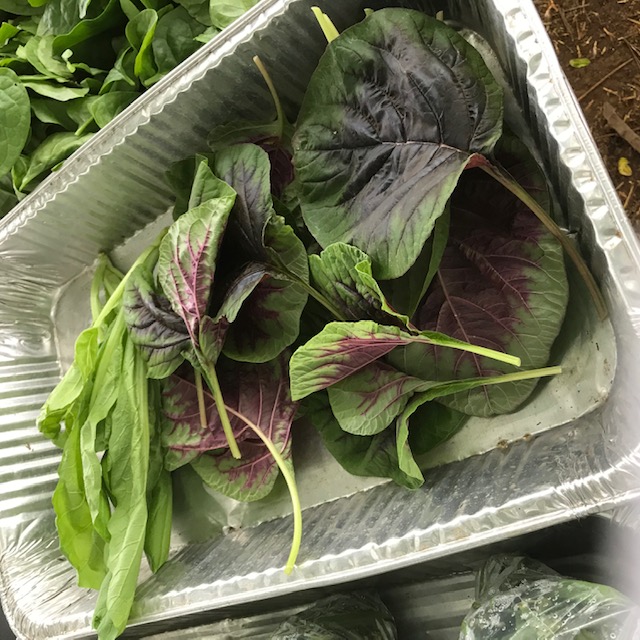
…..Tri-color amaranth, great for salads and sandwiches.
…..Pink, striped, purple, and red snap beans. Not so rare but many people haven’t seen them before. I’m currently growing Purpiat, Dragon’s Tongue, Tanya’s Pink Pod, Red Swan, Purple Teepee.
….. Purple bok choy. I like Purple Lady and Purple Gem.
…. White and golden beets. Avalanche is a good white. Touchstone Gold. I’m going to try Burpee Golden later this year.
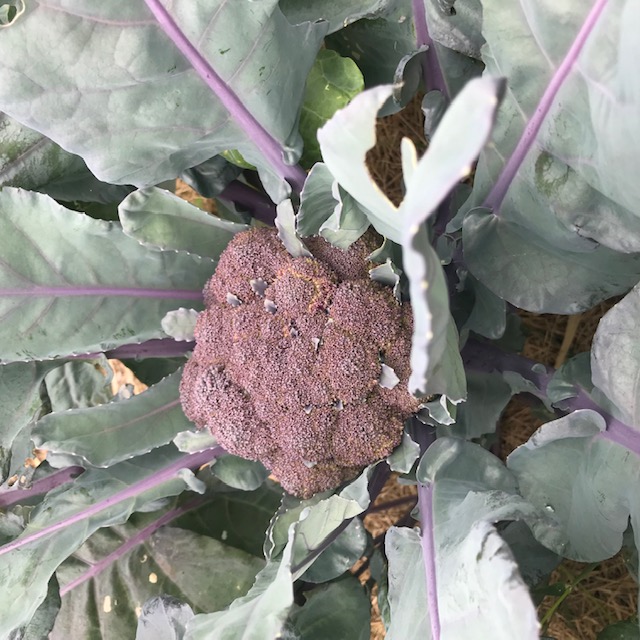
….. Purple Broccoli. I just got some Purple Magic seeds and looking forward to trying it. I used to grow one called Violet Queen, which grew like a broccoli although it was listed as a cauliflower. Fantastic variety. But it disappeared and I still mourn its loss.

Since the beginning of this project we have been growing some oddball stuff, so it’s no longer unusual around here. Things like white, yellow, and purple carrots.  Soybean.  Tomatillo. Yard long beans. Different colored and striped eggplants.  Different colored sweet potatoes. Different colored potatoes. When I don’t have these on my tables, customers actually complain, since they are so use to seeing them.

One item that is quite unusual around here are large slicing tomatoes. They are difficult to grow without a protective screenhouse, and even then various diseases spread crazily in a screenhouse or greenhouse. Without using chemicals, you’re lucky to get a few tomatoes before the plant succumbs. Therefore I am tickled pink with my tomato bagging experiment. I’m actually getting tomatoes!
IMG_7460.jpeg
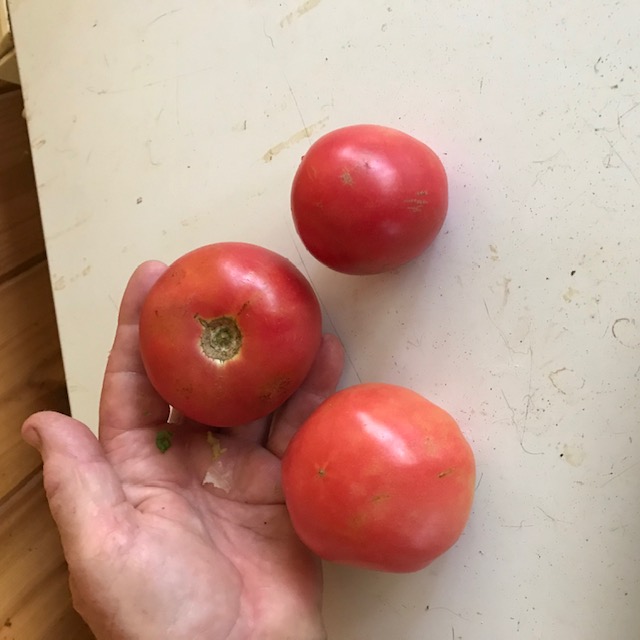
Burpee Globe. I’m so proud of these babies!
IMG_7462.jpeg
Tricolored amaranth
Tricolored amaranth
IMG_7464.jpeg
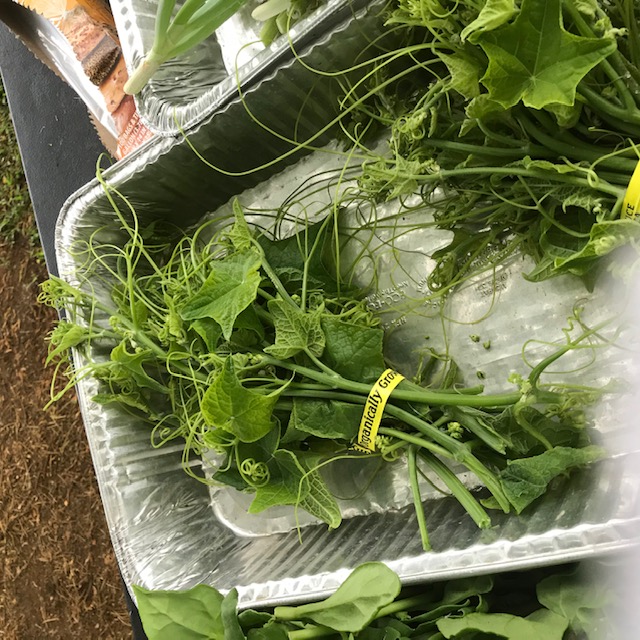
The growing tips of the pipinola (chayote) vines.
IMG_7465.jpeg
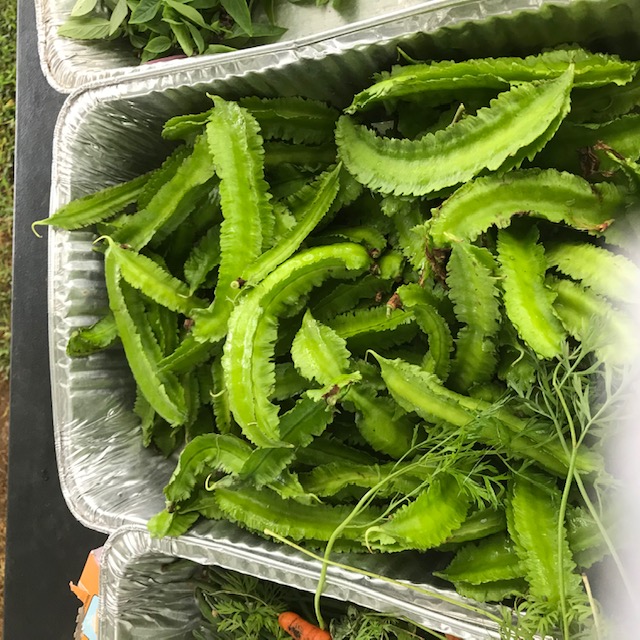
Winged Beans
Winged Beans
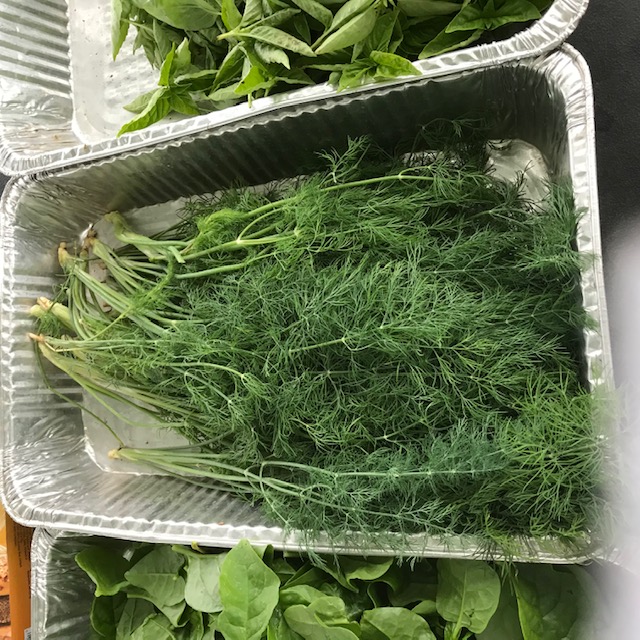
IMG_7463.jpeg
Dill. While not rare, I’ve never seen it being sold at the farmers markets here.
 
Su Ba
pollinator
Posts: 2142
Location: Big Island, Hawaii (2300' elevation, 60" avg. annual rainfall, temp range 55-80 degrees F)
1064
forest garden rabbit tiny house books solar woodworking
  • Likes 4
  • Mark post as helpful
  • send pies
    Number of slices to send:
    Optional 'thank-you' note:
  • Quote
  • Report post to moderator
No-till Garden Size:

Keeping in mind that our main gardening area is 3 acres, plus we use two commercial greenhouses, we are already producing quite a lot of food for our community. It’s not like we are struggling to grow more food. But I was getting a bit antsy to get another experiment of some sort started again….something to add some permaculture aspects to this overall project. I do quite a lot of little experiments. They are fun. And sometimes they work out so well that I incorporate them into our food project. Thus my new experiment is no-till, something that I have failed at a couple of times already…..but not at this particular location. The soil and conditions are different here than on my own farm, which is about 10 miles away. Yes, 10 miles can make a big, big difference. As one gets more and more permaculture knowledge and experience, one can notice the subtle differences that location can make.

So……
I’m starting small for primarily 3 reasons. 1- I’m doing this by myself. No helpers. 2- I don’t have lots of extra time, so I cannot devote scads of time to this. 3- I’ve learned that I do better taking little baby steps when I start something new.

I chose a small plot to start with. It’s 20’ by 35’. I chose this size for 3 reasons. 1- it was a piece of land close to the greenhouse. 2- It had once been used as a veggie garden several years ago.  I could have made it larger (20’ by 50’) but I was hesitant that I could handle the larger area.

20’ by 35’ turned out to be a good starting size. I have been able to produce enough mulch to keep the ground covered. The area was small enough that I had the time to make the rows, plant, and tend them. Surprisingly, it is the harvesting that I find difficult to get enough time to do.

I’m doing ok tending this new garden area. Keeping it mulched has saved me a lot of time normally devoted to weeding and watering. And since I have to do the mowing anyway, I just add a grass catching bag to the mower rather than blowing the clippings out the discharge. Gathering grass clippings takes a little more time, but not much.

Being an optimist, I decided to try expanding this no-till garden project since I was handling the first 20’ by 35’ plot just fine. So I tarped another area (to kill most of the weeds) that is 25’ by 35’.  That plot was lightly mulched and partially seeded 2 weeks ago. And right now it is ready for its second mulch application.

By essentially doubling the size of this experiment, I am finding that it is a bit more of a strain on my time. Planting isn’t the problem. I simply plant a 10 foot long row at the end of a day. It only takes a little bit more time, hardly noticeable. But the mulching is taking more time. Not that I can’t do it for now, but I am seeing the signs that mowing is now becoming a task rather than something I would do whenever I had the day for it. For example, the new area needs mulching. I’ve put it off for several days now. Putting off just mowing the grounds isn’t a problem, but delaying the mulch could be. So I will need to think about how to make harvesting mulch an easy, time effective task.  The bottom line is that my no-till garden may be approaching its size limit. We shall see.
 
Su Ba
pollinator
Posts: 2142
Location: Big Island, Hawaii (2300' elevation, 60" avg. annual rainfall, temp range 55-80 degrees F)
1064
forest garden rabbit tiny house books solar woodworking
  • Likes 3
  • Mark post as helpful
  • send pies
    Number of slices to send:
    Optional 'thank-you' note:
  • Quote
  • Report post to moderator
How Much Mulch Do I Need?

A lot!!!    That having been said, let’s delve deeper.

First of all, I’m using freshly mown grass clippings. They are fluffy, more air than substance. And they are full of moisture so they have a lot of volume until they dry out. Therefore, there is not a lot of actual bulk to them. They are mostly air and water.

Next, one cannot , or should I say, should not spread a thick layer of fresh clippings as mulch. The thickness will result in the grass fermenting, thus resulting in a wet, gooey, slimy, sticky mass that is slick as heck to walk upon. Plus it will prevent a light rain from reaching the soil.

What I do is apply a moderate layer of fresh clippings, about 3’ to 4’ deep. If the clipping contain a lot of dead grass in them, then I could go with 6".

In preparing these new no-till garden areas, after removing the weedblock tarp (remember, I had sprayed with 47% vinegar before applying the tarp) , I apply a generous amount of grass clippings immediately. I don’t want to give any surviving weed roots a chance to respond to the bright sunlight. While I could start seeding immediately, I am putting off seeding for 3 weeks. Therefore when I start seeding, it’s time for the second mulch application.

So at 3 weeks, I pull back the light covering of mulch to expose a row for seed planting. And I pull any weeds I see that are sprouting. To date, there have not been many,  After planting the seeds, I then apply a second application of mulch, but I do not cover up the freshly seeded row. Some grass clippings will blow over the seed row, but not enough to interfere with the sprouting seeds.

I am finding that the ideal schedule to apply more mulch is once every 3 weeks.  At least in the beginning so far. That hopefully will change in the future as the mulch layer builds up and the soil improves. Applying mulch every 3 weeks calls for a lot of grass clippings.

How much clippings is needed for a 20’ by 35’ garden?  The first application took twenty 35 gallon trash cans filled to within 6’ from the top (filling them completely up makes them too heavy for me to hoist into the bed of my pick up truck). I applied it over a period of 3 days because I wasn’t capable of mowing it all on the same day. The second application took 10. The third application on the first garden bed took only 8 trash cans.  As the mulch layer builds up, I may be able to get away with applying less grass clippings as time goes on.
 
Su Ba
pollinator
Posts: 2142
Location: Big Island, Hawaii (2300' elevation, 60" avg. annual rainfall, temp range 55-80 degrees F)
1064
forest garden rabbit tiny house books solar woodworking
  • Likes 1
  • Mark post as helpful
  • send pies
    Number of slices to send:
    Optional 'thank-you' note:
  • Quote
  • Report post to moderator
Expanding the Experiment Because It’s Working So Well So Far:


Call me crazy, but I covered another section to add to the no-till garden. It’s a 25’ by 30’ piece. This ground has not been tilled for 4-5 years. It once hosted a conventional veggie garden. I saw this garden once, and it was rather poor looking. So perhaps the garden was not well tended, or the soil non-fertile, or both. Keeping this in mind, I opted to apply compost and manure tea early.

Before covering it, I mowed the grass and weeds down as short as I could. Next I poured on a generous amount of manure tea, emptying 2 trashcanfuls. Then I let it sit for a bit over a week so that whatever was going to regrow had the time to push new little  shoots. The area was fairly dense in assorted weeds and grass. Next, on a sunny morning with the promise of all day sun, I sprayed everything with 47% vinegar. Our local hardware store can get this for me. By the next morning a lot of the greenery was burnt. Having a second sunny day, I resprayed anything that looked green. The next day I covered the area with weedblock tarps.

I got back to looking at this site about 4 weeks later. Pulling off the tarps, I was pleased to see that most of the weeds were gone. There was just some blanched out grasses here and there. But don’t be fooled. Experience has taught me that there are dormant grass roots just waiting for the sun so that they can resprout.

Before proceeding, I dumped a trashcanful of fish emolsion onto this future garden. And then applied some finely crushed burnt bones. Immediately I set to harvesting grass clippings. I ended up using 12 trashcanfuls of clippings to cover the area. I was planning on using a few more, but rain set in and I had to quit. I admit that I’m too old now to be out working in the rain. It chills me and it takes 2 days to recover. No sense of beating up my body like that anymore. So the next time it was dry enough, I mowed a bit more until I was satisfied with the mulch covering.

Time to figure out what I’ll plant. Common sense says to put in a crop that takes less of my time. Something on the order of pumpkins or gourds. The ground may not be fertile enough for taro, which is another super easy crop. But I’ll test the soil first before deciding. My inner child wants to plant peas, cowpeas, long beans, and broccoli. Maybe my adult inner soul will be sensible, or maybe the child in me will win out.
 
Su Ba
pollinator
Posts: 2142
Location: Big Island, Hawaii (2300' elevation, 60" avg. annual rainfall, temp range 55-80 degrees F)
1064
forest garden rabbit tiny house books solar woodworking
  • Likes 1
  • Mark post as helpful
  • send pies
    Number of slices to send:
    Optional 'thank-you' note:
  • Quote
  • Report post to moderator
No-till Experiment Timeline - Up to Date

I started this experiment a few months ago, but I didn’t start posting immediately. So these past posts have been playing catch-up on the timeline. But by now we have caught up with the real time, the present. For now on, what you read will be current, the story as it happens in real life.

I currently have 3 no-till garden sites…..
… #1 is fully planted and has been producing beans, soybeans, and tomatoes. I have done 2 weeks of picking the "Homerun" green beans, 1 week of the "Tohya" soybeans, and 2 weeks of some "Burpee Globe" tomatoes. To date I have harvested 9 pounds of green beans, 1/2 pound of soybeans, and 6 pounds of tomatoes. This has generated $77.
… #2 is planted except for the last 2 rows. This coming week the final two rows will be seeded. Nothing is ready for harvesting.
… #3 is in the preparation stage. This coming week I will seed two rows and apply the second layer of mulch.

My impressions …
… the present location appears to be well suited for this experiment.
… the soil has taken well to the use of homemade liquid fertilizers.
… the mulch has been effective in keeping the soil soft enough to work by hand, and the soil type has kept it from becoming mucky.
… having unlimited mulch material has helped tremendously
… most importantly !!!—- the type of weeds I’m finding here have been far easier to control than those on my own home farm.

At this time I cannot say if the mulch and liquid fertilizers will be enough to keep the soil fertile. We will simply have to watch the experiment unfold. And will the mulch be sufficient to control the weeds? Maybe, but again, time will tell.

My previous attempts at no-till failed. Things about the site were difficult. The soil tended to pack hard after a heavy rain. Mulch tended to keep the dense soil saturated, turning it in sticky, dense muck. The weeds were creeping grasses including kikuyu, Bermuda, Augustine, and others. Mulch didn’t stop them. I learned that soil and site are very important for successful no-till being done permie style. Aaahhhh—— that old saying comes to mind :  location, location, location.
 
Su Ba
pollinator
Posts: 2142
Location: Big Island, Hawaii (2300' elevation, 60" avg. annual rainfall, temp range 55-80 degrees F)
1064
forest garden rabbit tiny house books solar woodworking
  • Likes 3
  • Mark post as helpful
  • send pies
    Number of slices to send:
    Optional 'thank-you' note:
  • Quote
  • Report post to moderator
Adding Permaculture Aspects, a Brief Summary—

The whole driving force behind my writing here is to document inserting permaculture aspects into a small commercial farm project. Focusing upon my latest endeavor, the no-till experiment, I’d like to comment on how I kept permaculture part of it.

… no-till.
… the site chosen for full sun. Fairly level. Well drained. Close to irrigation water. Away from the worse of the vog. Protected from direct wind. Protected from most pollutants. Also chosen for human ease.
… mulch to assist in weed control , soil moisture retention, and to improve soil health.
… mulch is locally sourced, biodegradable, sustainable, and will contribute toward soil nutrition and condition.
… some start up seeds are locally produced, and in the future, almost all the seed will be locally produced.
… fertilizers are homemade : compost, compost teas, manures, manure teas, fish emulsion and local sourced.
… local landrace varieties will be soon introduced (kombucha pumpkin type)
… irrigation water is sourced locally right from the hills above this garden. Yes, poly pipes transport the water to the garden, but the water is "a natural", no treatment. It is clean, non-polluted, naturally filtered through lava.
… no pesticides have been used to date, with the intention of not using chemical sprays in the future.
… the only tools being used (excluding a lawnmower) are hand tools. To date. Just a mattock and a pruning snipper. In the future I foresee a hammer, saw, post driver, pliers, screwdriver, screws, wire.

Non-permie aspects have help start and maintain this no-till experiment.
…  weedblock tarps were used to help eliminate the initial overlaying grasses and weeds.  And commercial vinegar was also used.
… a gasoline powered lawnmower is used to harvest the grass clippings used for mulch.
… fine mesh, reuasable bags are used to protect tomatoes from fruit flies.
… possibly some future crops may require the purchase of outside seed, such as chard, beets, parsley, parsnips.
 
Su Ba
pollinator
Posts: 2142
Location: Big Island, Hawaii (2300' elevation, 60" avg. annual rainfall, temp range 55-80 degrees F)
1064
forest garden rabbit tiny house books solar woodworking
  • Likes 4
  • Mark post as helpful
  • send pies
    Number of slices to send:
    Optional 'thank-you' note:
  • Quote
  • Report post to moderator
Today…..

1… harvested a dozen tomatillos, my first picking.
2… harvested 5 pounds of Homerun green beans
3… harvested 10 tomatoes - 9 Burpee Globe and 1 (my first) Burpee Jubilee
4… harvested 1 pound of soybeans (in the pods)

I’m still amazed that this experiment is working and I’m getting a harvest. Wow.  Two rows of younger beans are just starting to bloom. So there will be more beans in a couple of weeks.

Also today, I sowed another row. Half the row is Cascadia pea, the other half is Henderson Lima.  Both were seeds that I grew myself. I ran out of time to get the second row sown. That will have to wait until tomorrow. And I need to add mulch to this garden tomorrow too. I don’t mind not getting to these jobs today.  This garden experiment is an add-on to all my other tasks, so I just aim to do a little bit each day. No stress adhering to a schedule.

Soil observation…….. sowing the seeds today meant opening up the soil. Not tilling, just opening it up. 8 weeks ago this soil was hard. You could have driven a car across it and not left a dent. For the past 2 months the soil has been covered, either by a weedblock tarp or by mulch. And generous amounts of manure & compost teas plus fish emulsion were poured into the plot a month ago. Today the soil is quite firm but moist, not wet. I found that I could readily slice though it with a hand tool. No mattock was necessary. This soil is old volcanic ash which tends to compact to a dense hardness when dried out. But today the soil was fairly easy to work with. I’m impressed. Keeping this soil moist by using a mulch seems to be the secret of working with this soil type, at least for growing veggies.
IMG_7530.jpeg
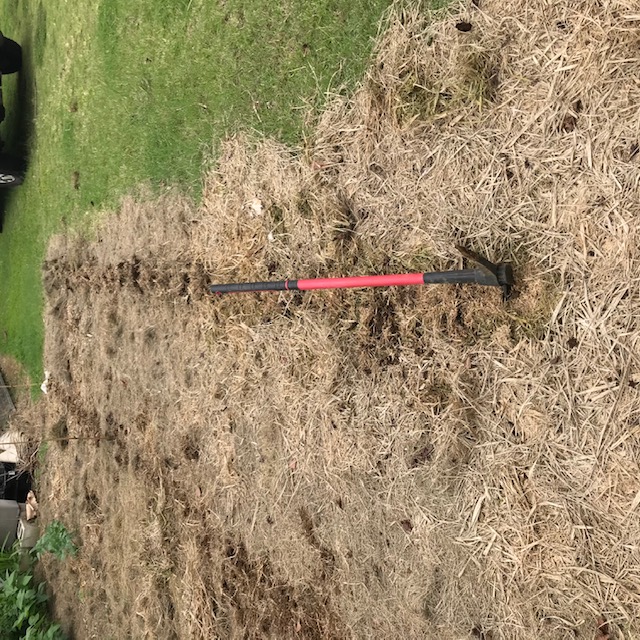
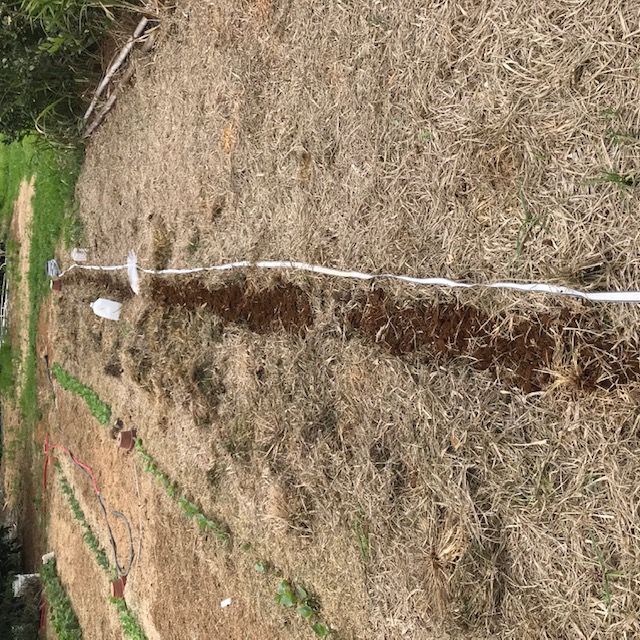
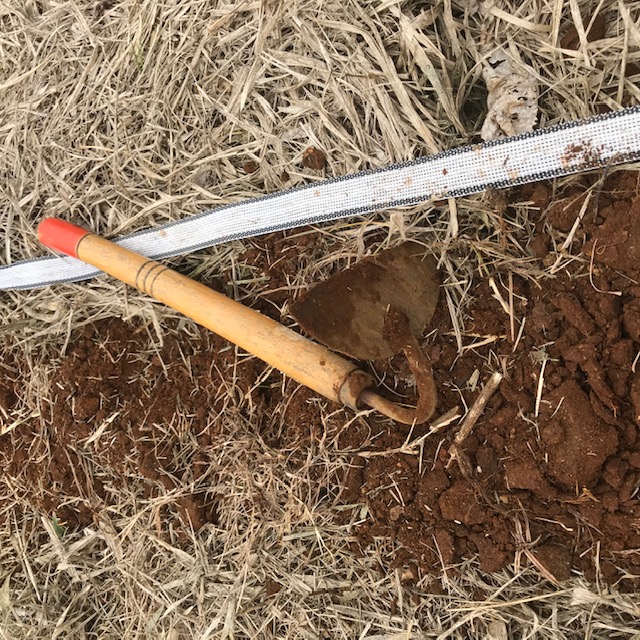
I marked the row with tape, pulled off the grass mulch, and starting working.
IMG_7531.jpeg
My favorite tool of the day.
IMG_7532.jpeg
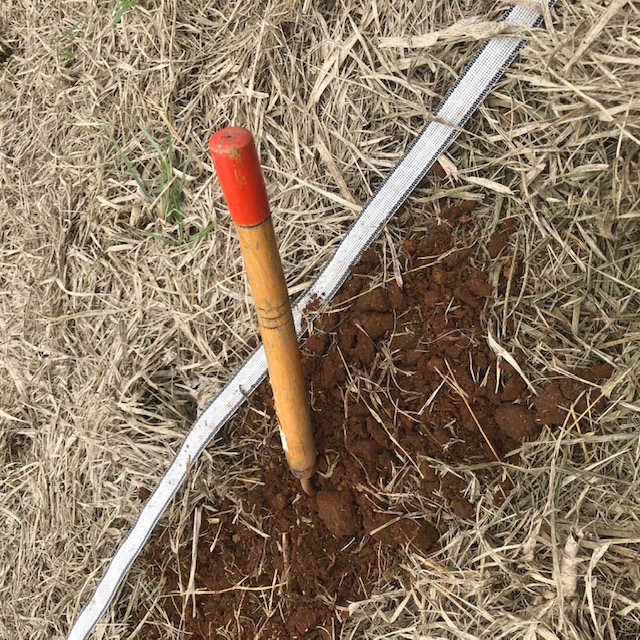
Angling the blade so that one of the points does the work, I pull it through the soil to loosen up the row a bit at a time.
IMG_7533.jpeg
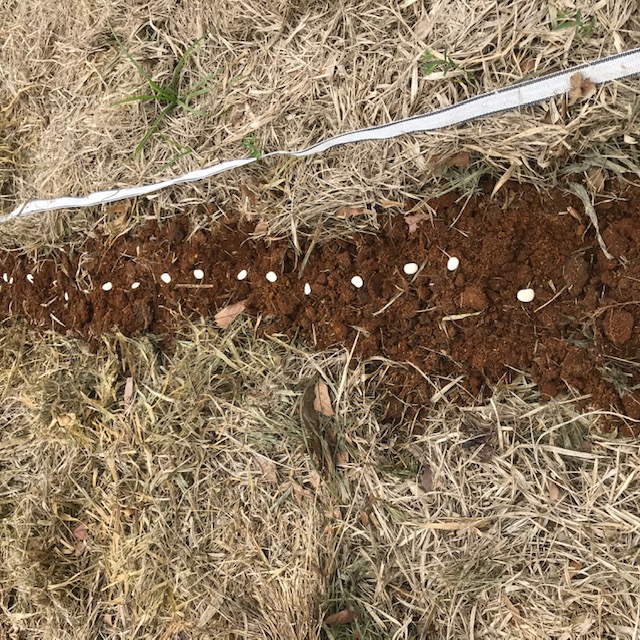
Lima beans ready to poke into the soil. Afterward I will water the row.
 
Su Ba
pollinator
Posts: 2142
Location: Big Island, Hawaii (2300' elevation, 60" avg. annual rainfall, temp range 55-80 degrees F)
1064
forest garden rabbit tiny house books solar woodworking
  • Likes 2
  • Mark post as helpful
  • send pies
    Number of slices to send:
    Optional 'thank-you' note:
  • Quote
  • Report post to moderator
Expanding the Garden

Since my last post, I’ve added some more crops.
... 10’ of cascadia pea
... 30’ of Tohya soybean
... 30’ of Henderson limas
... 10’ dragon tongue beans
... 10’ soybean, I can’t recall the name right now

And this week I need to add at least 2 more 30’ rows of something, most likely green beans. I have pumpkin seeds that I need to find a spot to plant.

Edible soybeans (edamane) are real popular here. So I am experimenting with some varieties to see which I like.
BF70E6D2-C8D1-4E9D-A648-E6E18ADA751F.jpeg
Soybeans almost ready to pick. The pods should be plump.
Soybeans almost ready to pick. The beans should be plump.
0238DC76-20D0-45B3-B245-5E6F71F6D57E.jpeg
Evidence that I had a visit from a rat.
 
Su Ba
pollinator
Posts: 2142
Location: Big Island, Hawaii (2300' elevation, 60" avg. annual rainfall, temp range 55-80 degrees F)
1064
forest garden rabbit tiny house books solar woodworking
  • Likes 3
  • Mark post as helpful
  • send pies
    Number of slices to send:
    Optional 'thank-you' note:
  • Quote
  • Report post to moderator
This past week I haven’t done a lot on this new experiment. Simply no spare time. But I did get some work on it today.

First thing I noticed was that where there was grass clipping mulch, the ground  beneath it still had some moisture. That’s great because the soil was quite dry the top 6 inches everywhere else. Since I don’t know when the farm will get rain again, I opted to get everything well watered today.

I also scuffed up two more rows and seeded a green snap bean called Affirmed and more Henderson limas. I now have only room for 2 more rows in this garden plot. Once seeded, I’ll have the first 3 plots in production. Ah-ha—-time to expand!!! I have tarps down on two other areas, so perhaps I’ll be able to start planting those next week, if time permits. Yes, time is my limiting factor.

A person who came to view this experiment asked me where I get my mulch from. Ha! My own little lawnmower and a goodly amount of effort on my part. She looked somewhat shocked. I guess the thought of actually working hadn’t crossed her mind. Guess she thought I got delivered. Anyway, today I was glad to have time to harvest 9 trashcanfuls of clippings. The effort gave me enough clippings to finish up mulching what I’ve planted so far, and also gave me a nice workout. I’m trying to increase my exercise, so I logged in a goodly number of steps today, along with pushing, bending, lifting, and dragging trash cans around.

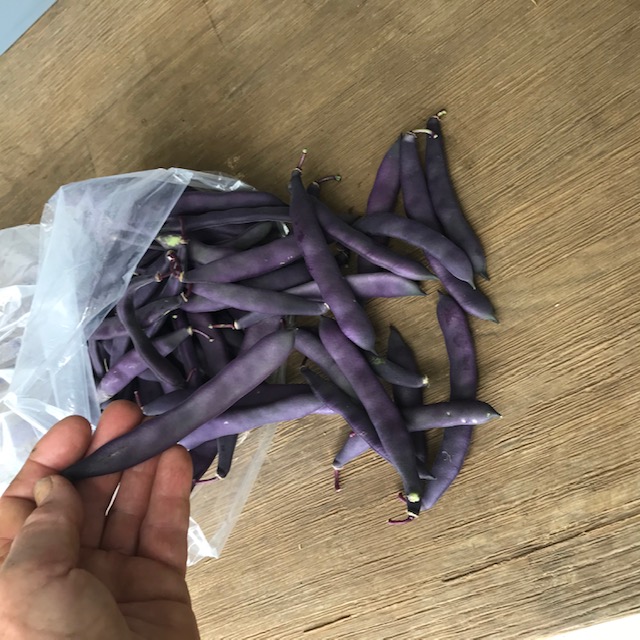
Today I harvested about 5 pounds of green snap beans, 2 pounds of radishes (an incidental crop because I just used them as markers in the rows), a few tomatillos, 10 tomatoes, and a pound of purple Romano beans—my first picking. Getting to harvest things from this experiment is tickling me to death. I’m thrilled!

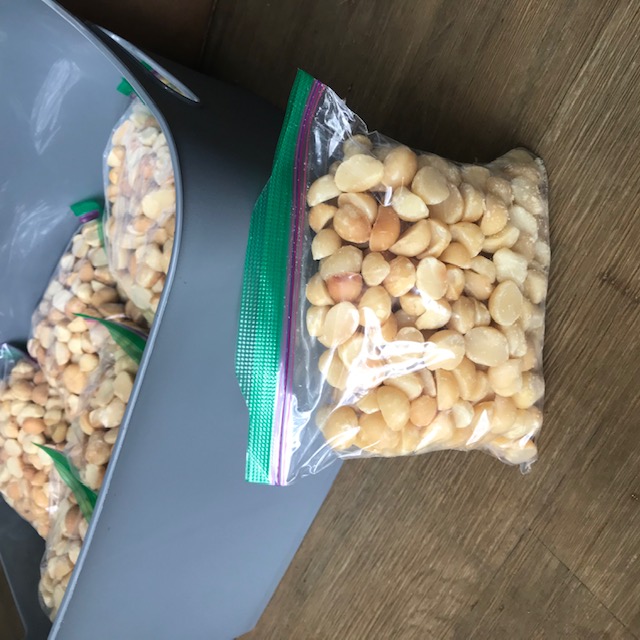
Yesterday I finished processing a bunch of macnuts from my farm. I thought I’d just take a picture of them to show you.
IMG_7589.jpeg
Macnuts
Macnuts
IMG_7595.jpeg
Mowing the grass beside the greenhouse
IMG_7588.jpeg
Purple Romano beans, my first picking.
 
Su Ba
pollinator
Posts: 2142
Location: Big Island, Hawaii (2300' elevation, 60" avg. annual rainfall, temp range 55-80 degrees F)
1064
forest garden rabbit tiny house books solar woodworking
  • Likes 3
  • Mark post as helpful
  • send pies
    Number of slices to send:
    Optional 'thank-you' note:
  • Quote
  • Report post to moderator
Marketing Update

When we started selling at our farmers market, we barely had enough produce to fill three 6’ long tables. Now this week, we are up to using 8 tables!  That’s quite an expansion.

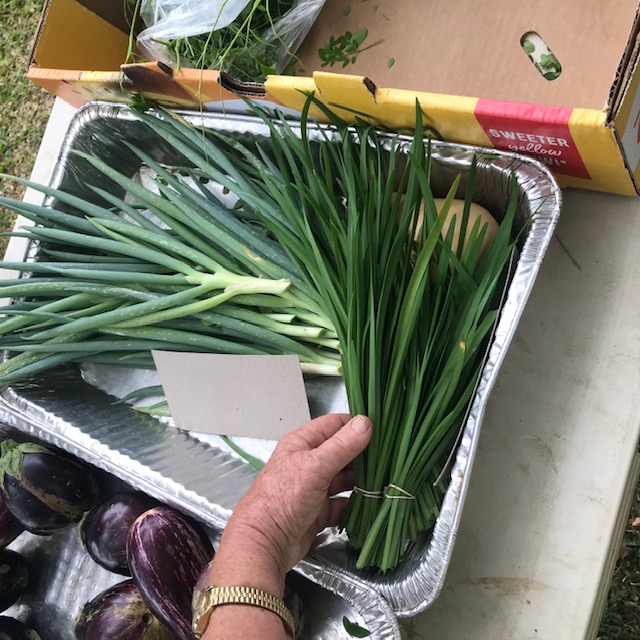
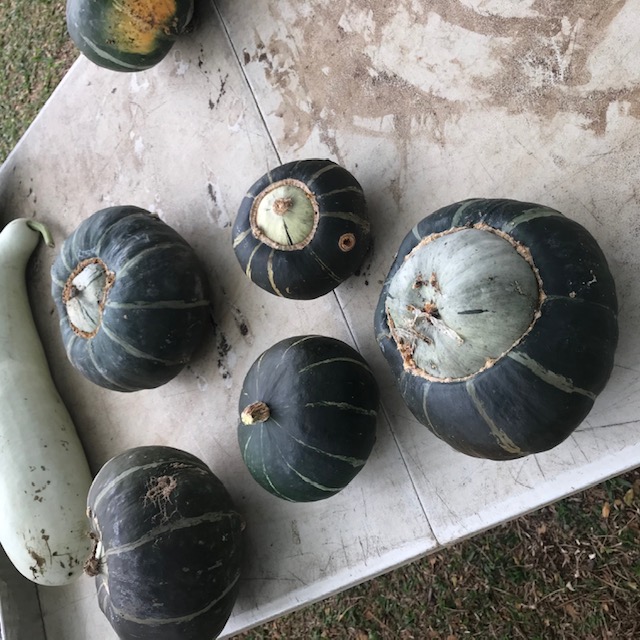
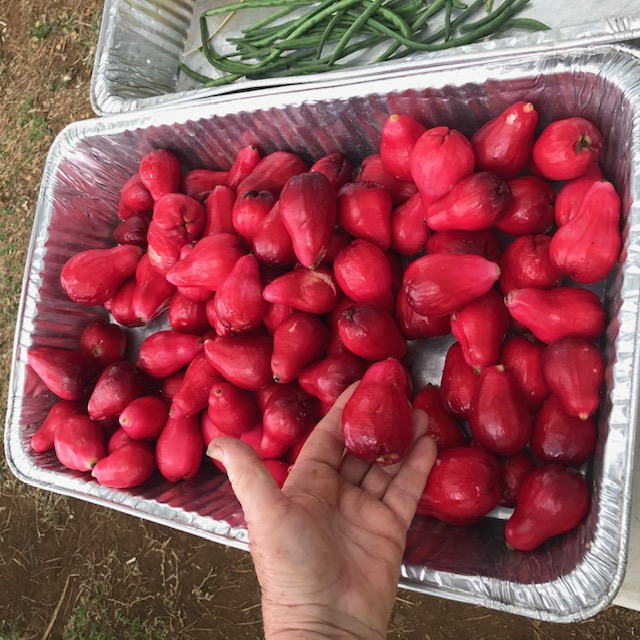
We are attempting to add more variety, focusing on items that are not often seen for sale. Recently we have added edamame (soybean). Pipinola shoots, garlic chives. Buttercup squash, turnips, and two seasonal fruits : lychee and mountain apples. We have had edamame in the past, but are now making it a permanent crop. Same for taro. We are expanding the areas being planted.

More table space is being devoted to the small salad tomatoes, pumpkins/squash, bananas, peas, snap beans, and papaya…all in high demand. We used to sell a lot of mixed greens, but after encouraging other small growers to try growing them, our own sales went down. So we switched to focusing on bok choy and loose head Chinese cabbage. No, we don’t mind other small growers taking over the market on our crops. We encourage it. People in our community need to grow food and develop a self supporting businesses. So we simply change our efforts to a different crop.

Since we still cannot satisfy the market demand for certain crops, we are working on  expanding the area where we grow them. These crops are sweet potato, regular (Irish) potato, onions, taro, banana, snap and snow peas, and papaya. We are now up to 300 papaya trees and still sell out each week.
IMG_7851.jpeg
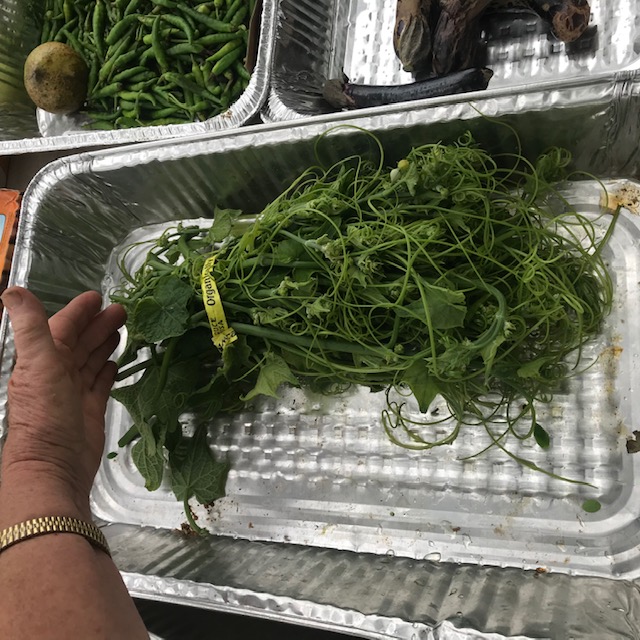
Pipinola shoots. These tender shoots come up from the root base. We allow one vine to grow, and harvest the extra shots.
Pipinola shoots. These tender shoots come up from the root base. We allow one vine to grow, and harvest the extra shoots.
IMG_7850.jpeg
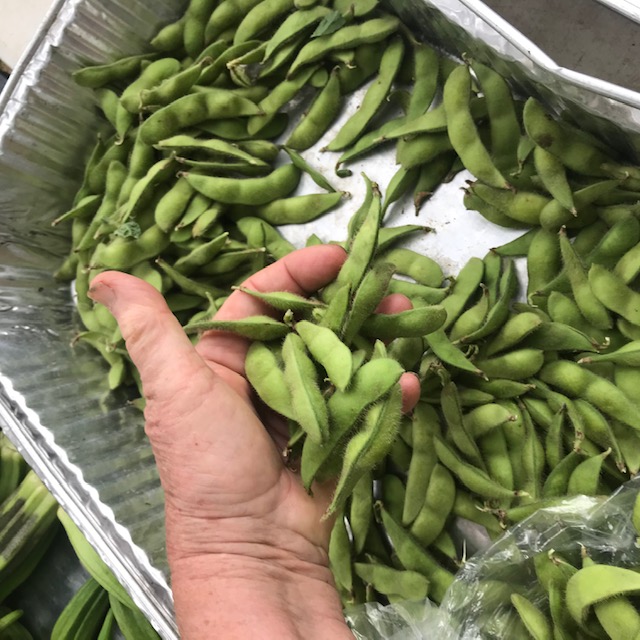
Edamame in the shell
IMG_7854.jpeg
Garlic chives and green onion leaves
IMG_7855.jpeg
Buttercup squash.
Buttercup squash.
IMG_7856.jpeg
Mountain apples
Mountain apples
 
Su Ba
pollinator
Posts: 2142
Location: Big Island, Hawaii (2300' elevation, 60" avg. annual rainfall, temp range 55-80 degrees F)
1064
forest garden rabbit tiny house books solar woodworking
  • Likes 2
  • Mark post as helpful
  • send pies
    Number of slices to send:
    Optional 'thank-you' note:
  • Quote
  • Report post to moderator
Volume-wise What We Had For SaleThis Week :

What we sell has significantly increased since started. Typically this is what we are now selling, though it is not unusual to a bit of this and that leftover at the end of the market. Those leftovers I either sell real cheap, give to the local soup kitchen, give away to other market vendors, or give to a school food project.

This past Wednesday this is what we did… ("trays" equals a large aluminum roasting pan, like the ones used for roasting turkeys. They hold about 25-30 pounds of tomatoes, to give you an idea. You can view the trays in some of the photos I have posted.)

Tomatoes - 8 trays. We ended up with 1/2 tray at the end of the day to give to a local restaurant. Our soup kitchen already has plenty in their freezer.
Tomatillos - 1 tray. 1/4 tray leftover and given away,
Pumpkins and squashes - 15. One long gourd squash not sold. Will offer it again next week.
Papayas - 8 trays plus 2 green papayas
Bananas - 2 trays
Snap beans - 2 trays
Eggplant - 2 trays
Wing beans - 1 full tray . 1/4 tray leftover. Given away.
Snow peas, shell peas, snap peas - 1 tray total
Taro root - 12
Pipinola - 1 tray. 8 individuals  leftover, given away.
Breadfruit - 6
Guava - 1/4 tray
Lemons - 1/4 tray
Limes - 1 tray
Tangerines - 1 tray
Pomalos - 12.  6 leftover which we will offer for saie next week.
Lychee - 3 trays
Serrano peppers - 1 large handful
Bok choy - 32 heads. One unsold which I gladly took home for dinner
Pipinola greens - 3 bunches. One leftover and given away.
Edamame soybean - 1 tray. A handful not sold and given away.
Garlic chives - 3 bunches
Onion greens - 6 bunches
Basil - 1 tray
Cilantro - 1 bunch
Dill - 1 bunch
Spearmint - 1 bunch
Greek oregano - 1 bunch
Mexican oregano - 6 bunches. 2 leftover
Sage - 1 bunch
Parsley - 10 bunches
Malabar spinach - 1 tray
Purslane - 1/2 tray
Moringa, fresh. - 1/2 tray
Moringa dried and powdered - eight 1 oz bags. 6 leftover for next week
Thai basil - 2 bunches
Tree spinach - 1/8 tray
New Zealand spinach - 1/4 tray. Only one handful sold. Rest fed to our pig.
Okra - 1 tray
Purple basil - 3 bunches and sold zero. Fed to the pig.
Sugar cane - four 15" long pieces
5 dozen eggs

 
Su Ba
pollinator
Posts: 2142
Location: Big Island, Hawaii (2300' elevation, 60" avg. annual rainfall, temp range 55-80 degrees F)
1064
forest garden rabbit tiny house books solar woodworking
  • Likes 5
  • Mark post as helpful
  • send pies
    Number of slices to send:
    Optional 'thank-you' note:
  • Quote
  • Report post to moderator
No-till experiment Update ;:

First, keep in mind that our goal is to produce lots and lots of affordable, clean fresh food for our community. Plus that we have quite limited man-hours to devote to this project. So while Wayne and Christine are addressing the various problems that arise by putting down weedblock down in the main large garden to eliminate all their time spent battling weeds, I have to deal with different issues. I’ve got the greenhouse project fairly under control and productive by using volunteers once a week to catch-up on tasks I could not get to. But I have a different issue on the outdoor garden.

The outdoor garden has been a no-till experiment. I’ve controlled the weed issue by applying grass clipping mulch, replenishing it every other week as needed. And the mulch has controlled the soil moisture retention problem. Fertilization has been via various homemade teas, since the mulch covering is very new and thus not decomposing yet.

Ok, so here we are. Keeping in mind that this experiment is extremely new, but also accepting the fact that I am old and don’t have 10 years to wait for the experiment to mature, these are my observations and conclusions so far……
… Aggressive mulching and nutrient teas have done nothing to loosen the dense soil. The only area that can be readily opened by hand is the 3 inch wide, 3 inch deep band that I originally scraped open and seeded into. When I removed the old crop plants, I saw that the roots were very poorly developed and spread primarily along the top 1 inch of the soil, spreading out about 12 to 18 inches from the plant base.
… The plants, although looking green and healthy, only grew to 50% the size of plants in my improved garden soil on my own farm.
… Harvest was only 30% to 40% of what I harvest from my improved garden on my own farm.
… The one crop that produced well was the tomatillos. They preformed almost as good as my plants at home.
… At the beginning of the experiment I saw no signs of worms. Now I see a couple if I specifically go looking for them. That’s a good improvement.
… The grass mulch has not decomposed very much. This implies very low soil microbe and soil life population. In my gardens at home, the mulch constantly is decomposing and this feeding the soil.
… Visually, the soil looks exactly the same as the samples I had taken at the start.
… N-P-K test indicates abundant amounts. I do not know what the availability factors are. pH is 6, a good improvement.
… I have not run a comprehensive soil test to compare start-to-present values.

I am concluding that if I had 10 years to devote to no-till in this location, and with generous continuous applications of mulches and teas, I could expect to see a good food garden here. Frankly I don’t have 10 years to devote. But I do believe that no-till could work here.

So what next?  I plan to spend the rest of this year incorporating organic material into the soil. Yes, that means tilling. I plan to till in lots of compost, grass clippings, manures, minerals. My method at home in my own gardens has been to lightly till in old mulch and fresh compost/manures between each crop. This method has served me extremely well. So I will apply this method to this new garden too. I am curious to see if this method works here too.

Why go back to tilling, even if only temporary?
…the soil is extremely devoid of organic material
…the soil has extremely poor drainage
…there is almost no earthworms or other soil life
…the soil is very dense to the point of not being able to be readily dug with a shovel
…the crops preformed poorly. (Our goal is to produce much needed food)

How long will tilling need to be done? I’m not sure. Experience has shown me that even with aggressive improvements, it can take a couple years to see adequate improvement in soil, plants, and yields. My own farm took 3 years. I plan to apply compost/manures between each crop, lightly tilling in a 20 inch swath of each row.

Why give up on the no-till experiment?  Simple——we need to grow food, and lots of it. If a short row can produce 50 pounds of beans at this point of this new garden, I know from experience that I could be getting far more than 100 pounds using my light-till method. We need that food now, not 10 years from now. And experience has proven that my light-till method works. And it improves poor garden soil and soil life.

Please keep in mind that this conclusion applies to my own location and specific situation. I am certainly not against no-till, though what many people are calling no-till is in reality low or light till. No-till for this location would probably take many years of work to actually be successful. So if anyone reading this would like to come here and continue this experiment without resorting to tilling, you are welcome to come to prove no-till works here just as well as light-till. Your help would be greatly appreciated.
 
gardener
Posts: 1807
Location: Zone 6b
1126
forest garden fungi books chicken fiber arts ungarbage
  • Likes 3
  • Mark post as helpful
  • send pies
    Number of slices to send:
    Optional 'thank-you' note:
  • Quote
  • Report post to moderator
Hi Su Ba, the results of your experiment are very interesting. I did similar thing a couple years ago on my very dense soil with low organic matters. Putting thick layer of compost and mulch on top grew good crops but the roots didn't penetrate the soil, and only the top 1 inch of the original soil turned darker in color, which quickly reverted if there was no constant supply of organic matters. I decided that loosing up the soil and mixing in organic matters is a better choice for building fertile soil, for the annual garden at least.

I remembered you talked about the balance of nutrients somewhere. Could you elaborate on the topic too? My condition is quite different from your tropical garden with an active volcano nearby, but the principles will be equally helpful. Thank you.

 
Su Ba
pollinator
Posts: 2142
Location: Big Island, Hawaii (2300' elevation, 60" avg. annual rainfall, temp range 55-80 degrees F)
1064
forest garden rabbit tiny house books solar woodworking
  • Likes 6
  • Mark post as helpful
  • send pies
    Number of slices to send:
    Optional 'thank-you' note:
  • Quote
  • Report post to moderator
Farmers Market Offerings …

Our group keeps tryjng to maintain diversity in our offerings. We’re missing a few crops this week, simply because they aren’t ready for harvesting, though we include them when we can. Crops such as peas (shelling, snow, and sugar snap types), turmeric, Irish potatoes, carrots, soybean, leeks, onions, beets, broccoli, cauliflower, Tongan spinach (aka-tree spinach), Chaya,  Chinese celery, carrots, parsnip, kohlrabi, lychee, mountain apples, pineapples, yacon. Some of these are seasonal, but others are year around crops that we simply haven’t gotten a handle on their planting schedule yet. We’re working on it.

This week we have :
   Oregano (Greek and Mexican), spearmint, common mint, chocolate mint, rosemary, dill, parsley, sage, thyme, Thai basil, Italian basil, garlic chives, green onion tops, loosehead Chinese cabbage (2 types), bok choy (4 types), a mild mustard cabbage, assorted other Chinese greens (3 types), arugula, kale, chard, Kai-lan (Chinese broccoli), eggplant (Italian, Japanese, Chinese), peppers (sweet banana, Serrano, Hawaiian), moringa (fresh and dried leaf, and seed pods called "drumsticks"),  cholesterol spinach, Okinawan spinach, radishes, daikon, snap beans (green, yellow, purple), Romano beans (green, purple, pink), winged beans, Lima beans, taro (leaf and corm), okra, salad tomatoes, tomatillos, tree tomatoes, pipinola (aka- chayote), assorted pumpkins and winter squashes, edible gourds, papaya, mangos, tangerines, oranges, lemons, limes, bananas, tree tomatoes, and starfruit. Wow, quite the list!  It doesn't seem that much when it’s on the tables.

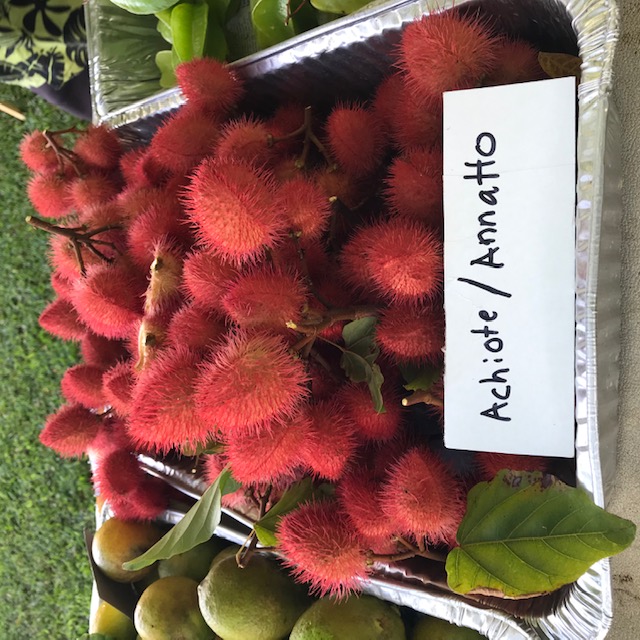
Something new — annatto. It’s a seed that gives the red coloration to Spanish rice. It’s used in other dishes too.

There are a few crops that we don’t grow anymore, usually because of disease or pest difficulties. But one that we don’t grow anymore for other reasons is jicama. This plant produces a toxic seed that looks all the world like a red Lima bean. We have had volunteers in the past harvest those "Lima beans" by mistake. Since we don’t want anyone accidentally getting sick, we opted to eliminate it altogether.  Luckily I was able to intercept that bag of suspect red limas before they got onto the market table.

When we first started this food project, Wayne and I were happy to be able to fill two 6’ long market tables with assorted veggies. We now fill 9 tables, plus have many bags of surplus items stored in the refrigerated trailer behind our booth so that we can refill trays as the morning progresses. I’m blown away when I think of how much progress we have made.
IMG_8166.jpeg
Our newest offering
Our newest offering
IMG_8094.jpeg
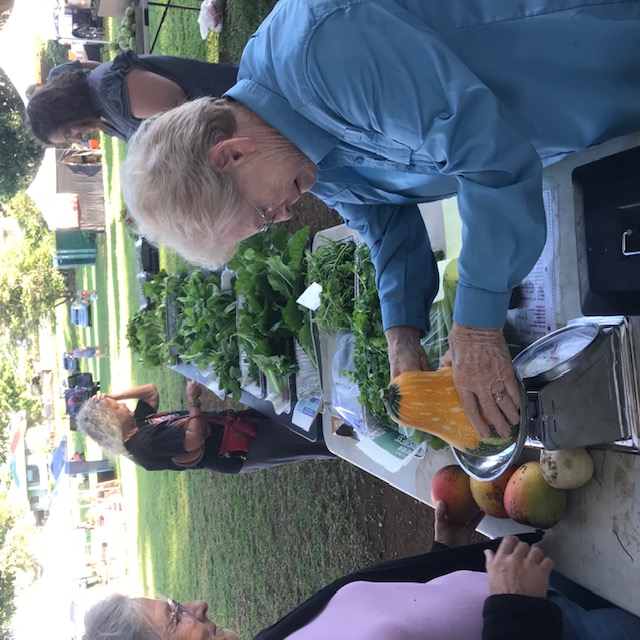
One of our volunteers manning the check-out
IMG_8167.jpeg
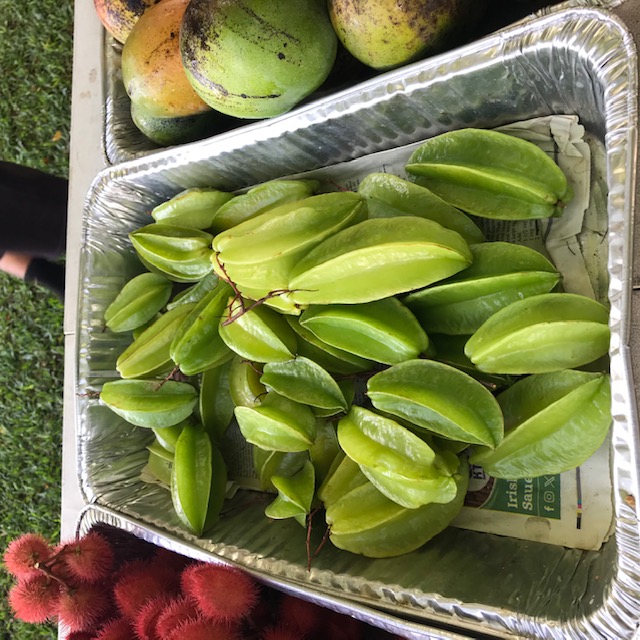
Starfruit. These will turn yellow in about 5 days.
IMG_8099.jpeg
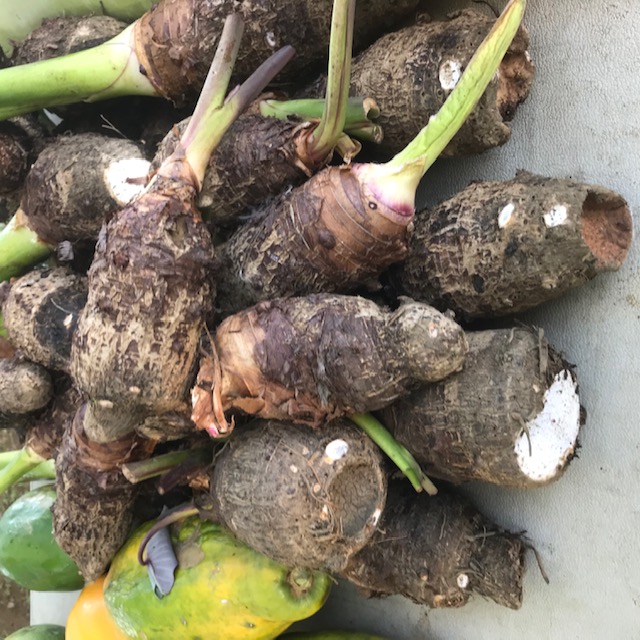
Taro. We leave the Hilo (top) so that people can plant it and thus grow their own taro.
Taro. We leave the huli (top) so that people can plant it and thus grow their own taro.
 
Su Ba
pollinator
Posts: 2142
Location: Big Island, Hawaii (2300' elevation, 60" avg. annual rainfall, temp range 55-80 degrees F)
1064
forest garden rabbit tiny house books solar woodworking
  • Likes 7
  • Mark post as helpful
  • send pies
    Number of slices to send:
    Optional 'thank-you' note:
  • Quote
  • Report post to moderator
May asked about nutrients. That’s a big and complicated subject. Things that I have learned from on my own farm and the OKK farm …..
……. Location has a big bearing. Is the land subject to acidification due to the volcano? I’ve learned that even if I get the nutrients into the ground, they may not be available to the plants if the pH is way off. So I do pH testing between crop plantings. Just one of those quick tests using pH paper. Accurate enough for my uses. If I need to adjust the pH (due to acid rain because of our erupting volcano, my soil tends to get acidic), I will add some extra compost (helps with pH), a bit of coral sand (slow acting), or perhaps some homemade burnt bone (crushed and faster acting). When available, I’ve used wood ashes (quicker adjustment).  I’ve also used dolomite lime, especially when I first start using a plot of land. And when we started out we used pulverized hydrate lime for a quicker pH adjustment. Another thing about location here —- volcanic ash deposits. The farms are downwind from the volcano, so every time the trade winds blow, we get a very light dusting of ash. Ash is a source of some soil nutrients too.
……. Soil type. On my own farm, the soil came from degraded organic material, mostly ohia leaves (a type of tree that is abundant and the dominant tree). Plus livestock manures and trampled grasses, since the land was pasture for decades and decades.  Between each crop I add a generous amount of homemade compost, which includes a very wide assortment of ingredients including mineral sources. I have sent out samples for soil analysis twice, or has it been three times? I no longer do that since the tests came back fairly good once I started adding lots of the compost.
     The soil on the OKK farm land is a type of degraded volcanic ash. The initial soil analysis showed lots of deficiencies. Calcium was quite lacking. Over the past 3 years we have been adding minerals (coral sand, lava sand, burnt bone, dolomite lime, ocean water), plenty of compost and fish fertilizers. We’ve also used a bit of borax and epson salt solutions. Since the crops are growing better and better as time goes by, I think the soil is getting better. Now at three years, it’s probably time to do another soil analysis to see where we stand and where we are heading. But we do test pH several times a year. No matter how many nutrients we add to the soil, if the pH is not in the preferred range, the plants will not benefit from those nutrients.
   My favorite source of nutrients is our homemade compost, which we often also use as a mulch. It has everything in it but the kitchen sink! Contrary to what I’ve read on social media about what to don’t put into compost, I put everything organic into it. I run a hot compost pile, so I even add meat, dead animals, all sorts of animal manures (human manure is relegated to being buried in flower beds only, where flooding is not an issue). The one trick with compost is that I run a lawnmower over all coarse vegetation before adding. Chopped up banana trucks need to be dried out a bit before shredding with the mower. And items that cannot be handled with a mower (palm fronds, tree trimmings, etc) just go into the bio-refuse pit for long term cold composting. Another trick I use is to add wild mushrooms and other fungus (such as dog vomiting fungus). I don’t know how much of that fungus actually survives, but I do sometimes see mushrooms popping up if the weather is right. And dog vomit fungus shows up frequently.
     How can I tell what nutrients are off kilter without a soil analysis? I exam the plants. Visually certain deficiencies or over abundance can be seen in the plants themselves……how their leaves look, how the plant is growing, what the roots look like, what the fruits look like. Even the taste of the crop can give clues.  Is it sweet? Bland? Bitter? I would prefer a full soil analysis, but they are expensive. We cannot afford to do them often.
    I’m no soil expert. I learn from my own experiences, the experiences of others, by observation, reading, and common sense. I believe that taking a soil course would be very enlightening, but frankly, I cannot afford it nor justify the expense if I could. Such courses being offered are not cheap by any means. So since my gardens seem to be productive, robust, and not in trouble , I’ll keep doing what I do without the fancy schooling.
 
May Lotito
gardener
Posts: 1807
Location: Zone 6b
1126
forest garden fungi books chicken fiber arts ungarbage
  • Likes 3
  • Mark post as helpful
  • send pies
    Number of slices to send:
    Optional 'thank-you' note:
  • Quote
  • Report post to moderator
Thanks for your time putting it together. It's a big topic and we are all learning. I am curious about a couple things about your growing conditions: 1) are organic matters decomposing very fast due to the warm and moist climate? Is it a challenge to keep up maintaining a mulch layer? 2) volcanic ash is fertile once the low pH problem is fixed. Have you tried growing brassicas like sakurajima daikon?
 
Su Ba
pollinator
Posts: 2142
Location: Big Island, Hawaii (2300' elevation, 60" avg. annual rainfall, temp range 55-80 degrees F)
1064
forest garden rabbit tiny house books solar woodworking
  • Likes 7
  • Mark post as helpful
  • send pies
    Number of slices to send:
    Optional 'thank-you' note:
  • Quote
  • Report post to moderator
May….great questions!! These are 2 topics my new students are always interested in.

#1-  Organic material here has 12 months a year for decomposing. So if one is used to US mainland seasons, one gets the impression that compost and mulch disappear in a flash. Things decomposed far slower with mainland conditions.  Thus, I can’t say that the decomposition is accelerated in the tropics per se. It’s just that it can happen year around without pause.
    What I do see here is that moisture and night temperatures have a bit of a bearing on this. Gardeners in dry regions see their mulch lasting far longer than those in moister regions. And with their compost not staying steadily moist, it is far slower to decompose. Those gardeners in elevated areas (4000 feet) report that their compost decomposes slower, most likely due to cooler night temperatures. But I’m just guessing on that since I’ve never investigated it.

#2- mulch also decomposes steadily. I see that as being good, since the mulch is a significant source of soil nutrients. I truely want my mulch to decompose. It’s a good sign that the soil is alive and healthy.
   The ability to maintain a mulch covering is dependent upon the availability of mulch material, the time and labor needed  to gather and spread it, and the square footage of the garden. In my own situation, I use primarily fresh grass clippings. But I also use the lawnmower to chop up weeds, light brush, and fallen tree leaves. Although I run the mower every week, I’d guess that generally any particular area gets fresh mulch applied once a month. That’s once a month…12 times a year. I have access to virtually unlimited grass and macadamia nut orchards to use for mowing mulch. The top limiting factor for gathering mulch is my time. Happily I have enough time to maintain the gardens on my own farm and the experimental gardens at the OKK farm. BUT add more square footage, the the picture changes big time!  The OKK farm garden is about 3 acres. With the equipment and manhours available, this garden cannot be kept mulched. We would need a silage chopper to make enough mulch, and that is something simply not available to us here. Our group has the grass land available, the tractor to use, but not the chopper. So instead, we use a different method. We use commercial weedblock to keep the soil covered. And we use some other methods along with the weedblock to keep the garden reasonably productive. Surely not permaculture, but it’s what we are capable of at the moment.

#3- fertile tropical soil— a bit of a myth. Only certain plants thrive in it. And volcanic soils here in Hawaii are deficient in many minerals that vegetables need. Volcanic soils are not all acidic. In fact, the soils on the north side of Big Island are alkaline. Plus nutrients, as the soil degrades, become water soluble. Thus they get leached out or trapped deeper in the soil than most vegetable plants  roots go.

#4- we grow all sorts of veggies and fruits. To date, we have or are growing about 7-8 different varieties of daikon. It grows good for us, but we harvest while the plants are young. We don’t have a market for the large roots.
 
pollinator
Posts: 496
Location: Illinois
108
  • Likes 2
  • Mark post as helpful
  • send pies
    Number of slices to send:
    Optional 'thank-you' note:
  • Quote
  • Report post to moderator

Su Ba wrote:No-till experiment Update ;:


Why go back to tilling, even if only temporary?
…the soil is extremely devoid of organic material
…the soil has extremely poor drainage
…there is almost no earthworms or other soil life
…the soil is very dense to the point of not being able to be readily dug with a shovel
…the crops preformed poorly. (Our goal is to produce much needed food)

Why give up on the no-till experiment?  Simple——we need to grow food, and lots of it. If a short row can produce 50 pounds of beans at this point of this new garden, I know from experience that I could be getting far more than 100 pounds using my light-till method. We need that food now, not 10 years from now. And experience has proven that my light-till method works. And it improves poor garden soil and soil life.

Please keep in mind that this conclusion applies to my own location and specific situation. I am certainly not against no-till, though what many people are calling no-till is in reality low or light till. No-till for this location would probably take many years of work to actually be successful. So if anyone reading this would like to come here and continue this experiment without resorting to tilling, you are welcome to come to prove no-till works here just as well as light-till. Your help would be greatly appreciated.


I understand your reasoning for tilling. I have a small amount of experience with volcanic tropical soils and how fast the organic matter is lost.

But, I wonder how your no-till system stacks up when considering labor time cost. You mentioned quite a bit lower production at this stage. Obviously for you, you want higher production at some added labor cost. From your perspective is the trade-off almost worth it but not quite, or is it a huge difference?

I ask because I am no-till or very low till. My goal is good production with as little labor input as I can get away with. I used to do lots of spade and hoe labor, but in my 60s that isn't as attractive as it was even one decade ago.
 
Su Ba
pollinator
Posts: 2142
Location: Big Island, Hawaii (2300' elevation, 60" avg. annual rainfall, temp range 55-80 degrees F)
1064
forest garden rabbit tiny house books solar woodworking
  • Likes 4
  • Mark post as helpful
  • send pies
    Number of slices to send:
    Optional 'thank-you' note:
  • Quote
  • Report post to moderator
Thom, on this project, time (manhours available to us) is our main limiting factor.  So like you, we wish to keep labor hours down.. We only have a few volunteers, and they work part-time here and there, so we have had to come up with ways to reduce the need for lots of labor hours. Going to no-till sounded like a good idea if we could make it work. But no-till also means having to have some method to control the aggressive weeds. Weeds here take over a row before a crop is even harvestable. Heavy mulching could do the trick, but we simply do not have the means to do that. What we finally resorted to was commercial weedblock. Over to coarse of the past year we have covered the entire 3+ acres. This greatly reduces the amount of time needed to make this garden work.

We pull back the weedblock cloth twice a year in order to work on soil improvements. We currently are tilling in a generous amount of some sort of compost, adding calcium, then reapplying the weedblock. A lot of work, but this is far less work than tryjng to keep the weeds controlled otherwise. This land had been used for decades as pasture, thus has several types of aggressive tropical grasses. Without using commercial herbicides, it has proven to be impossible to irradicate them.

So what is our no-till experiment telling us? No-till most likely could work here once the soil gets a bit improved. Give it 3 years, and things might be fine. Right now we are spending 6 manhours a week on the experimental no-till garden. 2 hours a week devoted to cleaning up the rows and reseeding, and watering if needed. 2 hours a week harvesting. 2 hours a week mulching and applying fertilizer…and pulling the occasional weeds. The mulch is working extremely well to control weeds and soil moisture.  We are harvesting a lot of beans, peas, tomatillos, okra, soybean, and radishes so far. A really impressive return on the manhours devoted. Not having to chop weeds every day makes a very big, big difference in the number of manhours needed.

So what is our next step?  This week we harvested 2 rows of beans. The plants are spent and ready to be replaced. I ran a lawnmower down the rows, and spread the resulting clippings on another row as a mulch. We then watered the rows, since this softens this soil type. My helper and I then brought over 2 wheelbarrow full of compost and forked them onto the rows. Next I ran a mantis tiller down each row. Since the soil has not been worked for many years other than using a pointed hoe to  open a shallow furrow , the tiller only incorporated the compost in the top inch. That’s fine for now. The soil will improve with each crop and I anticipate the tiller being able to lightly till the top 2 inches next time. I’m aiming  for 2 to 3 inches.  Not heavy tilling, just a light and quick tilling down the row. We then reseeded. Next week once the beans have sprouted, we will thin the row and apply grass clipping mulch. I don’t anticipate needing to spend any of our time weeding. As my helper pointed out, we were able to run the tiller down a row faster then using the hoe to open the soil for seeding. So I have hopes of not having to devote a lot of extra time to this garden than we are now doing. Just a tad more since we will be adding compost between each crop.

Thom, like you, I am no spring chicken. I’m closer to 80 than to 70. My joints and heart don’t do well with spade work anymore. So I am tryjng to develop methods that save time and reduce wear & tear in my body.

Eventually it would be great to have our entire 3+ acres under mulch. With the addition of a silage chopper, we probably could handle it. Maybe we will be lucky enough to get a government grant to buy one. Wishful thinking, perhaps. But I had been pessimistic  about getting refrigeration for our harvest, and a grant actually got a refrigerate trailer for the farmers market! So maybe, just perhaps, a grant will come along for a mulch-maker. Our State is actually compensating farmers for buying compost right now, so maybe we could convince some politician that a silage chopper would be a great investment for making our own compost and mulch. You never know. I’m still surprised that we got the refrigerated trailer!
 
May Lotito
gardener
Posts: 1807
Location: Zone 6b
1126
forest garden fungi books chicken fiber arts ungarbage
  • Likes 1
  • Mark post as helpful
  • send pies
    Number of slices to send:
    Optional 'thank-you' note:
  • Quote
  • Report post to moderator
A forage chopper will be more suitable for the job than a mower or chipper. I do a lot of hot composting too, particle size is the biggest factor to affect the kinetics and thermodynamics.

Do you grow potatoes? Does the overly high night time temperature make it difficult?
 
Su Ba
pollinator
Posts: 2142
Location: Big Island, Hawaii (2300' elevation, 60" avg. annual rainfall, temp range 55-80 degrees F)
1064
forest garden rabbit tiny house books solar woodworking
  • Likes 4
  • Mark post as helpful
  • send pies
    Number of slices to send:
    Optional 'thank-you' note:
  • Quote
  • Report post to moderator
May, we have grown potatoes successfully in the past. No problems. Good yields. And our buyers loved them. Sold all the potatoes, even the tiny ones down to marble size. The varieties we liked best were Dark Red Norland, Elba, Magic Molly. Red Thumb, and Banana Fingerling. Also a red fleshed variety that came from a gardener in Peru.

Our number one problem with potatoes is saving seed for the next crop.  The first time we tried, volunteers discovered the cache, and not knowing it was seed stock, proceeded to take the taters home and eat them. The second year we tried, rats tunneled in and eat them before anyone noticed. The third time we tried, we stored the tubers in metal trashcans. Bad decision. The tubers quickly rotted.

For now we have given up on potatoes. We cannot justify the cost of purchasing seed stock and shipping it into Hawaii. Shipping cost is astronomical.

A future project on our list is coming up with a workable solution for saving our own seed stock. Right now we simply don’t have the time and people to do that.

By the way, the warmth here doesn’t seem to phase the potatoes. They yield well. And most are ready for harvest in 3 months.
 
I don't like that guy. The tiny ad agrees with me.
12 DVDs bundle
https://permies.com/wiki/269050/DVDs-bundle
reply
    Bookmark Topic Watch Topic
  • New Topic