• Post Reply Bookmark Topic Watch Topic
  • New Topic
permaculture forums growies critters building homesteading energy monies kitchen purity ungarbage community wilderness fiber arts art permaculture artisans regional education skip experiences global resources cider press projects digital market permies.com pie forums private forums all forums
this forum made possible by our volunteer staff, including ...
master stewards:
  • Nancy Reading
  • Carla Burke
  • r ranson
  • John F Dean
  • paul wheaton
  • Pearl Sutton
stewards:
  • Jay Angler
  • Liv Smith
  • Leigh Tate
master gardeners:
  • Christopher Weeks
  • Timothy Norton
gardeners:
  • thomas rubino
  • Jeremy VanGelder
  • Maieshe Ljin

Rocketing on the Edge

 
pioneer
Posts: 807
Location: Inter Michigan-Superior Woodland Forest
129
5
transportation gear foraging trees food preservation bike building solar writing woodworking wood heat
  • Likes 5
  • Mark post as helpful
  • send pies
    Number of slices to send:
    Optional 'thank-you' note:
  • Quote
  • Report post to moderator
I'm nearing the completion of my yurt, need to start figuring out details on how to get a bit of heat into it. I'm trying to take in all the various resources and make some sort of plan from it. It seems J-tubes are the standard for most situations so the bulk of the plans go that way. Unfortunately the yurt in northern Wisconsin thing makes a big batch box seem much more suitable, and trying to adapt all the experience built around j-tubes into the more cutting edge(?) batch boxes is confusing all 7 of my brain cells something fierce.

To attempt to sort my mind a bit:

1) with a 24' yurt with 12oz canvas and no insulation (might string up some fabric to create some interior pockets to limit convection), seems like the bigger the better, so an 8" system would be better than 6", or is that asking for trouble in a batch box?

2) I bought 32 standard brand new fire bricks. I since acquired over 1000 old school red clay bricks (no mortar, pretty sharp edges) that are unusually large, probably needing to be cut to size in many cases. I need to pick a box/riser combo plan to build. I'm happy to support people in the community to speed up the build, so looking at what it makes sense to order and complete materials. Looks like Dragon Tech would be the best way to find specialized materials like a P tube and fire clay (not much clay on my property, no way am I prospecting around now that there is a foot of snow on it). What parts of the construction need the special fire bricks? My estimate is that it won't be enough to do the box and riser, what if I did the 5(6?) minute riser?

3) I acquired 2 55 gallon metal barrels that had machine oil in them. I know someone with a small sandblaster, will that be sufficient to clean up the barrels without doing a toxic burn party? I'm thinking one barrel for the radiant chamber, part of the other for a manifold...

4) My plan for the exhaust is to run a hexagon or octagon just below grade in the floor. I plan to dig down and build the area around the 8" ducting with red bricks, spaced out to promote airflow all around, covered with ceramic tile or something to make it floor like. It should be about half the diameter of the yurt, around 12', off center a bit to allow the burn box and adjacent chimney (to promote quicker initiation of the system from cold) to exit from the yurt ring. I've had lots of warnings about how the ground will suck away all the heat, never to be seen again. My goal is to have the heated tile around as a warm area, and to create a mass of ground inside of this loop that will hold some thermal inertia, even if the outer ground will be unimpressed by my meager efforts. My brain can't get past the fact that the heat going into the ground isn't going to go down and around the exterior, it will at the least make a tiny dent in the cold sucking ground in the tent. I figure I at least have the radiant chamber giving off heat from the initial box burn to give me a spot to warm up as needed. I'd also do and abbreviated bench/chair right next to that of some sort of mass if there is anything I can build without large amounts of cob available. Any chance this will cook me out of the living space without heating any mass such that I'd have to quit burning periodically for comfort?

4a) How does the in-ground nature of this run affect the draw of my system? Do I calculate the length of ducting as normal, or will the cold earth draw off extra heat and neccessitate a shorter run?

4b) What kind of above grade mass should I do next to the box/burn chamber with limited materials available as a stub bench?

5) Gaps in my understanding of what is needed for a finished, functional RMH...
 
pollinator
Posts: 293
Location: US, East Tennessee
34
  • Likes 7
  • Mark post as helpful
  • send pies
    Number of slices to send:
    Optional 'thank-you' note:
  • Quote
  • Report post to moderator
A 6" batch-box has the equivalent heat output of an 8" J, with the added perk that you get to use a 6" chimney system. However, batch-boxes don't like pushing lengthy horizontal flu runs, and they prefer tall chimney systems that have a strong natural (when cold) draft. Even a J-tube does so much better with a good tall chimney system, i.e. 12 to 15 feet minimum height. A 6" batch-box, with an above grade heated bench is doable, either with a steel barrel or a brick "bell" over the heat riser, and you could have a thermal mass bench too.

I'm actively heating 1000 sq. ft. stick-frame cabin with my 6" batch-box, and from experience I can tell you what the fuel difference is between heating a poorly insulated space as opposed to a fairly good insulated space in the fairly moderate climate of east Tennessee. About two to three times as much firewood is required for heating the poorly insulated space. Insulation never stops paying for itself, so I'd think about a double layer of "curtains", say, spaced a couple of inches from the wall and from each other. Do something similar for the ceiling, if that hasn't been taken care of in the yurt's design etc.

With a 1000 bricks, I myself would be thinking about building a "bell" system with a batch-box combustion unit, and maybe use the barrels for constructing a half barrel thermal mass bench.
 
Coydon Wallham
pioneer
Posts: 807
Location: Inter Michigan-Superior Woodland Forest
129
5
transportation gear foraging trees food preservation bike building solar writing woodworking wood heat
  • Likes 2
  • Mark post as helpful
  • send pies
    Number of slices to send:
    Optional 'thank-you' note:
  • Quote
  • Report post to moderator
That is new to me, about problems with batch box and horizontal ducts. I thought Peter van den berg got started on these by converting his j Tube system over and using the same duct work for both. Is there a discussion somewhere on how to estimate the draw that will be produced in a batch box system?

The ring of the yurt is 15 feet up so the chimney will be more than that.

I expect the walls to quickly acquire a few feet of snow over them for some good insulation. I have some extra quilts I can string up on the inside of the rafters, but going to need more if going for complete coverage. However, for the first year I'll be happy to spend a little more on seasoned wood and to have to hug the radiant chamber for warmth if necessary...
 
Coydon Wallham
pioneer
Posts: 807
Location: Inter Michigan-Superior Woodland Forest
129
5
transportation gear foraging trees food preservation bike building solar writing woodworking wood heat
  • Likes 2
  • Mark post as helpful
  • send pies
    Number of slices to send:
    Optional 'thank-you' note:
  • Quote
  • Report post to moderator
6) why does it seem there is hate for the bypass idea in the rmh world? At the rmh jamboree I heard lots of talk about cold plugs, difficulties of overcoming them, and all sorts of elaborate method to attempt this. What is so complex/dangerous about a bypass to make this faster and easier? They seem pretty common on wood burning stoves so aren't they rather Gilligan proof?
 
Rocket Scientist
Posts: 4526
Location: Upstate NY, zone 5
574
5
  • Likes 6
  • Mark post as helpful
  • send pies
    Number of slices to send:
    Optional 'thank-you' note:
  • Quote
  • Report post to moderator
I think Gilligan proof is a relative term. I could easily see a Gilligan forgetting to close a bypass, but the result would probably just be a failure to accumulate heat in the mass, and would be self-correcting as the operator noticed it was not getting warm. For a single operator who is attentive to the system, a bypass would be a fine idea. Making the opened bypass control bright and obvious would be a good idea too.

A setup where a bypass could chill a space or cause runaway combustion or something, combined with larger areas where random people could come in and tweak controls, could be a hazard. I could see this being an issue at Wheaton Labs.
 
Posts: 9
1
  • Likes 4
  • Mark post as helpful
  • send pies
    Number of slices to send:
    Optional 'thank-you' note:
  • Quote
  • Report post to moderator
@Coydon How is this project going. I am looking at installing a batch box in an 18' yurt with a gravel filled bench. Trying to size it and ensure the draw works. Have you done your install yet?

Nico
 
Coydon Wallham
pioneer
Posts: 807
Location: Inter Michigan-Superior Woodland Forest
129
5
transportation gear foraging trees food preservation bike building solar writing woodworking wood heat
  • Likes 5
  • Mark post as helpful
  • send pies
    Number of slices to send:
    Optional 'thank-you' note:
  • Quote
  • Report post to moderator
My attempts to use the online plans for my 24' yurt went bad as a few of the formulas at the site didn't work. I'm close to completing a more modest 16' version, but that experience has sated my appetite for experimentation a good deal. The fact that Everything I've seen working apart from the shopatorium heater has been J tube, all the reference material focuses on J tube, and I had the opportunity to build a J tube core at the PTJ this summer, I'm going with a J tube for my first heater. If I get that up and working before too long, I'll try a second yurt and batch box it. I'm thinking I should have the first one done by the end of this month. I have yet to figure out the mass part so...
 
rocket scientist
Posts: 6320
Location: latitude 47 N.W. montana zone 6A
3191
cat pig rocket stoves
  • Likes 7
  • Mark post as helpful
  • send pies
    Number of slices to send:
    Optional 'thank-you' note:
  • Quote
  • Report post to moderator
Good choice Coydon;
J tubes are easy and inexpensive to build, a good starting point.
If you build an 8" J tube with a piped mass, then you can easily upgrade to a 6" batch when you are ready.
When using a piped mass you need 8" pipes to support the output of a 6" batch.

As far as using pea gravel as your mass.  
It works but is a very poor mass compared to using larger heavy dense rock.
In an insulated home, it does the job just fine.
In a yurt, I would want as much solid mass as I could lift into my containment box.
Use dirt /clay but not sand as a filler, you want as many heavy rocks in your containment as you can fit.
You want that mass to keep radiating all night,


Coydon Wallham
pioneer
Posts: 807
Location: Inter Michigan-Superior Woodland Forest
129
5
transportation gear foraging trees food preservation bike building solar writing woodworking wood heat
  • Likes 2
  • Mark post as helpful
  • send pies
    Number of slices to send:
    Optional 'thank-you' note:
  • Quote
  • Report post to moderator

thomas rubino wrote:Good choice Coydon;
J tubes are easy and inexpensive to build, a good starting point.
If you build an 8" J tube with a piped mass, then you can easily upgrade to a 6" batch when you are ready.
When using a piped mass you need 8" pipes to support the output of a 6" batch.

As far as using pea gravel as your mass.  
It works but is a very poor mass compared to using larger heavy dense rock.
In an insulated home, it does the job just fine.
In a yurt, I would want as much solid mass as I could lift into my containment box.
Use dirt /clay but not sand as a filler, you want as many heavy rocks in your containment as you can fit.
You want that mass to keep radiating all night,


Pushing the rockety edge once again, I'll be putting the final wall on the yurt tomorrow (in it's temporary site) and cutting some glass to cover the ring. I've been trying to absorb more info on pebble style and low insulation installs. Still planning to go with the duct in a box plan that can be moved/modified.

Thomas, you are suggesting I could use dirt to fill in the pebble style boxes instead of pea gravel? I've been setting aside chunks of top soil sod and large rocks as I've dug the site for the yurt foundation (to be constructed of pallets). Would stacking this in the boxes around the ducting perform similar to cob? Is there and example of a build like this? How about some kind of combo of sod with pea gravel on top or to the sides?
 
thomas rubino
rocket scientist
Posts: 6320
Location: latitude 47 N.W. montana zone 6A
3191
cat pig rocket stoves
  • Likes 6
  • Mark post as helpful
  • send pies
    Number of slices to send:
    Optional 'thank-you' note:
  • Quote
  • Report post to moderator
Hi Coydon;
Yes, a packed dirt fill will outperform an air gap-filled tiny rock mass.
Use packed dirt around your tubes and as much heavy dense rock as you have.
Leave no air pockets anywhere.
Leave the pea gravel out.
 
Coydon Wallham
pioneer
Posts: 807
Location: Inter Michigan-Superior Woodland Forest
129
5
transportation gear foraging trees food preservation bike building solar writing woodworking wood heat
  • Likes 2
  • Mark post as helpful
  • send pies
    Number of slices to send:
    Optional 'thank-you' note:
  • Quote
  • Report post to moderator

thomas rubino wrote:Hi Coydon;
Yes, a packed dirt fill will outperform an air gap-filled tiny rock mass.
Use packed dirt around your tubes and as much heavy dense rock as you have.
Leave no air pockets anywhere.
Leave the pea gravel out.


So I've taken the sod from the area and stacked it uphill to divert water flow around the foundation. I could easily restack it in the boxes around the ducts. But after serving as a heat mass for the winter half of the year, I'm thinking any root structure holding the sod together will have had it's structural decay accelerated. Will I just be shoveling out loose dirt if I redo the design next year? I'm anticipating a great deal more work here than would result with pebbles.

I'm also thinking that if I don't have enough sod cut (or around to add), what if I topped off the box with pea gravel? Would gravel perform better on the bottom, or just fill up with dirt from above?

Also, my soil is extremely sandy, basically all sand below the top 6"-9" or so. I'm having trouble finding anything that hints at clay content, need to do some mason jar tests come spring...
 
thomas rubino
rocket scientist
Posts: 6320
Location: latitude 47 N.W. montana zone 6A
3191
cat pig rocket stoves
  • Likes 8
  • Mark post as helpful
  • send pies
    Number of slices to send:
    Optional 'thank-you' note:
  • Quote
  • Report post to moderator
Hi Coydon;
Yes, I have heard the soil there is just sand and rocks.
Using your sod to divert water around your foundation is a good use for it.
If you like the fast easy method of pea gravel, then try it out.
It may work out just fine for you.
If you find it a bit chilly in the mornings you can try a solid fill next year.


Coydon Wallham
pioneer
Posts: 807
Location: Inter Michigan-Superior Woodland Forest
129
5
transportation gear foraging trees food preservation bike building solar writing woodworking wood heat
  • Likes 4
  • Mark post as helpful
  • send pies
    Number of slices to send:
    Optional 'thank-you' note:
  • Quote
  • Report post to moderator

thomas rubino wrote:Hi Coydon;
Yes, I have heard the soil there is just sand and rocks.
Using your sod to divert water around your foundation is a good use for it.
If you like the fast easy method of pea gravel, then try it out.
It may work out just fine for you.
If you find it a bit chilly in the mornings you can try a solid fill next year.


Any reason not to try dirt in the first part of the run, and gravel in the rest? I plan to move/rebuild this and do it in a few other structures, so being able to compare the two con-/de-struction methods up front seems helpful.

Not sure if performance would be telling as the sequential order could affect it.
 
Coydon Wallham
pioneer
Posts: 807
Location: Inter Michigan-Superior Woodland Forest
129
5
transportation gear foraging trees food preservation bike building solar writing woodworking wood heat
  • Likes 3
  • Mark post as helpful
  • send pies
    Number of slices to send:
    Optional 'thank-you' note:
  • Quote
  • Report post to moderator

thomas rubino wrote:Hi Coydon;
Yes, a packed dirt fill will outperform an air gap-filled tiny rock mass.
Use packed dirt around your tubes and as much heavy dense rock as you have.
Leave no air pockets anywhere.
Leave the pea gravel out.

I noticed that at the lab they just redid the red cabin with cob around the ducts, but then put pea gravel around the outside of that to protect the wooden containment box from excess heat.

If I just used dirt packed into the boxes around the ducts, would that come close enough to cob's efficiency that I should worry about overheating the surrounding wood? How would I go about determining the best distance between duct and outer box for an initial build, again planning to do a dirt fill?
 
thomas rubino
rocket scientist
Posts: 6320
Location: latitude 47 N.W. montana zone 6A
3191
cat pig rocket stoves
  • Likes 5
  • Mark post as helpful
  • send pies
    Number of slices to send:
    Optional 'thank-you' note:
  • Quote
  • Report post to moderator
Hi Coydon;
I think they were just playing it safe, with all the visitors and no permanent operator... no sense taking chances.
Piped masses average on the outside surface around 100F-150F.   Wood ignites at 456F.
However, I would use brick (extra mass)  at my house to contain that mass.
Pebbles are fast and easy that's about it.
Large rock is seated and surrounded with cob/dirt and more large rock.
Imagine a pile of pebbles sitting in the hot sun, now imagine a large rock sitting next to it.
Which one do you think is going to stay warm longer?

My containment box is around 27" wide with two 8" pipes so just over 5" from each pipe to the brick containment walls.
 
Coydon Wallham
pioneer
Posts: 807
Location: Inter Michigan-Superior Woodland Forest
129
5
transportation gear foraging trees food preservation bike building solar writing woodworking wood heat
  • Likes 2
  • Mark post as helpful
  • send pies
    Number of slices to send:
    Optional 'thank-you' note:
  • Quote
  • Report post to moderator
Well, mortored bricks won't work for my purposes, is there a way to dry stack that would keep them holding that much earth? Seems like a 2x4 frame with enough slats to support a regular stack would be as much work/expense as a whole containment box. Would bricks drystacked perpendicular to the ducts be stable enough to contain the fill when 18+ inches high?

How about the base layer? A few inches of sand on the ground to provide something for a thermal break?

How high are your boxes? When doing an out and back run of ducts, should one place them as close to each other as possible or is it good to have some mass between them?
 
thomas rubino
rocket scientist
Posts: 6320
Location: latitude 47 N.W. montana zone 6A
3191
cat pig rocket stoves
  • Likes 6
  • Mark post as helpful
  • send pies
    Number of slices to send:
    Optional 'thank-you' note:
  • Quote
  • Report post to moderator
Hi Coydon;
I think at 18" turning the bricks should provide enough stability but would take more bricks.
However, I suggest when you think about mortar, forget concrete...  Dry bagged clay from a pottery place (fire clay is not needed) and clean consistent sand (home Depot builders sand)
Clay mortar is fun to work with and for this application should provide enough stability to contain your mass.
When you wish to remove this, simply tap bricks with a mallet, scrape the mortar into a bucket (very easy) add water to bucket and rehydrate your mortar...
Use the same mortar time and time again.
 
Coydon Wallham
pioneer
Posts: 807
Location: Inter Michigan-Superior Woodland Forest
129
5
transportation gear foraging trees food preservation bike building solar writing woodworking wood heat
  • Likes 5
  • Mark post as helpful
  • send pies
    Number of slices to send:
    Optional 'thank-you' note:
  • Quote
  • Report post to moderator
I had thought of cob for mortor, but didn't realize plain clay would work. Does it mould and set in freezing temps just as well?

Another option would be some hollow bricks I am picking up, if there are enough. I'm thinking some 3-4' rebar through the holes and into the ground would provide a quick and modular construction method, have to look at the cost of rebar. Seems like as long as the tops aren't capped, the bricks won't present an insulative barrier...
 
thomas rubino
rocket scientist
Posts: 6320
Location: latitude 47 N.W. montana zone 6A
3191
cat pig rocket stoves
  • Likes 4
  • Mark post as helpful
  • send pies
    Number of slices to send:
    Optional 'thank-you' note:
  • Quote
  • Report post to moderator
Yup,  one scoop of dry clay and three scoops of sand make a fine mortar.
Your idea of rebar thru the holes is a  good one.  This will work fine for your temporary containment.

My box is about 32" high and 12' long, my pipes are as close together as a 180-degree turn will let them, maybe 2" apart?
 
Coydon Wallham
pioneer
Posts: 807
Location: Inter Michigan-Superior Woodland Forest
129
5
transportation gear foraging trees food preservation bike building solar writing woodworking wood heat
  • Likes 3
  • Mark post as helpful
  • send pies
    Number of slices to send:
    Optional 'thank-you' note:
  • Quote
  • Report post to moderator
So my initial thought to base this off a 'pebble style' RMH doesn't seem to make sense any more. If going with earth fill inside of dry stacked bricks, I imagine its closer to cob than pebbles inside a wood box. But;
1) How close to cob? Should I use numbers from regular cob builds to figure my duct runs?
2) Should I be tamping the dirt inside the bricks and against the ducts as tight as I can? Would moistening the earth help compact it and/or create better contact with the duct work for heat extraction?
[edit: questions 3-5 were effectively answered with a more careful reading of Iantos RMH book]
3) How do I determine the optimal distance between the ducts and the bricks being used for walls to contain the earth?
4) Where I have space, is it better to put large stones in than more earth? How do clay bricks compare to stones for this purpose?
5) What temperatures should I be looking for on top of the mass? Any considerations to putting various styles of brick here, would masonry tiles be a good choice?

Constructing this over uninsulated ground, based on general recommendations, I'm starting my attempts with the recommendation to insulate from the ground. Sand (2"?) under the burn tunnel seems important to insulate the burn tunnel, to help get the burn to temperature and keep it there.
6) Should I worry about sand and/or air channels under the ducts and mass?
7) Any other simple methods of insulation to consider?
 
Coydon Wallham
pioneer
Posts: 807
Location: Inter Michigan-Superior Woodland Forest
129
5
transportation gear foraging trees food preservation bike building solar writing woodworking wood heat
  • Likes 3
  • Mark post as helpful
  • send pies
    Number of slices to send:
    Optional 'thank-you' note:
  • Quote
  • Report post to moderator

thomas rubino wrote:Hi Coydon;
I think at 18" turning the bricks should provide enough stability but would take more bricks.
However, I suggest when you think about mortar, forget concrete...  Dry bagged clay from a pottery place (fire clay is not needed) and clean consistent sand (home Depot builders sand)
Clay mortar is fun to work with and for this application should provide enough stability to contain your mass.
When you wish to remove this, simply tap bricks with a mallet, scrape the mortar into a bucket (very easy) add water to bucket and rehydrate your mortar...
Use the same mortar time and time again.


Say Thomas~
What kind of heat can regular potters' clay deal with for RMH purposes? Can I use it to seal joints around the manifold? I'll be filling in the rest of the area around it with sand, I think I just need something to keep the sand out of the ducting areas. Maybe high temperature tape will work for this?
 
thomas rubino
rocket scientist
Posts: 6320
Location: latitude 47 N.W. montana zone 6A
3191
cat pig rocket stoves
  • Likes 5
  • Mark post as helpful
  • send pies
    Number of slices to send:
    Optional 'thank-you' note:
  • Quote
  • Report post to moderator
Hi Coydon;  
All clays have a different composition.
All will work as a mortar, everywhere but the core itself.
After leaving the riser your true high heat is gone.
At the transition, you're now dealing with temps in the 500F range and quickly cooling.
 
Coydon Wallham
pioneer
Posts: 807
Location: Inter Michigan-Superior Woodland Forest
129
5
transportation gear foraging trees food preservation bike building solar writing woodworking wood heat
  • Likes 2
  • Mark post as helpful
  • send pies
    Number of slices to send:
    Optional 'thank-you' note:
  • Quote
  • Report post to moderator
I'm thinking of where the manifold (using half of a metal barrel) rests around the burn tunnel. Will the exterior of the fire bricks there (wrapped in sheet metal from the shipable core) become too hot?
 
thomas rubino
rocket scientist
Posts: 6320
Location: latitude 47 N.W. montana zone 6A
3191
cat pig rocket stoves
  • Likes 3
  • Mark post as helpful
  • send pies
    Number of slices to send:
    Optional 'thank-you' note:
  • Quote
  • Report post to moderator
I would say you are ok to use a clay-based mortar at that spot.
You have a CFB core, and most of your heat will be heading up the riser.
Clay mortar is incredible stuff, it can seal small gaps or it can be gobbed on by the handful.
 
Coydon Wallham
pioneer
Posts: 807
Location: Inter Michigan-Superior Woodland Forest
129
5
transportation gear foraging trees food preservation bike building solar writing woodworking wood heat
  • Likes 3
  • Mark post as helpful
  • send pies
    Number of slices to send:
    Optional 'thank-you' note:
  • Quote
  • Report post to moderator
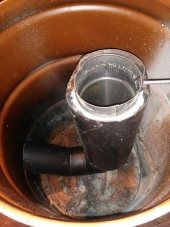
No, this is a shipable core from uncle mud, all fire brick held together by sheet metal and 'radiator' clamps. The riser is superwool inside a ten inch metal duct. CFB is pretty insulative, right?
 
thomas rubino
rocket scientist
Posts: 6320
Location: latitude 47 N.W. montana zone 6A
3191
cat pig rocket stoves
  • Likes 4
  • Mark post as helpful
  • send pies
    Number of slices to send:
    Optional 'thank-you' note:
  • Quote
  • Report post to moderator
Oh, my mistake.
Indeed CFB is super insulative.
Firebricks get hot.  
I still think you will be ok sealing with a clay mortar.
You can also use superwool to seal in questionable areas, it is the duct tape of RMH construction.
 
Coydon Wallham
pioneer
Posts: 807
Location: Inter Michigan-Superior Woodland Forest
129
5
transportation gear foraging trees food preservation bike building solar writing woodworking wood heat
  • Likes 3
  • Mark post as helpful
  • send pies
    Number of slices to send:
    Optional 'thank-you' note:
  • Quote
  • Report post to moderator
I only have the superwool that the riser was constructed with. I do have a garbage bag of regular ceramic fiber wool I picked up, from someone who had torn some out, before I learned of its dangers. Is it worth messing with that if I'm going to be rebuilding this next year?

BTW, thanks again for addressing my endless string of questions Thomas.
 
thomas rubino
rocket scientist
Posts: 6320
Location: latitude 47 N.W. montana zone 6A
3191
cat pig rocket stoves
  • Likes 4
  • Mark post as helpful
  • send pies
    Number of slices to send:
    Optional 'thank-you' note:
  • Quote
  • Report post to moderator
Well, you can use the "other" ceramic blanket if you don't mind the issues.
Or I sell super wool by the lineal foot... just saying.
 
My favorite is a chocolate cupcake with white frosting and tiny ad sprinkles.
Freaky Cheap Heat - 2 hour movie - HD streaming
https://permies.com/wiki/238453/Freaky-Cheap-Heat-hour-movie
reply
    Bookmark Topic Watch Topic
  • New Topic