• Post Reply Bookmark Topic Watch Topic
  • New Topic
permaculture forums growies critters building homesteading energy monies kitchen purity ungarbage community wilderness fiber arts art permaculture artisans regional education skip experiences global resources cider press projects digital market permies.com pie forums private forums all forums
this forum made possible by our volunteer staff, including ...
master stewards:
  • r ranson
  • Nancy Reading
  • Carla Burke
  • John F Dean
  • Jay Angler
  • paul wheaton
stewards:
  • Nicole Alderman
  • Pearl Sutton
  • Anne Miller
master gardeners:
  • Christopher Weeks
  • Timothy Norton
gardeners:
  • Nina Surya
  • Matt McSpadden
  • thomas rubino

Small home, 4" dia, stove

 
Posts: 6
  • Mark post as helpful
  • send pies
    Number of slices to send:
    Optional 'thank-you' note:
  • Quote
  • Report post to moderator
Hello, I should have joined this sooner and asked for advice sooner. but I usually experiment before I ask.
Anyway.
I'm trying to construct a smaller than usual stove for a smaller rental home, kind of like cabin size, and I am trying to use a 4" exhaust.
I only finally found a post about how important the diameter of the riser is, and that is finally doing the trick.
has anyone built a 4" system? other than pre molded?
I am documenting my process, sizes, and errors to help people in the future, but I'm still trying to finalize this right now.
 
pollinator
Posts: 4154
Location: Northern New York Zone4-5 the OUTER 'RONDACs percip 36''
67
hugelkultur fungi books wofati solar woodworking
  • Mark post as helpful
  • send pies
    Number of slices to send:
    Optional 'thank-you' note:
  • Quote
  • Report post to moderator
Chris Magnus : As A first Time poster, new Fellow Member, Welcome to Permies.com / Richsoil.com, and a Big Welcome to the Rocket And Wood Stoves
Forum Threads, With 28,000+ members World wide, you can come here any time and talk to people who want to talk about what you want o talk about !

I can tell you I only know of a couple of self reported 4'' Rocket Mass Heaters RMHs, and have no Idea how well they function!

As much for our fellow members who may find their way to this Forum Thread I wanted to explain the special problems of a 4'' system Briefly

a pretty standard 8'' RMH system has a Constant cross-sectional area C.S.A. of 50.24 sq. inches and a perimeter of 25.12 running inches note the Ratio 2 : 1

Now the 4 inch RMH System has a Constant Cross - sectional area or C.S.A. of 12.56 sq. inches and a perimeter of 12.56 running inches note the Ratio 1 : 1

SO- not only does the 4'' system only have 1/4 the area in sq, inches to transport combustion air in, and hot exhaust gases away, but it actually has Twice the
Surface are to volume of the 8'' system .

Due to a Condition called Laminar Flow there is progressively less and less flow of gases through any pipe as we move from the fastest moving gases at the
center of the pipe out to the perimeter where the flow of a gas or a liquid Stops !

So we start with 1/4 of the flow not 1/2 and then the proportionally higher ration of surface area robs us of a further proportionally higher portion of the
remainder !

Generally speaking I and almost everyone of your fellow members would recommend attempting nothing smaller than a 6'' system to anyone contemplating a
first build ! After you have a First successful build is soon enough to work on creating a successful 4'' unit!

For the Good of the Craft ! Big AL
 
Chris Magnus
Posts: 6
  • Mark post as helpful
  • send pies
    Number of slices to send:
    Optional 'thank-you' note:
  • Quote
  • Report post to moderator
I totally appreciate your reply, and I do understand the 6" system. But I like to tinker and experiment.
I want mass, and I want a small portable system for easy removal and small indoor space saving usage.
My ultimate goal is to find a way that "tiny homes" or trailer homes, can have a small efficient mass wood stove that fits in the small footprint of their dwelling.
For now, I'm playing with a 4" unit and I think I've figured out the stack, but I'm wondering about the burn tunnel length.
Perhaps someone knows about small "tiny house" systems...
thanks again for any and all responses.
I can take constructive criticism.
 
gardener
Posts: 1068
Location: +52° 1' 47.40", +4° 22' 57.80"
455
woodworking rocket stoves wood heat
  • Likes 1
  • Mark post as helpful
  • send pies
    Number of slices to send:
    Optional 'thank-you' note:
  • Quote
  • Report post to moderator
I've built a 4" system that really works. I'm using it right now in a super insulated house. The footprint is small, the thing doesn't have a quantity of mass to speak of. See the thread "Small scale development" at donkey32.proboards.com
 
Posts: 2413
48
  • Mark post as helpful
  • send pies
    Number of slices to send:
    Optional 'thank-you' note:
  • Quote
  • Report post to moderator
Hi Peter,

Many of these systems in your link seem to be made out of metal? None of those are going to be very durable. Is the metal used just as a method to experiment with shapes of burn chambers and gas passage channels?

Regards,

j
 
Peter van den Berg
gardener
Posts: 1068
Location: +52° 1' 47.40", +4° 22' 57.80"
455
woodworking rocket stoves wood heat
  • Mark post as helpful
  • send pies
    Number of slices to send:
    Optional 'thank-you' note:
  • Quote
  • Report post to moderator

Jay C. White Cloud wrote:Many of these systems in your link seem to be made out of metal? None of those are going to be very durable. Is the metal used just as a method to experiment with shapes of burn chambers and gas passage channels?


Hi Jay,
Indeed, metal constructions are easy to change. In one instance, the 1/8" thick mild steel burned through in about 5 hours of running the thing. Satamax is right, metal is definetely doomed in a well running rocket heater. Even stainless wont hold out for long. The last one mentioned in that particular thread is still in use as we speak, but that one is made from castable refractory. It's the prototype of the kind which is sold by Dragon Heaters, using the same bells and whistles.
 
Posts: 226
Location: S.W. Missouri, Zone 6B
8
  • Mark post as helpful
  • send pies
    Number of slices to send:
    Optional 'thank-you' note:
  • Quote
  • Report post to moderator
I do not have any sage words of advice to offer. My dry stacked test burnings have been in a 4.5" system. That's because the fire brick I bought measure 2.25 x 4.5 x 9.0 inches

I'm too early in the process to give any advice, but I can say that it draws and burns as I have read j-rocket stoves behave. Temperatures seem to be in the right ball park, for what I am able to measure. But this is only a mock-up to allow me to test the basic principals and obtain heat estimates. For my instance I need to keep weight low, so I'm starting small, and will see where that takes me. And I have no idea if it would have enough "thrust" to push the exhaust through a thermal mass heat exchanger.

The only other thing I could add is to briefly describe where I'm at, and if that's of any use to you, great.

This is outside and dry stacked fire brick. I have a big pile of sand (for gardening). I shovelled about an inch of sand on the ground, then laid two 2x6's on top of that, and shovelled about another inch of sand on top of that. This was to 1) provide a somewhat level working surface; 2) allow me to stick a thermometer probe into the sand below the fire brick and read the temperature there; and to give an opportunity for the 2x6's one inch under the fire box to burst into flames (I say only half-joking).

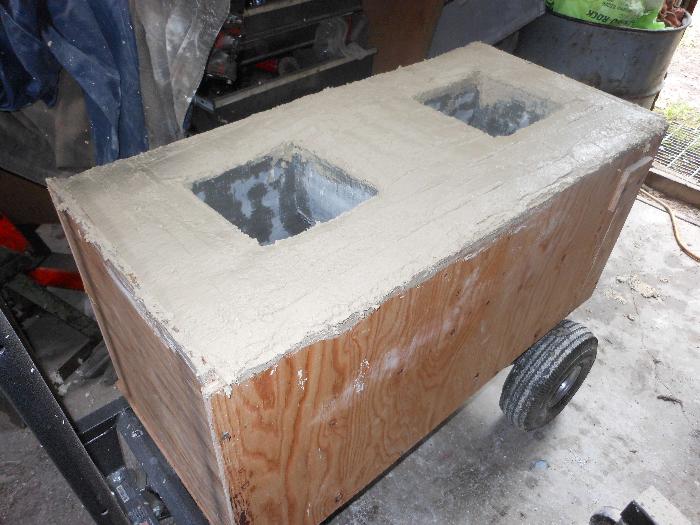
I have since built a short ring of block and brick around the perimeter of the fire brick, and shovelled more sand into this. This helps insulate the horizontal area of the J. It is also the base for my support onto which I'll place my 55-gallon barrel (which is the step I'm at right now).

My current build has a layer of fire brick face down on the sand bed, and this is the floor of the fire box. Then I stacked fire brick on edge making a perimeter U-shape, with the open end at the feed tube. The internal horizontal measurement is 16.25" (D). At the end that I built the feed tube, the fire brick that enclosed the perimeter is stacked with its long axis vertical. That way I can lay the third course (that also forms the bridge/roof of the burn chamber) on edge, and have the top of the feed tube opening at the same height as the top of the bridging bricks that form the roof of the burn chamber.

At the opposite end -the fire riser- I make the normal on edge square risers, with the fire brick. That height, measured from the roof of the burn chamber is about 36" so it is a little greater than a 2:1 rise (E : D).

The maximum temperature I have measured under the burn chamber is 175*F, and that happens after I rake the coals to sit above that spot (the coals are separated from the thermometer probe by the 2.25" thickness of the fire brick floor and about 1/2" of sand).

The maximum temp. I have measured at the outside-bottom-rear of the fire riser is 225*F. The probe was pushed down through about 8 inches of sand, with the probe against the outside of the fire brick, so it was separated from the internal flames by the thickness of the fire brick (2.25").

I do not have a thermometer that is able to read the exhaust temp. out the top of the fire riser. All I can say is this very quickly ran past the 550*F limit of my thermometer, showing no signs of slowing down. A cheap magnetic "flue" thermometer attached to a 6-inch piece of stove pipe I sat on top of the fire riser (to hold the magnetic thermometer) displayed about 225*F. But I have no idea how accurate it is, and it was only $10USD, so I assume it is not highly accurate.

That's about all I know right now

Weaver-2.0_113.jpg
[Thumbnail for Weaver-2.0_113.jpg]
Weaver, Build #2
 
Posts: 54
5
  • Mark post as helpful
  • send pies
    Number of slices to send:
    Optional 'thank-you' note:
  • Quote
  • Report post to moderator
I have built a smaller RMH in a space that Is about 8x12 or 96sq. The stove uses a 30 gallon drum and a covered exterior. The bench is about is about the with of the space 8ft by 3ft deep. The exit tube which is in the bench is about 12ft with three 180degree turns and a 14 ft of exit with 3ft of rise above the roof. It burns a mix of pellets and pine cones scrap wood and other. Buy color , bright white orange I gather I burn at about 1200 to 2100. I have melted the grate which holds the pellets it glows white orange. The exhaust is at about 120f or warm to the touch. If you would like more specs let me know. It was a lucky guess and I believe I could do it again but don't understand all the factors that make this work like it does. Ther are multiple heat pumps which increase the effectiveness of this size to burn ratio.
image.jpg
[Thumbnail for image.jpg]
image.jpg
[Thumbnail for image.jpg]
 
Posts: 9
  • Mark post as helpful
  • send pies
    Number of slices to send:
    Optional 'thank-you' note:
  • Quote
  • Report post to moderator
I have posted this before ... http://www.permsteading.com/viewtopic.php?f=6&t=601 It is not plugged into a mass, but I don't think it would be hard to do.....It is small and portable. Maybe a bell for holding heat rather than a bench. The problem I have with a 4" is the every 20-30 minute feedings...This system would probably be OK for a small insulated area. ....The metal is sacrificial.....it will burn out.... Perhaps Mr. P Van den Bergs batch box would work for you....
 
I met your mom on a Carribean cruise and she said you would help me and this tiny ad:
Binge on 17 Seasons of Permaculture Design Monkeys!
http://permaculture-design-course.com
reply
    Bookmark Topic Watch Topic
  • New Topic