• Post Reply Bookmark Topic Watch Topic
  • New Topic
permaculture forums growies critters building homesteading energy monies kitchen purity ungarbage community wilderness fiber arts art permaculture artisans regional education skip experiences global resources cider press projects digital market permies.com pie forums private forums all forums
this forum made possible by our volunteer staff, including ...
master stewards:
  • Carla Burke
  • Nancy Reading
  • John F Dean
  • r ranson
  • Jay Angler
  • paul wheaton
stewards:
  • Pearl Sutton
  • Leigh Tate
  • Devaka Cooray
master gardeners:
  • Christopher Weeks
  • Timothy Norton
gardeners:
  • thomas rubino
  • Matt McSpadden
  • Jeremy VanGelder

DIY Steel melting foundry

 
gardener
Posts: 5174
Location: Cincinnati, Ohio,Price Hill 45205
1011
forest garden trees urban
  • Mark post as helpful
  • send pies
    Number of slices to send:
    Optional 'thank-you' note:
  • Quote
  • Report post to moderator
Hey Joshua, are you up for sharing the details your steel melting foundery?
 
pollinator
Posts: 186
Location: Alpine southwest USA
95
cat hunting cooking building woodworking
  • Likes 6
  • Mark post as helpful
  • send pies
    Number of slices to send:
    Optional 'thank-you' note:
  • Quote
  • Report post to moderator

William Bronson wrote:Hey Joshua, are you up for sharing the details your steel melting foundery?


Sure.
Are you interested in starting from ore in a large clay furnace, making high-carbon steel from plain iron in a crucible furnace, or remelting mild steel scraps into a steel bloom?
Three different processes, with different outcomes, each with different properties. All of them need a forge to process what comes out of them.

A "foundry" is where the raw ore is processed into usable metals using charcoal as the fuel. This is a really big project with a very steep learning curve. You may get low-carbon iron, you may get medium or high-carbon steel, and you might get cast iron. Lee Sauder is an internationally acclaimed blacksmith who pioneered the research and recreation of "backyard" or primitive ore smelting. I have yet to try this as my wife takes a dim view of me building one of these in the backyard. You can find his work online: https://www.leesauder.com/smelting-research. You can also Google Tatara Furnace to see the traditional Japanese smelting furnace where they take magnetite black sand and melt it into an iron and/or steel "bloom". This is a sponge-like blob of stuff that needs repeated forging, folding, and refining to get anything really usable.

A crucible steel melt is specifically for making small batches (1-3 kg) of high-carbon homogenous steel. (tool steel) I do this occasionally with mixed results. Then again, I am focused on making a specific form of high-carbon steel, the fabled Wootz steel, and it is a very tricky process. If you are just looking to create a usable form of tool steel, that would be much easier and you could probably use scrap mild steel instead of pure iron like I do.

A remelt furnace (aka Aristotle furnace) is a fairly small affair or a larger one depending on how crazy you want to get. It also uses charcoal as the fuel. I have also done this with a couple of dozen bricks and a shop vac on a dimmer switch to control the blower speed. You can literally feed almost anything ferrous into this furnace. Scrap pieces of steel, railroad spikes, wrought iron, old nails, whatever you want. This also creates a bloom that requires refining heats and forge processing. The most commonly used style of furnace can be seen here: https://youtu.be/WKMX4NBZ1Ig?si=2uCZ5krwIHuf3JIz

Be very careful what you watch and read out there on the interwebs. There are a lot of hacks and even more misinformation about steel making out there.
Some names of well known US experts on the subject are Lee Sauder, Daniel Cauble, Niels Provos, Mark Greene, Jan Ysslestein, and Emiliano Carrillo.
They all have Facebook accounts and some of them have YouTube channels.
 
William Bronson
gardener
Posts: 5174
Location: Cincinnati, Ohio,Price Hill 45205
1011
forest garden trees urban
  • Likes 2
  • Mark post as helpful
  • send pies
    Number of slices to send:
    Optional 'thank-you' note:
  • Quote
  • Report post to moderator
I think "create a usable form of tool steel" is a good description of what intrigued me.
I have built a Whitlox style wood fired forge, and I've  explored melting aluminum, copper and/or bronze for decorative castings.
I hadn't realized one could fully melt steel in a charcoal fired device,much less improve its strength.
Being able to cast steel,even in small amounts,would be darn useful.
It's easy to come by and I can see artists excited to pay for such a service.
Being able to make tool quality steel has more possibilities than I can grasp just yet.

 
Joshua States
pollinator
Posts: 186
Location: Alpine southwest USA
95
cat hunting cooking building woodworking
  • Likes 5
  • Mark post as helpful
  • send pies
    Number of slices to send:
    Optional 'thank-you' note:
  • Quote
  • Report post to moderator

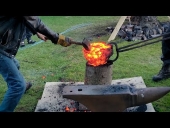
William Bronson wrote:I think "create a usable form of tool steel" is a good description of what intrigued me.
I have built a Whitlox style wood fired forge, and I've  explored melting aluminum, copper and/or bronze for decorative castings.
I hadn't realized one could fully melt steel in a charcoal fired device,much less improve its strength.
Being able to cast steel,even in small amounts,would be darn useful.
It's easy to come by and I can see artists excited to pay for such a service.
Being able to make tool quality steel has more possibilities than I can grasp just yet.


Ancient smiths only had charcoal to make iron and steel. The most notorious of these smiths, those in Japan and the Vikings, used pine charcoal. With a good bellows or motorized blower, you can easily get the shortstack furnace over the required 2800*F (1540*C) to melt steel, but it comes out in a sponge-like blob called a bloom. This needs to be heated to forge welding temperature (2250*F) and forged into a bar. Your Whitlox-style forge may have the ability to do that, but most guys doing this are using either that same short stack, or a propane fueled forge to reach this temp.
My crucible furnace uses propane for the heat. This is made in a standard BBQ bottle with lots of hi-temp (3000*F working temp) refractory cement covering a layer of ceramic insulation. The burner is also cast from the same refractory cement and involves a forced air system to increase the temp and use less fuel. The base materials are loaded into a graphite-clay crucible with some sort of fluxing agent, typically crushed glass, and sealed with a castable refractory lid.

I have a couple hundred dollars in parts and supplies to make this. The fire-brick short stack is far less expensive, but the end product takes a lot more time to process. The crucible furnace produces a small, uniform puck of steel. Depending on the resulting carbon content, you will have either mild steel, tool steel, or cast iron. Just for reference, Mild steel has a carbon content of .2-.4%, tool steel has a carbon content of .5-1.8%, and cast iron has carbon content of anything over that.
My crucible furnace, a crucible prepped for firing with a clay wash, and the resulting steel puck are the images below.
Finished-furnace-(1).jpg
[Thumbnail for Finished-furnace-(1).jpg]
Cooking.JPG
[Thumbnail for Cooking.JPG]
Pre-melt-(2).jpg
[Thumbnail for Pre-melt-(2).jpg]
IMG_5139.JPG
[Thumbnail for IMG_5139.JPG]
IMG_5140.JPG
The crucible furnace produces a small, uniform puck of steel
 
Joshua States
pollinator
Posts: 186
Location: Alpine southwest USA
95
cat hunting cooking building woodworking
  • Likes 5
  • Mark post as helpful
  • send pies
    Number of slices to send:
    Optional 'thank-you' note:
  • Quote
  • Report post to moderator
BTW-Casting molten steel into a form is pretty much out of the question, no matter what you saw in the movie Conan the Barbarian.
The temperatures we are talking about will melt your safety glasses onto your face and there is really nothing that will hold up to having molten steel poured onto it other than steel or cast iron. Even these crucibles I use don't last forever. Each firing degrades the crucible a little bit and most guys are getting 4-6 melts before a crucible just disintegrates.
 
pollinator
Posts: 5007
Location: Canadian Prairies - Zone 3b
1357
  • Likes 5
  • Mark post as helpful
  • send pies
    Number of slices to send:
    Optional 'thank-you' note:
  • Quote
  • Report post to moderator
Very cool stuff guys! Just made popcorn and am settling in to watch the show.

Silly question perhaps -- but given that the world is awash in steel, could one game the system and scrounge specific types that can be easily reworked into the kinds of tools that homesteaders need?
 
Joshua States
pollinator
Posts: 186
Location: Alpine southwest USA
95
cat hunting cooking building woodworking
  • Likes 6
  • Mark post as helpful
  • send pies
    Number of slices to send:
    Optional 'thank-you' note:
  • Quote
  • Report post to moderator

Douglas Alpenstock wrote:Very cool stuff guys! Just made popcorn and am settling in to watch the show.

Silly question perhaps -- but given that the world is awash in steel, could one game the system and scrounge specific types that can be easily reworked into the kinds of tools that homesteaders need?


Not a silly question at all really. One of the most common tool steels you can scrounge up is spring steel. Yep, that stuff that leaf and coil springs for automobiles is classified as tool steel because it is hardenable. A quick note on hardenability in steel alloys. Previously, I had laid out the carbon content as the determining factor is whether a steel was mild, tool, or cast iron. This is for simple steels really. Once we started to alloy other elements into iron, we found that you could increase the hardenability of lower carbon content steels. That's why you hear so much about Chromium or Vanadium alloys. The presence of these other elements can improve the hardenability of a simple steel. ("simple" means not much else in the steel besides Iron and Carbon)

Back to the spring steel and automotive parts. In years gone by, the vast majority of automotive springs were made from two common steels, and all steels are named with either a set of numbers or a combination of numbers and letters. It never really spells a word you can easily remember either. These two steels are called 5160, a mild chromium alloy, and 1095 a simple steel.  How the number relates to content is an ANSI standard. The 51 in 5160 means it is a low chromium alloy and the 60 is the "points" of carbon. 10 points equals .1%. 1095 is a simple steel with 95 points of carbon or .95%.
These days, I don't know what steels they are using and the manufactureres do not share that information easily. I have a couple of old leaf springs rusting in the yard that are actually stamped "1095" and FORD, so I know what they are.

A word of caution about salvage automotive springs. These have taken a lot of use and abuse and are prone to stress fracturing. These hairline cracks can open up during the forging process and are almost impossible to forge weld back together again if they are chromium alloys. Chromium alloys generally do not like to forge weld to themselves. Simple steels are a bit easier. This is not to say that salvaged auto springs are bad or you should avoid them. Just be aware that the possibility of failure is there and if it happens, don't be surprised.

Now the bright side. Look around your area and find out if there are any machine shops or automotive springs shops that build after-market leaf springs. They frequently have cutoff ends of fresh new steel called "drops" which are headed to the dumpster on their way to the landfill or recycle center. They might be willing to part with a few of them on the cheap. You may even be able to barter a dozen donuts for a few of them, if you appear at the correct time.

So there are plenty of tool steels available to reuse, upcycle, repurpose, or whatever you want to call it. It really comes down to do you have the equipment and skills to reform that hunk of steel into what you want? I could really spend most of the rest of the night describing how to forge and heat treat tools steels, so if anyone is interested, let me know and I'll spill the beans for you.

Other than that, old tools are another excellent source of tool steel. Old files and rasps sometimes are good steel, although the cheaper ones are typically mild steel that was case hardened. Old hammer heads, prybars, even that worn out shovel is good tool steel. There's no reason that broken chisel can be repurposed into a center punch, small drift, or even a screwdriver.
 
Joshua States
pollinator
Posts: 186
Location: Alpine southwest USA
95
cat hunting cooking building woodworking
  • Likes 1
  • Mark post as helpful
  • send pies
    Number of slices to send:
    Optional 'thank-you' note:
  • Quote
  • Report post to moderator
So moving on to addressing the idea of "making a usable form of tool steel" from mild steel scraps, here is a small refining furnace I made about 6 years ago using a bunch of bricks for the furnace, a shop vac for the blower, and pine charcoal for the fuel. The project was to melt a bunch of cut nails down and make some hardenable tool steel. In the last six years, I have learned that the square furnace I made is neither the most efficient design, nor does it use the least amout of bricks. I posted a link above to a video from Hurstwick where you can see a similar process using about 8 bricks stood on end in a circle and held together with bailing wire.  

The furnace I had made is a base of hard fire bricks and several regular clay salvaged red bricks stacked on top. aThe fire bricks are better at reflecting the heat and they won't melt as easily as the red brick, but they are quite a bit more expensive. The shop vac is plugged into a simple household dimmer switch to allow turning the blast down when charging the furnace.

What do I mean by "charging"? The charcoal and the iron/mild steel material is slowly fed into the top of the furnace in small amounts. Roughly speaking, the ratio is 2:1 charcoal to iron by weight. So a small food scale is handy to have and you divide the charcoal and iron into small batches. Each batch is a single "charge".

The process is basic. First load the furnace with a small amount of tinder and light it on fire. Fill the furnace with charcoal and turn the blower on. You have to be careful not to blow the charcoal out of the furnace as this can be problematic for a variety of reasons. Allow it to burn down about equal to the size of your charge, but not more than halfway. Turn the blower down and pile most of the the charge charcoal in and load the iron/mild steel scrap on top. Cover with the remainder of the charcoal charge.  Turn the blower back up. You should be seeing flames and sparks flying up out of the furnace. This has to get hot enough to melt the iron/steel material. Lather, rinse, repeat until you are done with your charges. Allow the fire to burn down and remove the mishapen blob (bloom) from the bottom of the furnace with a pair of tongs. It really helps to have either a wooden stump or a large rock handy to put the bloom on and a sledge hammer to start compacting the bloom. The initial compaction is done with light hits. You are just trying to consolidate the steel into a roundish or squarish form. This is not heavy forging and the bloom is quite fragile at this stage.

A word about placement of the tuyer or blower pipe. Where this is placed is critical. You do not want it at the bottom of the furnace as this will blow the air directly on the bloom as it forms. This will oxidize the bloom and make it unusable. You do not want the tuyer too high and this will not produce enough heat to melt the iron or enough travel distance for the molten iron to collect carbon on it's way down to the furnace bottom. There is a small depression in the bottom of the furnace that extends below the bottom of the first brick layer. This depression is coated with about a half-inch of charcoal fines, The tuyer enters the furnace about 3 inches above the bottom of the first brick layer. It barely sticks into the furnace cavity. Check out that Hurstwick video for proper tuyer placement.

This experiment used 3 pounds of 4d cut nails (1.5 inches long) and yeilded a little over three pounds of steel bar. The excess weight is both carbon uptake from the charcoal and slag from the melting bricks.  Subsequent forging and welding of this material together left me with a bar of high carbon steel about 3/4' square and 8 inches long. This weighed a little over two pounds. Carbon content is approximated by grinding the bar and checking the sparks, called spark testing. You want to see bright sparking that produces a long tail of sparks for the high carbon content.

Preheat.png
[Thumbnail for Preheat.png]
Running-1.png
[Thumbnail for Running-1.png]
The-puck.png
[Thumbnail for The-puck.png]
1st-Forging.jpg
[Thumbnail for 1st-Forging.jpg]
Third-forging-(1).jpg
Subsequent forging and welding of this material together left me with a bar of high carbon steel
Spark-test.jpg
simple check or spark test for carbon content of steel
 
Doe, a deer, a female deer. Ray, a pocketful of sun. Me, a name, I call my tiny ad ...
Switching from electric heat to a rocket mass heater reduces your carbon footprint as much as parking 7 cars
http://woodheat.net
reply
    Bookmark Topic Watch Topic
  • New Topic