• Post Reply Bookmark Topic Watch Topic
  • New Topic
permaculture forums growies critters building homesteading energy monies kitchen purity ungarbage community wilderness fiber arts art permaculture artisans regional education skip experiences global resources cider press projects digital market permies.com pie forums private forums all forums
this forum made possible by our volunteer staff, including ...
master stewards:
  • r ranson
  • Carla Burke
  • Nancy Reading
  • John F Dean
  • Jay Angler
  • paul wheaton
stewards:
  • Pearl Sutton
  • Burra Maluca
  • Joseph Lofthouse
master gardeners:
  • Timothy Norton
  • Christopher Weeks
gardeners:
  • Jeremy VanGelder
  • Maieshe Ljin
  • Nina Surya

What can I use to fill deep lines in my concrete floor?

 
steward
Posts: 21862
Location: Pacific Northwest
12454
11
homeschooling hugelkultur kids art duck forest garden foraging fiber arts sheep wood heat homestead
  • Likes 2
  • Mark post as helpful
  • send pies
    Number of slices to send:
    Optional 'thank-you' note:
  • Quote
  • Report post to moderator
We're currently remodeling our garage to have part of it be a family room/den. We'll be using milk paint on the concrete to seal and beautify it. Thankfully, the concrete is level, but for some reason it has deep lines in it (as well as a brushed textured surface). Maybe the lines are from how the concrete was poured? Regardless, this makes it really hard to sweep. I actually didn't know how deep the lines were until I took a clothes hanger and scraped away dirt to get to the bottom of the line. It's at least 1/2 inch deep, maybe even an inch deep. This was annoying when the garage was used for storage, but will be really frustrating when we're trying to keep a family room swept!

I would love to fill in these cracks in a way that will still allow me to paint over them with milk paint (so I need a porous, non-synthetic material to fill the line).

Any ideas?
20240528_164943.jpg
It's as wide as a Sharpie marker. I took this picture before excavating to see how deep it was.
20240528_165251.jpg
I scraped out a section and took this picture
20240528_165329.jpg
The line goes all the way across the room. There's a slightly shallower perpendicular to it.
The line goes all the way across the room. There's a slightly shallower line perpendicular to it.
 
steward & bricolagier
Posts: 15016
Location: SW Missouri
10649
2
goat cat fungi books chicken earthworks food preservation cooking building homestead ungarbage
  • Likes 13
  • Mark post as helpful
  • send pies
    Number of slices to send:
    Optional 'thank-you' note:
  • Quote
  • Report post to moderator
Those are control joints, you need them. If you must fill them, fill them with something soft in the caulk type range. They need to be able to relieve the stress on the concrete floor to keep it from cracking if there's a problem, and they are a required thing.  Don't fill them up with hard stuff, or if there's any issues, the cracks will go all over your floor.
 
Nicole Alderman
steward
Posts: 21862
Location: Pacific Northwest
12454
11
homeschooling hugelkultur kids art duck forest garden foraging fiber arts sheep wood heat homestead
  • Likes 6
  • Mark post as helpful
  • send pies
    Number of slices to send:
    Optional 'thank-you' note:
  • Quote
  • Report post to moderator
Ooooh, that's good to know! Thank you!

Hmmmm, I wonder if I should paint the floors first with milk paint, and then pigment the caulk to match the milk paint and then caulk the lines? Would that even work?

We are putting down a big area rug that will hopefully cover most of the control joints, but it'd be nice to be able to somehow easily keep them free of gunk. They're so dirty!
 
master pollinator
Posts: 5317
Location: Canadian Prairies - Zone 3b
1451
  • Likes 7
  • Mark post as helpful
  • send pies
    Number of slices to send:
    Optional 'thank-you' note:
  • Quote
  • Report post to moderator

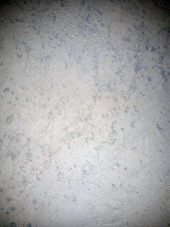
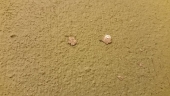
Pearl Sutton wrote:Those are control joints, you need them..


Pearl is quite right. These are deliberately introduced "fault planes" that will hopefully break the big concrete slab into neat rectangular smaller slabs if the supporting base underneath rises/falls/shifts. If the shift is extreme, here are methods like mud-jacking which can level out a the small slabs without having to jackhammer out the old floor and pour a new slab.
 
master pollinator
Posts: 1878
Location: Ashhurst New Zealand (Cfb - oceanic temperate)
582
duck trees chicken cooking wood heat woodworking homestead
  • Likes 11
  • Mark post as helpful
  • send pies
    Number of slices to send:
    Optional 'thank-you' note:
  • Quote
  • Report post to moderator
You could probably use lime mortar to fill those. It never gets really hard and if the slab starts to move, it will give (this is why it's so valuable in stonework and part of the reason really old stone buildings in places like England and Europe are still in good shape). Plain old lime putty with fine sand will work and milk paint will adhere to it without any trouble.
 
pollinator
Posts: 5541
Location: Bendigo , Australia
495
plumbing earthworks bee building homestead greening the desert
  • Likes 6
  • Mark post as helpful
  • send pies
    Number of slices to send:
    Optional 'thank-you' note:
  • Quote
  • Report post to moderator
Its my understanding that those crack lines are only there as the slab dries and sets. They cause any cracking to be controlled rather than spread anywhere,
but once all is hardened and cracked I dont think much happens.
I think if settlement occurs it may happen along those same lines but it may be a fluke.
Coloured silicone or caulking as suggested would be a great filler.
 
Nicole Alderman
steward
Posts: 21862
Location: Pacific Northwest
12454
11
homeschooling hugelkultur kids art duck forest garden foraging fiber arts sheep wood heat homestead
  • Likes 3
  • Mark post as helpful
  • send pies
    Number of slices to send:
    Optional 'thank-you' note:
  • Quote
  • Report post to moderator

Phil Stevens wrote:You could probably use lime mortar to fill those. It never gets really hard and if the slab starts to move, it will give (this is why it's so valuable in stonework and part of the reason really old stone buildings in places like England and Europe are still in good shape). Plain old lime putty with fine sand will work and milk paint will adhere to it without any trouble.


Do you have any recommendations for where to buy lime putty/lime mortar? I found this lime mortar that has already been mixed with sand at https://lancasterlimeworks.com and a bunch of different lime mortars with different strengths at at limeworks.us.

I'm also wondering if I could use the same thing to patch the chips and cracks in my garage's concrete retaining wall

The top of this retaining wall has a bunch of chunks missing from it. I'd love to patch it and protect it somehow.
 
Phil Stevens
master pollinator
Posts: 1878
Location: Ashhurst New Zealand (Cfb - oceanic temperate)
582
duck trees chicken cooking wood heat woodworking homestead
  • Likes 3
  • Mark post as helpful
  • send pies
    Number of slices to send:
    Optional 'thank-you' note:
  • Quote
  • Report post to moderator
That premixed mortar looks like a really easy way to get the job done. If you get one of the bagged blends, the lower strength numbers will have more "give" in case the slab settles, with the tradeoff being a less durable finish. The thing about lime mortar is that repointing (refilling of the joints) is a periodic maintenance task on brick and stonework, so accepting that some wear will take place and that you might have to touch it up in ten or twenty years is part of the package.
 
look! it's a bird! it's a plane! It's .... a teeny tiny ad
Learn Permaculture through a little hard work
https://wheaton-labs.com/bootcamp
reply
    Bookmark Topic Watch Topic
  • New Topic