• Post Reply Bookmark Topic Watch Topic
  • New Topic
permaculture forums growies critters building homesteading energy monies kitchen purity ungarbage community wilderness fiber arts art permaculture artisans regional education skip experiences global resources cider press projects digital market permies.com pie forums private forums all forums
this forum made possible by our volunteer staff, including ...
master stewards:
  • Nancy Reading
  • Carla Burke
  • r ranson
  • John F Dean
  • paul wheaton
  • Pearl Sutton
stewards:
  • Jay Angler
  • Liv Smith
  • Leigh Tate
master gardeners:
  • Christopher Weeks
  • Timothy Norton
gardeners:
  • thomas rubino
  • Jeremy VanGelder
  • Maieshe Ljin

Putting up fur for tanning, from a fur trapper

 
pollinator
Posts: 190
Location: Nebraska zone 5
78
hunting chicken building
  • Likes 10
  • Mark post as helpful
  • send pies
    Number of slices to send:
    Optional 'thank-you' note:
  • Quote
  • Report post to moderator
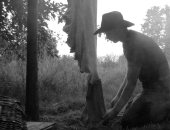
As promised, I'll show how I put up fur, as one might do to prep for tanning. First of all ....when you skin a critter, it'll be covered in fat and membrane. All that fat can be put to good use, as soap or something, if one is interested. It burns quite well in a wood stove, too. It can even go to the chickens. Skunk oil in particular is said to have medicinal properties when rendered. Anyways, all that fat has to be removed, down to the bare skin.
PXL_20241123_212852232.jpg
when you skin a critter, it'll be covered in fat and membrane
 
James Bridger
pollinator
Posts: 190
Location: Nebraska zone 5
78
hunting chicken building
  • Likes 6
  • Mark post as helpful
  • send pies
    Number of slices to send:
    Optional 'thank-you' note:
  • Quote
  • Report post to moderator
The tools of the trade......a fleshing beam (just a board with a slight convex curve to it, rounded to a point on the end) a fleshing knife (razor sharp on th convex side, not so sharp on the concave side) and a small clamp, to hold the fur up for easier positioning.  A fleshing knife is basically a modified draw knife. A regular knife could be used too, if one is willing to work at it
PXL_20241123_213052390.jpg
A fleshing knife is basically a modified draw knife
 
James Bridger
pollinator
Posts: 190
Location: Nebraska zone 5
78
hunting chicken building
  • Likes 6
  • Mark post as helpful
  • send pies
    Number of slices to send:
    Optional 'thank-you' note:
  • Quote
  • Report post to moderator
The fleshing life is used to shave the fat off, down to the bare skin. The sharp convex side is used on the more gristley parts, th concave side is used to push on the more fatty parts.
PXL_20241123_213220217.jpg
The fleshing life is used to shave the fat off, down to the bare skin
 
James Bridger
pollinator
Posts: 190
Location: Nebraska zone 5
78
hunting chicken building
  • Likes 8
  • Mark post as helpful
  • send pies
    Number of slices to send:
    Optional 'thank-you' note:
  • Quote
  • Report post to moderator
When it's all done, it can either be salted, or go straight to tanning, or get dried, as shown. This one's put up for the commercial fur market, on a standard sized stretcher, but for home tanning, anything will work. If you let it dry, it will need to be rehydrated before tanning. There are commercial products for this, but a soak in acidic (1-2 pH) salt water will rehydrate most critters just fine.
PXL_20241123_214824735.jpg
If you let it dry, it will need to be rehydrated before tanning
 
pollinator
Posts: 186
Location: Alpine southwest USA
95
cat hunting cooking building woodworking
  • Likes 4
  • Mark post as helpful
  • send pies
    Number of slices to send:
    Optional 'thank-you' note:
  • Quote
  • Report post to moderator
Awesome thread! Bookmarked for future reference.
A long time ago I purchased some books on tanning hides and fur. I did try to tan a deer hide once. I didn't have the brain for brain tanning and tried to smoke tan it.
Miserable failure.....
 
gardener
Posts: 1804
Location: Zone 6b
1124
forest garden fungi books chicken fiber arts ungarbage
  • Likes 6
  • Mark post as helpful
  • send pies
    Number of slices to send:
    Optional 'thank-you' note:
  • Quote
  • Report post to moderator
Very informative and timely, Thanks!
I have a few questions here:
1) do you mean the fleshed skin can be air-dried without any preservative?
2) what acid do you use to get pH below 2? I saw people use citric acid solid to make a solution.
3) when you use salt and acid to pickle the skin, is it the Lutan ( aluminum choride) that you use? I have aluminum formate but the solubility is low. I am wondering if pickling and alum treatment are better done separately.
The other day when I skinned a skunk with a 4×4 and a knife, my chickens just eagerly ate every bit of fat and meat! I turned the skin over and they were all scared away.
 
James Bridger
pollinator
Posts: 190
Location: Nebraska zone 5
78
hunting chicken building
  • Likes 5
  • Mark post as helpful
  • send pies
    Number of slices to send:
    Optional 'thank-you' note:
  • Quote
  • Report post to moderator

May Lotito wrote:Very informative and timely, Thanks!
I have a few questions here:
1) do you mean the fleshed skin can be air-dried without any preservative?
2) what acid do you use to get pH below 2? I saw people use citric acid solid to make a solution.
3) when you use salt and acid to pickle the skin, is it the Lutan ( aluminum choride) that you use? I have aluminum formate but the solubility is low. I am wondering if pickling and alum treatment are better done separately.
The other day when I skinned a skunk with a 4×4 and a knife, my chickens just eagerly ate every bit of fat and meat! I turned the skin over and they were all scared away.


1. Yes, it will air dry and can be stored in a temp controlled environment for a couple years that way. Bugs will get to it and eat the fur and leather eventually, if it's stored outside, though.  2. I've used commercial tanning acids (safe-t acid) and oxalic acid from the hardware store.
3. When I've tanned with lutan, the acid and salt bath pickle (1-2 pH) are used during rehydration, and then the pH has to get raised with baking soda (between 4.0-4.4pH, if I remember right) and the lutan chemical goes in. Various tanning chemicals require specific pH levels, otherwise they'll either surface-tan only or not dissolve properly, if it's too high or low.
 
May Lotito
gardener
Posts: 1804
Location: Zone 6b
1124
forest garden fungi books chicken fiber arts ungarbage
  • Likes 5
  • Mark post as helpful
  • send pies
    Number of slices to send:
    Optional 'thank-you' note:
  • Quote
  • Report post to moderator
I am very new to this so this maybe a stupid question.  From some tutorials I read, the procedures to make fur vary a lot. Some simply pickle, neutralize and degrease; some add aluminum treatment after that; and some consider all of these are just preparation steps before vegetable or chromium tanning. Mechanism wise, the acid bath kills bacteria and dissolves non-collagen proteins and aluminum salts fill in the pores through coagulation. So these steps change the texture and prevent rotting but still are not true tanning, i.e. the chemical reactions between tannic acid and collagen protein to make the latter structurally stable. So why is vegetable tanning not normally used in making fur as in leather? Too time consuming? Or because the color and texture on the suede side is rarely a concern? The only time I see the backside is shown is in the case of a shearling jacket.
 
pollinator
Posts: 424
162
  • Likes 3
  • Mark post as helpful
  • send pies
    Number of slices to send:
    Optional 'thank-you' note:
  • Quote
  • Report post to moderator
I'm not an expert by any means, but I did take a natural tanning course. So for what it's worth:

You can use vegetable tanning on furs. We tanned a fox skin in willow bark on the course. The problem is that if a skin remains wet for too long, the hair will come off (that's actually one of the primary methods to de-hair hides meant for leather). So if you want to bark-tan a fur, the tanning solution has to be very strong. This, in turn, can cause other issues, namely that the surface of the skin tans too hard, too fast, and the interior remains raw since the tannins on the surface form a barrier of sorts. Apparently (according to my teacher) this is more of a problem with some types of bark than with others. Supposedly, willow bark has smaller tannin molecules than for instance spruce bark, which is why we used it. Also, how thick the skin is plays a part. A fox or marten skin (very thin) can be tanned this way. A sheep skin (thicker) probably can't. The sheep skins we prepared on the course were fat-tanned (egg yolk and oil).

If I was to tan more furs (I would like to tan some more sheep skins at some point) I'd probably want to try a method similar to the one traditionally used for buckskin: fat-tanning followed by cold smoking. For more info on this type of tanning I'd very much recommend Deerskins Into Buckskins by Matt Richards.

Again, I'm far from an expert, and it's been a while, so it's possible that I forgot something important.
 
May Lotito
gardener
Posts: 1804
Location: Zone 6b
1124
forest garden fungi books chicken fiber arts ungarbage
  • Likes 5
  • Mark post as helpful
  • send pies
    Number of slices to send:
    Optional 'thank-you' note:
  • Quote
  • Report post to moderator
I am underway of my second attempt of fur tanning, with a roadkill possum. After removing fat and strands of muscles, the membrane underneath was so strongly attached and I couldn't get it off without ripping holes. I went straight to pickling for three days and the tissues looked plump and white. I could easily flesh most of the lower 2/3 but upper back to head portion remained very challenging. I ended up using a serrated knife to shave the layer off and pickled the pelt some more, so that there won't be different thickness to affect further treatments.

So my question is, if fleshing is properly done with the beam and draw knife, is the resulting skin thin and even from head to tail? In the first time I did a skunk and it was a lot easier. Does material freshness or animal types matter when it comes to fleshing?

Thanks in advance.
 
James Bridger
pollinator
Posts: 190
Location: Nebraska zone 5
78
hunting chicken building
  • Likes 5
  • Mark post as helpful
  • send pies
    Number of slices to send:
    Optional 'thank-you' note:
  • Quote
  • Report post to moderator
possums are really tough to flesh, because their skin is so thin. Regardless of the critter, the skin isn't evenly thin after fleshing. Fleshing doesn't remove any of the actual skin, just the fat/membrane.

If you want to thin the actual skin, you'd use a machine called a fleshing wheel (also called a round knife), to shave off thin little layers of skin. There are videos of this on youtube. Dakota fleshing wheels is a popular brand. They're expensive, it's something that typically a professional tannery would use.

As far as the best time to flesh......for most all critters, it's better to skin when they're fresh, and and then flesh when they're cold. When the fat and such is cold, it's more solid and comes off better. Animal type definitely matters.  With possums you're mostly just pushing the fat off, not a lot of slicing. Raccoons require slicing on the back until you're past the shoulders, then it's pushing. Beavers are almost all slicing except for the belly.
 
May Lotito
gardener
Posts: 1804
Location: Zone 6b
1124
forest garden fungi books chicken fiber arts ungarbage
  • Likes 2
  • Mark post as helpful
  • send pies
    Number of slices to send:
    Optional 'thank-you' note:
  • Quote
  • Report post to moderator
The fleshing machine is cool! It gotta be indispensable for people doing it at a commercial scale. I am just a beginner learning the basic skills so I will just drool over it.

The opossum skin is fairly thin but there is a streak in the center back with very strong connective tissues and the epidermis near the head is much thicker that requiressome shaving. There two areas are hard to deal with. After alum treatment, drying and stretching, the fur feels very supple without making any cracking sound. However, I couldn't get to the edges and that's a lot of loss of usable area from such a small animal.

I only stretch the skin over the corner of a metal file cabinet to break in the collagen matrix at the last step. Will it help if I stretch a few more times after fleshing or pickling?

Here are the pictures of the opossum skin showing the hard edges vs stretched center parts.
IMG_20241213_141135.jpg
Lower back, easy to flesh, edges hard to stretch
IMG_20241213_141140.jpg
Upper back below the ear, marks of shaving visible
 
James Bridger
pollinator
Posts: 190
Location: Nebraska zone 5
78
hunting chicken building
  • Likes 1
  • Mark post as helpful
  • send pies
    Number of slices to send:
    Optional 'thank-you' note:
  • Quote
  • Report post to moderator
You may be able to slightly wet that down, just dampen it, and work it some more.
 
A lot of people cry when they cut onions. The trick is not to form an emotional bond. This tiny ad told me:
12 DVDs bundle
https://permies.com/wiki/269050/DVDs-bundle
reply
    Bookmark Topic Watch Topic
  • New Topic