posted 1 year ago
Let me just say up front, for anyone that has ever built pretty much anything, this will most likely be a waste of your time. I'm posting it to maybe give a little building confidence to people that have never really built anything and may be a little intimidated to try. This project is great because nothing has to be square or level, none of the measurements are critical, it can be built fairly quickly, and it is modular, so you can make it bigger (or smaller) with no trouble at all. The easiest way to do it is to cut all the posts that same length, and all the boards the same length. If you use a chop saw, you can use a stop block and cut everything at once, or you can just use a tape measure and measure each piece. I made the posts 3 feet long, and the boards 3 and 1/2 feet. You don't need to use my measurements. I used them because it makes the bin about 3'x3' and I find that to be a good size compost bin. It's big enough that it heats up well and small enough that turning it is quick easy work that takes less than ten minutes per bin to flip. My neighbor had a very old barn that was falling apart and he wanted to take it down. He had a big stack of badly milled lumber in it that he offered me for $1 a board. All hardwood. Lots of cherry, some oak, maple, and some others that I don't know what it is. I've built several things from the better wood, but I had a lot left that was uneven, crooked, warped, and just not good for much. The posts were cut offs I found at a construction site. The only thing I bought for retail prices were the screws.
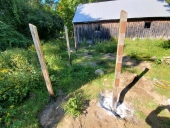
I built the back panel first. I knew I wasn't going to extend the bins in one direction, so I lined up the boards with one edge of the post and ran them to the middle of the other post. I went to the middle so I could keep adding on more bins as I went. My boards are random widths, so I just kept adding boards until I ended with one higher than the post. When the back was done, I stood it up, added a bottom board to start making the sides, added the posts on the front of the bin. I just used one screw at the bottom so the post would still move and attached the a board to the top of the posts. Then of course, just go back and fill in the other boards to complete the sides. Before I added the sides, I added another board to the bottom of the back post to get set up for the next bin in the row. I used a cheap harbor freight clamp to make it easier to attach the top board but there are lots of ways to hold it if you don't have a clamp. After I connected that next back post, I went back and filled in the side boards of the first bin. As I said, it's a very simple build, and hopefully I didn't insult anyone's intelligence by over explaining something so simple. I just thought it might help a complete beginner that hasn't built anything before.
One other note I wanted to add regarding filling the bin. I often use planer shavings that I get from a friend combined with grass clipping from my yard in my bins. No matter how thin you try to make the layers, they can clump pretty badly. It doesn't really hurt anything but when you turn it the first time, it takes much longer because you have to break up all the clumps. I've found it works far better to put down a layer of the shaving, then layer on the grass, and then use a rake to really thoroughly mix the two together. Once they are really well mixed, I shovel them into the bin they will compost in. It takes longer to do the first time, but it makes turning the piles in the future much faster and easier.
I hope this maybe helps someone.
back-of-bin.jpg
![[Thumbnail for back-of-bin.jpg]](/t/281580/a/267024/thumb-back-of-bin.jpg "Filename: back-of-bin.jpg
Description:")
sides-going-on.jpg
![[Thumbnail for sides-going-on.jpg]](/t/281580/a/267025/thumb-sides-going-on.jpg "Filename: sides-going-on.jpg
Description:")
attaching-next-bin-back-boards.jpg
![[Thumbnail for attaching-next-bin-back-boards.jpg]](/t/281580/a/267026/attaching-next-bin-back-boards.jpg "Filename: attaching-next-bin-back-boards.jpg
Description:")
first-completed-bin.jpg
![[Thumbnail for first-completed-bin.jpg]](/t/281580/a/267027/thumb-first-completed-bin.jpg "Filename: first-completed-bin.jpg
Description:")
mixing-before-moving-to-composting-bin.jpg
![[Thumbnail for mixing-before-moving-to-composting-bin.jpg]](/t/281580/a/267028/mixing-before-moving-to-composting-bin.jpg "Filename: mixing-before-moving-to-composting-bin.jpg
Description:")


 12
12


![[Thumbnail for back-of-bin.jpg]](/t/281580/a/267024/back-of-bin.jpg "Filename: back-of-bin.jpg
Description:")
![[Thumbnail for sides-going-on.jpg]](/t/281580/a/267025/sides-going-on.jpg "Filename: sides-going-on.jpg
Description:")
![[Thumbnail for first-completed-bin.jpg]](/t/281580/a/267027/first-completed-bin.jpg "Filename: first-completed-bin.jpg
Description:")

Skill verified by Ash Jackson")