• Post Reply Bookmark Topic Watch Topic
  • New Topic
permaculture forums growies critters building homesteading energy monies kitchen purity ungarbage community wilderness fiber arts art permaculture artisans regional education skip experiences global resources cider press projects digital market permies.com pie forums private forums all forums
this forum made possible by our volunteer staff, including ...
master stewards:
  • Carla Burke
  • Nancy Reading
  • John F Dean
  • r ranson
  • Jay Angler
  • paul wheaton
stewards:
  • Pearl Sutton
  • Leigh Tate
  • Devaka Cooray
master gardeners:
  • Christopher Weeks
  • Timothy Norton
gardeners:
  • thomas rubino
  • Matt McSpadden
  • Jeremy VanGelder

My Rocket Build Thread & Questions!

 
Posts: 2
Location: Santa Cruz, CA
  • Mark post as helpful
  • send pies
    Number of slices to send:
    Optional 'thank-you' note:
  • Quote
  • Report post to moderator
Hi All, I've been browsing the Rocket Stove section of Permies for a few weeks now, as well as a few other places, and just finished Ianto's book. . Lots of knowledge here, very thankful for what I've found to date.

I've been planning my rocket heater for the last few weeks and amassing materials. I did my first test run on my heater core this weekend and it went fairly well. That being said, I'd love to get the feedback from anyone who'd care to comment before I start finalizing my design and executing it.

The Goal: A super efficient patio heater that is self-contained and fairly easily movable with/by two people

The Heater:
6" System (practically mass-less to keep weight down for portability)
55 Gallon Drum (larger than normal for 6" system to help maximize heat exchange through barrel surface area)
Firebrick feed, burn tunnel, and heat riser
30 gallon drum heat riser outer tube, with vermiculite fill insulation
Steel frame holding everything, somewhat similar design concept to DragonHeaters 6" portable heater


I built a mock-up of the core this weekend, 1st test run yielded this:


Draw was good, as long as the feed tube was >3/4 full, otherwise the fuel would start to burn up the feed tube:


Tested with some of the feed blocked off and it solved the problem:


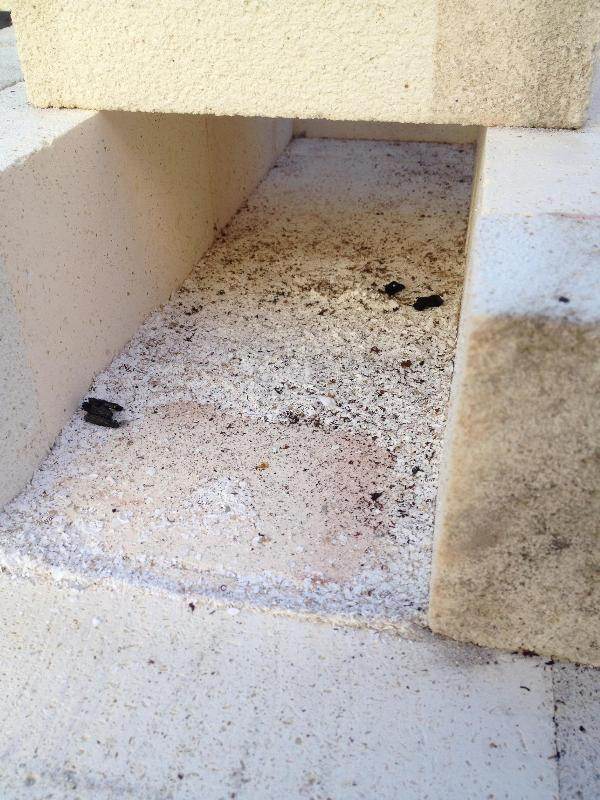
After disassembling this was the ash and two tiny coals left (more ash than I'd like, but I used a lot of paper trying to figure out how to light it!):


And finally here is a schematic of the core as tested:


Note that my test core did have the modifications indicated by the dotted lines (ash pit and wedge brick)

Questions:
Does anything look glaringly wrong with my core design?
I know drum-riser spacing is larger than recommended, thinking it may give the gasses a bit more "dwell time" in the barrel for more heat exchange. Thoughts?
I've seen drawings with and without an ash pit below the feed tube? Good idea or not necessary?
I've read a few places favorable reports of a wedge brick at the back of the burn tunnel to heat riser junction. Thinking about how important a constant CSA is and extrapolating on that, this wedge seems a good idea to me to maintain constant CSA. Thoughts?
I bought 50 firebricks off of Craigs List, some are feather light with very smooth surfaces and some are a fair bit heavier and more gritty. I've got about 25 of each. Which ones should I use where?


After these details are ironed out I'll continue with designing the frame and exhaust.


Thank you in advance to any and all who lend some advice!
 
rocket scientist
Posts: 6356
Location: latitude 47 N.W. montana zone 6A
3209
cat pig rocket stoves
  • Mark post as helpful
  • send pies
    Number of slices to send:
    Optional 'thank-you' note:
  • Quote
  • Report post to moderator
Hi Scott; Your mock build looks good, Ash build up with an open system is normal, when you cover your heat riser with the barrel your burn temps will quickly rise increasing heat thru the whole system creating a secondary burn that should incinerate almost all but the finest fly ash. Your heavy bricks should be used in your feed tube and burn tunnel and the lighter bricks would go for your heat riser. Dwell time translates to back drafting ,not good. 5" is more gap than you want at the top of the heat riser , experiment, but 2.5" is normally what is used. You want the turbulence created by the close tolerance to get the secondary burn going as well as the heat pump effect of cooling air sinking down and pulling more hot air up the riser and therefore pushing more heat where you want it.
 
Posts: 5
  • Mark post as helpful
  • send pies
    Number of slices to send:
    Optional 'thank-you' note:
  • Quote
  • Report post to moderator

thomas rubino wrote:Hi Scott; Your mock build looks good, Ash build up with an open system is normal, when you cover your heat riser with the barrel your burn temps will quickly rise increasing heat thru the whole system creating a secondary burn that should incinerate almost all but the finest fly ash. Your heavy bricks should be used in your feed tube and burn tunnel and the lighter bricks would go for your heat riser. Dwell time translates to back drafting ,not good. 5" is more gap than you want at the top of the heat riser , experiment, but 2.5" is normally what is used. You want the turbulence created by the close tolerance to get the secondary burn going as well as the heat pump effect of cooling air sinking down and pulling more hot air up the riser and therefore pushing more heat where you want it.


The 5" gap will be good here has been stated in a lot of the rocket stove books and forums a formula rhat takes into account the area of the gas flow but not the laminar flow of the gases.


For example, an 8 inch system via Pi R2 will give you 50 square inch, the circumference is Pi D, a little bit more than 25 inches. Fifty inches divided by 25 inches is exactly 2 inches for the gap between end riser and the top of the barrel. Mark however, this is the minimum size for such a system according to the book,

The same method goes for a square heat riser, by the way

This example has no compensation FOR LAMINAR flow steam leaving a pipe. It will act the same for a short distance just out side as if the pipe were the pipe extended do to laminar flow on an 8 inch system a 2" gap will be undersized at low pressure ( under 10psi ) the laminar effect will be about 2% of the area For the 8" Pi * R*r / Pi *D + (.02*pi*R*R) 50/25+.02*50=3 for the minimum gap.
I have seen an 8" running into 2 55 Gal. drums stacked 1 above the other with no bench 10" of [pipe @ the floor 5' up 24 " into a brick chimney.
 
gardener
Posts: 3471
Location: Southern alps, on the French side of the french /italian border 5000ft elevation
194
  • Mark post as helpful
  • send pies
    Number of slices to send:
    Optional 'thank-you' note:
  • Quote
  • Report post to moderator
Yep, the top gap can be as big as you want. Look at Peter van den Berg workshop heater


Scott, since you have insulating firebricks, i think you should consider using theses for the whole J tube. But find a way to be able to change a few when the time comes. I've drawn a few iterations for the batch rocket, where a metal box holmds the insulating firebricks without any mortar of any kind. When the times comes, you just unscrew the front, and replace thoses.
 
Scott Slater
Posts: 2
Location: Santa Cruz, CA
  • Mark post as helpful
  • send pies
    Number of slices to send:
    Optional 'thank-you' note:
  • Quote
  • Report post to moderator
Thank you all for the insight and help!

Does anyone have any thoughts on the ash pit at the bottom of the feed tube and the wedge brick at the bottom of the heat riser?

 
Cat talks about fish. Like it needs a fix. This tiny ad told me to never say "fix" to a cat person:
2024 Permaculture Adventure Bundle
https://permies.com/w/bundle
reply
    Bookmark Topic Watch Topic
  • New Topic