|

|
|
|
|

|

|

|
.png)
|

|


 8
8


For all your Montana Masonry Heater parts (also known as) Rocket Mass heater parts.
Visit me at
dragontechrmh.com Once you go brick you will never go back!
11
![[Thumbnail for 20251016_182144.jpg]](/t/360535/a/276370/20251016_182144.jpg "Filename: 20251016_182144.jpg
Description:")
![[Thumbnail for 20251016_182227.jpg]](/t/360535/a/276371/20251016_182227.jpg "Filename: 20251016_182227.jpg
Description:")
![[Thumbnail for 20251016_182415.jpg]](/t/360535/a/276372/20251016_182415.jpg "Filename: 20251016_182415.jpg
Description:")
![[Thumbnail for 20251016_182420.jpg]](/t/360535/a/276373/20251016_182420.jpg "Filename: 20251016_182420.jpg
Description:")
For all your Montana Masonry Heater parts (also known as) Rocket Mass heater parts.
Visit me at
dragontechrmh.com Once you go brick you will never go back!
13

.jpg "Filename: 20251017_102052-(1).jpg
Description: ceramic coated T-bars")
")

.jpg "Filename: 20251017_125252-(1).jpg
Description: 1/4\" superwool")


For all your Montana Masonry Heater parts (also known as) Rocket Mass heater parts.
Visit me at
dragontechrmh.com Once you go brick you will never go back!


 7
7
It is a privilege to live, work and play in the traditional territory of the Salish People.
Now drop and give me 52... ~ Come Join the permies Shoecamp! ~ All about Permies, including Tutorials ---
Twenty bucks off the homesteading bundle for the next 72 hours!

Skill verified by Mike Haasl")

Skill verified by Leigh Tate")

Skill verified by jordan barton") 7
7
regards, Peter
11

For all your Montana Masonry Heater parts (also known as) Rocket Mass heater parts.
Visit me at
dragontechrmh.com Once you go brick you will never go back!

 7
7
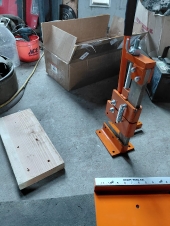
![[Thumbnail for IMG_8243.JPG]](/t/360535/a/276667/IMG_8243.JPG "Filename: IMG_8243.JPG
Description:")
Rocket surgeon and soil builder... healthy plants are all about the soil.
- My 6" Batch Rocket specs and materials list: https://permies.com/t/248275/Batch-Rocket-Double-Skin-Bell
- Batch Rocket detailed build thread with Q&A: https://permies.com/t/238503/Batch-Rocket-Build
8


For all your Montana Masonry Heater parts (also known as) Rocket Mass heater parts.
Visit me at
dragontechrmh.com Once you go brick you will never go back!

|
The longest recorded flight time of a chicken is 13 seconds. But that was done without this tiny ad:
hands on gardening and natural building
https://wheaton-labs.com/bootcamp
|