• Post Reply Bookmark Topic Watch Topic
  • New Topic
permaculture forums growies critters building homesteading energy monies kitchen purity ungarbage community wilderness fiber arts art permaculture artisans regional education skip experiences global resources cider press projects digital market permies.com pie forums private forums all forums
this forum made possible by our volunteer staff, including ...
master stewards:
  • Nancy Reading
  • Carla Burke
  • John F Dean
  • Timothy Norton
  • r ransom
  • Jay Angler
  • Pearl Sutton
stewards:
  • Devaka Cooray
  • Leigh Tate
  • paul wheaton
master gardeners:
  • Christopher Weeks
gardeners:
  • M Ljin
  • thomas rubino
  • Megan Palmer

Structural reinforcement & crack repairs in +100y old Greek house

 
Posts: 4
  • Likes 6
  • Mark post as helpful
  • send pies
    Number of slices to send:
    Optional 'thank-you' note:
  • Quote
  • Report post to moderator
First time here so hello everyone!

We have a house in Greece that is at least 100y old and its built from big (and small) stones with what looks like red sand in between the stones. The sand is very soft and can be rubbed away with the finger very easily. The roof is "new", maybe like 40 years and made from concrete and in good condition, so is the floor. We plan to make an extension to the house and that required excavations on one side of the house. It was made with a rock drill attached to a tractor… The excavation happened very close to the house and naturally removed some plastering from the lower part of the wall, exposing it to rain. And most likely the vibration and changes in support caused some cracks and movement of some stones on the corner of the house.

Now the plan is to fix the cracks, renew the plastering and perhaps most urgently to add some more support to the corner of the house, it looks like it might collapse with more rain and minor earthquakes that happen here occasionally.
What kind of support would you suggest and what kind of materials?

We have an engineer who suggest to drill stainless steel rods to the base rock and the big corner stones, glue them with epoxy and to make a some sort of concrete support to the corner… For the cracks he suggests lime based mortar in a quite liquid form to reach deep in the cracks… Any thoughts on this?

Im very conflicted the engineer, who is an experienced builder, but has very limited experience in this kind of renovation is insisting on using concrete to fix the corner. His logic is that to prevent the outward movement of stones, something very strong is needed. From what I read, natural stone buildings and old sand/claymortar (if its even mortar thats between the stones) don't go well together, but is it really a crucial issue in this case.

I have also been using ChatGPT's "Heritage Sage" gpt (attached), which at least to an untrained eye seems convincing. But as always in important matters it needs a human eye to verify the results. So any comment on this would be valuable.

Thank you in advance!

Filename: NHL-and-structural-support.pdf
File size: 153 Kbytes
1.png
[Thumbnail for 1.png]
2.png
[Thumbnail for 2.png]
 
Posts: 834
Location: Sierra Nevada foothills, 350 m, USDA 8b, sunset zone 7
186
  • Likes 9
  • Mark post as helpful
  • send pies
    Number of slices to send:
    Optional 'thank-you' note:
  • Quote
  • Report post to moderator
It could be repaired in a traditional way by surrounding the wall stones with large stones, use mortar with similar properties and recompact the area around the stones VERY WELL. The original foundation was probably built in a trench of virgin ground, so it was/is surroundad by nature-compacted solid substrate.
Concrete and nice stainless/epoxy would be good too, but at the same time it feels like some incompatible patch. Tieing the old stone with bars and concrete will surely reinforce them, but it may shift the problem to other parts of the wall.

The addition being built will probably have concrete foundation that will reinforce the old wall on entire exposed length. My suggestion would to use the new foundation as the support wall for the old foundation. This way it will mimick the support of the compacted soil that was removed. The less intrusion into a building that is otherwise fine, the better. Also, it's not the building's fault that its surrounding ground was disturbed and damaged something that survived 100 years.
For the cracks I would suggest to use some similar mix. Lime is a wonderful material, but the original mortar is more compatible with the wall.

At the same time I understand that the wet season has started and my suggestion may not work due to time constraints.
 
gardener
Posts: 189
Location: PNW Steppe climate, not far from the big river.
137
2
homeschooling kids solar wood heat homestead
  • Likes 10
  • Mark post as helpful
  • send pies
    Number of slices to send:
    Optional 'thank-you' note:
  • Quote
  • Report post to moderator
Greetings,
I have not worked with stone such as you have (I have done lime-mortar work in soft brick), but I can confirm that Portland-based cement is not compatible with soft lime-based cements, which are typical in century-plus old construction. The Roman pozzolan cements put all modern materials to shame, in spite of being "weaker". Injecting a fine lime/sand glue mortar can be effective, but you do not want to inject at a high pressure (lest you float the joint), and you will get better penetration into the crack with modest vibration (but again, gently).  If the rock is lime-based, which seems likely enough in Greece, lime is more compatible. If the rock is granitic (which I hear happens in some places), then a more aggressive cement might be OK, but I think in all cases, lime would be an acceptable choice.

Epoxy + stainless will indeed create a new load path, which might help, but as Cristobal noted, this is somewhat likely to just shift load paths into unexpected places - as in, it will take a system that relied only on compression and cause some of it to rely on tension and bending (which stone does not like). Gravity compression of adjacent materials is going to develop better distribution of load against the wall. To avoid outward motion of the foundation, you need pressure, not strength, and you want it to be distributed evenly over the older materials. This could be done with concrete buttresses with a backfill against the wall, if you like how they look, or it could probably be done with rock-filled gabions, or other things, but in any case you probably do need to key some reinforcement into the ground/bedrock, so you get shear resistance, whether a footer trench or vertical pins (of steel or concrete), I can't guess from a distance. Cristobal's comment about using the new foundation as the retaining wall to buttress the old is quite reasonable.

I am a PE over here in the US, and for that reason, I urge you to take your engineer seriously, but not too seriously. Don't be shy about asking questions, doing your own research, finding other case studies, and talking them over in a conversational, curious manner. There are very few experts in this kind of thing, but remarkably, old buildings have survived quite a lot of expertise over the years. Keep clear in you head the important distinctions between pressure (distributed loads), forces (point loads), and strength (material properties), and aim for a gradual load path change - ie, a very strong material with high forces embedded in a weak material that requires pressure loads is risky. This sort of thing has a lot in common with putting pins in bone or putting nails in wood than with putting rebar in conventional concrete. The act of drilling for the reinforcement rods could itself cause unexpected problems. The sooner you can protect that exposed footing, though, the better. Godspeed! Kali dynami!

Mark


"Et facta est lux."
 
P.T Heinonen
Posts: 4
  • Likes 5
  • Mark post as helpful
  • send pies
    Number of slices to send:
    Optional 'thank-you' note:
  • Quote
  • Report post to moderator
Hi
Thank you for the valuable insight! Indeed at the moment, time was our enemy, the rain season has started and we also have to leave the island for some weeks. There is quite some irony here as the constraints of modern life force us to deal in days/weeks on something that has stood there for more than 100 years…

So we had to rely on our engineer on this and this is what they did. Its an iron and fiber reinforced concrete wall/case with small inox pins drilled&epoxied in the stones and bedrock, tied together by the concrete. I am a bit worried that this will cause problems elsewhere as you say, Im not sure to which extent the engineer understood this but he was more worried about the structural strength.
Another concern is how the humiditiy of the soil/clay behind this wall behaves. Perhaps its not a big issue on this small area but if, as you suggested and our engineer is planning, the new concrete wall of the extension will cover the exposed area and will work as structural support - what are the potential issues? And of course there will be a wall all the way above the roof of the old building. Considerations are if some kind of bricks that would be somewhat breathable could be used, when the walls are touching each other, what needs to be in between etc…

Perhaps its also worth to note the floor inside the house (concrete) is roughly at the level of the exposed area without plaster except on the right side of the picture where there is a traditional “cellar” i.e 1m deep hole under the bed
5d68b541-3d05-40bc-be0f-a14349c63f16.jpeg
[Thumbnail for 5d68b541-3d05-40bc-be0f-a14349c63f16.jpeg]
IMG_9581.jpeg
[Thumbnail for IMG_9581.jpeg]
IMG_9569.jpeg
[Thumbnail for IMG_9569.jpeg]
 
pollinator
Posts: 5906
Location: Bendigo , Australia
536
plumbing earthworks bee building homestead greening the desert
  • Likes 2
  • Mark post as helpful
  • send pies
    Number of slices to send:
    Optional 'thank-you' note:
  • Quote
  • Report post to moderator
AS a Civil Engineer the images of your work look interesting.
I think it will be effective.
I take it you will be using a lime based plaster elsewhere? Is that correct?
 
P.T Heinonen
Posts: 4
  • Likes 4
  • Mark post as helpful
  • send pies
    Number of slices to send:
    Optional 'thank-you' note:
  • Quote
  • Report post to moderator

John C Daley wrote:AS a Civil Engineer the images of your work look interesting.
I think it will be effective.
I take it you will be using a lime based plaster elsewhere? Is that correct?


Yes, that's the plan. To renew the plastering around the house and inside the house with lime and fill the cracks/voids on the wall with something lime based. This is new to me so all tips are useful regarding materials and technique or reading resources.
 
John C Daley
pollinator
Posts: 5906
Location: Bendigo , Australia
536
plumbing earthworks bee building homestead greening the desert
  • Likes 4
  • Mark post as helpful
  • send pies
    Number of slices to send:
    Optional 'thank-you' note:
  • Quote
  • Report post to moderator
There are good sources of lime plaster mixes on this site.
too many to list, but search carefully and you will find it.
 
Cristobal Cristo
Posts: 834
Location: Sierra Nevada foothills, 350 m, USDA 8b, sunset zone 7
186
  • Likes 5
  • Mark post as helpful
  • send pies
    Number of slices to send:
    Optional 'thank-you' note:
  • Quote
  • Report post to moderator
This is my old post about the lime plaster. I have improved the text a little bit.

This is the mix that I use for compressed earth block, clay brick and concrete.

HOW TO MAKE LIME PUTTY
Ingredients for 20 l bucket:
-12 kg high calcium hydrated lime (make sure it's calcium lime not dolomitic Ca/Mg)
-10 l (more for additions) water
Tools:
-20 l bucket
-lid (if no lid is available then cover with plastic bag/film, then piece of plywood and secure with stone/brick)
-powerful drill with mixing paddle (I use Bosch hammer drill with SDS+ paddle)

Pour water into the bucket and add most of the lime and keep mixing till smooth. Occasionally you have to scrape the walls to reincorporate drier material into the mix that can not be reached by the paddle.
Keep adding the remaining lime and some more water. if needed The consistency should be very smooth, thicker than thick sour cream but a little thinner than cream cheese.
Smooth and level the top with the trowel, cover with 2 cm of water - all putty has to be covered - otherwise uncovered sections will dry.
It takes around 10 minutes to make one bucket of putty. Let it "age" for at least 2 days, so it will be more uniform.


HOW TO DETERMINE SAND TO PUTTY RATIO
Tools;
-sand
-isopropyl alcohol - at least 70 %, the less water the better so it will be less sticky
-measuring cup with 250 ml mark

Collect 250 ml of the sand you are going to use. It has to be completely dry. If not dry, then bake it in the oven. Fill the measuring cup with sand to 250 ml mark. Put it on a level surface. Start adding alcohol with a measuring spoons till the surface of sand is wet, but NOT more. Record the volume of alcohol added.
The volume of alcohol added to the volume of sand is your putty to sand ratio. For my sand it is 1:2.2.


HOW TO MAKE THE PLASTER MIX
To a wheelbarrow or mixing tray add sand and lime putty in the determined ratio Keep mixing. It will seem way too dry and you will be tempted to add a lot of water, but add only a little bit - a cup or few cups and keep mixing till smooth and uniform. Then you can add more water for desired consistency. At this moment you may add pozzolan (ash, pumice, ground bricks) and fibers. I add rice straw, cut to length no longer than 3 cm - 10% of sand volume used for the plaster.
Please remember to always smooth the top of remaining putty and cover with water and a lid.

One 20 l bucket of putty (12 kg of dry lime) is enough to plaster 5 m2 of wall (plaster thickness 10 mm).
Before plastering clean the wall, brush it, and whitewash with the putty+water mix (creamer consistency). It will create an interface for the plaster layer. It's important - especially when plastering adobe/cob.
When the whitewash solidifies after at least 24 hours, then spray with water and start plastering.
Protect the lime plaster from direct sun/high heat and temperatures lower than 5 C
Keep spraying the plaster with mist of water for a few days. In hot dry climates you may want to spray at least 3-4 times per day for 5 days. I recommend using large sprayer with a hose. The bottle sprayers are too small for larger jobs, have lower pressure and less capacity.

For larger jobs it helps tremendously to buy some used food grade barrel for mixing the putty. It took me 25 minutes to make putty from 70 kg of lime. If I did it in 20 l buckets I would spend over an hour.

I have not tried adding pozzolan yet. I have a pallet of extra fine pumice and I'm going to use it on exterior walls of my house.
 
P.T Heinonen
Posts: 4
  • Likes 1
  • Mark post as helpful
  • send pies
    Number of slices to send:
    Optional 'thank-you' note:
  • Quote
  • Report post to moderator
Thank you for this. Considering my inexperience, would you recommend this or ready made NHL 3.5 for this renovation job?


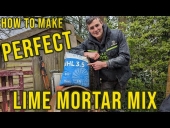
Cristobal Cristo wrote:This is my old post about the lime plaster. I have improved the text a little bit.

This is the mix that I use for compressed earth block, clay brick and concrete.

HOW TO MAKE LIME PUTTY
Ingredients for 20 l bucket:
-12 kg high calcium hydrated lime (make sure it's calcium lime not dolomitic Ca/Mg)
-10 l (more for additions) water
Tools:
-20 l bucket
-lid (if no lid is available then cover with plastic bag/film, then piece of plywood and secure with stone/brick)
-powerful drill with mixing paddle (I use Bosch hammer drill with SDS+ paddle)

Pour water into the bucket and add most of the lime and keep mixing till smooth. Occasionally you have to scrape the walls to reincorporate drier material into the mix that can not be reached by the paddle.
Keep adding the remaining lime and some more water. if needed The consistency should be very smooth, thicker than thick sour cream but a little thinner than cream cheese.
Smooth and level the top with the trowel, cover with 2 cm of water - all putty has to be covered - otherwise uncovered sections will dry.
It takes around 10 minutes to make one bucket of putty. Let it "age" for at least 2 days, so it will be more uniform.


HOW TO DETERMINE SAND TO PUTTY RATIO
Tools;
-sand
-isopropyl alcohol - at least 70 %, the less water the better so it will be less sticky
-measuring cup with 250 ml mark

Collect 250 ml of the sand you are going to use. It has to be completely dry. If not dry, then bake it in the oven. Fill the measuring cup with sand to 250 ml mark. Put it on a level surface. Start adding alcohol with a measuring spoons till the surface of sand is wet, but NOT more. Record the volume of alcohol added.
The volume of alcohol added to the volume of sand is your putty to sand ratio. For my sand it is 1:2.2.


HOW TO MAKE THE PLASTER MIX
To a wheelbarrow or mixing tray add sand and lime putty in the determined ratio Keep mixing. It will seem way too dry and you will be tempted to add a lot of water, but add only a little bit - a cup or few cups and keep mixing till smooth and uniform. Then you can add more water for desired consistency. At this moment you may add pozzolan (ash, pumice, ground bricks) and fibers. I add rice straw, cut to length no longer than 3 cm - 10% of sand volume used for the plaster.
Please remember to always smooth the top of remaining putty and cover with water and a lid.

One 20 l bucket of putty (12 kg of dry lime) is enough to plaster 5 m2 of wall (plaster thickness 10 mm).
Before plastering clean the wall, brush it, and whitewash with the putty+water mix (creamer consistency). It will create an interface for the plaster layer. It's important - especially when plastering adobe/cob.
When the whitewash solidifies after at least 24 hours, then spray with water and start plastering.
Protect the lime plaster from direct sun/high heat and temperatures lower than 5 C
Keep spraying the plaster with mist of water for a few days. In hot dry climates you may want to spray at least 3-4 times per day for 5 days. I recommend using large sprayer with a hose. The bottle sprayers are too small for larger jobs, have lower pressure and less capacity.

For larger jobs it helps tremendously to buy some used food grade barrel for mixing the putty. It took me 25 minutes to make putty from 70 kg of lime. If I did it in 20 l buckets I would spend over an hour.

I have not tried adding pozzolan yet. I have a pallet of extra fine pumice and I'm going to use it on exterior walls of my house.

 
Cristobal Cristo
Posts: 834
Location: Sierra Nevada foothills, 350 m, USDA 8b, sunset zone 7
186
  • Likes 2
  • Mark post as helpful
  • send pies
    Number of slices to send:
    Optional 'thank-you' note:
  • Quote
  • Report post to moderator

P.T Heinonen wrote:Thank you for this. Considering my inexperience, would you recommend this or ready made NHL 3.5 for this renovation job?


It will work.
NHL in US ix prohibitively expensive (+ shipping cost), so I provided a universal recipe for high calcium lime (3 times cheaper and no shipping cost), to which pozzolanic agent (calcined clay, brick powder, pumice) can be added to make hydraulic lime.
 
Stop it! You're embarassing me! And you are embarrassing this tiny ad!
Learn Permaculture through a little hard work
https://wheaton-labs.com/bootcamp
reply
    Bookmark Topic Watch Topic
  • New Topic