• Post Reply Bookmark Topic Watch Topic
  • New Topic
permaculture forums growies critters building homesteading energy monies kitchen purity ungarbage community wilderness fiber arts art permaculture artisans regional education skip experiences global resources cider press projects digital market permies.com pie forums private forums all forums
this forum made possible by our volunteer staff, including ...
master stewards:
  • Nancy Reading
  • Carla Burke
  • r ranson
  • John F Dean
  • paul wheaton
  • Pearl Sutton
stewards:
  • Jay Angler
  • Liv Smith
  • Leigh Tate
master gardeners:
  • Christopher Weeks
  • Timothy Norton
gardeners:
  • thomas rubino
  • Jeremy VanGelder
  • Maieshe Ljin

4.3m² of isa in a single barrel?

 
gardener
Posts: 3471
Location: Southern alps, on the French side of the french /italian border 5000ft elevation
194
  • Likes 1
  • Mark post as helpful
  • send pies
    Number of slices to send:
    Optional 'thank-you' note:
  • Quote
  • Report post to moderator
By doing it this way! about half and half quick heat and storage. 181kg of firebrick. But heated at high temps. I wonder how long it would hold heat.

brickfins.jpg
[Thumbnail for brickfins.jpg]
Filename: brickfins.skp
File size: 66 Kbytes
 
gardener
Posts: 1054
Location: +52° 1' 47.40", +4° 22' 57.80"
447
woodworking rocket stoves wood heat
  • Mark post as helpful
  • send pies
    Number of slices to send:
    Optional 'thank-you' note:
  • Quote
  • Report post to moderator
Yes, it can be done this way. But you have to invent some method to stack those bricks and keep it stable. Bottoms of barrels are flexible because there's a rim around the perimeter so it will prove difficult to even stack three bricks like that.

I'm sorry Max, I hate it being a spoil-sport.
 
Satamax Antone
gardener
Posts: 3471
Location: Southern alps, on the French side of the french /italian border 5000ft elevation
194
  • Mark post as helpful
  • send pies
    Number of slices to send:
    Optional 'thank-you' note:
  • Quote
  • Report post to moderator

Peter van den Berg wrote:Yes, it can be done this way. But you have to invent some method to stack those bricks and keep it stable. Bottoms of barrels are flexible because there's a rim around the perimeter so it will prove difficult to even stack three bricks like that.

I'm sorry Max, I hate it being a spoil-sport.


Don't worry Peter, i knew this was comming. I was thinking about holding thoses with a rebar hoop, which would stay springy.

You think it's enough for an 8 incher J? The tube i'm planning to use outside of the heat riser is 30cm, and the gap between two opposite bricks is 36. I might have too tight a tolerance in side gaps.

Thanks.

Max.
 
                    
Posts: 238
Location: AR ~ozark mountain range~zone7a
9
  • Mark post as helpful
  • send pies
    Number of slices to send:
    Optional 'thank-you' note:
  • Quote
  • Report post to moderator
I don't see where the exhaust/ash can flow at the bottom, if the brick are stabilized/connected to the heat riser, & retained by the barrel on the outside circumference. The title of this thread, indicates that the brick are inside the barrel..."in a single barrel".

If it is true that the brick are inside the barrel, and if, the bottom course of brick where notched or modified to allow exhaust flow, the baffling effect of modified bricks would drastically disrupt exhaust air flow, to what extent, I do not know.

james beam
 
Satamax Antone
gardener
Posts: 3471
Location: Southern alps, on the French side of the french /italian border 5000ft elevation
194
  • Mark post as helpful
  • send pies
    Number of slices to send:
    Optional 'thank-you' note:
  • Quote
  • Report post to moderator
James, it's a quick sketchup drawing.

The plan is to remove two bricks at the bottom and lay one flat over the remaining ones to make a portal big enough for the exhaust tube. The bricks won't touch the heat riser. The gap will be small, at about 1" 1/4 But there's room for the gases to flow in between the bricks too. It's just at the bottom that it might cause a bit of trouble. Tho i have nearly 40' of chimney above!
 
Peter van den Berg
gardener
Posts: 1054
Location: +52° 1' 47.40", +4° 22' 57.80"
447
woodworking rocket stoves wood heat
  • Mark post as helpful
  • send pies
    Number of slices to send:
    Optional 'thank-you' note:
  • Quote
  • Report post to moderator
OK then, it could be done with a couple of hoops and pins sticking out all around to keep the bricks adequately spaced. No problem with the gap between the bricks and the riser insulation canister, though. The gaps between the bricks are about 0.01 m2 each and you've got 13 of those. Really plenty of space I would think. The riser does need a generous top gap of at least 8 cm in order to get the gases between the bricks but that's alright.

However, James made a sensible remark about the exhaust side of this. The side gap is far too cramped to act as a manifold so you have to create one, and leaving out one brick in the row isn't enough. Leaving out two bricks would create an opening in the side of 18 x 22 cm. Because the opening is right at the bottom three sides are usable for the stream profile, or ring projection as you wish, which totals up to 62 cm, multiplied by the side gap of 3.175 cm would give you... 196.85 cm2. This is still too cramped, even for a 6" system, because there's still a lot of friction at that spot.

This could be alleviated by keeping the bridging of the bricks as open as possible but I don't know whether this would be enough. Is it possible to build the thing in 1.5 barrel? You've got some slack, the maximum in this case is around 5.5 m2 I'd think. Then it would be possible to have the bricks stacked another way at the lower region in order to get room enough.
 
                    
Posts: 238
Location: AR ~ozark mountain range~zone7a
9
  • Mark post as helpful
  • send pies
    Number of slices to send:
    Optional 'thank-you' note:
  • Quote
  • Report post to moderator
Your idea is to build mass into the barrel, because you won't be using the typical cob bench as mass?

Your application might use a direct exhaust to the chimney? Therefore you need mass/fins in the barrel to cool off the exhaust as quickly as possible, for the sake of preventing heat loss out the chimney?

It is an interesting idea holding absorbed heat within the barrel, I don't think there is any doubt that built-in mass will do it's purpose, to radiate heat long after the fire is out, and compliment radiant heat from the insulated burn tunnel.

I think manually blocking off the chimney after the system is completely flushed of poisonous gases, was shown on 'Wheaton's office rocket' to be a good way to allow the thing to radiate heat after the fire is out.

In addition to our rebar hoops, you might think about welding to the barrel some vertical steel support 'channels' for your brick. I guess your idea is to build the brickwork within the barrel first, then flip the heavy assembly and lower in place?....sounds like a back breaker.

james beam
 
Satamax Antone
gardener
Posts: 3471
Location: Southern alps, on the French side of the french /italian border 5000ft elevation
194
  • Mark post as helpful
  • send pies
    Number of slices to send:
    Optional 'thank-you' note:
  • Quote
  • Report post to moderator
Peter, may be something along thoses lines?

With the horizontal brick cut to conform to the barrel, and have an equal gap. (i can get some 4.5x17x50cm slabs of firebricks)

James, you get it mostly. But i will use a barrel with a lid! I'm not that daft to think i can turn over a 181kg barrel! Obviously blocking the feed after fire has stoped! My chimney has soo much draft that i wouldn't even think about it otherwise. It's up to the point i might consider chocking the system with a 4 inch tube out of the barrel, to avoid having too much draft.

Filename: brickfins2.skp
File size: 74 Kbytes
 
                    
Posts: 238
Location: AR ~ozark mountain range~zone7a
9
  • Mark post as helpful
  • send pies
    Number of slices to send:
    Optional 'thank-you' note:
  • Quote
  • Report post to moderator
Ohhhhhh I never meant to imply you are daft. Speaking of daft, I never considered a drum with a lid. (ya I'm kina stubborn like that, flipping and trying to not dislodge anything, and ya I have a worn out back)

Ok now I'm trying to catch where your going with this, how about simply cut some pie shaped holes in the bottom, along the perimeter of the drum (along with a big hole in the center for the heat riser) to correspond with the flues created by the brickfins. Then weld an exhaust manifold (about the size of the drum, and need only be a spacer about 6"-8" tall, for the exhaust/ash to settle into. In this way the brickwork is supported by the metal bottom, and allowed for direct flow right out the bottom. If ya get real tricky with the 6-8" spacer/manifold, you might install an ash clean out door.

How come you don't want your brickfins to connect/heat conductivity to the heat riser? Concentrating the exhaust flow in between the brickfins, will choke your exhaust flow somewhat, but you sort of wanted a choked down flow model anyway...so there is that!

james beam
brickfin-support.jpg
[Thumbnail for brickfin-support.jpg]
 
Posts: 2413
48
  • Mark post as helpful
  • send pies
    Number of slices to send:
    Optional 'thank-you' note:
  • Quote
  • Report post to moderator
I have written this several times...and each time it comes across and "snooty", "high brow" or "Proffessorly."

Oh Well, take it for what it is worth and understand I don't mean any offense toward anyone.

Here we go...

One of the issues I have had with RMH conceptual from the beginning is the thought that someone that they had done this first and was inventing something "new, bold and improved." I don't even like the name RMH...

RMH really are just simply masonry heaters of a more horizontal variant ....and...I love what Satamax just suggest in this thread as it really illustrates my point.

Not only is this achievable Satamax...it is very much like (if not close to identical) to channeling in many of the Finnish masonry heater cores. Laying brick (or Steatite) in this format is more than achievable but is not moving from the "novice" build that so many are (sometime dangerously) experimenting with...into the realm of Master Mason of kiln, oven and Masonry stove.

I can think of a half dozen varieties of this, the modalities for laying and even methods for getting rid of the barrel...yet...if I did that it would be just another "excellent" masonry heater.

I think you would love what you achieved with this Satamax...you should build one...yet again...I think you should really study more about traditional kilns and masonry heaters...I think then you would really begin to understand some of my points about RMH.

Good luck with it...Great idea!!!
 
Jay C. White Cloud
Posts: 2413
48
  • Mark post as helpful
  • send pies
    Number of slices to send:
    Optional 'thank-you' note:
  • Quote
  • Report post to moderator
I have tried writing this post entry several times...and each time it comes across as "snooty", "high brow" or "Proffessorly."

Oh Well, take it for what it is worth and understand I don't mean any offense toward anyone.

Here we go...

One of the issues I have had with RMH conceptually from the beginning is the thought that someone thought they had done this first and was inventing something "new, bold and improved." I don't even like the name RMH...

RMH really are just simply masonry heaters of a more horizontal variant ....and...I love what Satamax just suggest in this thread as it really illustrates my point.

Not only is this achievable Satamax...it is very much like (if not close to identical) to channeling in many of the Finnish masonry heater cores. Laying brick (or Steatite) in this format is more than achievable but is now moving from the "novice" skill set in building that so many are (sometime dangerously) experimenting with...into the realm of Master Mason of kiln, oven and Masonry stove.

I can think of a half dozen varieties of this, the modalities for laying and even methods for getting rid of the barrel...yet...if I did that it would be just another "excellent" masonry heater.

I think you would love what you could achieve in building like this Satamax...you should build one...yet again...I think you should really study more about traditional kilns and masonry heaters...I think then you would really begin to understand some of my points about RMH not really being that unusual, new or unique...

Good luck with it...Great idea!!!
 
Peter van den Berg
gardener
Posts: 1054
Location: +52° 1' 47.40", +4° 22' 57.80"
447
woodworking rocket stoves wood heat
  • Mark post as helpful
  • send pies
    Number of slices to send:
    Optional 'thank-you' note:
  • Quote
  • Report post to moderator
Max,
The idea of James is a nice one although a bit complicated to make.
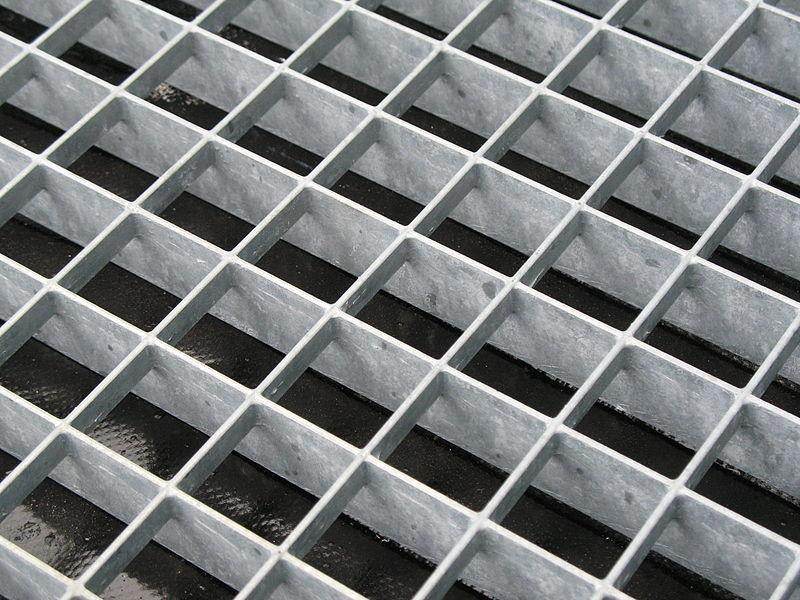
Alternatively, you could start with a barrel, make a grid shelf about 8" from the bottom. Something like the press grid things used for emergency stairs for example, those are very sturdy things. There you have your manifold, from there it's dead easy to exhaust in any direction. It's even possible to place the rocket on that same platform.

This way it's easy to extend the heater with another barrel.

And Jay C. White Cloud is right, this is yet another one of the contraflow heaters.
 
Satamax Antone
gardener
Posts: 3471
Location: Southern alps, on the French side of the french /italian border 5000ft elevation
194
  • Mark post as helpful
  • send pies
    Number of slices to send:
    Optional 'thank-you' note:
  • Quote
  • Report post to moderator
Thanks a lot to all of youses guys!

Well, instead of pipe dreams, i've done this!

Goten rid of the flat's table. Put the buffet (is that right for a piece of furniture holding plates, cutlery and pans? ) on the other side from where it was previously. Anc chucked that in!

Does that one seem familiar to some?
WP_000964.jpg
[Thumbnail for WP_000964.jpg]
 
                    
Posts: 238
Location: AR ~ozark mountain range~zone7a
9
  • Mark post as helpful
  • send pies
    Number of slices to send:
    Optional 'thank-you' note:
  • Quote
  • Report post to moderator
That old wood burning cookstove looks like it will work just fine... for now, satamax. :) But I was having so much fun 'pipe dreaming'! I must admit I was thinking in my last post...hummm there are probably a million different ways to do this, and I thought it rather fun, to just throw suggestions out there, mainly for my own amusement. Even tho the subject is somewhat serious, as various stove projects seem urgent when facing the winter months.

I walk outside as sleet is currently bouncing off my house, watch the lack of smoke from my chimney outside. I look inside the house at the orange, blue flames, and coals, and I'm always happy to make suggestions that might retain useable heat as compared to the 'norm' of simply wasting resource out the chimney. And if I can help one guy, one family, and know, that the old dead snag that must come down will get used as wisely as the stout 90 year old oak that still remains for a future generation to enjoy, so I make a suggestion or a picture now & then, just for fun.

And thanks to Peter for the grill suggestion, which does indeed look quite substantial, & effective even within the fairly hot working environment. I suppose the steel grill recessed within the barrel 8", is a valuable suggestion. So out of a million different ways to do this, there are a few personal, functional, fun suggestions based on nothing but the problem at hand.

Hi JC Whitecloud, your posts are always welcome, your perspective is valuable & sound. You always come off as 'snooty', high brow, & proffessorly'!!! hahaha, and I'm glad your here at Permies, you make me listen intently as if I had just heard the shake of a turtle shell rattle. And by the way JC Whitecloud, you don't like the name RMH, and I don't like the secondary burn notion, and yet when we work hard at it, both those things generate interest.


james beam


pollinator
Posts: 293
Location: US, East Tennessee
34
  • Mark post as helpful
  • send pies
    Number of slices to send:
    Optional 'thank-you' note:
  • Quote
  • Report post to moderator
Max, is that the cook stove you modified by building in a rocket burner / riser?
 
Satamax Antone
gardener
Posts: 3471
Location: Southern alps, on the French side of the french /italian border 5000ft elevation
194
  • Mark post as helpful
  • send pies
    Number of slices to send:
    Optional 'thank-you' note:
  • Quote
  • Report post to moderator

Byron Campbell wrote:Max, is that the cook stove you modified by building in a rocket burner / riser?


http://donkey32.proboards.com/thread/1216/new-range-candidate-rocket-retrofitSome pics start missing! Blady facebouc!
 
Byron Campbell
pollinator
Posts: 293
Location: US, East Tennessee
34
  • Mark post as helpful
  • send pies
    Number of slices to send:
    Optional 'thank-you' note:
  • Quote
  • Report post to moderator
Nice job!
 
Satamax Antone
gardener
Posts: 3471
Location: Southern alps, on the French side of the french /italian border 5000ft elevation
194
  • Mark post as helpful
  • send pies
    Number of slices to send:
    Optional 'thank-you' note:
  • Quote
  • Report post to moderator
So, up and running.

Just shedding way too much heat to the great outdoors!

http://www.youtube.com/watch?v=Ih8SbghZtD0&feature=youtu.be


Two options, i have a barrel burned, but not cleaned.

Do i run a pipe horizontaly to the top of the barrel to the left of the range, do a top entry, a plunger tube and fill that with firebricks?

Or do i use the all ready made 35kg gas bottle bell i have somewhere, in need of sanding. And pile up the bricks around? All that on top of the range!

The grey one on the left.


Posts: 238
Location: AR ~ozark mountain range~zone7a
9
  • Mark post as helpful
  • send pies
    Number of slices to send:
    Optional 'thank-you' note:
  • Quote
  • Report post to moderator
You might try an 'insulated chimney pipe' like those stainless steel ones that are filled with asbestos, those retain a good amount of heat. You can make your own, simply put a 4" pipe inside an 7" pipe and fill in the void with dirt or ash. (Since your piping your way over to some sort of auxiliary heat absorber unit.)

I couldn't see any of the build pixs over at donkey, just the videos. It looks like you have an 1-1/4" air hole (that you were flicking your bic at) that pipes over into the heat riser.(which I guess your trying to add air for a leaner burn? maybe it 'T' into the firebox to pickup syngas?) {is this true? yes or no}

I like your cooktop just above the heat riser, that must get really hot, fast, but it seems like your hot air flow after the heat riser must circulate in various directions thru-out the rest of the stove? Must the oven remain functional for cooking? I was thinking maybe you could just fill the rest of the stove with fluted mass, which might be more practical than having a working oven, by directing the heat flow thru specific channels (brickfins) before it exits the stove. Simply filling the oven with brick, should retain a good amount of heat.

As a side note, I think if your trying to get your cook top really hot, on a small amount of wood, you will probably need a blower in the firebox to create a kind of forging influence.

Ya the plunge thing into a barrel should work.

james beam
 
Satamax Antone
gardener
Posts: 3471
Location: Southern alps, on the French side of the french /italian border 5000ft elevation
194
  • Mark post as helpful
  • send pies
    Number of slices to send:
    Optional 'thank-you' note:
  • Quote
  • Report post to moderator
James, the hole in front is a Peter channel. Going above the port in the firebox. Bringing preheated fresh air to that point.

Removing the base plate of the oven and filling it with bricks is next on the list, that was for sure. As well as filling the tray holder at the bottom. Tho, this last one will only gather heat via conduction.

I will make a microbell in the chimney flue. At about one more square metre (10.76sqft) Still, i'm far from the 44sqft that this thing could power. I'd rather not insulate the pipe, but lerave it to shed heat in the room!
 
Satamax Antone
gardener
Posts: 3471
Location: Southern alps, on the French side of the french /italian border 5000ft elevation
194
  • Mark post as helpful
  • send pies
    Number of slices to send:
    Optional 'thank-you' note:
  • Quote
  • Report post to moderator
I've done the mods, added about 10sqft contraflow or bell (top entry, bottom exit.)

It's 26C° now in the flat, and it's blady too hot. That cast iron top dissipates way too much!

Now, lighting goes fast!

WP_000972.jpg
[Thumbnail for WP_000972.jpg]
Grid replacing the oven
WP_000973.jpg
[Thumbnail for WP_000973.jpg]
Couldn
WP_000974.jpg
[Thumbnail for WP_000974.jpg]
bottom tray
WP_000983.jpg
[Thumbnail for WP_000983.jpg]
first row of bricks
WP_000984.jpg
[Thumbnail for WP_000984.jpg]
second row of bricks. Third one isn
WP_000985.jpg
[Thumbnail for WP_000985.jpg]
trying to make the oven gastight.
WP_000977.jpg
[Thumbnail for WP_000977.jpg]
Top of the plunger tube, with the rockwool ceiling.
WP_000980.jpg
[Thumbnail for WP_000980.jpg]
Bottom of the plunger tube, with a brick spacer.
WP_000988.jpg
[Thumbnail for WP_000988.jpg]
Watertank, gonna be filled with bricks too.
WP_000975.jpg
[Thumbnail for WP_000975.jpg]
Plunger tube. In several parts, otherwise, it wouldn
WP_000987.jpg
[Thumbnail for WP_000987.jpg]
Ready to light.
 
No prison can hold Chairface Chippendale. And on a totally different topic ... my stuff:
Free Heat movie
https://freeheat.info
reply
    Bookmark Topic Watch Topic
  • New Topic