• Post Reply Bookmark Topic Watch Topic
  • New Topic
permaculture forums growies critters building homesteading energy monies kitchen purity ungarbage community wilderness fiber arts art permaculture artisans regional education skip experiences global resources cider press projects digital market permies.com pie forums private forums all forums
this forum made possible by our volunteer staff, including ...
master stewards:
  • Nancy Reading
  • Carla Burke
  • r ranson
  • John F Dean
  • paul wheaton
  • Pearl Sutton
stewards:
  • Jay Angler
  • Liv Smith
  • Leigh Tate
master gardeners:
  • Christopher Weeks
  • Timothy Norton
gardeners:
  • thomas rubino
  • Jeremy VanGelder
  • Maieshe Ljin

Vermicompost texture question

 
Posts: 17
  • Likes 1
  • Mark post as helpful
  • send pies
    Number of slices to send:
    Optional 'thank-you' note:
  • Quote
  • Report post to moderator
Hi everyone,
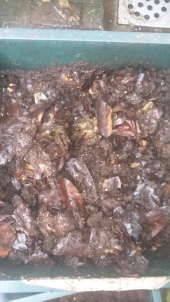
My red wigglers survived the winter in a cold garage, on a diet of mostly coffee grounds and shredded newspaper. And the occasional banana peel. I was expecting the end result to be crumbly - like good, humus-rich soil; but instead I find the castings to be rather sticky, like clay. There are no "off" smells that I can detect - I don't think it went anaerobic. Is this a cause for concern? Did I not harvest soon enough? Thanks in advance for any input.
 
pollinator
Posts: 11853
Location: Central Texas USA Latitude 30 Zone 8
1261
cat forest garden fish trees chicken fiber arts wood heat greening the desert
  • Likes 3
  • Mark post as helpful
  • send pies
    Number of slices to send:
    Optional 'thank-you' note:
  • Quote
  • Report post to moderator
That is my exact experience. The worm castings are very dense and claylike.

 
Carl Trotz
Posts: 17
  • Mark post as helpful
  • send pies
    Number of slices to send:
    Optional 'thank-you' note:
  • Quote
  • Report post to moderator

That is my exact experience. The worm castings are very dense and claylike.


Thanks! That's good to know. I can stop worrying now that I did something wrong...
 
pollinator
Posts: 288
Location: Mason Cty, WA
41
trees books cooking food preservation writing homestead
  • Mark post as helpful
  • send pies
    Number of slices to send:
    Optional 'thank-you' note:
  • Quote
  • Report post to moderator
I've been bin vermicomposting for four months, feeding a lot of vegetable scraps, bananapeels, yerba mate, coffeegrounds, juicer pulp, and pulverized eggshells. My finished bin vermicompost is also kind of clayey and, though it smells fine, clumps in big balls and doesn't mix well into soil, or have the instantaneous magical rejuvenative effects of outdoor earthworm compost. I'll be happy to return to the earthwormed compost, unless I'm doing something wrong.
 
gardener
Posts: 522
Location: Sierra Nevadas, CA 6400'
201
4
hugelkultur dog trees woodworking
  • Likes 3
  • Mark post as helpful
  • send pies
    Number of slices to send:
    Optional 'thank-you' note:
  • Quote
  • Report post to moderator
Two things to keep in mind about vermicomposting:

1. The type of system you use will have a dramatic effect on the texture of the overall product. Flow through systems produce the best texture, allowing for a 100% aerobic environment, while plastic bin systems often lean toward anaerobic environments.

2. The materials you use to vermicompost also have a significant effect on the texture of the overall product. Most commercial producers prefer horse, cow, or pig manure to produce their vermicompost, and those materials will always make the best castings (in terms of texture and effectiveness). Food waste is often toward the "low end" of materials.

That being said, a plastic bin system fed with food scraps will still make excellent vermicompost! But might require some extra post-processing to get the nice crumbly texture you're used to from commercial growers. I'd suggest drying out the castings, and optionally screening them depending on how much you care about the texture. To dry them, spread out the castings in a shallow tub and break them up every couple of days with a hand fork. You don't want the castings to get dry, so you want this to be a slow process. You're just looking to remove excess moisture. Once they reach a wetness somewhere around a lightly damp sponge, you can screen them. To do this, staple on some 1/4" hardware cloth onto a square frame and dump some castings on top. Shake back and forth, and the vermicompost that falls through the hardware cloth will be a nice, uniform texture.

You won't see any negative effects from using clayey castings, but the effectiveness of the vermicompost will definitely improve if you allow them to dry out and reach a more aerobic environment.

You might also look into removing excess moisture from your bin system. The worms can tolerate a very wet environment, but the best castings come from an entirely aerobic environment. It might be as simple as removing the lid and replacing it with cloth, or drilling some more drainage holes (especially toward the bottom), or just adding more bedding (more bedding never hurts!).
 
Carl Trotz
Posts: 17
  • Mark post as helpful
  • send pies
    Number of slices to send:
    Optional 'thank-you' note:
  • Quote
  • Report post to moderator
Kyle,
Thank you for the information. Maybe I'll try a flow through system next.
 
pollinator
Posts: 459
Location: 18 acres & heart in zone 4 (central MN). Current abode: Knoxville (zone 6 /7)
53
dog books urban bike
  • Likes 2
  • Mark post as helpful
  • send pies
    Number of slices to send:
    Optional 'thank-you' note:
  • Quote
  • Report post to moderator
My vermicompost worms have been going for five years now and have never made crumbly textured material.

I think commercial producers make a product that looks a certain way because that's what consumers expect. Kind of like red delicious apples, only they make black and delicious looking compost. (Though the vermicompost probably tastes better than red delicious apples.)

Commercial producers also have to be able to label their vermicompost with nutrient levels. That means it needs to be fairly consistent. And those labels have to meet consumers' expectations and look good lined up against the competition.

All that means they do things a certain way to get that commercially viable result.

Compare what comes out of an old manure pile to bagged up and sold "composted ruminant manure" and you see something similar. The bagged up manure is crumbly and spreads easily. The bagged stuff is much less lumpy and chunky than the natural stuff, and very consistent throughout. That's the result of processing and addition of material to achieve a result.

As Kyle says, there's nothing wrong with using your clayey textured vermicompost. When you put your vermicompost on your garden, it will melt into to the soil as the organic material breaks down further. Then your plants will thank you.
 
Posts: 1
  • Mark post as helpful
  • send pies
    Number of slices to send:
    Optional 'thank-you' note:
  • Quote
  • Report post to moderator

Carl Trotz wrote:Hi everyone,
  My red wigglers survived the winter in a cold garage, on a diet of mostly coffee grounds and shredded newspaper.  And the occasional banana peel.  I was expecting the end result to be crumbly - like good, humus-rich soil; but instead I find the castings to be rather sticky, like clay.  There are no "off" smells that I can detect - I don't think it went anaerobic.  Is this a cause for concern?  Did I not harvest soon enough?  Thanks in advance for any input.


You can get a super nice and crumbly texture if you add one handful of commercial compost when emptying the caddy.
I tried using garden soil (mine is clay), but the worm compost felt like clay too.
 
Posts: 2
Location: Philadelphia
urban bee ungarbage
  • Mark post as helpful
  • send pies
    Number of slices to send:
    Optional 'thank-you' note:
  • Quote
  • Report post to moderator
Commercial vermicompost producers typically pre-compost their feedstocks, and then dry and screen their end product to make it uniform and shelf-stable.  There are often a lot of aging steps involved as well - the feedstocks (such as manure) may be aged before being fed to the worms, and the vermicompost may be aged before sale as well.  I don't see anything to criticize in this, but home vermicomposting has a different process with different aims, so naturally a different result.

My biggest challenges with home-produced vermicompost are that the end product is initially very wet and sticky, like heavy lumps of clay, and that the finished vermicompost has a lot of worms and worm cocoons in it, despite efforts to separate the worms via various methods.  Drying and hand-screening help a lot with the first problem.  When the worm bin is indoors, the drying step can be more challenging - I find it goes a lot faster in warm breezy weather outside, whereas indoors I'd have to plug in fans and so forth to get more air circulation, and I dislike the extra hassle and electricity use.  Hand-screening is labor intensive, and aging the vermicompost until all of the worm eggs have hatched and the worms can be baited out into material with fresh food, is also burdensome.  So I only process a portion of my vermicompost this way - and use that portion exclusively for my container plants.*  The wetter, lumpier stuff that still has worms and cocoons in it can go straight into my garden, although big lumps generally shouldn't be allowed to sit on the soil surface and dry out because they become hard as rock.

(*Live red wigglers in container plants cause problems.  In my experience, they can live in a plant pot a remarkably long time, and their continual reprocessing of the planting mix means the roots of the plant cannot grow.  Either the worms are eating the fine roots outright, or their constant digging is constantly killing those roots - either way, the result is the same.  When I finally realize what's happening and tip the pot out, I get a stunted plant with a tiny root mass out of the top of the pot, and the rest of the potting mix is soggy and gooey and falls apart because it's been re-eaten by worms continually.  This has happened to me with small houseplants as well as sizeable container plants outside.)

Another approach to over-wet vermicompost is to use a more breathable bin system - either wood, or one of the newer breathable fabric flow-through bins.  I have a commercially made, stacking tray system currently and am constantly frustrated with the amount of moisture it retains.  I never spray water in the bin or soak the bedding - all the water comes from the kitchen scraps that are my main feedstock, and it naturally seeps downward through the trays and keeps the oldest trays quite wet.  I am contemplating getting a more breathable system.  I have also come to the conclusion that too much moisture in the lower trays contributes a lot to the problem of worm cocoons in the finished product, because the worms like to lay their eggs in those soggy lower layers when they're available.

I know I'm responding to a thread that is several years old, but all this is fresh in my mind because I just read the excellent "Worm Farmer's Handbook" by Rhonda Sherman of NC State, which gives a lot of info about how large-scale commercial and institutional worm farms operate.  Most of it is not directly applicable to my own very small-scale, personal vermicomposting, but I take an interest anyway.
 
pollinator
Posts: 981
Location: New Brunswick, Canada
244
duck tiny house chicken composting toilet homestead
  • Mark post as helpful
  • send pies
    Number of slices to send:
    Optional 'thank-you' note:
  • Quote
  • Report post to moderator
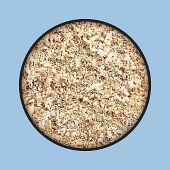
I've had somewhat the same experience with most of my vermicompost and I've found that it pays to keep it aerobic, like Kyle says.  I have gotten the crumbly texture from composting well aged quail manure in pine shavings bedding and chicken manure in the same bedding, which make sense as it's got a lot more air spaces than paper.  With the bird manure, I made sure to leave at least a quarter bin of cardboard/paper bedding with veggie scraps as a refuge from the hot bedding and, while it took longer, it sure made great vermicompost.  I find corrugated cardboard works very well for bedding; much better than paper.  The worms sure love those tunnels.

There's a commercial vermicompost company a 40 minute drive from where I'm moving and, while it's farther than I want to drive, I'm thinking I'll apply for a job there because, hey, who doesn't want to work with worm poop for a living?  If I do, and I get the job, I'll report back here.
 
Posts: 140
Location: montana
29
6
  • Mark post as helpful
  • send pies
    Number of slices to send:
    Optional 'thank-you' note:
  • Quote
  • Report post to moderator
We have a large wooden indoor bin and have had the same experience with clumpy finished castings. What if we installed something like a computer fam for further aeration?
 
Posts: 1
Location: Nairobi
  • Likes 1
  • Mark post as helpful
  • send pies
    Number of slices to send:
    Optional 'thank-you' note:
  • Quote
  • Report post to moderator
So glad to have found this thread even seven years after it began Have been vermicomposting at home (2-plastic bucket system, kitchen scraps) for a few years and have always been frustrated with the dense wet clay-like consistency. Without more processing the big clumps turn hard as rocks as someone else mentioned, and is not as easily incorporated into our small kitchen garden.

However, the most recent harvest was better than usual, and after drying for about 1-2 days, I hand-crumbled the now-moist clumps to improve the consistency of texture.   I really need to invest in building a screen to make the process easier! The worms seemed super happy and there were tons of baby worms and eggs. I am also hoping to deduce what changed in the bin environment to produce better results. Recently the weather got warmer and drier, and I've been better about adding a thick layer of browns (torn paper bags) atop each weekly scrap feeding. We don't have a practice of mixing the bin with each feeding, or any other way of adding aeration. Is this the issue? And perhaps the higher proportion of browns was also contributing to a better environment?

Hope people are still up for chatting about this Thanks all.

 
steward
Posts: 16058
Location: USDA Zone 8a
4272
dog hunting food preservation cooking bee greening the desert
  • Mark post as helpful
  • send pies
    Number of slices to send:
    Optional 'thank-you' note:
  • Quote
  • Report post to moderator
Susan, welcome to the forum.

I have not done vermicomposting though the worm casting that I purchased in the past looked nothing like soil or hummus.

I hope you will ask lots of questions as our members love to answer questions.


gift
 
The Humble Soapnut - A Guide to the Laundry Detergent that Grows on Trees ebook by Kathryn Ossing
will be released to subscribers in: soon!
reply
    Bookmark Topic Watch Topic
  • New Topic