• Post Reply Bookmark Topic Watch Topic
  • New Topic
permaculture forums growies critters building homesteading energy monies kitchen purity ungarbage community wilderness fiber arts art permaculture artisans regional education skip experiences global resources cider press projects digital market permies.com pie forums private forums all forums
this forum made possible by our volunteer staff, including ...
master stewards:
  • Nancy Reading
  • Carla Burke
  • r ranson
  • John F Dean
  • paul wheaton
  • Pearl Sutton
stewards:
  • Jay Angler
  • Liv Smith
  • Leigh Tate
master gardeners:
  • Christopher Weeks
  • Timothy Norton
gardeners:
  • thomas rubino
  • Jeremy VanGelder
  • Maieshe Ljin

My experience with a trench fire for biochar

 
pollinator
Posts: 3842
Location: Kent, UK - Zone 8
696
books composting toilet bee rocket stoves wood heat homestead
  • Likes 5
  • Mark post as helpful
  • send pies
    Number of slices to send:
    Optional 'thank-you' note:
  • Quote
  • Report post to moderator
I mentioned in another thread that I was looking for a method that would let me process a large amount of material quickly, and that retort styles were too slow and labour intensive. I've wanted to try a cone kiln for a while, but getting one made up simply hasn't happened.  In the end I cracked out the spade and dug a trench, and had excellent results.


  • The material I am burning is long stems/branches of willow.
  • I wanted to minimise cutting of the lengths, so laying whole sections down the length of the trench was ideal
  • The material was cut in late winter and has had a few montsh to dry. The water content was down a fair bit already, so it burned nice and cleanly.


  • A few observations

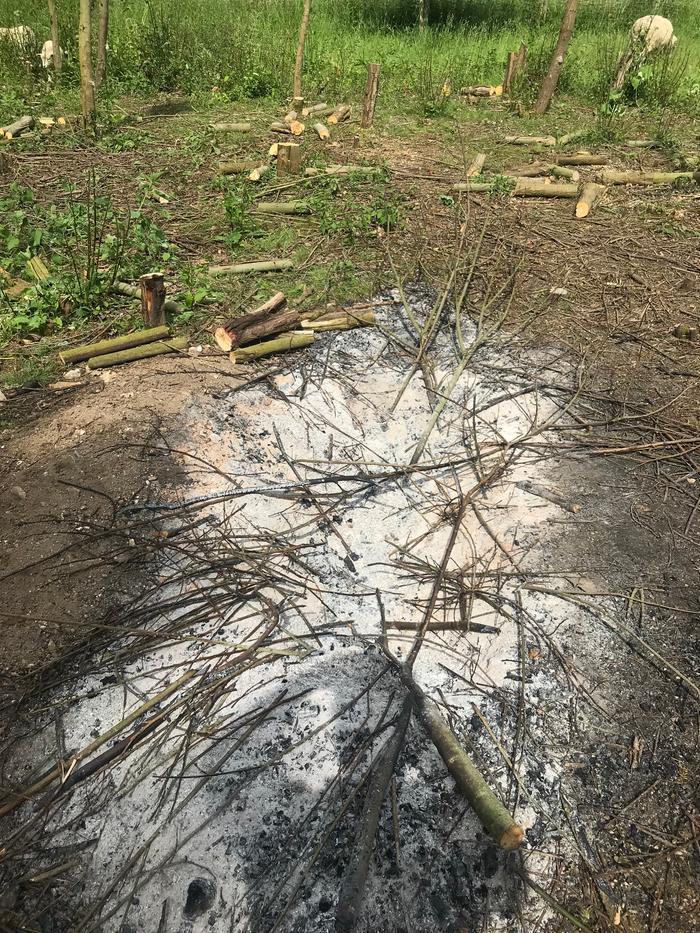
    Most of the wood was too long for the trench, so the branches were suspended over the trench with excellent air flow. The fire was ferociously hot and consumed material rapidly. As soon as the wood had burned to lose structural integrity the charred sections fell into the pit, where they were effectively protected from burning any further by the flame front above.  After about two hours of burn time (we paused in the middle to have dinner and toast marshmallows and damper bread) the pit was full of char. I kicked all the ends in and left it for a few more minutes, before starting the quench.

    We didn't have access to a hose, so I was using buckets of water from the pond. Rather than pouring them into the trench - which in our soil would not hold water - I filled an old metal galvanized bathtub thing with water, and shoveled the char into it. This was quick and easy, and when finished the water was just lukewarm. This minimised the amount of water I had to haul.

    In that one burn I think I went through about 1/8th of the cut material we have sitting ready, and there is plenty more around the property. I'll be using this method again, quite happily. It is, for me, a perfect balance of low effort investment with good yield.
    IMG-1716.JPG
    [Thumbnail for IMG-1716.JPG]
    IMG-1712.JPG
    [Thumbnail for IMG-1712.JPG]
    IMG-1715.JPG
    [Thumbnail for IMG-1715.JPG]
    IMG-1711.JPG
    [Thumbnail for IMG-1711.JPG]
     
    pollinator
    Posts: 4958
    1195
    transportation duck trees rabbit tiny house chicken earthworks building woodworking
    • Mark post as helpful
    • send pies
      Number of slices to send:
      Optional 'thank-you' note:
    • Quote
    • Report post to moderator
    I am surprised you did not get a reply on this, but I suppose it is because there was no real question to be answered, just an explanation of what worked.

    I am glad it did for you though. I tried this last year and failed miserably. In my case I think I tried to use too big of wood, and the wrong kind (White Pine). I had a good burn, but I either had ash, or charred wood blocks, nothing in between.

    I am glad it worked for you however.

    (Nice family and homestead by the way, you should be very proud)

     
    Michael Cox
    pollinator
    Posts: 3842
    Location: Kent, UK - Zone 8
    696
    books composting toilet bee rocket stoves wood heat homestead
    • Mark post as helpful
    • send pies
      Number of slices to send:
      Optional 'thank-you' note:
    • Quote
    • Report post to moderator

    Travis Johnson wrote:I am surprised you did not get a reply on this, but I suppose it is because there was no real question to be answered, just an explanation of what worked.

    I am glad it did for you though. I tried this last year and failed miserably. In my case I think I tried to use too big of wood, and the wrong kind (White Pine). I had a good burn, but I either had ash, or charred wood blocks, nothing in between.

    I am glad it worked for you however.

    (Nice family and homestead by the way, you should be very proud)


    Thanks Travis.

    We did another burn since then, using the same hole. I've got it down to a pretty slick process now. I can get the trench filled with char in about 2 hours. Shoveling out to quench has worked well for me - it saves a lot of water, and if the trench is full I can empty it and immediately carry on burning.

    And yes, the family are pretty awesome. I just wish we had the time to really do a "homestead". Life is settling down a bit though, and some projects are progressing.
     
    gardener
    Posts: 6814
    Location: Arkansas - Zone 7B/8A stoney, sandy loam soil pH 6.5
    1647
    hugelkultur dog forest garden duck fish fungi hunting books chicken writing homestead
    • Mark post as helpful
    • send pies
      Number of slices to send:
      Optional 'thank-you' note:
    • Quote
    • Report post to moderator
    hau Michael, good system there, very much like the contemporaries of the ancients are doing it today.

    Thanks for posting the pics, that should help a lot of folks see what a working trench fire should look like.

    Redhawk
     
    Michael Cox
    pollinator
    Posts: 3842
    Location: Kent, UK - Zone 8
    696
    books composting toilet bee rocket stoves wood heat homestead
    • Likes 5
    • Mark post as helpful
    • send pies
      Number of slices to send:
      Optional 'thank-you' note:
    • Quote
    • Report post to moderator
    And update:

    I spent the last two days having big burns in the trench, trying to clear the remaining brash. It was a lot of work, and was loading branches pretty much continually for 12 hours plus. Having used it a fair bit now I am really happy with how it works. The system isn’t at all “fussy” - I can pretty much just throw slash on of any length and thickness and it burns away cleanly.

    Periodically I take a break from loading to get a drink of water. In ten minutes it has died down substantially, and I can throw in any of the overhanging partially burned ends.  

    Once every couple of hours the trench is full and needs quenching and emptying. I have settled on giving the top surface a light spray with the hose - just enough to dampen it down so I can get close - then using a shovel to move the embers into a quench tub. Once in the quench tub I bash it about with the spade to break up any over sized lumps, then use buckets to dump it out on my finished pile. At this point I start loading again directly into the trench, which still has sufficient hot embers to get going again quickly.

    The whole process feels very time efficient - i’d Have take far longer to get through the material in any other bio chat system I have seen, and the trench does a pretty good job of conserving the char.

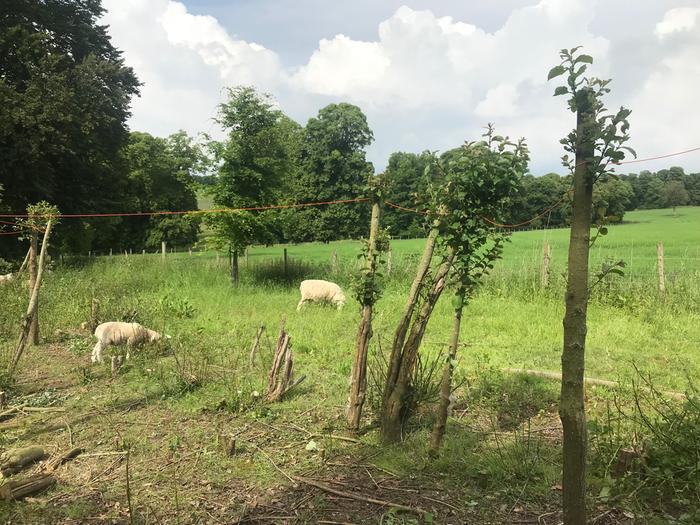
    Now that this area is basically clear it is going to become a chicken run. I have left some willow trunks standing secure fencing to. Today we have let the sheep in from the field next door to eat down the grass, weeds and resprouting tree stumps. They seem very happy to oblige.
    6F1D99DC-3DDF-4042-9C82-E7F6483A0C71.jpeg
    The view has been transformed a bit!
    The view has been transformed a bit!
    190BC407-F99A-46CE-979A-49655D2CCBFE.jpeg
    The trench - hard to get a sense of scale, but it is about 1.5m long
    The trench - hard to get a sense of scale, but it is about 1.5m long
    C4C261F5-B612-45FA-AD36-1E118543E061.jpeg
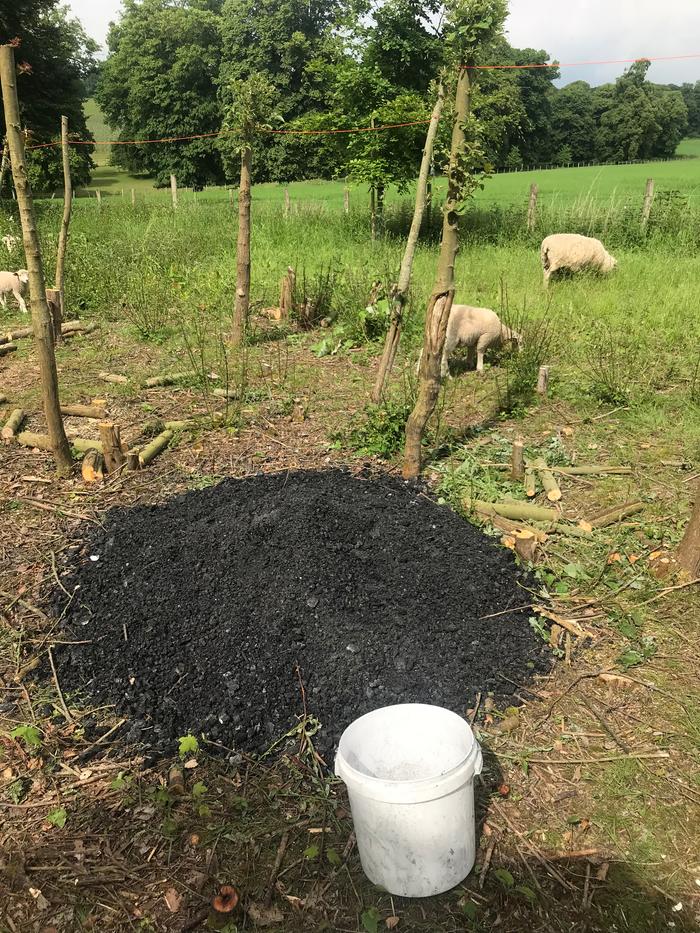
    The finished char pile. About the same amount again has been distributed to garden beds from earlier burns
    The finished char pile. About the same amount again has been distributed to garden beds from earlier burns
    91CFD0A5-A570-442F-9E92-826FD39CA453.jpeg
    The orange string marks out the proposed fence line for the chickens
    The orange string marks out the proposed fence line for the chickens
    4026D9C4-3A43-4DE5-A893-30A24D85C9BD.jpeg
    I also ended up with a fair amount of normal firewood
    I also ended up with a fair amount of normal firewood
     
    Posts: 13
    Location: Richmond, United States
    • Mark post as helpful
    • send pies
      Number of slices to send:
      Optional 'thank-you' note:
    • Quote
    • Report post to moderator
    Great pictures, thanks! The quenching trough seems like a nice touch as well. I think I will try this out myself and maybe even just bury some in place to make a garden bed like I have seen mentioned in other threads.
     
    pollinator
    Posts: 424
    162
    • Mark post as helpful
    • send pies
      Number of slices to send:
      Optional 'thank-you' note:
    • Quote
    • Report post to moderator
    Michael, everyone,
    Do you figure this would work with resinous woods (thinking primarily Pinus sylvestris and Picea abies)? I want to do this, but I very much don't want to end up with char soaked in tar. But I suppose it gets pretty hot in there, so maybe it burns off all the volatiles? Does anyone have experience with using conifer wood for a trench burn? (Note: If this question has been answered already elsewhere on the forum, my bad. Haven't got around to reading everything. Yet.)
     
    Michael Cox
    pollinator
    Posts: 3842
    Location: Kent, UK - Zone 8
    696
    books composting toilet bee rocket stoves wood heat homestead
    • Likes 1
    • Mark post as helpful
    • send pies
      Number of slices to send:
      Optional 'thank-you' note:
    • Quote
    • Report post to moderator
    I don’t have direct experience of burning conifers like this, but provided they have had a month or so to dry I would expect the volatiles to burn away completely. The secret seems to be in adding the material fast enough that the flames prevent ash forming. But slow enough that the material is properly charred before it is buried. You’ll get the feel of it pretty quickly.
     
    pollinator
    Posts: 814
    Location: Appalachian Foothills-Zone 7
    202
    • Mark post as helpful
    • send pies
      Number of slices to send:
      Optional 'thank-you' note:
    • Quote
    • Report post to moderator
    I burn a lot of pine (white and yellow) for fuel.  It never really makes much in the way of coals.  The resin burns much like a candle and then the log turns to ash.  I am able to make biochar out of the small wood (branches) because they break down fast enough but haven't really figure out how to do it with logs without splitting them into small pieces, and I'm not quite that ambitious!
     
    Michael Cox
    pollinator
    Posts: 3842
    Location: Kent, UK - Zone 8
    696
    books composting toilet bee rocket stoves wood heat homestead
    • Mark post as helpful
    • send pies
      Number of slices to send:
      Optional 'thank-you' note:
    • Quote
    • Report post to moderator
    I only burn lightweight brash for char. Anything heavier is cut, stacked and used in the house. Heavy stuff doesn't char well in these systems because the outside surface burns away to ash before the middle is charred.
     
    No more fooling around. Read this tiny ad:
    Heat your home with the twigs that naturally fall of the trees in your yard
    http://woodheat.net
    reply
      Bookmark Topic Watch Topic
    • New Topic