
• Post Reply Bookmark Topic Watch Topic
  • New Topic
permaculture forums growies critters building homesteading energy monies kitchen purity ungarbage community wilderness fiber arts art permaculture artisans regional education skip experiences global resources cider press projects digital market permies.com pie forums private forums all forums
this forum made possible by our volunteer staff, including ...
master stewards:
  • Carla Burke
  • Anne Miller
  • Nancy Reading
  • John F Dean
  • r ransom
  • paul wheaton
  • Timothy Norton
stewards:
  • Jay Angler
  • Pearl Sutton
  • AndrĂ©s Bernal
master gardeners:
  • Christopher Weeks
gardeners:
  • M Ljin
  • Thekla McDaniels
  • May Lotito

Rocket stove, first try

 
master pollinator
Posts: 1189
Location: Illinois
301
  • Likes 14
  • Mark post as helpful
  • send pies
    Number of slices to send:
    Optional 'thank-you' note:
  • Quote
  • Report post to moderator
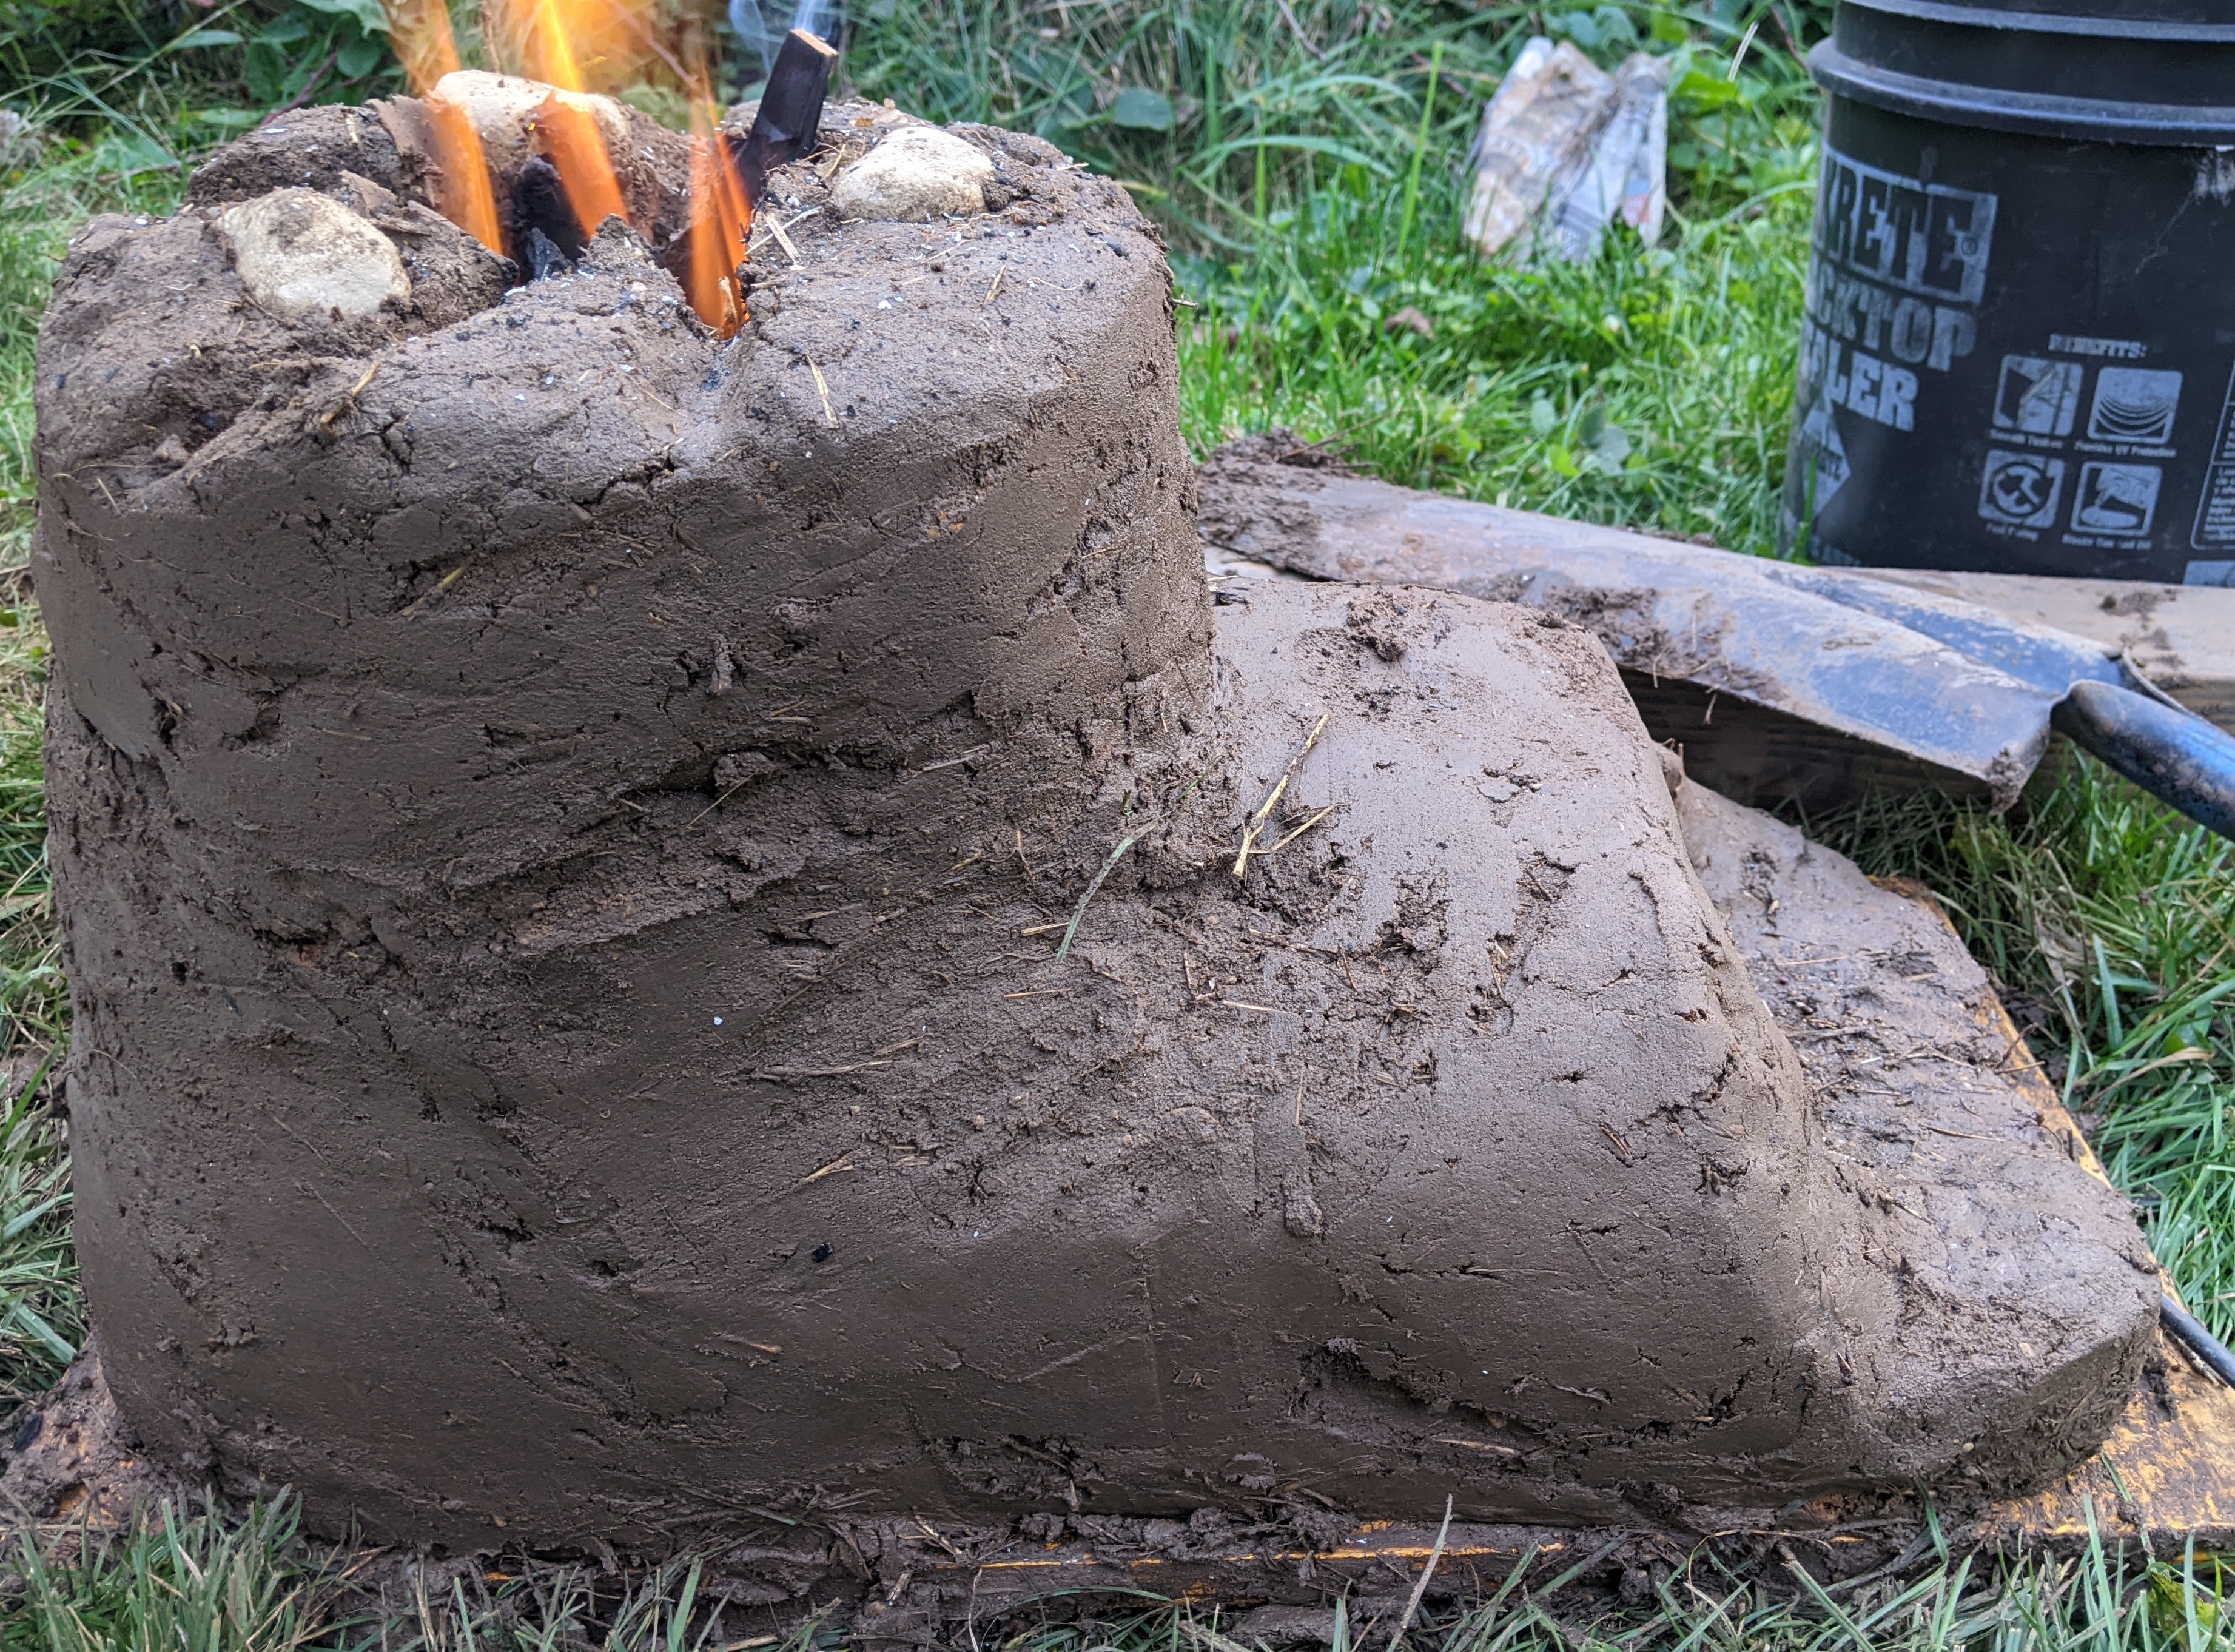
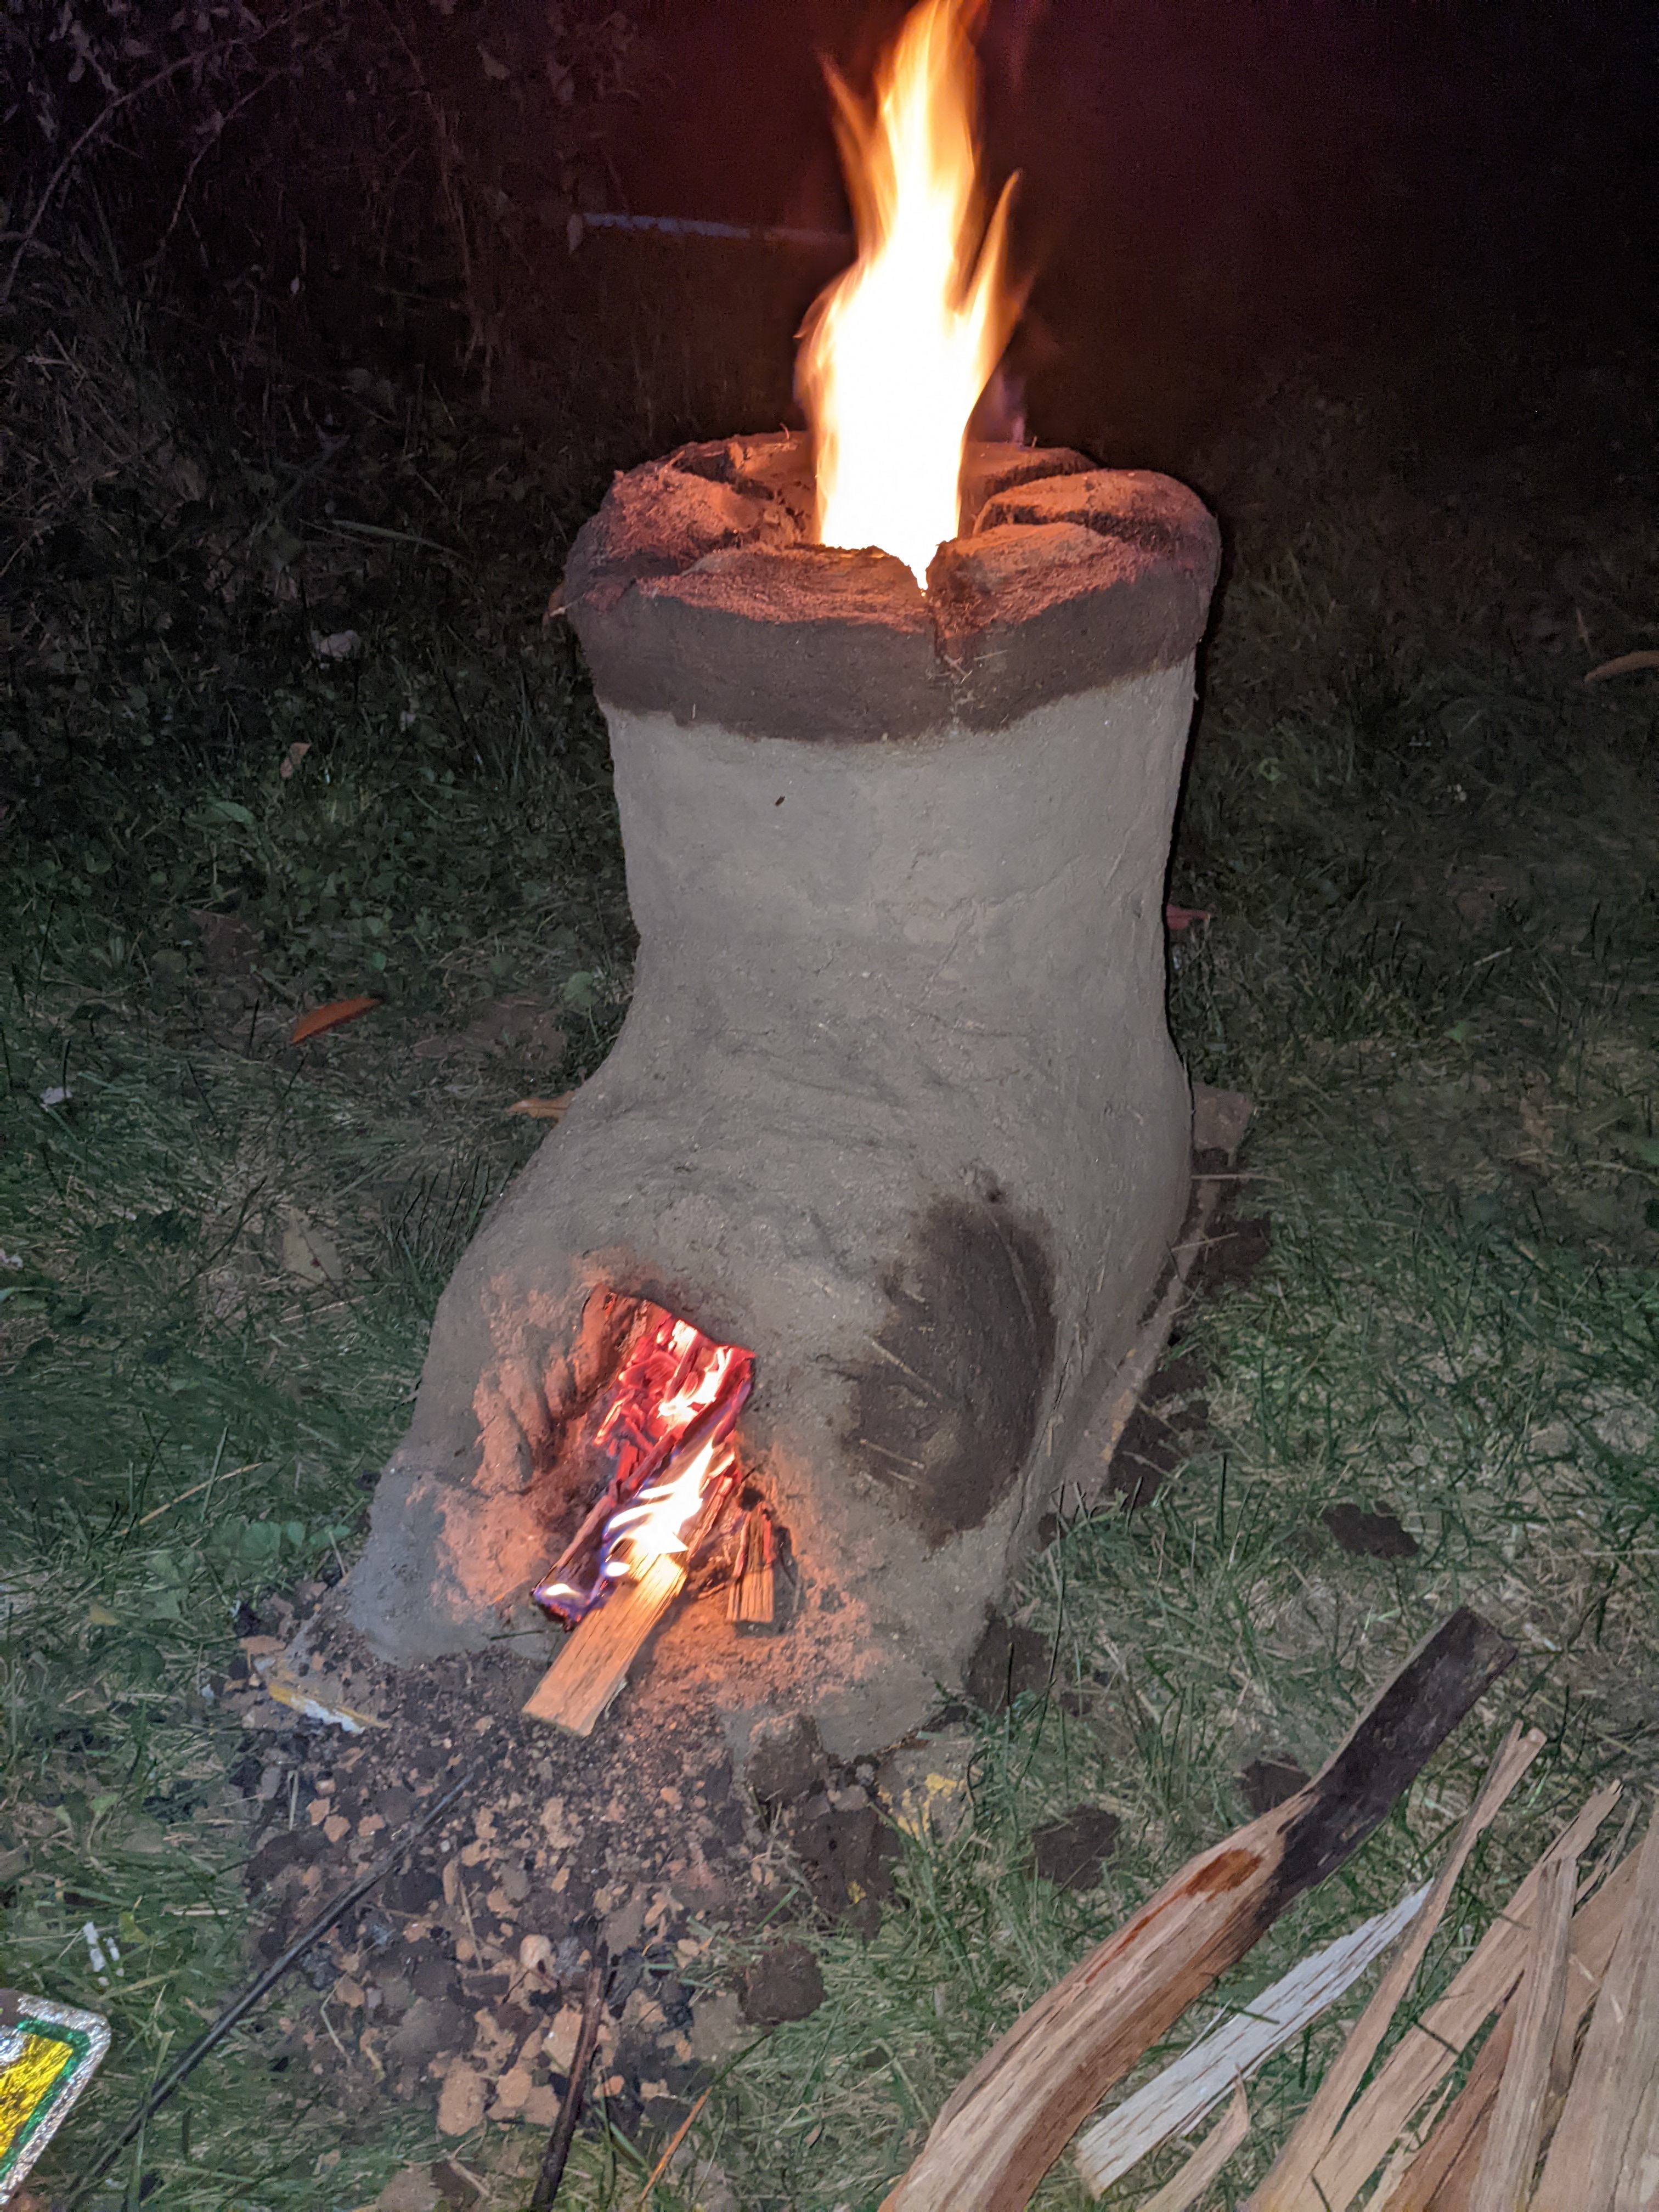
My first try:
PXL_20261024_224337671.jpg
Rocket stove
Rocket stove
 
Thom Bri
master pollinator
Posts: 1189
Location: Illinois
301
  • Likes 13
  • Mark post as helpful
  • send pies
    Number of slices to send:
    Optional 'thank-you' note:
  • Quote
  • Report post to moderator
Clay, sand and grass, tromped together. This took two 5-gallon buckets of clay, one of sand.

I need to add more height to the chimney since it doesn't draw well. I expected to have enough materials to complete it, but two buckets of clay wasn't enough. A job for tomorrow.

It sits on a wooden board and has a cable attached to the front so I can more easily move it around.

Back in the 1980s I helped build what was called then the 'estufa lorena', Spanish for 'mud stove'. Goal then was to help poor country folk save on wood use and also direct smoke outside of houses for health. They were fun to build and the locals were very familiar with how to make and build with adobe, so we made a lot of them.

I have wanted to make one at home for years but just never got off my butt, until today. This was a very small, simple trial run, took a couple of hours. One goal was to have a way to cook if the electricity goes out, which is pretty common here for short periods. But with all the news recently I am getting more motivated to deepen my ability to get along without power.

I watched a couple of youtube videos then went ahead. This one is similar to one I saw on David the Good's channel.
 
Thom Bri
master pollinator
Posts: 1189
Location: Illinois
301
  • Likes 7
  • Mark post as helpful
  • send pies
    Number of slices to send:
    Optional 'thank-you' note:
  • Quote
  • Report post to moderator
I need to find some pots that my wife will let me put on an open fire.
 
pollinator
Posts: 680
122
  • Likes 6
  • Mark post as helpful
  • send pies
    Number of slices to send:
    Optional 'thank-you' note:
  • Quote
  • Report post to moderator
Thom, good start sir, keep us posted.  Others here can give advice more expertly than I.
I think a majority of folks use one clay to 3 sand, then mix in straw ....was your grass dry in your mixing?  

One trick I learned in Cub Scouts camping, to avoid a thrashing at home, was to smear dishwashing soap on the pot before the open fire....an easy cleanup before sneaking it back into mother's cabinet.  
 
Thom Bri
master pollinator
Posts: 1189
Location: Illinois
301
  • Likes 5
  • Mark post as helpful
  • send pies
    Number of slices to send:
    Optional 'thank-you' note:
  • Quote
  • Report post to moderator

Rico Loma wrote:Thom, good start sir, keep us posted.  Others here can give advice more expertly than I.
I think a majority of folks use one clay to 3 sand, then mix in straw ....was your grass dry in your mixing?  

One trick I learned in Cub Scouts camping, to avoid a thrashing at home, was to smear dishwashing soap on the pot before the open fire....an easy cleanup before sneaking it back into mother's cabinet.  


Funny story about the dishsoap. We always did that too. One friend didn't understand the concept, and put the layer of soap on the INSIDE!

The grass was dry, but I probably should have used more. Re sand/clay mix, I guess we will see if it cracks.
 
Thom Bri
master pollinator
Posts: 1189
Location: Illinois
301
  • Likes 9
  • Mark post as helpful
  • send pies
    Number of slices to send:
    Optional 'thank-you' note:
  • Quote
  • Report post to moderator
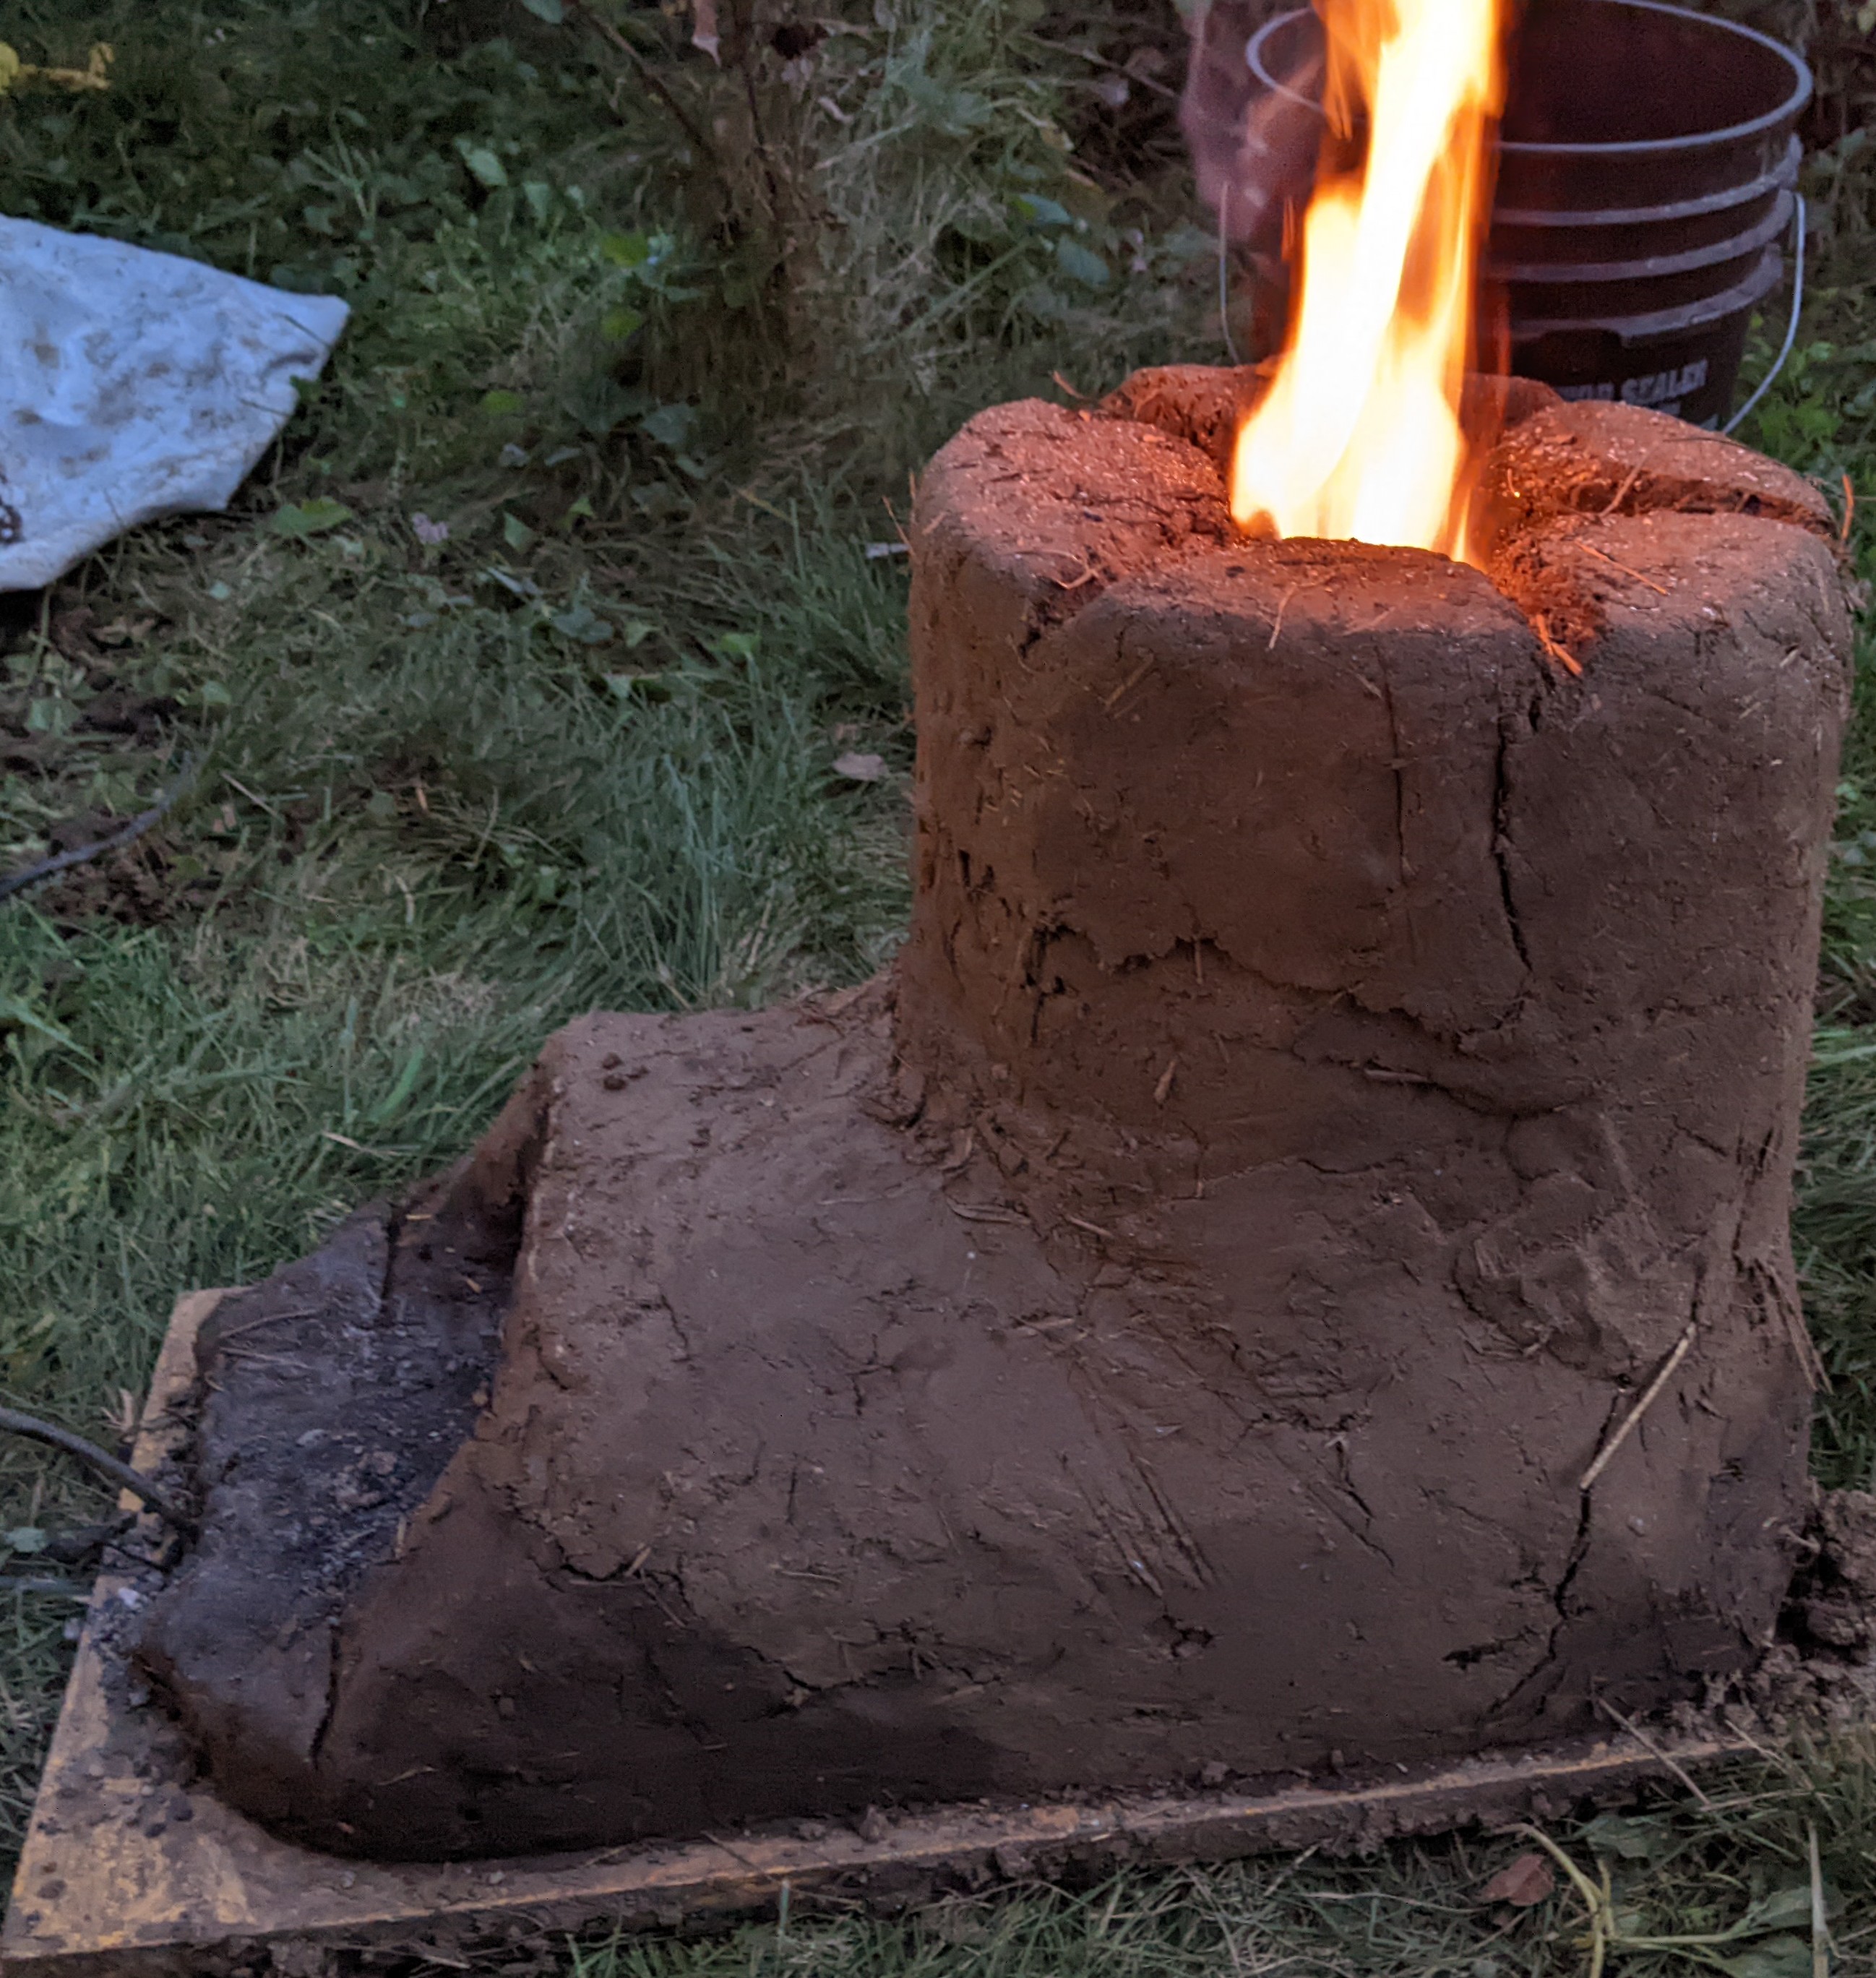
Renovated. Increased the height of the chimney a couple inches, and added mass to the walls so I can have a wider, flatter top to place pans on. I got some old pans from parent's house. Nostalgic; these were pans my mom used for many years before she passed. No one has used them since 2008.

It draws a little better but not excellently. Smokey, even with dry oak burning. I think it needs more airflow. Maybe I will drill an air intake through one side.

I left it burning all day to help it dry down. The walls are now getting distinctly hot.
PXL_20261025_231618686.jpg
Rocket stove
Rocket stove
 
Thom Bri
master pollinator
Posts: 1189
Location: Illinois
301
  • Likes 7
  • Mark post as helpful
  • send pies
    Number of slices to send:
    Optional 'thank-you' note:
  • Quote
  • Report post to moderator
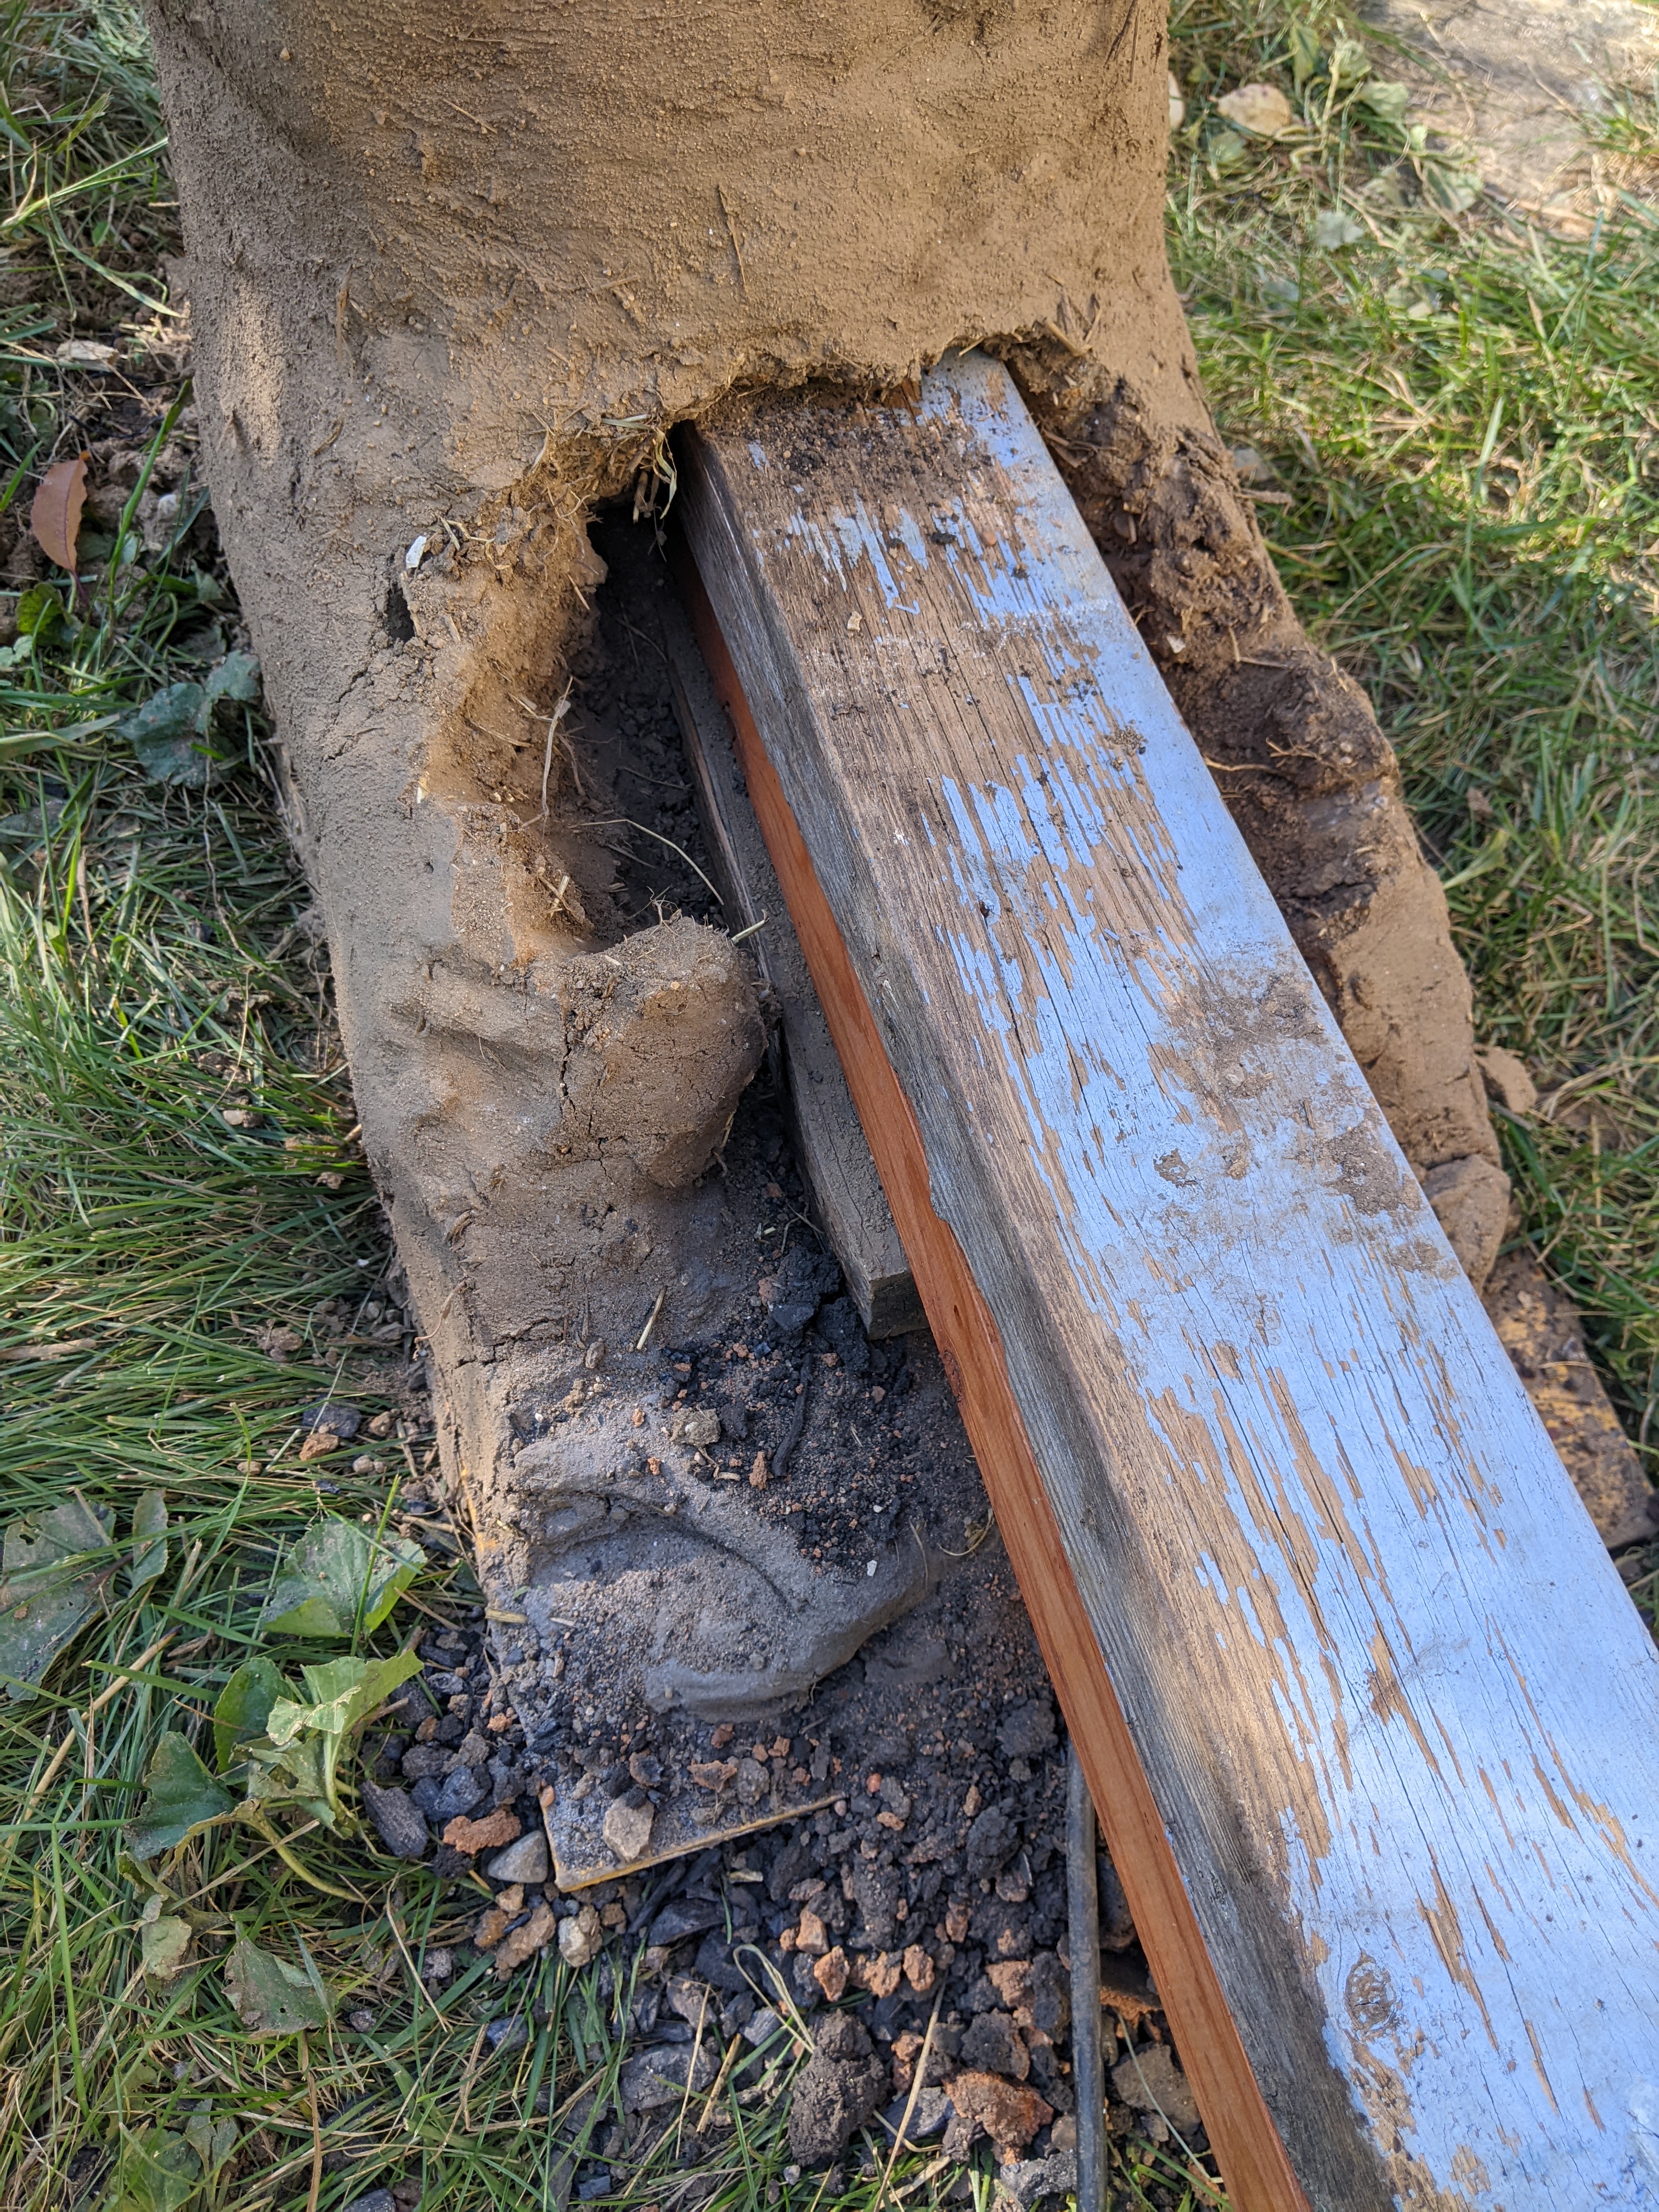
Realized my fire box/air intake is probably too small. I used a 4x4 to hold open the space while I packed the clay around it, then I pulled it out and used the same 4x4 to make the chimney. The fire box area slumped some while I was working on the chimney. So chimney is still 4x4 but fire box clearly smaller.

So tomorrow I will try first, making the chimney a couple inches taller. That's the easy fix for poor draft. If that doesn't fix the problem I will bust the whole thing up with a sledge and rebuild it with a larger fire box/air intake.
A larger firebox would also make loading the fuel a lot easier. It's a very small stove already, so the fire box isn't ever going to hold a lot of fuel. Right now it requires constant fussing with very small sticks of wood.

It's all fun. I am sure other people have figured all this out before me many times. But I like fiddling with things myself.
 
Posts: 1021
Location: Sierra Nevada foothills, 350 m, USDA 8b, sunset zone 7
299
  • Likes 9
  • Mark post as helpful
  • send pies
    Number of slices to send:
    Optional 'thank-you' note:
  • Quote
  • Report post to moderator
Thom,

4x4 (100x100 mm) is tiny, much smaller than already small and finicky 4" batchbox firebox (144x215 mm).
If you enlarge the firebox to 8x8x8 and the vertical riser to 3x8 it will draw beautifully. It's much easier to experiment with ordinary red bricks. The stove can be reconfigured while the fire is burning to observe how it affect the combustion.

 
Thom Bri
master pollinator
Posts: 1189
Location: Illinois
301
  • Likes 9
  • Mark post as helpful
  • send pies
    Number of slices to send:
    Optional 'thank-you' note:
  • Quote
  • Report post to moderator

Cristobal Cristo wrote:Thom,

4x4 (100x100 mm) is tiny, much smaller than already small and finicky 4" batchbox firebox (144x215 mm).
If you enlarge the firebox to 8x8x8 and the vertical riser to 3x8 it will draw beautifully. It's much easier to experiment with ordinary red bricks. The stove can be reconfigured while the fire is burning to observe how it affect the combustion.


This is for fun and experiment. I want one small enough to drag around. I want adobe. It's not very practical, though I could boil a pot of water even now.
 
Cristobal Cristo
Posts: 1021
Location: Sierra Nevada foothills, 350 m, USDA 8b, sunset zone 7
299
  • Likes 9
  • Mark post as helpful
  • send pies
    Number of slices to send:
    Optional 'thank-you' note:
  • Quote
  • Report post to moderator

Thom Bri wrote:I want one small enough to drag around. I want adobe.


I understand. In this case I would recommend to make it from very "fluffy" mix with a lot of straw/grass/wood dust or better perlite/vermiculate and then finish with a coat of clay. It would help combustion at this small size and would also make it lighter for dragging around.
 
Thom Bri
master pollinator
Posts: 1189
Location: Illinois
301
  • Likes 6
  • Mark post as helpful
  • send pies
    Number of slices to send:
    Optional 'thank-you' note:
  • Quote
  • Report post to moderator
I broke up the firebox and rebuilt it taller and a hair wider. What was 4x4 is now 6x4, that is, three 2x4s high.

PXL_20261028_195141201.jpg
Rocket stove rebuild
 
Thom Bri
master pollinator
Posts: 1189
Location: Illinois
301
  • Likes 6
  • Mark post as helpful
  • send pies
    Number of slices to send:
    Optional 'thank-you' note:
  • Quote
  • Report post to moderator
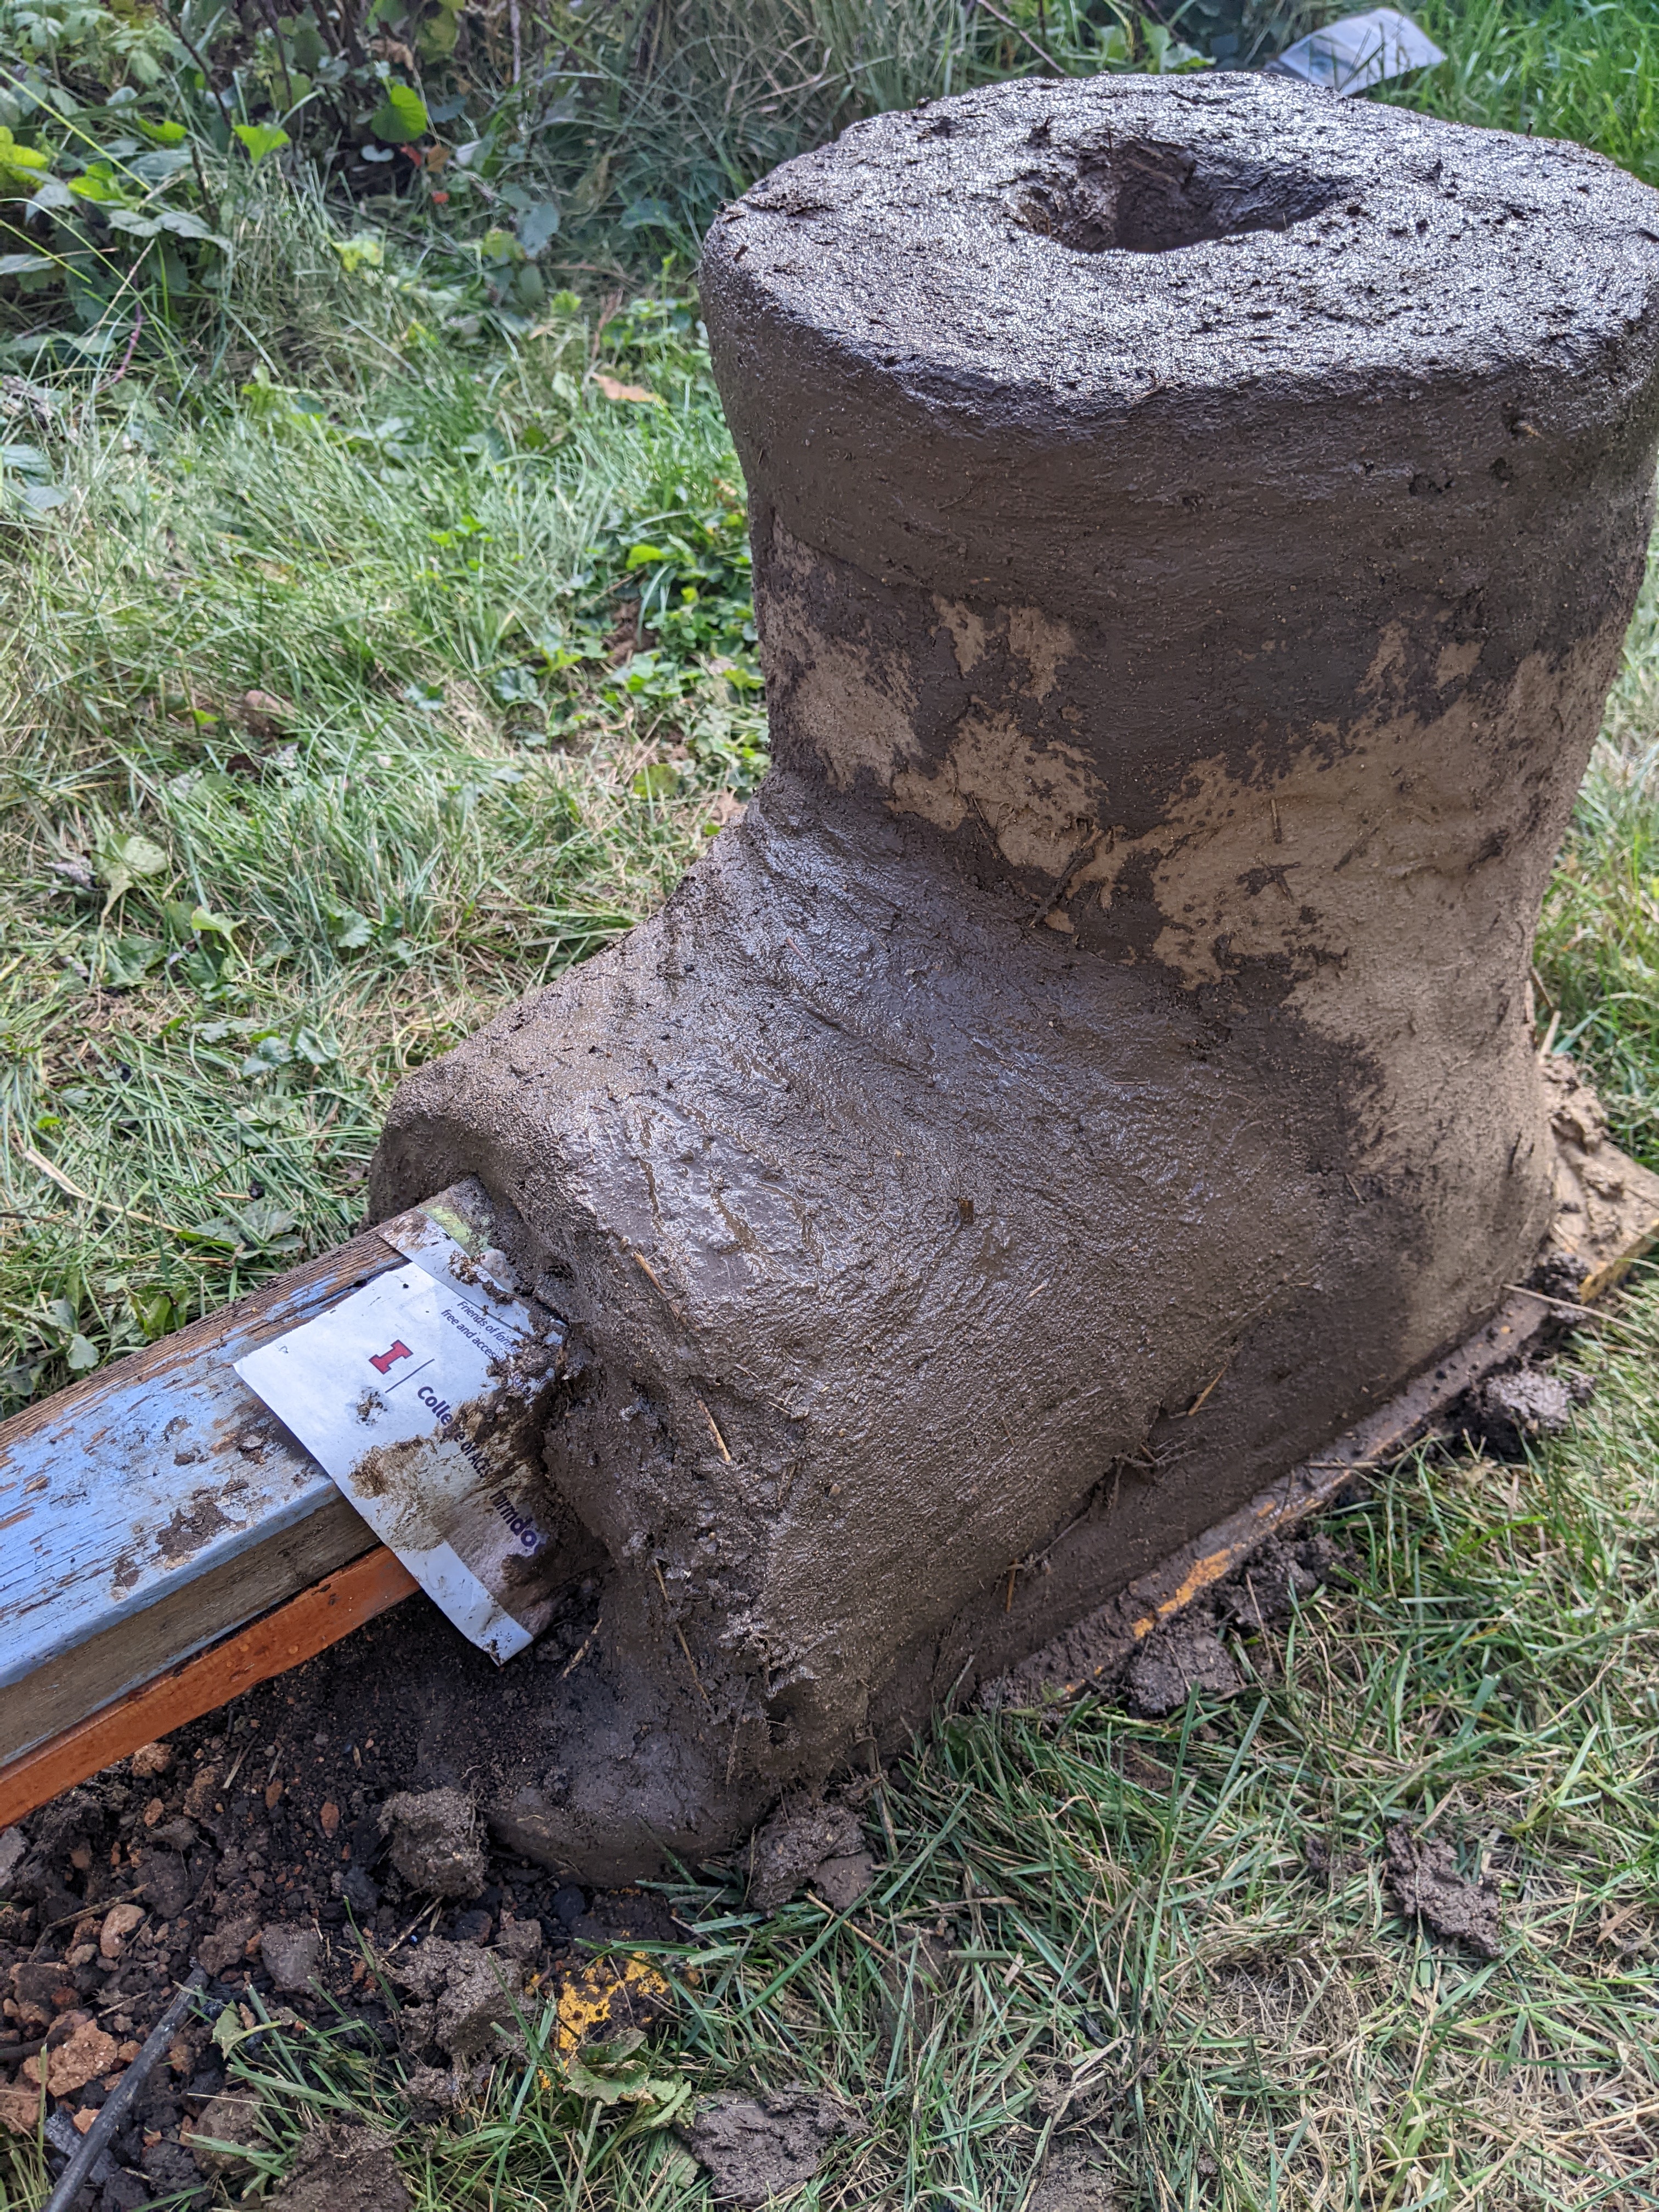
I also added about 2 inches of height.
PXL_20261028_201316007.jpg
[Thumbnail for PXL_20261028_201316007.jpg]
 
Thom Bri
master pollinator
Posts: 1189
Location: Illinois
301
  • Likes 10
  • Mark post as helpful
  • send pies
    Number of slices to send:
    Optional 'thank-you' note:
  • Quote
  • Report post to moderator
And, it draws much better now, it actually has a bit of the jet effect now without having to fan extra air. I was able to bring a pot of water to a boil. I loaded the fire box and went inside for dinner. When I came back out, the water was simmering. However, I think some low risers, a raised metal grill of some sort, would make it better. Not quite enough draft with the pot in place blocking air flow.

I have it burning now, reloaded with thicker wood to burn a long time, to help the adobe dry out. This batch I used more sand and straw to the mix, to prevent cracks.
PXL_20261028_232702498.jpg
[Thumbnail for PXL_20261028_232702498.jpg]
 
Rocket Scientist
Posts: 4849
Location: Upstate NY, zone 5
810
5
  • Likes 13
  • Mark post as helpful
  • send pies
    Number of slices to send:
    Optional 'thank-you' note:
  • Quote
  • Report post to moderator
You are right that you need more exit airflow, but you could easily get that by making little pillars all around the top instead of a flat top with small grooves in it. I might try six pillars with equal spacing and height as their thickness. Put them toward the outside edge of the top of the chimney so there is just enough inner/upper surface to properly support the smallest pot you want to use.
 
Thom Bri
master pollinator
Posts: 1189
Location: Illinois
301
  • Likes 8
  • Mark post as helpful
  • send pies
    Number of slices to send:
    Optional 'thank-you' note:
  • Quote
  • Report post to moderator

Glenn Herbert wrote:You are right that you need more exit airflow, but you could easily get that by making little pillars all around the top instead of a flat top with small grooves in it. I might try six pillars with equal spacing and height as their thickness. Put them toward the outside edge of the top of the chimney so there is just enough inner/upper surface to properly support the smallest pot you want to use.


Tried it with just a heavy grill on top and that did the trick. Water boiled easily and fast. Just that little extra bit of air flow.

If the power went out I could make one of these in an afternoon and be cooking food that night. Even faster if I had bricks. One more survival skill learned. Thanks Permies! I am not really a prepper, but somehow I have half a year's food stored and a way to cook it.
 
Thom Bri
master pollinator
Posts: 1189
Location: Illinois
301
  • Likes 6
  • Mark post as helpful
  • send pies
    Number of slices to send:
    Optional 'thank-you' note:
  • Quote
  • Report post to moderator
Burned in it most of the day to cook out the moisture. No significant cracks.

It got too hot to touch. I understand now how the rocket mass heater works. That big mass of clay will hold heat a long time even after the fire is out.
 
I agree. Here's the link: https://woodheat.net
reply
    Bookmark Topic Watch Topic
  • New Topic