I used a post hole digger and a shovel to dig a Dakota fire hole in my back yard. This was a great experiment and relatively quick to complete despite my heavy clay soil (or maybe because of it?).
I’m not a huge fan of hard boiled eggs, but my wife sure is, so with her blessing I made her some snacks for the week.
I liked everything about it, except: I think the rocks holding up the grates were unnecessary. The hole was several inches bigger than the Dutch Oven, so I think I could have had more success with less wood if I had used the old oven grates alone.
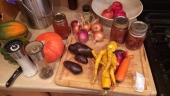
I fueled this with cutoff scraps of mostly cedar and a little pine. I sure wish I had measured better, maybe starting with a box of a specified weight, then weighing it at the end. It felt like such a small amount of wood.
There are two cottonwood trees within 5 feet on either side, which have branches almost directly above the fire hole itself… absolutely nothing was wilted, much less scorched.
A far cry from even the most banal campfire.
Despite my reservations, I couldn’t help but check to see how well I did. To my surprise, I think the eggs came out textbook-perfect!
8/10, would repeat for fun and am definitely recommending to family and friends!
To get certified for this Badge Bit you must provide pics or video (<2 min) of the following:
- The spot where the Dakota fire hole will be dug
- Building the Dakota fire hole
- Starting materials before fire with cold Dakota fire hole
- Fire started
- Additional wood added
- Food cooking
- If using a pan or pot, show it resting on something to keep from plugging the exhaust of the system
My attempt at building and cooking with a Dakota fire pit.
The “- Fire started” and “- Additional wood added” Pictures are from the second time using the fire pit. I forgot to get them the first time I used it.


 1
1


")


Skill verified by gir bot")

Skill verified by Mike Haasl")

Skill verified by Mike Haasl")

Skill verified by Jeremy VanGelder")

Skill verified by Paul Fookes")

Skill verified by Alexandra Malecki")

Skill verified by Timothy Norton")

Skill verified by Timothy Norton")


Skill verified by Jeremy VanGelder")

Skill verified by Alexandra Malecki")

Skill verified by Mike Haasl")

Skill verified by Jeremy VanGelder")

Skill verified by Opalyn Rose")

Skill verified by Christopher Weeks")

Skill verified by Nikki Roche")

Skill verified by Mike Haasl")

Skill verified by Opalyn Rose")

Skill verified by Nikki Roche")

Skill verified by Mike Haasl")

Skill verified by Timothy Norton")

Skill verified by Jeff Bosch")

Skill verified by Leigh Tate")

Skill verified by Alexandra Malecki")

Skill verified by Alexandra Malecki")

Skill verified by Mike Haasl")

Skill verified by Alexandra Malecki")


Skill verified by gir bot")