• Post Reply Bookmark Topic Watch Topic
  • New Topic
permaculture forums growies critters building homesteading energy monies kitchen purity ungarbage community wilderness fiber arts art permaculture artisans regional education skip experiences global resources cider press projects digital market permies.com pie forums private forums all forums
this forum made possible by our volunteer staff, including ...
master stewards:
  • Nancy Reading
  • Carla Burke
  • r ranson
  • John F Dean
  • paul wheaton
  • Pearl Sutton
stewards:
  • Jay Angler
  • Liv Smith
  • Leigh Tate
master gardeners:
  • Christopher Weeks
  • Timothy Norton
gardeners:
  • thomas rubino
  • Jeremy VanGelder
  • Maieshe Ljin

Split side adjustable skirt - Can I do it?

 
steward
Posts: 12458
Location: Pacific Wet Coast
7018
duck books chicken cooking food preservation ungarbage
  • Likes 14
  • Mark post as helpful
  • send pies
    Number of slices to send:
    Optional 'thank-you' note:
  • Quote
  • Report post to moderator
I need a fancy outfit. I *don't* do frilly - which is what other people wanted me to wear.

I had heard about a "split side adjustable skirt" on another thread all about skirts. I got seriously pissed when lovely clothing I made 20+ years ago or a decade earlier, didn't fit me after 2 kids and menopause. It simply wasn't adjustable. I don't want that to happen this time. I want to be able to adjust this to fit many people, not just me. If I'm going to make something that will only be worn when *really fancy* is in the cards, it needs to earn its keep!

The split side skirt is based on an 18th Century skirt which you can explore here:
https://www.youtube.com/watch?v=6xHOnS4fK2c

I like the "zero waste" concept, but in the 18th century people wore clothing differently, so I didn't want to do a straight replica.

I also watched this video. I love the pocket, but I still wasn't quite sure this was what I was looking for:
https://www.youtube.com/watch?v=kbLWWQqXmYw

So then I watched this two part video and decided to wing it.
The Split Side, adjustable waist, giant pockets skirt tutorial   parts 1 and 2.

https://www.youtube.com/watch?v=yK_t5eqGPd4
https://www.youtube.com/watch?v=Pul8nxwM2VA

There were still things that I didn't want - "the swoosh". This was partly because I didn't want too much fullness at the waist, but had by this time decided that I was upcycling the fabric. That meant I had restricted options.

So if you want to know how I got there - and the pain of the first cut - follow along!
 
Jay Angler
steward
Posts: 12458
Location: Pacific Wet Coast
7018
duck books chicken cooking food preservation ungarbage
  • Likes 8
  • Mark post as helpful
  • send pies
    Number of slices to send:
    Optional 'thank-you' note:
  • Quote
  • Report post to moderator
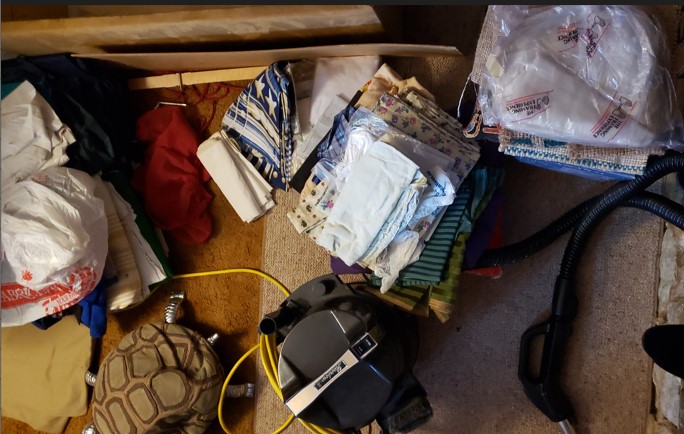
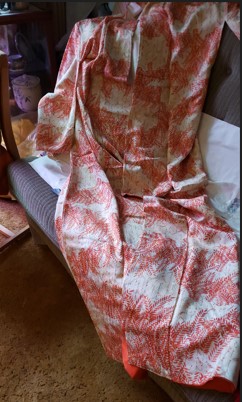
So my step 1 was emptying the whole fabric chest. The kimono I wanted to upcycle was under a panel at the bottom, so absolutely everything had to come out:


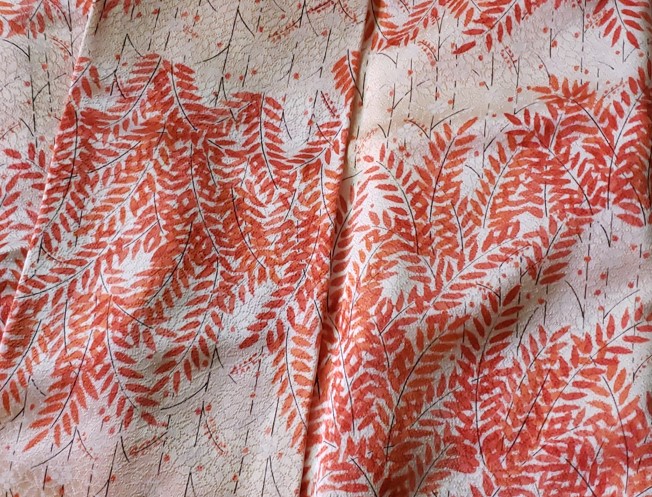
But it was sooo... worth it. Quality silk is beautiful stuff! It has drape to it. It's got texture woven in, as well as a pattern dyed on.


Here's a close-up: a friend insisted that I don't wear orange, but I am what the colour people call, "spring" and a clear orange is in that palette.


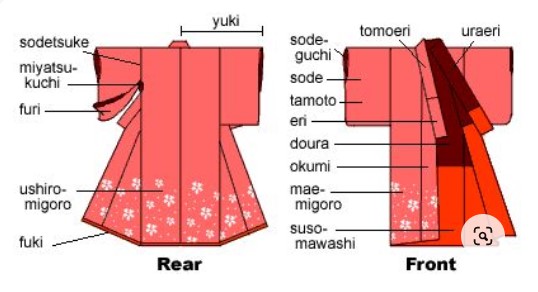
And so people have some idea of the amount of fabric I will have to work with, here's a quick diagram of kimono parts:


I actually have leftovers. I could make some sort of vest, but was convinced to go with a nice blouse and a traditional Sikh shawl, as I will have to cover my hair while at the temple.

 
Jay Angler
steward
Posts: 12458
Location: Pacific Wet Coast
7018
duck books chicken cooking food preservation ungarbage
  • Likes 8
  • Mark post as helpful
  • send pies
    Number of slices to send:
    Optional 'thank-you' note:
  • Quote
  • Report post to moderator
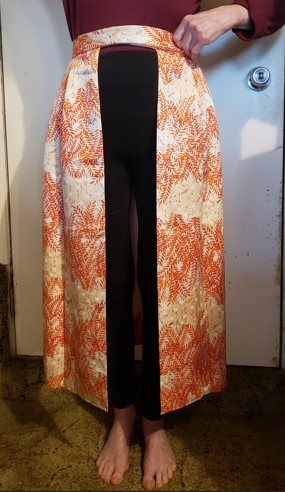
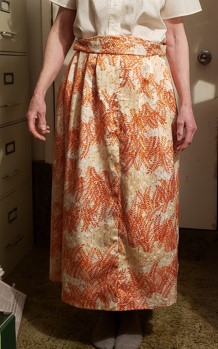
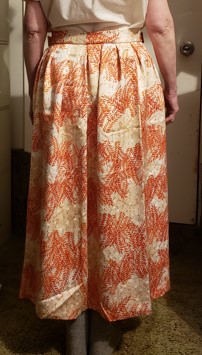
The special event I'm attending has a religious part to it which tradition says I need to be in a long, but not floor-length skirt. If anything, it ended up a little longer than intended, but for this event, I will fit right in, and it can always be hemmed in the future.

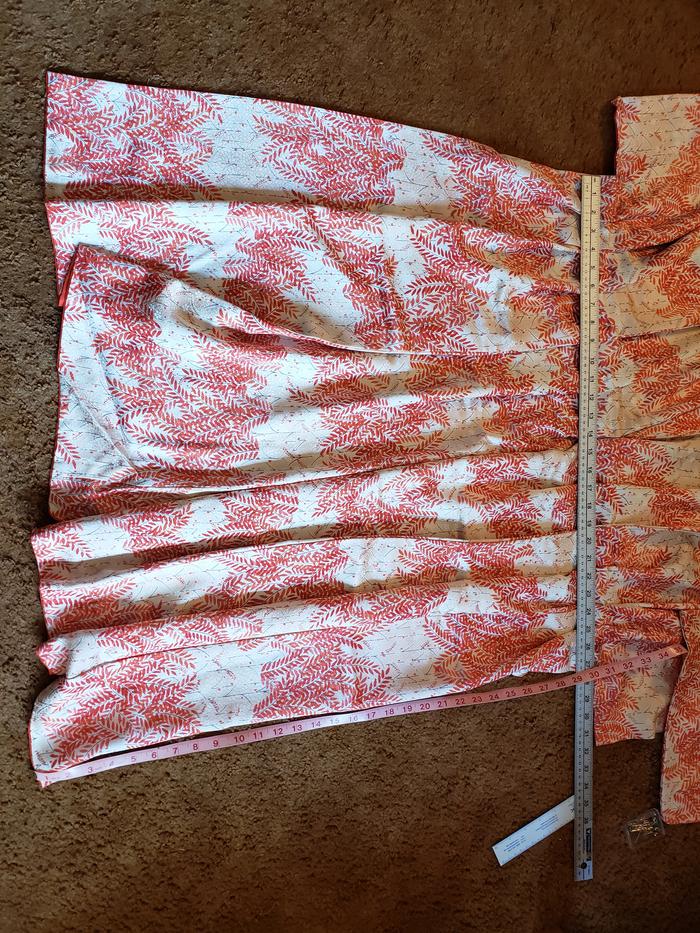
The next step was to see if I could pleat the body of the kimono and have it look intentional:


That first cut when I unpicked the bottom of the Eri, and then cut the panel off the top of the kimono truly scared the heck out of me. However, reality is - that kimono wasn't having a life in the bottom of my chest. If I messed up totally, I could give in and buy something. It wouldn't fit me, as most commercial clothing doesn't, but I had a back-up plan!

Once that first step was taken, I got down to work. Kimonos are traditionally hand sewn. I stayed with tradition because it is slippery fabric and I didn't trust my sewing machine - particularly with me as the operator.

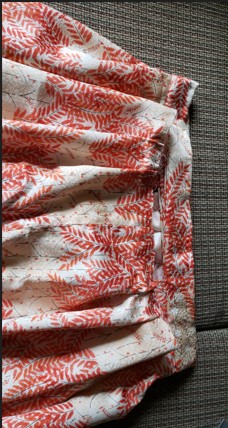
However, I had kept that in mind as I planned this. The entire bottom part became the back and sides. I basted the top before I cut it off to keep the lining and the outer fabric aligned. I hand basted the pleats and actually added two extras as I felt the fabric was coming too far around the front.

I then carefully unpicked the sleeves to make a narrower panel for the front.  This didn't take all the sleeve fabric, so I was able to cut strips to make the waistbands out of.

I don't do frills, and that includes bows. My goal was to have buttons in different locations on the waistband so that I could adjust the waist measurement by either 1 inch or 2 inches depending on the thickness of the blouse material and on whether I had eaten or not.


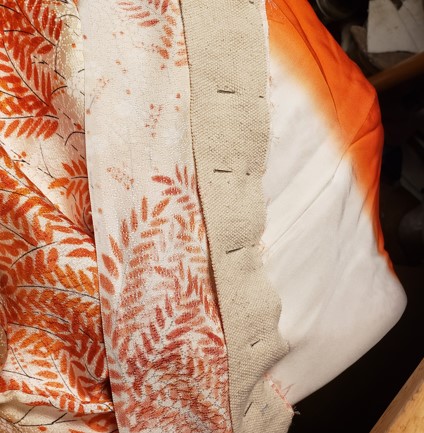
I have some cotton canvas that was fine as a reinforcement. I felt it would make the waistband look sturdier by adding a little thickness, even if the silk alone might have been adequate.

Some of you will recogize the fabric from my Fantastic Fasteners thread  


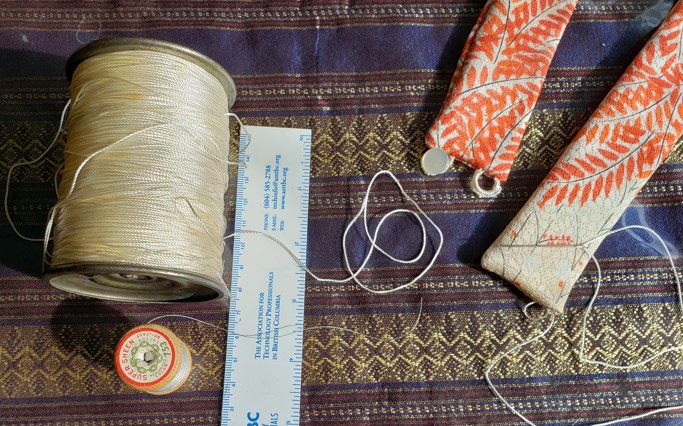
I particularly didn't trust my machine to make button holes. Making button loops is not that hard with a little practice, and I'd done some before on a shirt in my clothing based on rectangles thread.

What relief I felt when I was at the point of saying that the back and sides were done, and looking good enough to call this project a win!

 
Jay Angler
steward
Posts: 12458
Location: Pacific Wet Coast
7018
duck books chicken cooking food preservation ungarbage
  • Likes 11
  • Mark post as helpful
  • send pies
    Number of slices to send:
    Optional 'thank-you' note:
  • Quote
  • Report post to moderator
For the front I had to sew the two arm panels together in the centre front. At the moment, that seam is a little puckered. I'm hoping a good pressing will solve the problem. If not, I will have to undo the seam and try again.

Once it was a single panel, I again organized pleats and basted them in place:


It isn't obvious, but the sides of the front panel are folded under about 3 inches. This helped to align them to the back panel, since it comes so far around on me. That fold is stitched into the waist band, but if someone much larger than I needs to wear this skirt, it is simple to unpick that bit of waistband and reduce the size of the fold.

However, there will be dancing at the event, so I wanted to feel like I had good leg movement, and maybe not the over-the-top "swoosh" in the videos, but an appropriate amount for any sort of dancing I might get involved in.


The waistband was done the same way as for the back panel. It too, needed loops for buttons and corresponding buttons on the back waistband. The back waistband is buttoned to itself. The front skirt panel then is brought up and buttoned to the back waistband. Most of the split side skirts use a front band that goes all the way around the body and ties with a bow. The system I used required less sewing and less material at the waist.

The last step was to sew the front panel edge that had been folded in, to the front edge of the back panel from about 1" up from the hem, to about 7" below the waistband.

Things to be aware of when building this:

1. For people who have very large hip circumference compared to their waist measurement, the larger the gap in the side seam, the easier it will be to get on.
2. Starting with uncut fabric is always easier than starting with an existing item of clothing and having to deconstruct and reconstruct. However, too much fabric is wasted in our society. Being willing to take the extra time to give fabric a second life is worth it to me.
3. There are several options shown for this skirt: a) a circle of fabric/or panels that form a circle
b) straight panels that are gathered at the waistband,
or c) pleats like I did - full or partial
However, if you have a skirt you like to compare your plans to so that you know that you have enough fabric at the hemline for comfortable sitting/walking/etc, I recommend you do so.
4. How adjustable do you need your skirt? Some people do fluctuate considerably more than I do. However, with minimal changes, this skirt can adjust from about 28 inches at the waist, to 42". For more specific info on that, go here: https://permies.com/t/243283/sewing/Split-Side-Adjustable-skirt#2299258
I find that pretty impressive myself! Considering clothing I gave away couldn't be adjusted even 2" without having access to matching fabric and doing a lot of reworking, this concept is a big win.


And lastly - a challenge! Who would like to try doing this style of waist with a pair of pants?

If people have questions, speak up.  It's hard to know what I need to tell people. And if anyone has tried this, please post your pictures!
 
gardener
Posts: 1809
Location: Zone 6b
1129
forest garden fungi books chicken fiber arts ungarbage
  • Likes 3
  • Mark post as helpful
  • send pies
    Number of slices to send:
    Optional 'thank-you' note:
  • Quote
  • Report post to moderator
Your skirt is so beautiful! Have fun in the party.
Is the fabric dry clean only?  Can you press with regular steam iron? I bought some used silk kimono panels before and they gave out very strong smell of organic solvent when washed in water.
 
Jay Angler
steward
Posts: 12458
Location: Pacific Wet Coast
7018
duck books chicken cooking food preservation ungarbage
  • Likes 4
  • Mark post as helpful
  • send pies
    Number of slices to send:
    Optional 'thank-you' note:
  • Quote
  • Report post to moderator

May Lotito wrote:Is the fabric dry clean only?  

I wouldn't even consider dry cleaning it! I was its first owner, so there may be chemicals from the manufacturing process, but if my math is correct, that was at a time when I suspect it was mostly done the traditional way and should be fairly safe. I would spot clean or hand wash.

Can you press with regular steam iron?  

No steam. A barely warm iron over top a dish-towel was recommended, although I think that was for thinner silk than this is. This fully lined skirt has weight - it's a kimono intended to be worn as our equivalent of a dress - not some "silky negligee". Close to the day, I am thinking I'll hang it in the bathroom while someone showers, then press it gently with the tea towel and call it done.

I bought some used silk kimono panels before and they gave out very strong smell of organic solvent when washed in water.

What a shame. Have you used the panels?
 
steward & author
Posts: 38467
Location: Left Coast Canada
13713
8
books chicken cooking fiber arts sheep writing
  • Likes 7
  • Mark post as helpful
  • send pies
    Number of slices to send:
    Optional 'thank-you' note:
  • Quote
  • Report post to moderator
So beautiful!

The material from a silk kimono should be able to spot clean (method depending on the stain - maybe keep some scraps of fabric for testing cleaning methods) and to West Coast dry clean- aka  hang outside for a day, night, and a day.

Best to put it inside out before hanging so the sun doesn't affect the colour and inside of clothes tends to get the most dirty anyway.

I wouldn't recommend kimono silk be submerged in water unless absolutely necessary or the washing instructions say okay.   The sizing and natural impurities left on the silk greatly influence the texture and drape.  If there is a lot of impurities from the reeling process,  it can really stink when fully wet, but these can also be left in to protect the fibre.
gift
 
Unofficial Companion Guide to the Rocket Oven DVD
will be released to subscribers in: soon!
reply
    Bookmark Topic Watch Topic
  • New Topic