• Post Reply Bookmark Topic Watch Topic
  • New Topic
permaculture forums growies critters building homesteading energy monies kitchen purity ungarbage community wilderness fiber arts art permaculture artisans regional education skip experiences global resources cider press projects digital market permies.com pie forums private forums all forums
this forum made possible by our volunteer staff, including ...
master stewards:
  • Carla Burke
  • John F Dean
  • Timothy Norton
  • Nancy Reading
  • r ranson
  • Jay Angler
  • Pearl Sutton
stewards:
  • paul wheaton
  • Tereza Okava
  • Andrés Bernal
master gardeners:
  • Christopher Weeks
gardeners:
  • Jeremy VanGelder
  • M Ljin
  • Matt McSpadden

Pants waist adjustment - a darting adventure!

 
pollinator
Posts: 207
Location: SE USA, southern Piedmont Uplands, zone 8b
169
home care tiny house cooking fiber arts seed writing composting
  • Likes 9
  • Mark post as helpful
  • send pies
    Number of slices to send:
    Optional 'thank-you' note:
  • Quote
  • Report post to moderator
Background
I currently source my pants and shirts from thrift stores. Buying them is usually just step 1; often I need to adjust the fit somehow before they're ready to wear. With pants, I typically need to shorten the legs and/or take in the waist.
My last thrift trip gained me 5 pairs, 4 of which needed waist reductions. My go-to method has been to take a "V" of fabric away from the back middle seam, then reassemble. Pretty straightforward!
...except for that annoying center belt loop.
...and except for sewing through that thick fabric fold where all the seams come together.
...and except for the little funny wrinkle left at the bottom of the V if I don't get it shaped juuuust right.
(I don’t think I have ever gotten it shaped "just right".)

But what's this? While examining one pair of my "new" pants, I see existing back waistband darts already in place, one above each of the back pockets:
making thrift store pants fit

Ooh! Two darts?!? Very cool. (Why didn't I think of that before....?)
Two darts means I can divide the waist adjustment amount between them. Two darts means the Vs won't be as long or wide. Two darts might even mean I don't have funny bumps!! And BONUS! - two darts mean I don't have to remove ANY belt loops.
I'm trying it!

To avoid suspense - it worked! Here's the final result:
pants waist adjustment

I'll post some notes, the step-by-step pictures, some resources, and things that helped me in the following posts.
 
Sara Hartwin
pollinator
Posts: 207
Location: SE USA, southern Piedmont Uplands, zone 8b
169
home care tiny house cooking fiber arts seed writing composting
  • Likes 3
  • Mark post as helpful
  • send pies
    Number of slices to send:
    Optional 'thank-you' note:
  • Quote
  • Report post to moderator
A few notes
I like working projects like this because it expands my understanding of how making 2-dimensional changes translates to 3-dimensional fit. For instance – darts aren’t just for taking away fabric. I can create fabric shapes with them, too.  And they’re versatile - in the future, I could potentially distribute the fabric reduction over 4 darts, and have 2 front waist darts and 2 back waist darts.
I want to begin thinking of darts as a tool in my pattern drafting kit.
These pants aren't constructed like typical jeans. There is only an inner waistband: the outer waist is simply the top of the leg panels.
 
Sara Hartwin
pollinator
Posts: 207
Location: SE USA, southern Piedmont Uplands, zone 8b
169
home care tiny house cooking fiber arts seed writing composting
  • Likes 2
  • Mark post as helpful
  • send pies
    Number of slices to send:
    Optional 'thank-you' note:
  • Quote
  • Report post to moderator
Step by step, part 1
Separate waistband from pants around each dart. Unpick enough that I can work in the area.
In this case there are two seams to release: the bottom/lower waistband seam...


...and the top/upper seam.


Both dart areas are free now. Hmm, the darts extend down past the pocket flaps. I’m going to need to partially rip those seams…


Then I can measure and pin each of the new darts to prep for sewing:
 
Sara Hartwin
pollinator
Posts: 207
Location: SE USA, southern Piedmont Uplands, zone 8b
169
home care tiny house cooking fiber arts seed writing composting
  • Likes 3
  • Mark post as helpful
  • send pies
    Number of slices to send:
    Optional 'thank-you' note:
  • Quote
  • Report post to moderator
Step by step, part 2
Darts sewn! At this point I did a quick fit check – the waist felt great and looked good enough for my standards.  Better do something about all that extra waistband, though.


Snip-snip!

Some tutorials have you take in the waistband before taking in the pants, but I prefer to do pants first, then match the waistband to the pants.

Now I can flatten each new end against the pants and mark it in line with the new dart seam. I pin the waistband right sides together, matching the marks. You can see my pencil marks here:

The marks become the stitching line.

Trim the seams to ~1/4”, press ‘em open, then press darts and waistband.
 
Sara Hartwin
pollinator
Posts: 207
Location: SE USA, southern Piedmont Uplands, zone 8b
169
home care tiny house cooking fiber arts seed writing composting
  • Likes 2
  • Mark post as helpful
  • send pies
    Number of slices to send:
    Optional 'thank-you' note:
  • Quote
  • Report post to moderator
Step by step, part 3
Oh – gotta reassemble those pocket flaps now. I only ripped out a small section around the dart tips, but they’ll need repositioning if I want them to lay flat again. Here, I prioritize economy of time/effort over having them perfectly centered. [← sounds better than “lazy”]
I’ll just rip the seam to one corner, leaving the other corner and remaining stitches intact:
reposition pants pocket


They extend past the pocket on the outside corner by a bit, but I am very okay with that oddity. Now to pin the waistband.


Sew them up, and they’re done! I am content with this result.
Notice how the waistline is no longer straight? Interesting side effects of fabric manipulation.
modifying thrift store pants
 
Sara Hartwin
pollinator
Posts: 207
Location: SE USA, southern Piedmont Uplands, zone 8b
169
home care tiny house cooking fiber arts seed writing composting
  • Likes 3
  • Mark post as helpful
  • send pies
    Number of slices to send:
    Optional 'thank-you' note:
  • Quote
  • Report post to moderator
Resource #1
Evelyn Wood’s method of sewing darts is my favorite so far.

(That woman’s channel is chock-full of high quality content, by the way.)
 
Sara Hartwin
pollinator
Posts: 207
Location: SE USA, southern Piedmont Uplands, zone 8b
169
home care tiny house cooking fiber arts seed writing composting
  • Likes 2
  • Mark post as helpful
  • send pies
    Number of slices to send:
    Optional 'thank-you' note:
  • Quote
  • Report post to moderator
Resource #2
This Sewing for a Living blog post explains the back center seam method in detail. The text tutorial (below the videos) is very informative, with lots of pictures.

Here’s the video:
 
Sara Hartwin
pollinator
Posts: 207
Location: SE USA, southern Piedmont Uplands, zone 8b
169
home care tiny house cooking fiber arts seed writing composting
  • Likes 5
  • Mark post as helpful
  • send pies
    Number of slices to send:
    Optional 'thank-you' note:
  • Quote
  • Report post to moderator
Final thoughts & encouragement
  • I work on an entry-level home sewing machine (Brother LS-590). I have no serger or overlock machine. This alteration is very doable with basic equipment.
  • A hammer is helpful for flattening and thinning bulky seams before you sew through them.
  • I recently discovered the arrowhead stitches on my machine. I like them for overlocking raw edges.
  • A clean machine works better – lint builds up really quickly under that plate! It’s a pretty quick job to clean it out. I don’t have a brush but a Q-tip gathers it right up.
  • This is one of those projects that I drag my feet getting started, because it's kind of fiddly, with plenty of opportunities for adult-only words. But the end result is so nice, I've never regretted doing it. The anticipation really is worse than the actual doing, for me. It never takes as long as I think it's going to.


  • I really am looking forward to playing around with darts more, especially on my bodice blocks.

    Edited for grammar fix.
     
    gardener
    Posts: 2034
    Location: Zone 6b
    1246
    forest garden fungi books chicken fiber arts ungarbage
    • Likes 4
    • Mark post as helpful
    • send pies
      Number of slices to send:
      Optional 'thank-you' note:
    • Quote
    • Report post to moderator
    Well done Sara! The result looks very neat.
    Men's pants are made to be adjustable with a central back seam in the waistband and also the order of construction is different from women's pants. I took darts out of the back waistband of my Jeans too but the job was quite quick and dirty I wear tops long enough to cover it.
     
    gardener
    Posts: 272
    Location: Idaho panhandle, zone 6b, 30” annual rainfall, silty soil
    208
    2
    foraging rabbit books chicken food preservation cooking fiber arts medical herbs bee seed sheep
    • Likes 4
    • Mark post as helpful
    • send pies
      Number of slices to send:
      Optional 'thank-you' note:
    • Quote
    • Report post to moderator
    If I had more apples, I’d throw them liberally all over this thread. Great posts, Sara! If you want more dart fun, check out Bianca at The Closet Historian. This video of hers got me understanding darts for the first time, and I’ve been sewing for a whiiiiiiiile.  
     
    Sara Hartwin
    pollinator
    Posts: 207
    Location: SE USA, southern Piedmont Uplands, zone 8b
    169
    home care tiny house cooking fiber arts seed writing composting
    • Likes 5
    • Mark post as helpful
    • send pies
      Number of slices to send:
      Optional 'thank-you' note:
    • Quote
    • Report post to moderator

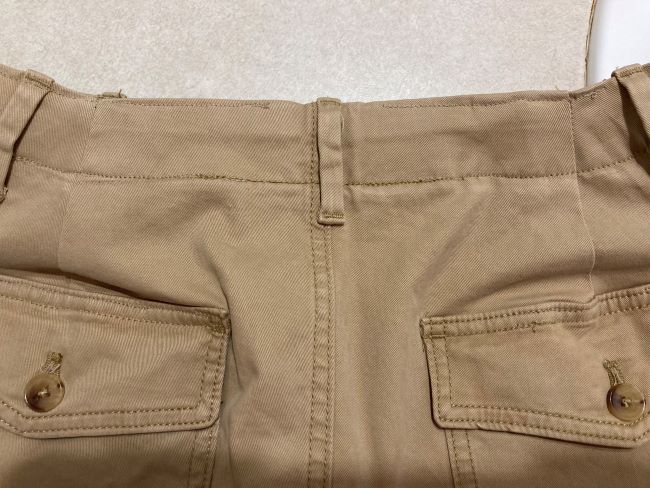
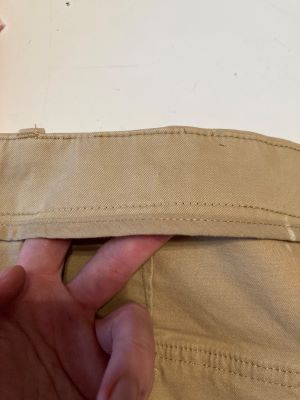
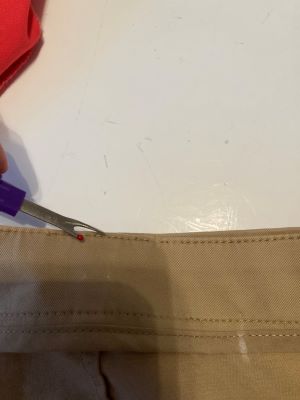
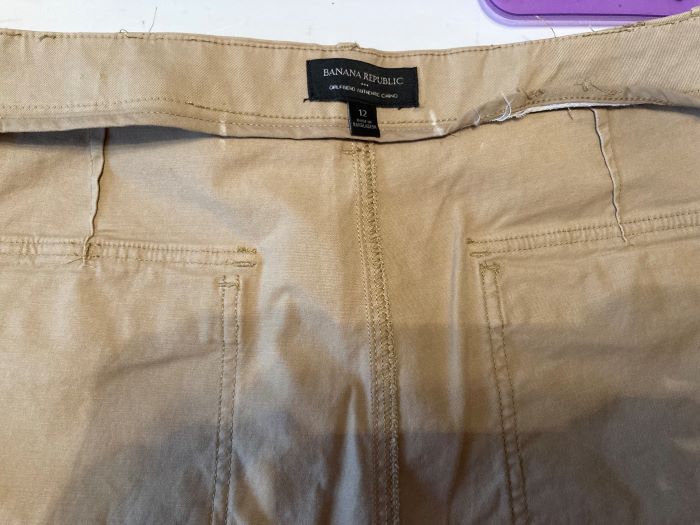
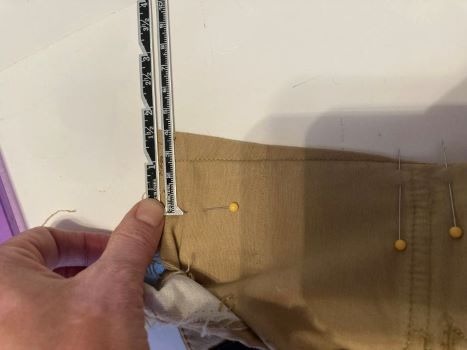
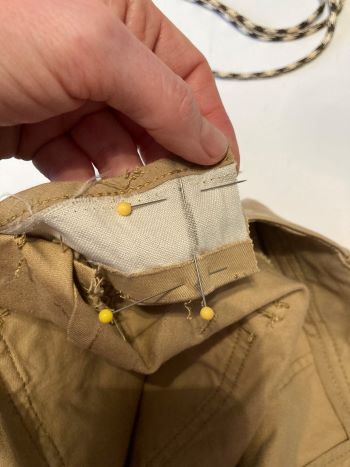
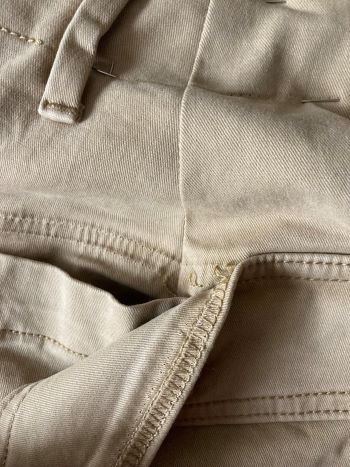
    May Lotito wrote:Men's pants are made to be adjustable with a central back seam in the waistband and also the order of construction is different from women's pants.


    I aspire to deciphering a garment's construction just by looking at it, but I don't have the experience yet. Taking clothes apart is so far the best way I've found of learning about commercial garment construction.

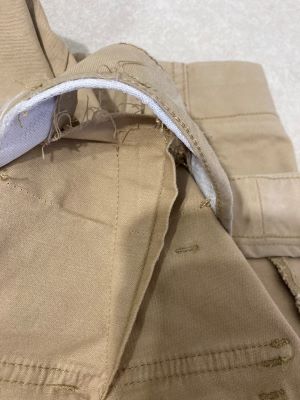
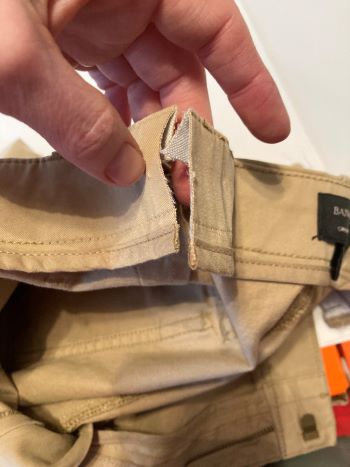
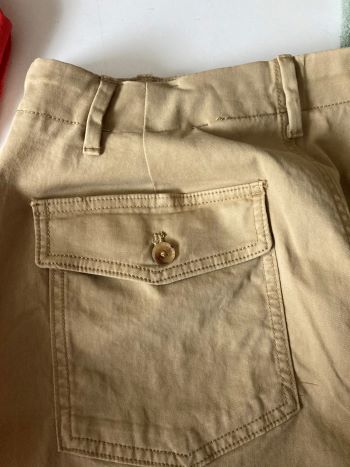
    May wrote:...I wear tops long enough to cover it.


    Yes! Wearing more tunic-like tops (therefore longer) is one reason I don't mind the imperfections.
    And the "out of sight, out of mind" principle works really well while I'm wearing them, even if I'm wearing shorter tops. :-D

    Shawn Foster wrote:...check out Bianca at The Closet Historian.


    Gracious, Shawn - I'm not even 10 minutes into that video, and I've already learned more from her than from the few blog articles I've read.
    I was thinking while writing this up: If we're darting, we're basically doing geometry. Like, really real-life doing it, not protractor and pencil and paper doing it. No fancy formulas or constants needed! Just fitting and marking.

    Thank you both for your kind compliments!
     
    Shawn Foster
    gardener
    Posts: 272
    Location: Idaho panhandle, zone 6b, 30” annual rainfall, silty soil
    208
    2
    foraging rabbit books chicken food preservation cooking fiber arts medical herbs bee seed sheep
    • Likes 5
    • Mark post as helpful
    • send pies
      Number of slices to send:
      Optional 'thank-you' note:
    • Quote
    • Report post to moderator
    Her pattern drafting video series (this is one of them) is so great. The combination of her explanation with the demonstrations actually works in my brain. I can actually make clothes based on my measurements now, rather than buying patterns!
     
    May Lotito
    gardener
    Posts: 2034
    Location: Zone 6b
    1246
    forest garden fungi books chicken fiber arts ungarbage
    • Likes 4
    • Mark post as helpful
    • send pies
      Number of slices to send:
      Optional 'thank-you' note:
    • Quote
    • Report post to moderator
    Here is what I did. When the waist is too big, it's important to figure out where does the excess ease go. In this case, taking in the side seam or center back won't have the same effect and will mess up with the grains.
    P1180994.JPG
    Too much gap in the back
    Too much gap in the back
    P1180997.JPG
    Make deeper darts aka original yoke not curvy enough
    Make deeper darts aka original yoke not curvy enough
     
    The glass is neither half full or half empty. It is too big. But this tiny ad is just right:
    Learn Permaculture through a little hard work
    https://wheaton-labs.com/bootcamp
    reply
      Bookmark Topic Watch Topic
    • New Topic