|

|

|

|

|

|
|
|
|
|
|
|
|

|

|

|

|

|
 25
25


“So I'm lightin' out for the territory, ahead of the scared and the weak and the mean spirited, because Aunt Sally is fixin’ to adopt me and civilize me, and I can't stand it. I've been there before.”
11


“So I'm lightin' out for the territory, ahead of the scared and the weak and the mean spirited, because Aunt Sally is fixin’ to adopt me and civilize me, and I can't stand it. I've been there before.”
9
“So I'm lightin' out for the territory, ahead of the scared and the weak and the mean spirited, because Aunt Sally is fixin’ to adopt me and civilize me, and I can't stand it. I've been there before.”
8

“So I'm lightin' out for the territory, ahead of the scared and the weak and the mean spirited, because Aunt Sally is fixin’ to adopt me and civilize me, and I can't stand it. I've been there before.”
10
.JPG)
.JPG)
.JPG)
.JPG)


“So I'm lightin' out for the territory, ahead of the scared and the weak and the mean spirited, because Aunt Sally is fixin’ to adopt me and civilize me, and I can't stand it. I've been there before.”
11
.JPG)

.jpg)
“So I'm lightin' out for the territory, ahead of the scared and the weak and the mean spirited, because Aunt Sally is fixin’ to adopt me and civilize me, and I can't stand it. I've been there before.”
7
"Ah, but a man's reach should exceed his grasp,
Or what's a heaven for?"
Andrea del Sarto by Robert Browning
7
Kevin Olson wrote:Joshua -
I didn't comment earlier, but I am watching your build with keen interest.
Though I probably won't do exactly what you have done, I do need to put up some sort of season stretcher over some existing raised beds. And soon-ish. We have starts that are blossoming (pinched off, so far, but they need to go in the ground, and we still had a hard frost this AM - nominal frost free date is June 1, here).
Anyway, thanks for documenting your build.
Kevin
“So I'm lightin' out for the territory, ahead of the scared and the weak and the mean spirited, because Aunt Sally is fixin’ to adopt me and civilize me, and I can't stand it. I've been there before.”
10
.JPG)


“So I'm lightin' out for the territory, ahead of the scared and the weak and the mean spirited, because Aunt Sally is fixin’ to adopt me and civilize me, and I can't stand it. I've been there before.”
11

“So I'm lightin' out for the territory, ahead of the scared and the weak and the mean spirited, because Aunt Sally is fixin’ to adopt me and civilize me, and I can't stand it. I've been there before.”
9


“So I'm lightin' out for the territory, ahead of the scared and the weak and the mean spirited, because Aunt Sally is fixin’ to adopt me and civilize me, and I can't stand it. I've been there before.”
7
.JPG)
.JPG)
.JPG)
“So I'm lightin' out for the territory, ahead of the scared and the weak and the mean spirited, because Aunt Sally is fixin’ to adopt me and civilize me, and I can't stand it. I've been there before.”
8
.JPG)
.JPG)
.JPG)
.JPG)
.JPG)
“So I'm lightin' out for the territory, ahead of the scared and the weak and the mean spirited, because Aunt Sally is fixin’ to adopt me and civilize me, and I can't stand it. I've been there before.”
8

“So I'm lightin' out for the territory, ahead of the scared and the weak and the mean spirited, because Aunt Sally is fixin’ to adopt me and civilize me, and I can't stand it. I've been there before.”
6
 6
6
Visit Redhawk's soil series: https://permies.com/wiki/redhawk-soil
How permies.com works: https://permies.com/wiki/34193/permies-works-links-threads

Skill verified by Nicole Alderman")

Skill verified by Mike Haasl") 11
11
Jay Angler wrote:I think it's a life rule... you never have as much soil as you think you have or as much as you really need. I sorrow with you, but don't know your ecosystem enough to suggest how to create more soil. I have found that growing in straight compost isn't that effective either.
Patience is a virtue - so if time allows, you might try growing a polyculture in some native soil to "improve" it for next year? Use whatever extra seeds you can scrounge or get cheap and do a lot of chop and dropping over the summer/fall and see how it goes?


“So I'm lightin' out for the territory, ahead of the scared and the weak and the mean spirited, because Aunt Sally is fixin’ to adopt me and civilize me, and I can't stand it. I've been there before.”
3
Eternal optimist, passionate about revitalizing the land, awake but conscious of how illusive truth really is. Much love to all!
6
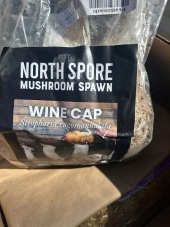
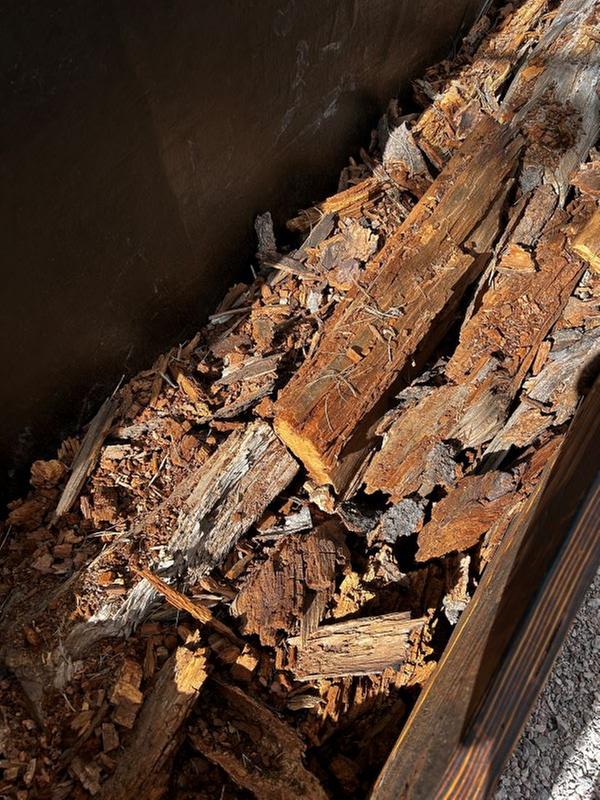
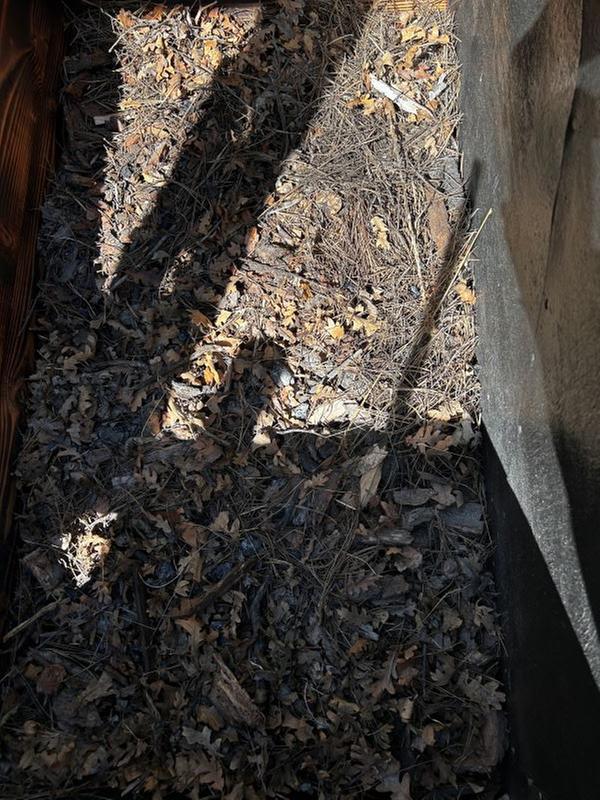
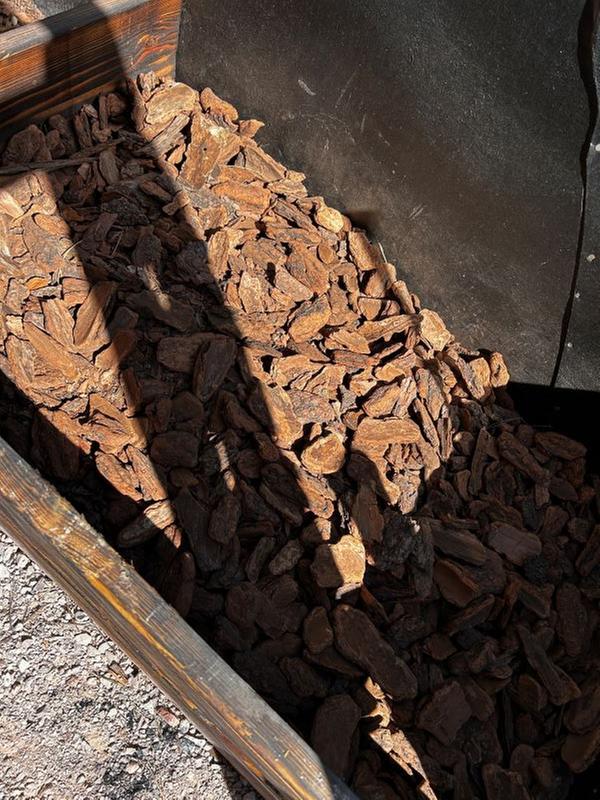
Suzie Park wrote:Strict amateur in the growing arena, but I'd stick damp (pre-soaked) logs and sticks with filler for the biggest gaps - leaves, etc. preferably still green - in the bottom under your lovely soil mix.
Very cool build btw!
“So I'm lightin' out for the territory, ahead of the scared and the weak and the mean spirited, because Aunt Sally is fixin’ to adopt me and civilize me, and I can't stand it. I've been there before.”


 5
5
How Permies works: https://permies.com/wiki/34193/permies-works-links-threads
My projects on Skye: The tree field, Growing and landracing, perennial polycultures, "Don't dream it - be it! "
10
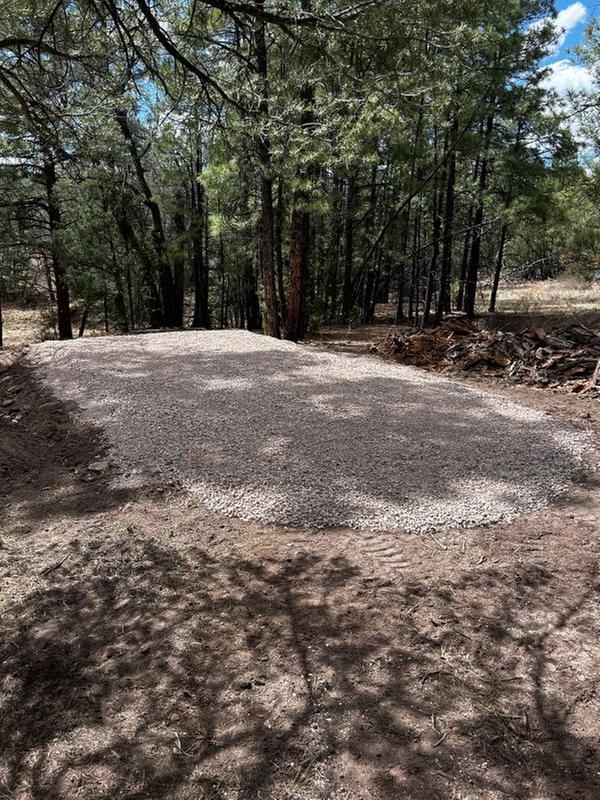
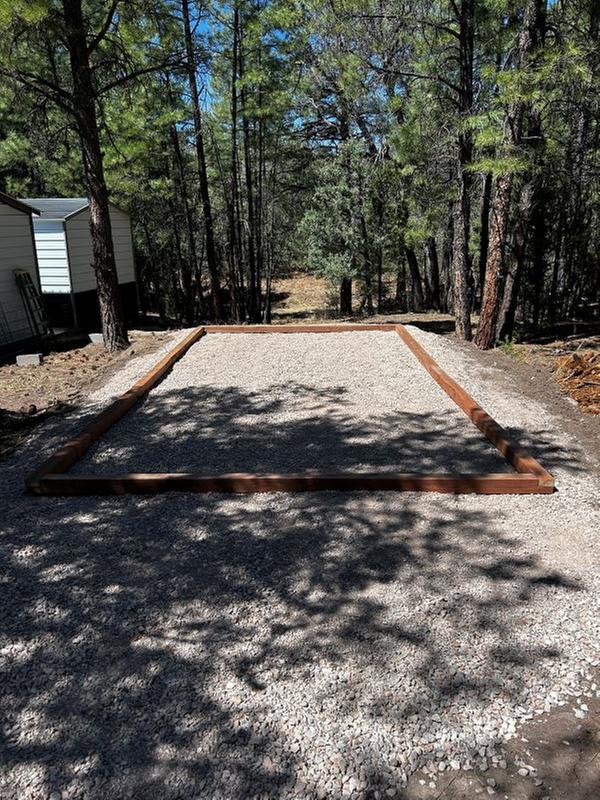
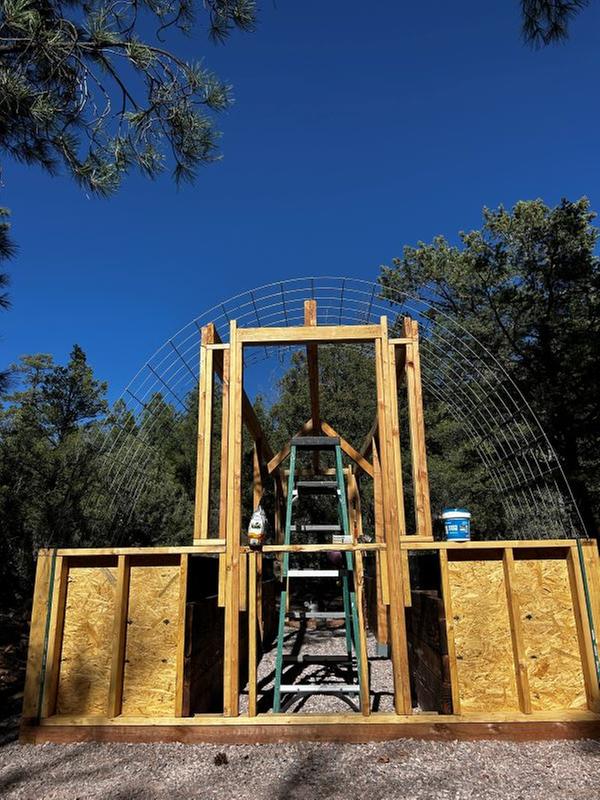
Nancy Reading wrote:Thanks for sharing your build Joshua - it's looking great. I have polytunnel envy here, mine is still a hole in the ground!
Sounds like you've got the soil level sorted - these were my thoughts....
I don't think adding more biochar would do any harm, but probably won't be enough for what you need. is there possibilities of coffee grounds from local coffee shops? aged manure (or bunny poo is less rich), mushroom compost, leafmould, chopped wool (remember those wool pellets?) any plant nurseries nearby that might have scrap plants that you could reuse the compost from...


“So I'm lightin' out for the territory, ahead of the scared and the weak and the mean spirited, because Aunt Sally is fixin’ to adopt me and civilize me, and I can't stand it. I've been there before.”
5

How Permies works: https://permies.com/wiki/34193/permies-works-links-threads
My projects on Skye: The tree field, Growing and landracing, perennial polycultures, "Don't dream it - be it! "
5
“So I'm lightin' out for the territory, ahead of the scared and the weak and the mean spirited, because Aunt Sally is fixin’ to adopt me and civilize me, and I can't stand it. I've been there before.”
6
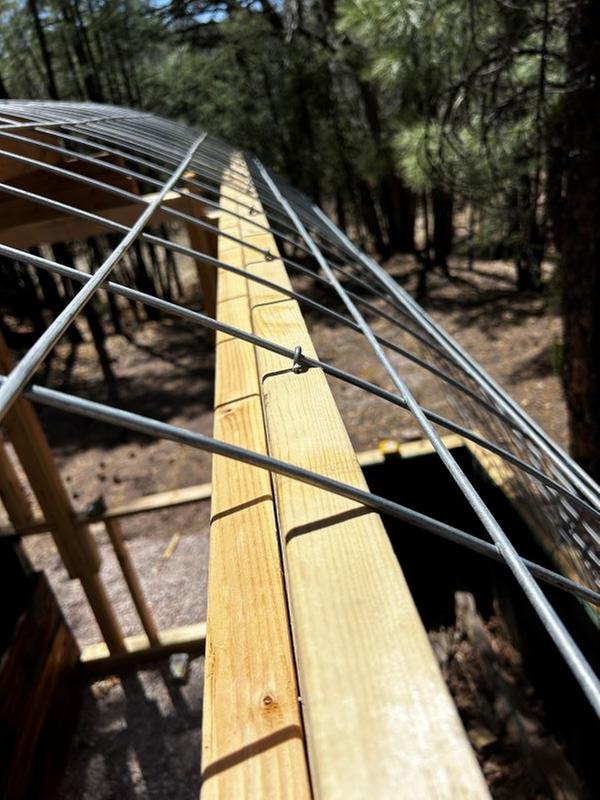
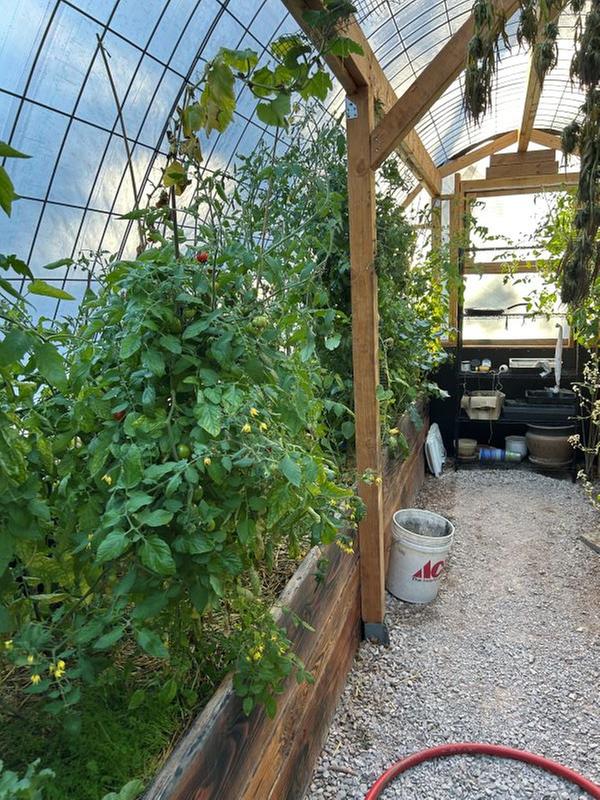
Joshua States wrote:It does get really hot in there during the day. I just purchased some small solar-power fans for ventilation and a screen door.
Visit Redhawk's soil series: https://permies.com/wiki/redhawk-soil
How permies.com works: https://permies.com/wiki/34193/permies-works-links-threads
7
.JPG)
.JPG)
.JPG)
.JPG)
.JPG)
.JPG)
“So I'm lightin' out for the territory, ahead of the scared and the weak and the mean spirited, because Aunt Sally is fixin’ to adopt me and civilize me, and I can't stand it. I've been there before.”
4
![[Thumbnail for Aug-1-2025-(1).JPG]](/t/278734/a/271119/Aug-1-2025-(1).JPG "Filename: Aug-1-2025-(1).JPG
Description:")
![[Thumbnail for Aug-1-2025-(2).JPG]](/t/278734/a/271120/Aug-1-2025-(2).JPG "Filename: Aug-1-2025-(2).JPG
Description:")
“So I'm lightin' out for the territory, ahead of the scared and the weak and the mean spirited, because Aunt Sally is fixin’ to adopt me and civilize me, and I can't stand it. I've been there before.”
5
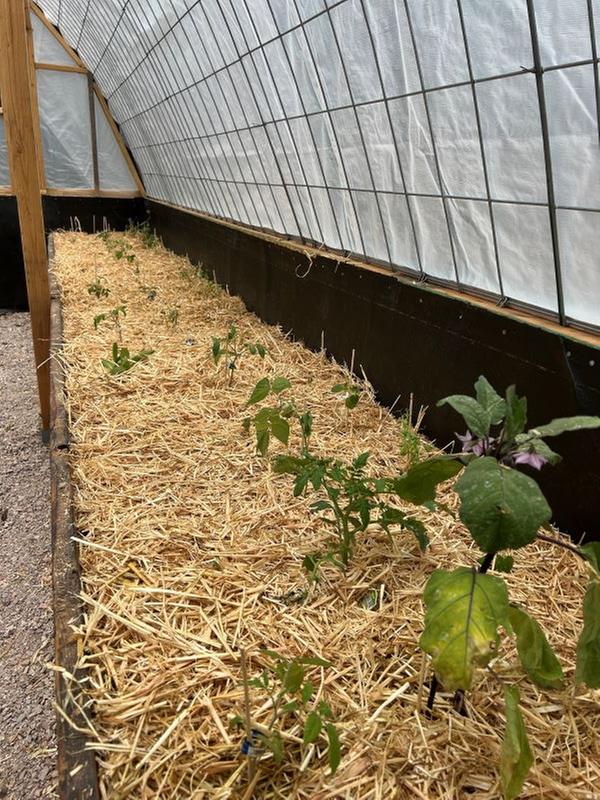
Joshua States wrote:... except for the peas, which all started dying, so I planted more,
The arugula is very potent!
The only real problems I am having is the root vegetables are stunted because the soil is very compacted and the lack of pollinators. Not too many bees and such around here, so I am hand pollinating the squash, melons, and eggplant with a Q-tip.
Next year I will dig up and loosen the soil. Probably add some amendments like coir or peat to keep it fluffier.
Visit Redhawk's soil series: https://permies.com/wiki/redhawk-soil
How permies.com works: https://permies.com/wiki/34193/permies-works-links-threads
3
Jay Angler wrote:
Joshua States wrote:... except for the peas, which all started dying, so I planted more,
Peas generally are a spring, cool weather crop. I'm not surprised they've died back, but a friend also started a second lot, so it's worth a try as it's so easy to save pea seeds and they're good for the soil even if they don't produce a crop.
And wrote:The arugula is very potent!
Again, in my ecosystem, it's a cool weather crop. The added heat of the greenhouse could account for the potency and so long as you don't mind the spiciness, consider it a feature rather than a bug!
And wrote:The only real problems I am having is the root vegetables are stunted because the soil is very compacted and the lack of pollinators. Not too many bees and such around here, so I am hand pollinating the squash, melons, and eggplant with a Q-tip.
Next year I will dig up and loosen the soil. Probably add some amendments like coir or peat to keep it fluffier.
Biochar can be a great addition to both loosen soil and to help it hold nutrients. If you have access to scrap wood or a lot of branch clippings, it would be something to consider. Lot's of info on small to larger scale ways to make it over on the biochar forum.
As for the bees - is this a local issue? Do you have native bees? Is it good bee territory? In my ecosystem, bee forage is an issue. The lowly dandelion is critical to supporting pollinators, as are some of the herbs I grow and allow to bloom specifically for them. I would do some research and talk to long term neighbors. If you're in an area where certain toxic gick is used, you may have to work hard to create a haven for pollinators in the hopes they'll stay home and not roam into dangerous territory.
“So I'm lightin' out for the territory, ahead of the scared and the weak and the mean spirited, because Aunt Sally is fixin’ to adopt me and civilize me, and I can't stand it. I've been there before.”
3

“So I'm lightin' out for the territory, ahead of the scared and the weak and the mean spirited, because Aunt Sally is fixin’ to adopt me and civilize me, and I can't stand it. I've been there before.”
2
.JPG)
.JPG)
“So I'm lightin' out for the territory, ahead of the scared and the weak and the mean spirited, because Aunt Sally is fixin’ to adopt me and civilize me, and I can't stand it. I've been there before.”

|
God is a comedian playing for an audience that is afraid to laugh - Voltair. tiny ad:
Homesteading and Permaculture Bundle - More than 35 Things
https://permies.com/w/235626/Homesteading-Permaculture-Bundle
|