• Post Reply Bookmark Topic Watch Topic
  • New Topic
permaculture forums growies critters building homesteading energy monies kitchen purity ungarbage community wilderness fiber arts art permaculture artisans regional education skip experiences global resources cider press projects digital market permies.com pie forums private forums all forums
this forum made possible by our volunteer staff, including ...
master stewards:
  • Carla Burke
  • John F Dean
  • Timothy Norton
  • Nancy Reading
  • r ranson
  • Jay Angler
  • Pearl Sutton
stewards:
  • paul wheaton
  • Tereza Okava
  • AndrĂ©s Bernal
master gardeners:
  • Christopher Weeks
gardeners:
  • Jeremy VanGelder
  • M Ljin
  • Matt McSpadden

I made my J out of steel did I fail?

 
Posts: 46
3
  • Likes 1
  • Mark post as helpful
  • send pies
    Number of slices to send:
    Optional 'thank-you' note:
  • Quote
  • Report post to moderator
Also with this design there's a lot of overhanging bricks and bricks that hang out underneath I have a nice brick saw would it be worth it to cut all that off so it could be insulated where those bricks aren't doing any good?
 
Chris Carn
Posts: 46
3
  • Likes 1
  • Mark post as helpful
  • send pies
    Number of slices to send:
    Optional 'thank-you' note:
  • Quote
  • Report post to moderator
This fire clay is straight clay and shows what you can add to it should I add sand or just use the Straight clay
 
master pollinator
Posts: 2012
Location: Ashhurst New Zealand (Cfb - oceanic temperate)
642
duck trees chicken cooking wood heat woodworking homestead
  • Likes 2
  • Mark post as helpful
  • send pies
    Number of slices to send:
    Optional 'thank-you' note:
  • Quote
  • Report post to moderator
On the subject of cutting the ends of the splits, I'd say do it if you've got a diamond saw. That will make it easier to wrap and the finished riser assembly will occupy less volume in the densification space.

Add sand to your fireclay to make your mortar. Clay by itself will shrink and crack as it dries. I'd go with a pretty fine grade since your joints are thin. Sifted perlite fines would be a good aggregate as well, maybe about 2:1 sand to perlite. Experimentation will guide you in getting a good mix.
 
Chris Carn
Posts: 46
3
  • Likes 2
  • Mark post as helpful
  • send pies
    Number of slices to send:
    Optional 'thank-you' note:
  • Quote
  • Report post to moderator
So I'm sure reading this whole thread I'm looking a little stupid when I say this the clay mortar I used is just the clay alone and then I just bought fire clay I'm wondering how different is it and and is it the same maybe? I didn't realize where it says Parts cement sand and clay are what you mix which it didn't have in it already it's straight clay
 
Phil Stevens
master pollinator
Posts: 2012
Location: Ashhurst New Zealand (Cfb - oceanic temperate)
642
duck trees chicken cooking wood heat woodworking homestead
  • Likes 2
  • Mark post as helpful
  • send pies
    Number of slices to send:
    Optional 'thank-you' note:
  • Quote
  • Report post to moderator
Fireclay will hold up far better at RMH temperatures. You could use the mortar clay in the exterior skin. But I made the same assumption when I looked at the photo initially...that this was a mixed product. Always pays to have a closer read of the label, or RTFM.
 
Rocket Scientist
Posts: 4648
Location: Upstate NY, zone 5
636
5
  • Likes 3
  • Mark post as helpful
  • send pies
    Number of slices to send:
    Optional 'thank-you' note:
  • Quote
  • Report post to moderator
Refractory cement is what is required by code for these applications. It actually "glues" the bricks together with a strong heat-resistant bond. It does mean that you can't neatly disassemble and reuse the bricks.

Fireclay mortar is not any kind of glue, purely a setting/leveling/sealing material which will not deteriorate from heat. It will actually get stronger when it is fired (but not stickier). It can easily be disassembled and the bricks wiped clean for easy reuse.

Regular mortar will fasten the bricks together initially, but will break down with heat and more or less turn back to powder.
 
Chris Carn
Posts: 46
3
  • Mark post as helpful
  • send pies
    Number of slices to send:
    Optional 'thank-you' note:
  • Quote
  • Report post to moderator
Thank you for all the help, so am I ok with the strait clay mix I used?
 
Posts: 36
15
  • Mark post as helpful
  • send pies
    Number of slices to send:
    Optional 'thank-you' note:
  • Quote
  • Report post to moderator
The cement helps speed the build since it gets hard rather quickly and you don't have to wait for the clay to dry. Yes, the cement will burn out, but the clay and sand tend to vitrify a bit at these temps and things stick together. I'd be happier with more clay and less cement and sand in the mix, but your thin joints look good. There's really not much structural cement to loose there.
 
Chris Carn
Posts: 46
3
  • Mark post as helpful
  • send pies
    Number of slices to send:
    Optional 'thank-you' note:
  • Quote
  • Report post to moderator
I'll be building another after this for a smaller greenhouse and wondered if I could pour a cylinder heat riser and fire it in the rocket stove using the clay and then maybe rockwool and vermiculite type mix and maybe cardboard to hold the shape till it burns of, do any of you able to link a thread of people who tried this, I am in a earthquake are and five that maybe a better solution than the stacked brick in the next project..thank you all for your amazing advice!!!
 
Phil Stevens
master pollinator
Posts: 2012
Location: Ashhurst New Zealand (Cfb - oceanic temperate)
642
duck trees chicken cooking wood heat woodworking homestead
  • Likes 2
  • Mark post as helpful
  • send pies
    Number of slices to send:
    Optional 'thank-you' note:
  • Quote
  • Report post to moderator
You've already got the ceramic blanket...consider making a five minute riser. Far easier than casting one (been there, done that). I replaced a janky cast perlite/clay riser that took over two weeks of trial and error to put together and was far too clay-heavy with a simple 5MR version two seasons ago. Performance improved and I know that any future builds of mine won't involve cast risers.
 
Chris Carn
Posts: 46
3
  • Likes 5
  • Mark post as helpful
  • send pies
    Number of slices to send:
    Optional 'thank-you' note:
  • Quote
  • Report post to moderator
Thanks I'll keep to your advice) saves me wasting time and money, I'm thinking if all goes well i might be able to test it out by the end of next week, then i will work on a coil to heat floor pex and spread out some of the heat if there's any left after the mass is heated.
 
Leslie Walper
Posts: 36
15
  • Likes 3
  • Mark post as helpful
  • send pies
    Number of slices to send:
    Optional 'thank-you' note:
  • Quote
  • Report post to moderator
For structural integrity you might also consider a thin layer (2mm - 1/8") of clay on the outside of the firebox and riser with fiberglass mesh embedded. The fiberglass mesh is available for embedding in stucco in fairly large rolls, or in smaller quantities in the sheetrock area of the bigbox stores for sheetrock repairs. I think it's 6" wide and has a little sticky on one side for sheetrock use (that will quickly cook out, but not hurt the integrity of the clay). Then, on top of that add the ceramic insulation wrap.
 
Chris Carn
Posts: 46
3
  • Likes 1
  • Mark post as helpful
  • send pies
    Number of slices to send:
    Optional 'thank-you' note:
  • Quote
  • Report post to moderator
That's a great idea thank you, going to try to break up rockwool In the clay too for support like the hay in.cob.
 
Chris Carn
Posts: 46
3
  • Likes 2
  • Mark post as helpful
  • send pies
    Number of slices to send:
    Optional 'thank-you' note:
  • Quote
  • Report post to moderator
I'm getting farther, I got the rest of the heat Riser put together and then I took a grinder with a diamond blade cut off the edges, then used a diamond wheel to smooth it out. After I mixed Rockwool fine sand and the clay together and tried to spray it through the texture gun  but it just clogged so I just trout It On by hand I'm just hoping the rock wall is in the waste of time since now it's smushed and probably loses some of its insulation properties. I'm thinking about adding some more in the center of each 4 ft part to make it rounder and the insulation May wrap nicer but just minimal amount to make it more round instead of square not sure if it matters, maybe it will add a little strength to the riser...but I'll post more as I go and any advice anyone has I really appreciate it, thanks so much!
20230918_174002.jpg
Tall heat riser of an RMH in progress
20230918_174030.jpg
heat riser cobbed up
 
Glenn Herbert
Rocket Scientist
Posts: 4648
Location: Upstate NY, zone 5
636
5
  • Likes 3
  • Mark post as helpful
  • send pies
    Number of slices to send:
    Optional 'thank-you' note:
  • Quote
  • Report post to moderator
Nice work! I think you will have a heater to be proud of.

The rockwool when mixed into clay/mortar will lose any insulating value, but it will nicely replace the straw in cob and reinforce the riser coating.
 
Chris Carn
Posts: 46
3
  • Likes 1
  • Mark post as helpful
  • send pies
    Number of slices to send:
    Optional 'thank-you' note:
  • Quote
  • Report post to moderator
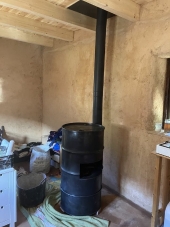
I'm going to start cutting on the barrels today, using two barrels any good ideas on how to hook them together,, and a way to take them apart for cleaning? Here's my plan so far, squwishing the lip in the bottom barrel with vice jaws the sealing between with something  and using the lid strap to connect them)
20230919_101507.jpg
Rim of a barrel in a mechanic's vice
 
Chris Carn
Posts: 46
3
  • Likes 1
  • Mark post as helpful
  • send pies
    Number of slices to send:
    Optional 'thank-you' note:
  • Quote
  • Report post to moderator
I cut out the steel and have it laid out is starting to take shape I need to scoot all together and try and seal it and I was thinking fill most of the bottom barrel with the pelletized clay other than where the hole is for the exhaust for insulation and also fill around the front of the barrel where the burn tube and fire box is.
20230919_135258.jpg
[Thumbnail for 20230919_135258.jpg]
 
Phil Stevens
master pollinator
Posts: 2012
Location: Ashhurst New Zealand (Cfb - oceanic temperate)
642
duck trees chicken cooking wood heat woodworking homestead
  • Likes 1
  • Mark post as helpful
  • send pies
    Number of slices to send:
    Optional 'thank-you' note:
  • Quote
  • Report post to moderator
If you're wrapping the riser with the insulating blanket, then there won't really be a need for more clay mix inside the barrel. It's important to have as little impedance as possible at the manifold transition where the sinking exhaust exits the barrel and enters the mass. I would leave this area open for the most part. You could put a layer or two of CFB on the top of the burn tunnel where it's inside the bell, as that is a point where the heat gradient is working against you.
 
Chris Carn
Posts: 46
3
  • Likes 3
  • Mark post as helpful
  • send pies
    Number of slices to send:
    Optional 'thank-you' note:
  • Quote
  • Report post to moderator
Thanks I was just thinking also it would help seal the bottom of the barrel I'll see how much CFB I have left after the riser and if I run out I'm going to try to cover it with the clay pellets as insulation... but I have most of it laid out. Everything in place and I still have to figure out when I'm going to wrap the bottom with maybe cub
20230919_164702.jpg
[Thumbnail for 20230919_164702.jpg]
 
Glenn Herbert
Rocket Scientist
Posts: 4648
Location: Upstate NY, zone 5
636
5
  • Likes 1
  • Mark post as helpful
  • send pies
    Number of slices to send:
    Optional 'thank-you' note:
  • Quote
  • Report post to moderator
Rather than mostly filling the bottom barrel with clay pellets, I would put a couple inches of insulation (perlite-clay) or some CFB around the burn tunnel but otherwise leave the inside of the barrel open for freest airflow. You want a sturdy layer of cob all around your feed tube so the bricks don't get knocked out of place, and I think you would benefit from wrapping the whole bottom barrel with cob for stability and heat storage.
 
Chris Carn
Posts: 46
3
  • Likes 3
  • Mark post as helpful
  • send pies
    Number of slices to send:
    Optional 'thank-you' note:
  • Quote
  • Report post to moderator
Ofcorce I'm short on the ceramic blanket so ordered more but also used clay/perlite  around the bottom and will put more ceramic fiber over the flat parts when it comes in.thanks again for your help!
20230920_151500.jpg
[Thumbnail for 20230920_151500.jpg]
20230920_144818.jpg
[Thumbnail for 20230920_144818.jpg]
 
Chris Carn
Posts: 46
3
  • Mark post as helpful
  • send pies
    Number of slices to send:
    Optional 'thank-you' note:
  • Quote
  • Report post to moderator
So after lots of work, the thing doesn't work, the mass does not heat up,it smokes, I added more insulation to the riser, raised the riser to two inches from the barrel from three inches...added Double 6 pipes in the mass for more area....the mass doesn't heat up, I even added a variable speed fan at the chimney to help draw but seems I've waisted more money than what my steel j had cost..would love some advice but seems the projects another expensive failure unfortunately....
20231108_162712.jpg
[Thumbnail for 20231108_162712.jpg]
20231107_161721.jpg
[Thumbnail for 20231107_161721.jpg]
20231101_141446.jpg
[Thumbnail for 20231101_141446.jpg]
 
Rocket Scientist
Posts: 827
Location: Guernsey a small island near France.
328
  • Likes 3
  • Mark post as helpful
  • send pies
    Number of slices to send:
    Optional 'thank-you' note:
  • Quote
  • Report post to moderator
Sorry I have not gone through your build thread but just by looking at the last set of photos, I would ask if you have a bypass and if so, does it still smoke while is use?
The main question is how long ago did you finish the build because that looks like a Huge amount of mass to dry out, it could take weeks or even a month or more to completely dry out!
The stove will only stop smoking when the temperature gets very high and that wont happen if the mass is damp.
 
Glenn Herbert
Rocket Scientist
Posts: 4648
Location: Upstate NY, zone 5
636
5
  • Likes 5
  • Mark post as helpful
  • send pies
    Number of slices to send:
    Optional 'thank-you' note:
  • Quote
  • Report post to moderator
I recall that your chimney runs outside below ground level, then comes up just a few feet to the chimney cap. Did you ever extend the chimney height? The chimney shown in your early photo would add little to no draw to the system, and as that is apparently a problem, adding height would be a good first step.

With the chimney where it is, a bypass is not an option, unfortunately. The most likely remedy to make your system work well would be to move the chimney inside the greenhouse and go through the roof. Being a greenhouse, small leaks would not be such an issue; you would mostly need to use heat-resistant material around the penetration.
 
Chris Carn
Posts: 46
3
  • Likes 2
  • Mark post as helpful
  • send pies
    Number of slices to send:
    Optional 'thank-you' note:
  • Quote
  • Report post to moderator
I appreciate the replies, I did raise the  chimney and i am running a fan at the bottom of the chimney where there's a clean out to help start it and keep good draw when it smokes bad
17013645800702690039205057278587.jpg
[Thumbnail for 17013645800702690039205057278587.jpg]
 
Chris Carn
Posts: 46
3
  • Likes 3
  • Mark post as helpful
  • send pies
    Number of slices to send:
    Optional 'thank-you' note:
  • Quote
  • Report post to moderator
The wet look is from linseed oil but yes it's still sweating In the tubes(trying to dry it out more every day but the top yas dry when I did the linseed to make the top smoothe rf I didn't use another and left the sides dry incase more moisture need to weep out.
17013649177454820648909020086325.jpg
[Thumbnail for 17013649177454820648909020086325.jpg]
 
Glenn Herbert
Rocket Scientist
Posts: 4648
Location: Upstate NY, zone 5
636
5
  • Likes 4
  • Mark post as helpful
  • send pies
    Number of slices to send:
    Optional 'thank-you' note:
  • Quote
  • Report post to moderator
That is taller, but not by much. How much insulation is around the long underground passage?
I don't know how much the linseed oil impedes drying of the mass, but I would definitely not add more until the cob is all dry
 
Chris Carn
Posts: 46
3
  • Mark post as helpful
  • send pies
    Number of slices to send:
    Optional 'thank-you' note:
  • Quote
  • Report post to moderator
I covered the burn tube with 1inch then pelletier clay then cob, I have 1 1/2 inch around the riser, should I add more and is 2 inches to the barrel better tan 3 for heat and draw..I couldn't really tell if there was a difference,  also there is room in the bottom barrel I could fill it with more pelleti,ed clay if that would help get the heat more into the mass.
 
Fox James
Rocket Scientist
Posts: 827
Location: Guernsey a small island near France.
328
  • Mark post as helpful
  • send pies
    Number of slices to send:
    Optional 'thank-you' note:
  • Quote
  • Report post to moderator
What is pelletier clay?
How much higher above the riser top would the chimney top be?
 
Chris Carn
Posts: 46
3
  • Likes 2
  • Mark post as helpful
  • send pies
    Number of slices to send:
    Optional 'thank-you' note:
  • Quote
  • Report post to moderator
Sry I ment pelletized clay, perlite mixed with fire clay and the chimney is only 14-18 inch taller than the barrel...the air is cold by then so not sure if it's helping the draft out by the time it's in there...I almost get better draft when I leave the cleanout open at the bottom of the chimney
 
Phil Stevens
master pollinator
Posts: 2012
Location: Ashhurst New Zealand (Cfb - oceanic temperate)
642
duck trees chicken cooking wood heat woodworking homestead
  • Likes 4
  • Mark post as helpful
  • send pies
    Number of slices to send:
    Optional 'thank-you' note:
  • Quote
  • Report post to moderator
Keep running it to dry out that mass. When you finally chase all the water out of the cob things will get better. Extending that chimney would really help as well, but when the mass is fully dry you might get away with it as is.
 
Chris Carn
Posts: 46
3
  • Likes 3
  • Mark post as helpful
  • send pies
    Number of slices to send:
    Optional 'thank-you' note:
  • Quote
  • Report post to moderator
Thanks so much for all of your help. I will post when I get farther With pictures and definitely will ask for more advice
 
Chris Carn
Posts: 46
3
  • Mark post as helpful
  • send pies
    Number of slices to send:
    Optional 'thank-you' note:
  • Quote
  • Report post to moderator
I'm rethinking my design.
Im wondering why wouldn't the riser be narrower like 5 inches or 4 inches to increase the heat after the long fire chamber...it's just combustion in there, why not compress the air...say a 7 inch fire area the the burn area then 7 inch burn chamber but reduce it 5 or 4 inches in the riser to compress the heat and pressure to increase burn and elevate the heat...compress the heat in the riser?
 
Phil Stevens
master pollinator
Posts: 2012
Location: Ashhurst New Zealand (Cfb - oceanic temperate)
642
duck trees chicken cooking wood heat woodworking homestead
  • Likes 7
  • Mark post as helpful
  • send pies
    Number of slices to send:
    Optional 'thank-you' note:
  • Quote
  • Report post to moderator
The cross section is the important constant in RMH design. What we have learned from all the years of trial and error is that a J-tube system with a given diameter that is pretty much equivalent across the burn tunnel, riser, and flue will perform well as long as other dimensions are in alignment with the ratios that are known to work. I'm intentionally citing diameter as the constant, instead of cross sectional area, because another thing we've learned is that as you get farther away from cylindrical sections, the effects of friction on the fluid dynamics are amplified.

This is not to say that you can't push the envelope in one or more directions. But the riser is quite possibly the least tolerant of diameter variance out of all the main parts of the system...the gases in there are at their most expansive point in the process. A riser that is too constricting will impede the flow of combustion gases, choke the draft, and inhibit clean burning. At the other extreme, a riser that is too wide will decrease the velocity and turbulence at the critical stage where the highest temperatures are developed, and this is also likely to limit mixing, efficiency, and clean performance.

 
Fox James
Rocket Scientist
Posts: 827
Location: Guernsey a small island near France.
328
  • Likes 5
  • Mark post as helpful
  • send pies
    Number of slices to send:
    Optional 'thank-you' note:
  • Quote
  • Report post to moderator
I think there are lots of improvements you could do rather than trying to change a proven design.
It seems like you are already pushing your designs capabilities past the limit.

I dont know how well perlite and fire clay actually works as a insulating material, a lot would depend on the mixing ratio and how porous  the end result is as  you dont want to be sucking up moisture from the surrounding soil.

I have mixed and used large amounts of Vcrete, (vermiculite and cement) as it is used in pizza oven construction.
The standard  insulating mix that covers the dome is 10-1.  I can only imagine just how difficult it must be to mix 10-1 perlite with clay? Just by adding a small percentage of perlite to clay will not make a good insulator.

It seems to me the long buried pipe that runs to your chimney is acting as a heat sink although it is not easy to see exactly how you have done that bit?
I am concerned  about the chimney needing more heat for it to draw and in turn pull the gasses through the system.
One easy mod would be to replace the brick riser with a 5 minute riser and another easy mod would to extend the chimney.
 
Chris Carn
Posts: 46
3
  • Likes 5
  • Mark post as helpful
  • send pies
    Number of slices to send:
    Optional 'thank-you' note:
  • Quote
  • Report post to moderator
Thank you for your feedback that definitely makes sense. Why the riser can't be changed. It will affect everything else. I'll keep drying it out and maybe add more insulation  to the heat riser since the greenhouse is out doors if it's not preheated takes a while to even start with a fan, and if needed I'll dig back the burn tunnel and add insulation instead of the perlite...thanks again for the info I will keep picking at it and posting for your help)
 
Glenn Herbert
Rocket Scientist
Posts: 4648
Location: Upstate NY, zone 5
636
5
  • Likes 3
  • Mark post as helpful
  • send pies
    Number of slices to send:
    Optional 'thank-you' note:
  • Quote
  • Report post to moderator
Perlite-clay is fine insulation as long as you use a lot more perlite than clay (just barely enough clay to make the perlite stick together). If you did that, I would not alter it as a first step. I would look at the exhaust going underground and outside. What are the details of that area? Underground outside would be hard to keep dry, and wet material steals heat efficiently. Exactly how tall is the chimney top now, above the feed level? If you have insulation that keeps the underground chimney from getting colder, then increasing the height would help draft. What does the final exhaust temperature feel like?
 
Chris Carn
Posts: 46
3
  • Likes 1
  • Mark post as helpful
  • send pies
    Number of slices to send:
    Optional 'thank-you' note:
  • Quote
  • Report post to moderator
Thanks for replying with more questions. I'll try to find the old pictures, but you're right. The chimney pipe is out in the lawn. Was s9me cement under it I put hoping that kept water coming thru dirt underneath, But it' still can collect ground moisture And I have it wrapped with a lava hoping it would  Help. Being a greenhouse I'm limited so going thru plastic in the roof adds unseen dangers that seemed easier to run in the yard...but I made modifications today to try to speed things up not sure if they help...atheist might be amusing for you) I put holes every 6 inches in the mass to help leach out moisture till its dry, I added insulation to the riser top, burn tube and then any space I had in the bottom half barrel I had wrapped the lower area I added lava rock to limit drum air area and hopefully add that heat to the mass...I got the top of the barrel to 950 and had I smoke storm of maybe mosty steam but I had intervals of soot smoke which I assume is higher heat clearing soot from tubes as it grabs seeping moisture, I also added a tube to the intake from the barrel to raise it and protected with fire brick materials, thanks for all the help I'm learning and realize these mistakes are the best lessons
20231207_124208.jpg
[Thumbnail for 20231207_124208.jpg]
20231207_124202.jpg
[Thumbnail for 20231207_124202.jpg]
20231207_123904.jpg
[Thumbnail for 20231207_123904.jpg]
20231206_162041.jpg
[Thumbnail for 20231206_162041.jpg]
 
Chris Carn
Posts: 46
3
  • Mark post as helpful
  • send pies
    Number of slices to send:
    Optional 'thank-you' note:
  • Quote
  • Report post to moderator
So I'm still having issues and looking for great advice once again. Ive raised the chimney and that did help with draw, but I realize the tube as it goes outside was designed poorly. I  had made a cement U-shaped area around the tube and put sand inside with lava rock onto the sand figuring the heat would keep it dry. As some of you have said it actually sucked the heat out. Im looking for any ideas of what I can replace that with to keep the draw flowing and stay hot? Maybe cement it in or even perlite/clay then cement top to seal it from moisture?  Thank you for any help you can give.
20231228_113527.jpg
[Thumbnail for 20231228_113527.jpg]
 
Fox James
Rocket Scientist
Posts: 827
Location: Guernsey a small island near France.
328
  • Likes 3
  • Mark post as helpful
  • send pies
    Number of slices to send:
    Optional 'thank-you' note:
  • Quote
  • Report post to moderator
You could try lying down an insulated twin wall chimney section as they are sealed units
 
The tiny ad to rule them all
montana community seeking 20 people who are gardeners or want to be gardeners
https://permies.com/t/359868/montana-community-seeking-people-gardeners
reply
    Bookmark Topic Watch Topic
  • New Topic