• Post Reply Bookmark Topic Watch Topic
  • New Topic
permaculture forums growies critters building homesteading energy monies kitchen purity ungarbage community wilderness fiber arts art permaculture artisans regional education skip experiences global resources cider press projects digital market permies.com pie forums private forums all forums
this forum made possible by our volunteer staff, including ...
master stewards:
  • Carla Burke
  • Nancy Reading
  • John F Dean
  • r ranson
  • Jay Angler
  • paul wheaton
stewards:
  • Pearl Sutton
  • Leigh Tate
  • Devaka Cooray
master gardeners:
  • Christopher Weeks
  • Timothy Norton
gardeners:
  • thomas rubino
  • Matt McSpadden
  • Jeremy VanGelder

I made my J out of steel did I fail?

 
Posts: 46
3
  • Likes 2
  • Mark post as helpful
  • send pies
    Number of slices to send:
    Optional 'thank-you' note:
  • Quote
  • Report post to moderator
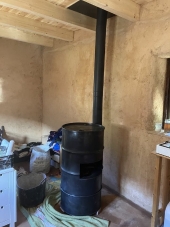
After $700 in I realized rereading the book that steels not good for the heat riser is there anything I can do to make this work I have the barrel and a welded 6-in Square steel J I'm wondering if I can insulate the inside somehow so it doesn't melt? Please any advice would be appreciated)
1693419774874438134922693563556.jpg
6 inch square rocket core made from steel
 
Rocket Scientist
Posts: 4530
Location: Upstate NY, zone 5
576
5
  • Likes 5
  • Mark post as helpful
  • send pies
    Number of slices to send:
    Optional 'thank-you' note:
  • Quote
  • Report post to moderator
Insulating the inside of a steel 6" J-tube would make it small enough that it may not work as reliably. I think at this point, I would insulate around the steel and use it while it lasts. Meanwhile, gather firebricks or other refractory materials for a core rebuild when it becomes necessary. The rest of your heater can be reused as long as you plan for disassembly.
 
Chris Carn
Posts: 46
3
  • Likes 2
  • Mark post as helpful
  • send pies
    Number of slices to send:
    Optional 'thank-you' note:
  • Quote
  • Report post to moderator
Thankyou I appreciate your advice I'm kinda devastated I have the mass half done and the chimney but after realizing this its alot if waisted work and money
 
Rocket Scientist
Posts: 1809
Location: Kaslo, BC
525
building solar woodworking rocket stoves wood heat greening the desert
  • Likes 12
  • Mark post as helpful
  • send pies
    Number of slices to send:
    Optional 'thank-you' note:
  • Quote
  • Report post to moderator
Hi Chris,

A hard burning, insulated (from the outside) steel J tube might last for about 1/2 to 1 season. As the steel spalls, it will begin to flake off possibly causing an obstruction (not good). My first stove core was steel and surrounded with loose vermiculite as a means of being able to easily modify it. One day, the steel core burnt through and the vermiculite poured into the burn chamber while the stove was running.. Luckily I was there to extinguish the fire. So basically, the metals life is short and destined for a rebuild sooner than you would probably like so why plan for failure.
My recommendation would be to save your nicely made J tube for a cooking/ camp stove. With a little modification, you could turn it into a Clarry stove that runs on stick wood rather than pellets.
As Glenn suggested, refractory for the core is an excellent choice to build a long lasting core that can withstand the high temperatures of a well functioning, clean burning rocket stove.
Keep us posted of your build. We like pictures....
 
Chris Carn
Posts: 46
3
  • Likes 5
  • Mark post as helpful
  • send pies
    Number of slices to send:
    Optional 'thank-you' note:
  • Quote
  • Report post to moderator
Thxs for the advice, this is my 2nd time trying to build this, I'm going to abandon  the steel j and make it into something else I guess but having a hard time finding the fire brick, they have 4x9 bricks for 5$ each here but looks like most of these are built with 7×9?
1693518080212394212075220497415.jpg
stove system in ground with a stove pipe popping up
 
Chris Carn
Posts: 46
3
  • Likes 6
  • Mark post as helpful
  • send pies
    Number of slices to send:
    Optional 'thank-you' note:
  • Quote
  • Report post to moderator
It's going in a greenhouse
16935181308697671697529848288402.jpg
[Thumbnail for 16935181308697671697529848288402.jpg]
 
Glenn Herbert
Rocket Scientist
Posts: 4530
Location: Upstate NY, zone 5
576
5
  • Likes 9
  • Mark post as helpful
  • send pies
    Number of slices to send:
    Optional 'thank-you' note:
  • Quote
  • Report post to moderator
Standard firebricks are 4 1/2" x 9" x 2 1/2" (splits are 1 1/4" thick). All builds I have seen with firebrick use these. There can be specialty firebrick in other sizes, especially large "plates" that can be used for ceilings.

There are plenty of ways to close off cavities that are wider than 8" using standard firebrick.


It appears that you are planning an exterior chimney that is only a few feet above ground. This might work, but would probably work much better if taller, like above the greenhouse roofline. The original RMH work emphasized hidden or ground-level exhaust, but more recent thinking is that you will get much better and more reliable results following standard chimney design principles.
 
Chris Carn
Posts: 46
3
  • Likes 1
  • Mark post as helpful
  • send pies
    Number of slices to send:
    Optional 'thank-you' note:
  • Quote
  • Report post to moderator
Getting closer but having trouble finding 9x4x2.5, I only can find the 1.25 thick bricks and parts like the bridge will be a pain with the thin ones I think.
20230905_163639.jpg
[Thumbnail for 20230905_163639.jpg]
 
Rocket Scientist
Posts: 797
Location: Guernsey a small island near France.
299
  • Likes 3
  • Mark post as helpful
  • send pies
    Number of slices to send:
    Optional 'thank-you' note:
  • Quote
  • Report post to moderator
Those bricks are perfect, they need to be stood on edge and backed with insulation, the full size bricks are easier to work with but take an age to heat up.
 
Chris Carn
Posts: 46
3
  • Likes 3
  • Mark post as helpful
  • send pies
    Number of slices to send:
    Optional 'thank-you' note:
  • Quote
  • Report post to moderator
Thanks for all the help I did find the other bricks and got the 1st ones layed
20230907_154305.jpg
[Thumbnail for 20230907_154305.jpg]
 
Fox James
Rocket Scientist
Posts: 797
Location: Guernsey a small island near France.
299
  • Mark post as helpful
  • send pies
    Number of slices to send:
    Optional 'thank-you' note:
  • Quote
  • Report post to moderator
OK that is not what I was expecting, you  dont seem to have any insulation under the bricks?
What is your plan, do you intend to build the whole core with full size bricks?
 
Chris Carn
Posts: 46
3
  • Likes 3
  • Mark post as helpful
  • send pies
    Number of slices to send:
    Optional 'thank-you' note:
  • Quote
  • Report post to moderator
I may be reading the plan I have wrong,  but I layed them out in this picture,  what should I do to improve the design?
20230907_111832.jpg
A firebrick rocket mass heater core
 
Fox James
Rocket Scientist
Posts: 797
Location: Guernsey a small island near France.
299
  • Likes 1
  • Mark post as helpful
  • send pies
    Number of slices to send:
    Optional 'thank-you' note:
  • Quote
  • Report post to moderator
You have several different colour bricks, I dont know if any are insulating but you will need to insulate all around the stove including  underneath.
The simple formula is 1-2-4 = fire box hight - burn tunnel length - riser hight.
 
Glenn Herbert
Rocket Scientist
Posts: 4530
Location: Upstate NY, zone 5
576
5
  • Likes 5
  • Mark post as helpful
  • send pies
    Number of slices to send:
    Optional 'thank-you' note:
  • Quote
  • Report post to moderator
It looks like you are using the tried and true standard layup for an 8" J-tube. I would suggest that, if you have enough splits on hand, you swap the lowest two courses of full firebrick in the riser for splits like the rest of the riser. Otherwise you are good to go. It is true that using more splits for sidewalls of the burn tunnel will let it heat up faster; I don't think that detail is a big deal for you. Splits in the area where wood is handled would require more secure backup than full firebrick. In any case, you will want to surround the whole thing with insulation. Perlite-clay is an inexpensive and reliable choice.

You do want some insulation under the core. A layer of perlite-clay (mixed on the stronger side) with bricks around to contain the edges would work fine. Then lay your firebrick floor. It is mostly the area under the burn tunnel that matters here.
 
Gerry Parent
Rocket Scientist
Posts: 1809
Location: Kaslo, BC
525
building solar woodworking rocket stoves wood heat greening the desert
  • Likes 6
  • Mark post as helpful
  • send pies
    Number of slices to send:
    Optional 'thank-you' note:
  • Quote
  • Report post to moderator
I agree with the insulation recommended.
To further that though, I would also suggest eliminating all the bricks in the heat riser and replace with a much less dense one of perlite /clay or superwool. In an area where there is no abrasion, it just makes sense.
 
Chris Carn
Posts: 46
3
  • Likes 1
  • Mark post as helpful
  • send pies
    Number of slices to send:
    Optional 'thank-you' note:
  • Quote
  • Report post to moderator
Do you recommend a website to buy super wool? I'm in a rural area and hard to locate materials like the brick, the only had a few and that's why they are different colors, and I have clay/mortar from the hardware store that's for chimneys can I mix that with perlite to insulate under the bricks? Thanks for all the help I thought with the thick brick base, then insulate around the rest was gonna work but I'm seeing from all your help in replys I'm still far from the target.
 
Chris Carn
Posts: 46
3
  • Likes 1
  • Mark post as helpful
  • send pies
    Number of slices to send:
    Optional 'thank-you' note:
  • Quote
  • Report post to moderator
I Was going to insulate with this from amazon for 90$ but I was hoping there is a cheaper way to make it more efficient, in a greenhouse even with pex in the floor and hopefully adding some kind of copper coil in the mass with maybe a water tank as a heat mass I can warm up too, the plastic will not be able to keep the heat from escaping.
20230909_235000.jpg
[Thumbnail for 20230909_235000.jpg]
 
Glenn Herbert
Rocket Scientist
Posts: 4530
Location: Upstate NY, zone 5
576
5
  • Likes 4
  • Mark post as helpful
  • send pies
    Number of slices to send:
    Optional 'thank-you' note:
  • Quote
  • Report post to moderator
That's enough ceramic fiber for about four "five-minute" heat risers... It will also work for wrapping the rest of the core, but far more expensive than other things that will work fine elsewhere than the riser. You don't need it for just wrapping a split firebrick riser, perlite-clay is totally fine there, or perhaps rockwool batt insulation.

To get the right amount of superwool for one riser, you can go to dragontechrmh in Gerry's signature. I think you would want three or maybe four feet of it.
 
Chris Carn
Posts: 46
3
  • Mark post as helpful
  • send pies
    Number of slices to send:
    Optional 'thank-you' note:
  • Quote
  • Report post to moderator
Should I pull up all those bricks and put insulation underneath?
 
master pollinator
Posts: 1751
Location: Ashhurst New Zealand (Cfb - oceanic temperate)
534
duck trees chicken cooking wood heat woodworking homestead
  • Likes 5
  • Mark post as helpful
  • send pies
    Number of slices to send:
    Optional 'thank-you' note:
  • Quote
  • Report post to moderator
Yes. The more heat you can retain in the core of the unit (the burn tunnel and riser) the better it will perform. Insulating the firebrick from whatever is outside that layer is essential to get high combustion temps and also to reduce the amount of time it takes the system to reach optimum levels.
 
Gerry Parent
Rocket Scientist
Posts: 1809
Location: Kaslo, BC
525
building solar woodworking rocket stoves wood heat greening the desert
  • Likes 2
  • Mark post as helpful
  • send pies
    Number of slices to send:
    Optional 'thank-you' note:
  • Quote
  • Report post to moderator
I would agree with Phil.
Its still easy to turn back at this point to make the correction knowing your not cutting corners that you may regret later.
 
Chris Carn
Posts: 46
3
  • Likes 5
  • Mark post as helpful
  • send pies
    Number of slices to send:
    Optional 'thank-you' note:
  • Quote
  • Report post to moderator
Do you have any links to videos or websites of how I can make this perlite pelletized clay and get it right? I appreciate all your input and help I know you guys are right I want to get this thing going and have it be a trophy instead of mistake after mistake. I bought the clay mortar for fireplaces but I'm now wondering if that's  not what you all are using as this pellet clay insulation,  I'm thinking now insulate with that under the brick after I make sure how to make it right. I been watching videos and seen one person use a perlite 80/20 clay mortar under the bricks. Thankyou again I'm definitely learning alot here and these forums are now my favorite website in these times.
 
Gerry Parent
Rocket Scientist
Posts: 1809
Location: Kaslo, BC
525
building solar woodworking rocket stoves wood heat greening the desert
  • Likes 7
  • Mark post as helpful
  • send pies
    Number of slices to send:
    Optional 'thank-you' note:
  • Quote
  • Report post to moderator
Make a clay slurry and add lots of perlite to it.  Mix well so that the perlite granules are lightly coated with the slurry.
Once you can squeeze it and holds its shape pretty good without easily crumbling apart, yet will pop when you pinch it, the mix is correct.
Too much clay takes away from the insulation value of the perlite so you'll need to experiment a bit to get it right.
 
Phil Stevens
master pollinator
Posts: 1751
Location: Ashhurst New Zealand (Cfb - oceanic temperate)
534
duck trees chicken cooking wood heat woodworking homestead
  • Likes 7
  • Mark post as helpful
  • send pies
    Number of slices to send:
    Optional 'thank-you' note:
  • Quote
  • Report post to moderator
I applaud your willingness to repeatedly dismantle and rebuild on the advice you're getting, Chris. It's our job to try and make all of this worth your while. Having a well-built RMH work properly right out of the gate is as much art as science, and some of the principles of combustion that we are exploiting may seem counterintuitive if you try to plug them into a conventional woodburner framework.

The consensus among those who have used a perlite/clay mixture as insulating infill (or to fabricate a heat riser, as I learned the hard way) is to make as dry a mix as possible. We make a moderately runny slip from fireclay and add just enough of this to a volume of perlite to make the grains stick together like a popcorn ball. If you overdo the clay proportion you lose insulative properties and it starts to slump and ooze all over (unless you're pouring into forms, which I don't advise either).

With your firebrick base, you could put down a layer of perlite and clay with a temporary frame around the perimeter, and lay your base on it immediately to key into the layer. Once it dries it will be pretty sturdy and the first few firings will vitrify the clay a little bit, making it harder still.
 
Chris Carn
Posts: 46
3
  • Mark post as helpful
  • send pies
    Number of slices to send:
    Optional 'thank-you' note:
  • Quote
  • Report post to moderator
I'm getting ready to mix my clay perlite and slap it on the bottom, I do have some Rockwool insulation that's loose rockwool would it be a good idea to throw some in there as well in the mix or is that just a waste of time?
 
Chris Carn
Posts: 46
3
  • Likes 8
  • Mark post as helpful
  • send pies
    Number of slices to send:
    Optional 'thank-you' note:
  • Quote
  • Report post to moderator
The perlite clay mix worked just like you said, and  it's about 1 1/2 thick hopefully I'm back on track, going to grout it better tomorrow when it's more dry than start on the layers of brick...I can always use the rockwool In the mix next time if it helps..going to put another in this green house that I'm working on with hopefully a small catfish pond.
20230911_145642.jpg
bricks for the bottom of a rocket mass heater on top of perlite-clay insulation
20230911_152339.jpg
a small catfish pond to go in a greenhouse
 
Gerry Parent
Rocket Scientist
Posts: 1809
Location: Kaslo, BC
525
building solar woodworking rocket stoves wood heat greening the desert
  • Likes 5
  • Mark post as helpful
  • send pies
    Number of slices to send:
    Optional 'thank-you' note:
  • Quote
  • Report post to moderator
Great job Chris!
I've broken up fibers of rock wool into my mix before and found it to be a big PIA.
Hard to get it to separate and ended up with clumps that I highly doubt did anything to improve the insulative performance.
Carry on.
 
Chris Carn
Posts: 46
3
  • Likes 2
  • Mark post as helpful
  • send pies
    Number of slices to send:
    Optional 'thank-you' note:
  • Quote
  • Report post to moderator
You guys are great at explaining why I'm having to change stuff I have a couple stupid questions I know concrete retains water would it be stupid to wrap the bottom of these bricks to hold them in place with some concrete? And is it best to use the ceramic or super wool around the bridge or can I actually use the clay paralyte over everything until I get to my riser for enough insulation to get this thing heating up good
 
Glenn Herbert
Rocket Scientist
Posts: 4530
Location: Upstate NY, zone 5
576
5
  • Likes 4
  • Mark post as helpful
  • send pies
    Number of slices to send:
    Optional 'thank-you' note:
  • Quote
  • Report post to moderator
You could put concrete or mortar of any kind around the edges of the perlite-clay layer to reinforce it.

Rockwool depends for its insulating value on trapped air spaces, which would vanish if mixed into mortar or perlite-clay. If the air spaces did not vanish, the mix would be significantly weaker.

Ceramic or other fiber blanket would work for insulation around the burn tunnel and heat riser, but perlite-clay would work just about as well while being more rigid and much less expensive.
 
Chris Carn
Posts: 46
3
  • Likes 1
  • Mark post as helpful
  • send pies
    Number of slices to send:
    Optional 'thank-you' note:
  • Quote
  • Report post to moderator
Thanks for the advice I think I'll go with perlite Clay around everything except the riser, I think that will work well if you all do. 👍
 
Chris Carn
Posts: 46
3
  • Likes 1
  • Mark post as helpful
  • send pies
    Number of slices to send:
    Optional 'thank-you' note:
  • Quote
  • Report post to moderator
So I'm using 6-in duct is 7.5 hole diameter to big for my air flow? Thank you for all your help
 
Glenn Herbert
Rocket Scientist
Posts: 4530
Location: Upstate NY, zone 5
576
5
  • Likes 4
  • Mark post as helpful
  • send pies
    Number of slices to send:
    Optional 'thank-you' note:
  • Quote
  • Report post to moderator
Not too big at all. There is no maximum for the opening between chambers of a bell system; the taller the openings, the more the chambers will behave as a single bell. If you would like the top surface to be even in temperature, a single bell under that surface is best.
 
Chris Carn
Posts: 46
3
  • Likes 1
  • Mark post as helpful
  • send pies
    Number of slices to send:
    Optional 'thank-you' note:
  • Quote
  • Report post to moderator
I didn't get much done yesterday other stuff came up, but I have new questions if anyone can help. So I had bought this half inch thick insulation in hopes of insulating the inside of my steel tube in the beginning, it's #8, I'm wondering if I can wrap the heat riser with this or even double it up. Also i found a second barrel, I'm thinking top one upside down then maybe wire feed weld the lid to bottom barrel and have the center of the lid cut out so it will strap together. Then I could just remove the top one easily for clean out. Also I was is the  barrel going to start melting with the heat from the riser focusing on the center at the hottest area.thanks for all the help going to get back to laying the bricks)
20230913_105410.jpg
[Thumbnail for 20230913_105410.jpg]
 
Glenn Herbert
Rocket Scientist
Posts: 4530
Location: Upstate NY, zone 5
576
5
  • Likes 4
  • Mark post as helpful
  • send pies
    Number of slices to send:
    Optional 'thank-you' note:
  • Quote
  • Report post to moderator
If you want to make a split firebrick heat riser, that ceramic fiber blanket would be fine insulation for it. People generally use a 1" thickness for this. The 24" x 36" will be not quite enough to go around a 10" square 24" high, so you would need more than one piece.

People have been using ordinary 55 gallon steel drums with 2 or 3" of clearance above the riser for decades, and they last fine. If you use a second one as you describe for more radiator and easy access, it will have even less heat stress. It will give off twice as much instant heat to the space instead of storing it, so consider the balance of your heating needs. If you go with the second barrel, cut the whole bottom and lid out leaving just an inch of metal around the edge for best airflow.
 
Chris Carn
Posts: 46
3
  • Likes 2
  • Mark post as helpful
  • send pies
    Number of slices to send:
    Optional 'thank-you' note:
  • Quote
  • Report post to moderator
Thanks again I did have a couple nicer splits then the red splits that I'm going to use on the bottom. I'm hoping to get at least this much set and grouted today, but I did set it up so two more rows on the Riser will be splits.
20230913_121424.jpg
The burn tunnel of a rocket mass heater with the beginnings of a riser
 
Chris Carn
Posts: 46
3
  • Likes 2
  • Mark post as helpful
  • send pies
    Number of slices to send:
    Optional 'thank-you' note:
  • Quote
  • Report post to moderator
So I'm about to finish the heat riser the split seem kind of fragile when I level up to one above it it kind of moves everything so I'm wondering what if I mix rockwool that I have here with water then add this clay mortar that I'm using to kind of spray around the joints with a texture gun before using my insulation, would that help at all to keep it more structural and also insulate? And was this the right clay .mortar to use on this?
20230914_114110.jpg
[Thumbnail for 20230914_114110.jpg]
20230914_114327.jpg
[Thumbnail for 20230914_114327.jpg]
20230914_114008.jpg
[Thumbnail for 20230914_114008.jpg]
 
Phil Stevens
master pollinator
Posts: 1751
Location: Ashhurst New Zealand (Cfb - oceanic temperate)
534
duck trees chicken cooking wood heat woodworking homestead
  • Likes 4
  • Mark post as helpful
  • send pies
    Number of slices to send:
    Optional 'thank-you' note:
  • Quote
  • Report post to moderator
Your rockwool and mortar stucco is a good idea. That mix may not be the greatest for high heat applications. Most RMH construction uses fireclay mortar...just clay and sand, which is effectively cob, does a fair job. The advantages are that it's more durable at operating temperatures, and when it comes time to disassemble for repair or modifications, things knock down and the firebricks are easy to clean and reuse.

Ordinary portland cement starts to degrade at sustained temperatures of 200 C. A well-built RMH burning energy dense wood can easily exceed 1200 C in the burn tunnel and heat riser. So consider just fireclay/sand in the riser, carry on and keep the photos coming!
 
Chris Carn
Posts: 46
3
  • Likes 1
  • Mark post as helpful
  • send pies
    Number of slices to send:
    Optional 'thank-you' note:
  • Quote
  • Report post to moderator
I haven't been able to find a fire clay in the area they gave me this other clay mortar for fireplaces, and I'm pretty far in how long do you think this will last and how safe do you think it is or should I stop and go on the search for the fireplace before I go any further? Thanks for all your help glad I got your advice
16947228401808322871500652879580.jpg
[Thumbnail for 16947228401808322871500652879580.jpg]
 
Chris Carn
Posts: 46
3
  • Likes 4
  • Mark post as helpful
  • send pies
    Number of slices to send:
    Optional 'thank-you' note:
  • Quote
  • Report post to moderator
Well I'm definitely learning, I just found fire clay out of town I'm going to get some and rebuild it again hopefully I'll be a professional after all this but definitely need to do it right
 
Phil Stevens
master pollinator
Posts: 1751
Location: Ashhurst New Zealand (Cfb - oceanic temperate)
534
duck trees chicken cooking wood heat woodworking homestead
  • Likes 3
  • Mark post as helpful
  • send pies
    Number of slices to send:
    Optional 'thank-you' note:
  • Quote
  • Report post to moderator
If you're planning to wrap the splits with the CFB, that will help stabilise things when the OPC mortar joints fail. As long as you're not in a place that has a lot of seismic activity, you might get away with it.
 
And tomorrow is the circus! We can go to the circus! I love the circus! We can take this tiny ad:
Rocket Mass Heater Jamboree And Updates
https://permies.com/t/170234/Rocket-Mass-Heater-Jamboree-Updates
reply
    Bookmark Topic Watch Topic
  • New Topic