• Post Reply Bookmark Topic Watch Topic
  • New Topic
permaculture forums growies critters building homesteading energy monies kitchen purity ungarbage community wilderness fiber arts art permaculture artisans regional education skip experiences global resources cider press projects digital market permies.com pie forums private forums all forums
this forum made possible by our volunteer staff, including ...
master stewards:
  • Carla Burke
  • Nancy Reading
  • r ranson
  • Jay Angler
  • John F Dean
  • Pearl Sutton
stewards:
  • Nicole Alderman
  • paul wheaton
  • Anne Miller
master gardeners:
  • Christopher Weeks
  • Timothy Norton
gardeners:
  • thomas rubino
  • Jeremy VanGelder
  • Matt McSpadden

Precisions about batch rocket, thanks for help!

 
pollinator
Posts: 1981
Location: La Palma (Canary island) Zone 11
9
purity forest garden tiny house wofati bike solar
  • Mark post as helpful
  • send pies
    Number of slices to send:
    Optional 'thank-you' note:
  • Quote
  • Report post to moderator
I have red I  dont know how many times the web site Peter Van der berg made http://batchrocket.eu/es/
and it saved my stubborn idea of having a rocket stove.
I have been stuck for the last 4 years by the special structure of my home, a cave at the foot of a 10 metrs Cliff. 20cms pipes for the long bench + the way up the Cliff.... too much. I made dozens of designs, wait for the next cold weather to test the wind direction, no way.

But all is ready, and thus unfinished, with an open Wall and a war trench in the floor!
And then came the bell.....
As happy as Easter bells!
I can do a CAVE BELL!
I just have to dig a Little bit more....
The place is so central that I can heat all + have a plant drier near the kitchen, and found I could make a bath in the waiting trench!!!
And look at the fire from the bath.
Heaven.

I could not expect peter to write all I needed in a specific Project, so I have some questions.
For some, I almost have the answer, but I want to be sure.

I have to combine a bell and nearly 2 meters of the old underground exhaust.
- I suppose according to this : system in 15.0 cm  (6")   ISA 5.3 m²    (57 sq ft)
that the tunnel counts in the ISA Surface.
But do I still need to have it the same diameter as my system, 15cm 6"

- is it better that the tunnel starts exactly at the lowest part of the bell?
I have seen that it can be a Little higher, but do not understand the theory behind this, as for me is sounds logical to put it exactly at the lowest level.

The material for inside the bell.
I have to use stones and .... and what?
Is hydraulic lime posible, this what I mostly used in all my cave, because it regulates humidity.
Cement is stronger, but does it have to be refractory for plastering the inside and make it smooth, or do I have to use clay. think that anyway I have to build something strong that will need cement, so can I put some clay over this, I am afraid of some incomatibility.
I have no idea of the temperatura inside a bell, so if someone can tell me about this, thanks a lot!

- I guess the inside of the bell must be as smooth as posible, for the gases to run free?

- I have to put red bricks in some places. Will they conduct heat if I fill them with lime or cement? If empty of course I know that they will insulate, but I was think  that the material itself should conduct heat...

- As my bell will have a fancy form, I have 2 questions, 1st if it is better to have the heat risaer as much as posible in the center, or if this does not matter at all. 2nd, you can guess that it will not be easy to calculate the ISA.... Is it better to plan a Little small or a Little big? I guess too big is worse...

- Then, I have found nothing about the cleaning of the bell.
With the tunnell solution, I could not find a solution for my plan, and the bell will have easier Access!
But it is not so easy to Access it, as it will have only the possibility from the front.
So, where is there more to clean ? Near the heat riser, or near the exhaust, or...

I have planned to take pics with some cardboards to represent the different parts, and until now, for the 1st time I have no major problema in the new design!
I am so happy!
Thanks!
 
gardener
Posts: 3471
Location: Southern alps, on the French side of the french /italian border 5000ft elevation
194
  • Mark post as helpful
  • send pies
    Number of slices to send:
    Optional 'thank-you' note:
  • Quote
  • Report post to moderator
Hi Xisca.

Well, all of this sound all right. A single bell needs to be refractory, at least the two top thirds .

In my case, i have a metal radiator bell (square fuel tank originally ) which wile shedding heat, stays at about 235/270C° This is bellow concrete spalling temps. This is followed by a big metal bell, which is covered by hollow bricks, filled with concrete. If this could give you an idea.

If you go for a single bell, with no metal radiator, you can expect temps of 900C° just outside of the heat riser. So definitely refractory territory.

In my bell, i made a door at the bottom, in front. I can reach all of it with a broom. But the first bell, acts as a turbulator, and gets most of the fly ash. This first bell has a door, in form of an old chimney insert door welded to the metal, on top of one of the sides. Not perfect to clean it, but perfectly doable.

Regarding bell size, Peter's numbers are conservative. Still in the range of a heater with no starting bypass. If you're not quite sure where you're heading, don't go mad, and fit a bypass anyway.

I can vaguely remember your pics. But not the trench. And you plan to use this as a chimney?

Well love, time to get to the drawing board, and draw what you have in mind. So we can check for errors, before you build anything.
 
Xisca Nicolas
pollinator
Posts: 1981
Location: La Palma (Canary island) Zone 11
9
purity forest garden tiny house wofati bike solar
  • Mark post as helpful
  • send pies
    Number of slices to send:
    Optional 'thank-you' note:
  • Quote
  • Report post to moderator
The trench will just be the start before the chimney, and the rest will serve to build a bath!
I can make a 10 meters chimney, just that it cannot be perfectly straight.

I have to solve passing the pics from my camera to the new Tablet.
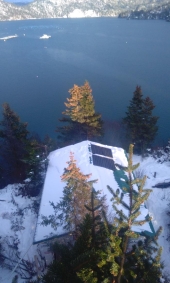
Now for a try, I will post a pic of the general view, taken with the tablet.
You will see why the chimney will be high, and why it was difficult to find solutions with the J-tube + pipes.
WIN_20170104_17_48_46_Pro.jpg
[Thumbnail for WIN_20170104_17_48_46_Pro.jpg]
 
Xisca Nicolas
pollinator
Posts: 1981
Location: La Palma (Canary island) Zone 11
9
purity forest garden tiny house wofati bike solar
  • Mark post as helpful
  • send pies
    Number of slices to send:
    Optional 'thank-you' note:
  • Quote
  • Report post to moderator
On the pic, there is a white rectangle (curtain!) on the left, and the chimney will start there, and will have to go up to the next terrace above. Easily 10 meters may be 12.

With a batch in 15, this is much more realistic than in 20...
If I could put a smaller diameter for the chimney, I would, but then the bell would be so small!
 
Satamax Antone
gardener
Posts: 3471
Location: Southern alps, on the French side of the french /italian border 5000ft elevation
194
  • Mark post as helpful
  • send pies
    Number of slices to send:
    Optional 'thank-you' note:
  • Quote
  • Report post to moderator
Vertical chimney, or near vertical, doesn't count as isa, nor pipe lengh.
 
Rocket Scientist
Posts: 4567
Location: Upstate NY, zone 5
590
5
  • Mark post as helpful
  • send pies
    Number of slices to send:
    Optional 'thank-you' note:
  • Quote
  • Report post to moderator
But it does count as expense to build...
And the larger, the more expensive.
 
Xisca Nicolas
pollinator
Posts: 1981
Location: La Palma (Canary island) Zone 11
9
purity forest garden tiny house wofati bike solar
  • Mark post as helpful
  • send pies
    Number of slices to send:
    Optional 'thank-you' note:
  • Quote
  • Report post to moderator
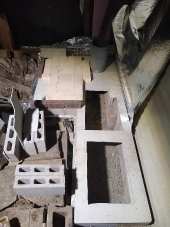
This is he place, where I started to dig a Little more on the right.
The cardboard box is were I have the idea, more or less, to put the heat riser.
On the left, you can see the foam mattress that insulate the living room until I make the BR!
This is where I want to make a heated seat.

What is red and White is also a hole. Here I can have a thinner part of the bell, to send more heat quicker.

The blue tube on the right represent the place where I can have a wáter pipe for heating, as I have a hole above in the ceiling.
Photo-16-17-761.jpg
[Thumbnail for Photo-16-17-761.jpg]
 
Xisca Nicolas
pollinator
Posts: 1981
Location: La Palma (Canary island) Zone 11
9
purity forest garden tiny house wofati bike solar
  • Mark post as helpful
  • send pies
    Number of slices to send:
    Optional 'thank-you' note:
  • Quote
  • Report post to moderator
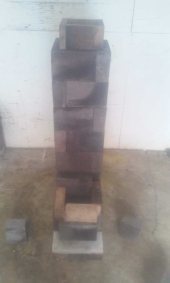
I could not get all in 1 pic, here is the super BR!
With one option, which is to have the pipe coming out under the core.
(But I have another topic specific for this)
I have the option to put it on the left, I still try to think of all options, but great, they reduce and it becomes more clear.
Photo-16-17-760.jpg
[Thumbnail for Photo-16-17-760.jpg]
 
Xisca Nicolas
pollinator
Posts: 1981
Location: La Palma (Canary island) Zone 11
9
purity forest garden tiny house wofati bike solar
  • Mark post as helpful
  • send pies
    Number of slices to send:
    Optional 'thank-you' note:
  • Quote
  • Report post to moderator
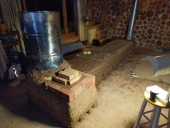
This pic represent the junction after the horizontal part, with the exhaust pipe going up.
I used 2" PVC!

(The second pipe, more on the right, is the second option, if the BR is the other side...)
Then the bricks behind represent the Wall to separate the bathroom from the drier.
I put bananas where the drier will be!
(just coming from the garden but unripe yet)

The bath will be on the right just after the chimney.
Photo-16-17-763.jpg
[Thumbnail for Photo-16-17-763.jpg]
 
You've got to ask yourself one question: "Do I feel lucky?" Well, do ya, tiny ad?
permaculture bootcamp - learn permaculture through a little hard work
https://permies.com/wiki/bootcamp
reply
    Bookmark Topic Watch Topic
  • New Topic