• Post Reply Bookmark Topic Watch Topic
  • New Topic
permaculture forums growies critters building homesteading energy monies kitchen purity ungarbage community wilderness fiber arts art permaculture artisans regional education skip experiences global resources cider press projects digital market permies.com pie forums private forums all forums
this forum made possible by our volunteer staff, including ...
master stewards:
  • Carla Burke
  • Nancy Reading
  • John F Dean
  • r ranson
  • Jay Angler
  • paul wheaton
stewards:
  • Pearl Sutton
  • Leigh Tate
  • Devaka Cooray
master gardeners:
  • Christopher Weeks
  • Timothy Norton
gardeners:
  • thomas rubino
  • Matt McSpadden
  • Jeremy VanGelder

rocket workshops / innovators gathering / September 2014

 
Posts: 22
2
10
  • Mark post as helpful
  • send pies
    Number of slices to send:
    Optional 'thank-you' note:
  • Quote
  • Report post to moderator
I just listened to the podcasts with the innovators. I deeply regret no being able to stay for the innovators event. I just wanted to send my thanks to everyone involved. I had a blast during the RMH builders workshop. I'm really excited about Tim's idea about providing heat for a tiny house. I am planning to heat a building that will have a hydronic radiant floor heating system. The primary heat source (to make the county inspectors happy) is an electric 40 gallon hot water tank. Originally I was going to build a standard RMH with bench like the one we built during the workshop. I love the idea that storing the heat outside the building in an insulated water tank to preheat the water before it enter the radiant system. This eliminates 2 problems that I was having difficulties finding acceptable solutions; 1. How to make a big barrel not look like a big dirty barrel in the middle of the room, and 2. The mass or bench takes up a lot of space. It also allows me to better heat the 3 separate rooms. Each has a separate heating zone that can be controlled by independent thermostats.

I will post pics of the progress. Cheers to all! And thanks for the inspiration!
 
Colin Skelly
Posts: 22
2
10
  • Mark post as helpful
  • send pies
    Number of slices to send:
    Optional 'thank-you' note:
  • Quote
  • Report post to moderator
It wasn't clear to me on the podcast. Are there any pictured of the Pocket locket rocket thingy?
 
Posts: 95
Location: Berkeley, CA
30
3
  • Mark post as helpful
  • send pies
    Number of slices to send:
    Optional 'thank-you' note:
  • Quote
  • Report post to moderator
Howdy!

Incredible set of events! Congratulations to all of you, the innovators, the hosts, the long termers, the participants, the kitchen, and the gappers. So, much was seen and done. And I took a lot of photos so, I will be posting many.

Here is Tim's cock it, lock it and rocket!

I posted some more photos and discussion in the thread on permaculture kitchen in community/Paul wheaton laboratories.

Is there a way I can link this to this thread? Help?

image.jpg
rocket stove construction barrel fuel efficient wood fired cooking
Putting the hot plate in on one side of the barrel.
image.jpg
rocket stove construction inside barrel super efficient wood fired oven
This is the oven inside of that same barrel
image.jpg
finished rocket stove oven clean burning wood heat
Tim putting the final touches
 
Seth Peterson
Posts: 95
Location: Berkeley, CA
30
3
  • Mark post as helpful
  • send pies
    Number of slices to send:
    Optional 'thank-you' note:
  • Quote
  • Report post to moderator
I also want to show more of Matt's work. He was quick out of the gate and built the rocket mass cooker with smoker attachment and bench before the gun had even fired. I smoked some of the best, fresh butchered, brined, locally grown pig I have eaten in my life on his contraption, which has smoker on it, but could easily changed to a wok, pot of water, flat top, oven, etc.

This is the first thing that I will build in my backyard. Building it with Matt showed us how easy it is to put together. And he was real keen on getting people to realize, yea this is awesome, this is better and I can do this. And, I can make it with a glass front to see the fire, or I can make it at the beach for a day with friends and family. Simply, phenomenal.

I will build one in time for this winter (Cali winter) and invite my friends and neighbors to a fire feast every full moon. We will cook on it and gather around the fire and they will understand why.

Seth Peterson
Permaculture Chef,
Post workshop thoughts and aspirations,
image.jpg
cob bench rocket mass heater with smoker
The rocket mass heated bench with glass front. I will definitely build a variation of this out back asap, as soon as, I watch Matt's videos a couple of times.
image.jpg
compact rocket mass heater with smoker
The rocket mass smoker bench that Oliver and I cooked some of the best meals known to chef and pig, praise that lard! And meet Oliver
 
steward
Posts: 4047
Location: Montana
415
fungi books food preservation bee
  • Likes 1
  • Mark post as helpful
  • send pies
    Number of slices to send:
    Optional 'thank-you' note:
  • Quote
  • Report post to moderator
Here is the Permaculture Kitchen thread but it is SUPER long so the link below is where Seth's pictures begin!

Seth's Pictures on Permaculture Kitchen Thread
 
Seth Peterson
Posts: 95
Location: Berkeley, CA
30
3
  • Mark post as helpful
  • send pies
    Number of slices to send:
    Optional 'thank-you' note:
  • Quote
  • Report post to moderator
Three great ideas/photos/thanx

1) Tom's list looks very nice! And yes he is a warrior, and so I dedicate the photo below to his honor.

Planning for next time, let's also have more billboard tarps for mixing cob and materials collection. And attendees bring more tools, and more materials and more expertise.

2) I also want to thank the hosts immensely, the space and time they created was powerful and unique, and the second photo is one I will present in a final project this semester (those are Paul's hands, for the uninitiated)
.
The permaculture kitchen: Paul's suggestions nailed it, a workshop like this needs a dedicated, pre-planned food service.

I went to a convergence before Paul's place and the kitchen was run smoothly, they fed 350 people a day, at $3 a plate and did it well. Because that is their area of excellence, it is what they do. All pre-planned, pre-budgeted, and executed in real time.

I would be happy to provide this service next time or work with / or train those who are, because it is a critical function that I do well. It is just a question of planning ahead.

Same as Tom's excellent list of ideas around early materials acquisitions or next time.

That said the kitchen performed very well in terms of healthy delicious food and on time, where the kitchen failed was in planning and costing out menus, clean up and general logistics as well as innefficiencies. The costs in time, money, energy and personal attention are avoidable under a solid Kitchen Commander with a system in place.

I look forward to any help I can give in this regard. The kitchen must be a source of delicious nourishment and happy revitalization through out the workday. To this end, large details like type of diet (we were mostly paleo and Weston a. Price) or even small details like serving homemade 'gatorade' and providing midmorning snacks that keep mind and body at their optimum are great elements to the permaculture kitchen.

3) a photo to honor Ernie and Erica who were the intellectual and physical backbone that put the workshop together, chose the team of innovators and were excellent teachers, crafty cat herders, formidable lion tamers, and sweet & savory cooks.

Cheers,
From the heart of Berkeley
Seth Peterson
Local Larder and
Permaculture Chef
image.jpg
tom ruttledge man in shop
Tom Ruttledge Eco warrior confronts his nemisis the mini mart
image.jpg
paul's hands and empty bowl catering service
The hands that fed us
image.jpg
fire technology how flames burn
The innovators who chose them all teaching fire science and ahowing us all what we believe we know about fire is ultimately wrong
 
Posts: 36
23
  • Mark post as helpful
  • send pies
    Number of slices to send:
    Optional 'thank-you' note:
  • Quote
  • Report post to moderator
Hi All this is the first real chance i've had to sit down and write since iv'e got home. So first things first. A huge thank you to all involved in what can only be described as a fantastic event. To my gracious hosts for the event Paul and Jocelyn thank you thank you thank you. To Rick my wingman and co conspirator for much of the event thanks for always having the right tool the right attitude and the right stuff. To the army of various gapers, minions and volunteers that worked tirelessly in the background to see the event across the line thank you. To my faithful work team on the oven project Chris and Jessie thanks for the laughs, the great ideas and your patience. To Tim Wheaton thanks for the help and not tearing my man card up too badly .Bless the cooks Oliver and Seth, even an army of Permaculture world domination marches on it's stomach, the food was fantastic. To all the course participants it is you guys and gals with your desire to know and learn that provide the meaning to why i do what i do (plus i just like to burn stuff). To the innovators firstly Ernie and Erica (Ernica?) and Paul this thing was your brain child thank you so much for the invite and the opportunity to meet yourselves and the other amazing people. Matt who showed me rocket stove construction can be like speed dating thank you for your help, the laughs and free exchange of ideas. Next year i will make more rocket stoves than you (i'll just fly in two weeks early and that should do it...just) . To Peter and his offsider Jeyte our innovators from below sea level, love your work and attention to detail. Peter, it was great to see you around the outside batch box that first official night and realise your never too old to play with fire. I'm reminded of another Peter who refused to grow up.

Peace love and efficient combustion.
Tim
 
Tim Barker
Posts: 36
23
  • Mark post as helpful
  • send pies
    Number of slices to send:
    Optional 'thank-you' note:
  • Quote
  • Report post to moderator
So i thought a summary of where i am/got to with my project is in order. My main area of interest is in designing robust simple devices for utilising the heat produced from wood combustion. Note i don't say rocket stove because while generally a rocket stove (power unit as i call/see them) is what i will generally use it's all about the context. In the past i have used my standard hot water heater but with a large TLUD powering it simply because the community it was being used for wanted a source of Biochar so rather than make biochar and dump the heat better to combine the two into one function. Anyway for me its about a balance between the convenience/ease of use, complexity of design and durability. So most of my projects are designed so they can be built with simple hand tools (no welding needed) http://www.koanga.org.nz/low-mass-insulated-barrel-oven/ . However when i make something for the first time i tend to do a lot of staring into space going through different ideas and then just start throwing things together making lots of false starts and mistakes along the way. One of my favourite sayings is "In theory, theory is as good as practice...... in theory". So while the build at the workshop used more complex fabrication methods having built it and tested some new ideas i now know i can simplify it pretty radically and yet retain (and improve) the functionality. Luckily i will get a chance to test this next weekend for i workshop i am running in Melbourne.

What where the main things i was pursuing?

Well firstly to intergrate a stove and cooktop together so that both could be used at the same time with some temp control and that it be simple and robust to operate. So i give that a tick. Oven temps were sitting easily around normal cooking temps with power to spare. At the same time the hotplate temp was good for cooking and was able to be regulated over a range of roughly 290 f to 550 f. This was done using not so much a baffle as a plate that "shaded" the bottom of the hot plate from the inflow of the heat riser. Note that this is a wood stove so like all wood stoves will require a period of learning how to get the best out of it. I only managed to cook one thing in the oven (muffins) and they turned out fine. There was a little more heat towards the rear of the oven as evidenced by the cooking pattern of the muffins but two points to note , usually i would have some baffles to more evenly distribute heat (but didn't due to time) i am actually very happy with how the oven performed in this regard to the point that for me i probably wouldn't fit the baffles. When i'm talking uneven i'm talking the tiniest bit of darker muffin(1/8-1/4") along the rearmost edge of the pan over the entire cooking time. I would just rotate the pan partway through the cooking time if i could be bothered.

Second thing i wanted to see was if i could integrate a third element into the design namely a hot water system. I felt i had to try it mainly because i was in the habit of telling people it was difficult to do and in pursuing all three you would end up having something that did everything but some of those things poorly. The jury is still out on wether this is in fact true as we didn't really get a chance to test this properly. Issues were wrong tank, poor gas sealing and possibly stratification. Remember i have half a dozen wood fired hot water systems in daily use so i know how to do it. In my usual design the power unit is below the hot water tank and the heated gasses rise directly against the bottom of the water tank and then around and out. In the intergrated design the tank is below the oven hot plate unit and so the gasses are much cooler (having heated the hot plate and oven first) and have a much more convoluted path which makes the quality of our heat exchange of greater importance. Secondly because of the convoluted path it's imperitive the unit is very gas tight as any leaks will detract from flow to the water tank heating area. This was very much the case with the unit as there were numerous leaks due to construction details and so almost no flow through the tank heater area. Finally i am worried by stratification of the water in the tank. When we heat from below we generate a circulating current from bottom to top mixing the water. If we heat from the top we get no mixing and so develop an undisturbed layer of hot water in the tank which may boil when the rest of the tank below is still cool (ish). The boiling water will effectivly strip the heat and dump it as steam at the tank outlet as fast as we can put it in via the hot gasses. I wanted to test to see if arranging baffles around the water tank so that half the top and one side was heated before the other would deliver enough uneven heating to induce a mixing current. So in trying to do exactly what i had warned others not to do i ended up exactly where i expected to be, however i am intrigued at the possibility and encouraged to purse it when i'm able. My next steps will be an exploration of car radiators as a cheap source of efficient heat exchangers. I even ordered some in for the workshop but ran out of time before i could test them. The other thing to pursue is a straight hot water system with the power unit beside the water tank and heating from the top as discussed. This would greatly simplify the construction of the hot water system as no need to support 400 pounds of water above a rocket stove.

So all in all the water heating side of things in this configuration was a very promising failure (the best kind) with lots of things to try.

Other little bugs and issues to note are
Height of hot plate is dictated by the stove riser and so is too high for most under 6'. Matt has good info on bent risers and others suggested a small wooden step so not a big problem.
Mass. I'm paranoid about mass in my devices so will be exploring some idea's to reduce the heated mass (less mass = quicker start and more efficient)
Complexity. My next built will be far less complex and nor require welding (except for oven racks)

Thats about it at this stage i'm all typed out. Id love to hear any ideas or suggestions.

Peace love and all that hippie shit
Tim


Posts: 2
Location: Littleton, CO
1
  • Likes 1
  • Mark post as helpful
  • send pies
    Number of slices to send:
    Optional 'thank-you' note:
  • Quote
  • Report post to moderator
Hmmm...it would appear that it didn't like my picasa links. I did this in a hurry as I had to run off to run an errand. Let's try that again...

Jesse's pic of the actual completed RMH in the wofati was suspiciously absent. Thought it should be included.
efficient clean burning cob bench rocket mass heater in wood lined cabin

Ernie's hilarious (and awesome) distraction, that completely side-tracked Paul's speech. Who could forget this?
clouds and contrails

Bella taking the bottom off a barrel.
efficient clean burning rocket mass heater self build cut barrel

Tim in full innovation mode:


Jesse cutting some angle-iron for the cast J-tube frame.


Tim constructing a batch-box stove door out of scrap iron.


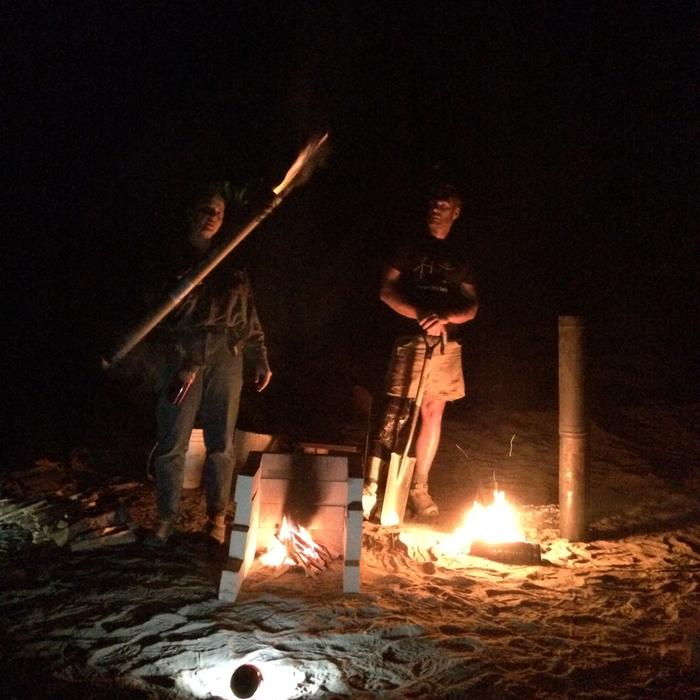
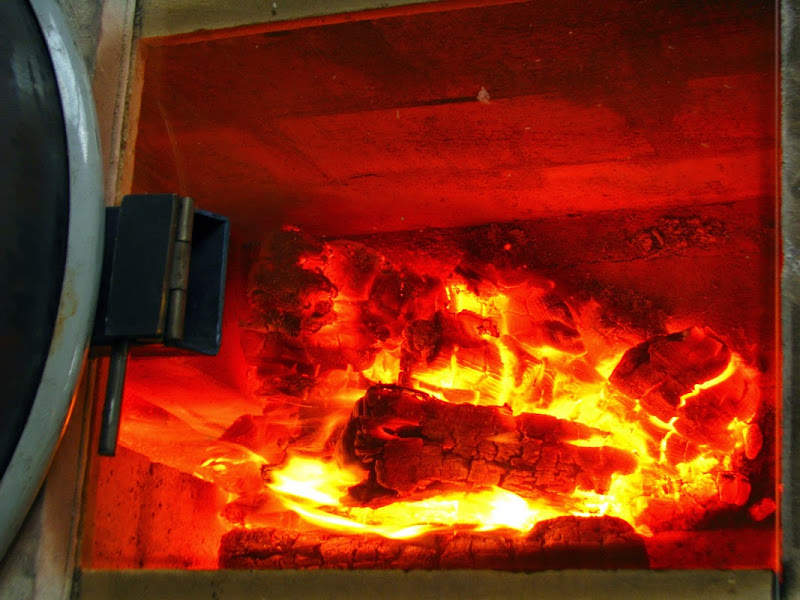
Lava escaping from Paul's secret volcano? Uh....no. Peter's batch-box making quick work of a full load of wood.

 
Posts: 38
Location: Wheaton Labs
12
3
  • Likes 1
  • Mark post as helpful
  • send pies
    Number of slices to send:
    Optional 'thank-you' note:
  • Quote
  • Report post to moderator
Here's a few more pictures from the workshop.
KIMG0017.jpg
efficient wood fired stove easy load
Peter Laying the brick surrounding the 8 batch burn in the aditorium
KIMG0018.jpg
rocket mass heater DIY stove construction
A brick manifold Erica built for demonstration
KIMG0007.jpg
firewood clean burn in rocket stove batch box
And here's another picture of the 8 batch burner in action, just because it looks so cool
 
Seth Peterson
Posts: 95
Location: Berkeley, CA
30
3
  • Likes 1
  • Mark post as helpful
  • send pies
    Number of slices to send:
    Optional 'thank-you' note:
  • Quote
  • Report post to moderator
It is my understanding that Peter is a self-taught rocket scientist. Turn this inventor mind to RMH and you get an attempt at developing RMHs that are 100% efficient, and since, technically speaking, that is not feasible in the real world he is shooting for 99.9% efficiency or more. Someone check me on all of this, because I maybe be confusing details, I mean, am I even close? This large RMH is the largest attempt yet as we approach a size that will give us 99.9%.

It was the double barrel of RMH.
image.jpg
Peter Vanden Berg Paul Wheaton Rocket Mass Heater build
Paul explaining the finer points of RMH to peter, oh wait! I think that's the other way around. In any case, Our gracious host let no RMH stone go unturned in his thirst for knowledge and better methodologies
image.jpg
batch box fuel efficient wood stove heat
Ready, set, fire!
image.jpg
ultra efficient renewable fuel wood stove
Am artist and his work.
 
Seth Peterson
Posts: 95
Location: Berkeley, CA
30
3
  • Mark post as helpful
  • send pies
    Number of slices to send:
    Optional 'thank-you' note:
  • Quote
  • Report post to moderator
Though English was not his first language his words spoke eloquent volumes of variables he captured through testing.

Seth
image.jpg
efficient wood heat rocket mass clean burn self build
Jeyte was one of Peter's trusty assistants.
image.jpg
dry build rocket mass heater core design
Taylor is building out the core for peters big plans. Every round of bricks gets re-checked for level to keep it straight and not crooked/slidy
image.jpg
diy build efficient wood heat batch box rmh
Brick by brick
 
Seth Peterson
Posts: 95
Location: Berkeley, CA
30
3
  • Mark post as helpful
  • send pies
    Number of slices to send:
    Optional 'thank-you' note:
  • Quote
  • Report post to moderator
The wofati on the lab that Tim and family moved into needed and RMH. Here are 3 shots. Sure wish I could post more at a time, how do people do that?

Seth Peterson
image.jpg
earth sheltered house annual heat storage design
Our mission: to build an RMH in this wofati in three days, winter is coming!
image.jpg
self build workshop cob bench pipework mass heater fuel efficeient wood heat
Half built core next to half built cob mass, see the tubes that run through it?
image.jpg
clean burning wood stove construction
Level, level, level
 
gardener
Posts: 1058
Location: +52° 1' 47.40", +4° 22' 57.80"
449
woodworking rocket stoves wood heat
  • Likes 1
  • Mark post as helpful
  • send pies
    Number of slices to send:
    Optional 'thank-you' note:
  • Quote
  • Report post to moderator

Seth Peterson wrote:It is my understanding that Peter is a self-taught rocket scientist.


Ehrrmm, sad to say, I am not. A self-taught masonry heater developer/designer looks more like it. I've been doing this off and on in my spare time for the last 30 years, got interested in rocket burner technology about 7 years ago.
 
Seth Peterson
Posts: 95
Location: Berkeley, CA
30
3
  • Mark post as helpful
  • send pies
    Number of slices to send:
    Optional 'thank-you' note:
  • Quote
  • Report post to moderator
Some more photos of what was done.
image.jpg
clean burn technology workshop renewables heat
A fire brick core with a high temp glass see through top, talk about fun fire watching
image.jpg
rocket stove technology fuel efficient wood heat
The wooden mold to pour a rocket stove core
image.jpg
how to build yourself a super efficient wood stove
Tim builds his Swiss Army knife of Rocket stoves
 
Posts: 182
15
  • Mark post as helpful
  • send pies
    Number of slices to send:
    Optional 'thank-you' note:
  • Quote
  • Report post to moderator
While Ernie, Erica, Tim and I were busy keeping the Wofati 0.8 RMH workshop going on schedule (and not without all the attendees and lab rats / gappers, Thank you, Thank You, Thank You and not enough Thank yous). Matt and Peter were up to something completely different which we got to see sunday night. The first mock-up of the first 8" batch box. Which became the prototype for the engine that went into the auditorium.

After the first show and tell during the waning light, Peter and most others went to bed...

The rest of us hung out, talked shop and mostly wanted to see "what's going on in there?"

 
Rick Edwards
Posts: 182
15
  • Likes 1
  • Mark post as helpful
  • send pies
    Number of slices to send:
    Optional 'thank-you' note:
  • Quote
  • Report post to moderator
See Peter's thread of the results of this Batchbox.
https://permies.com/t/40007/rocket-stoves/Results-batch-box-thingy-Innovators

Here they discuss all about the workings of this beast and all the science and measurements (physical and exhaust),
other peoples designs and installs and the way we ended up with glass on top.

And now for later in the night with only a few of us left and Bella on guitar.

 
Tim Barker
Posts: 36
23
  • Mark post as helpful
  • send pies
    Number of slices to send:
    Optional 'thank-you' note:
  • Quote
  • Report post to moderator
Hi All this link is about a new material for TEG modules which is much much cheaper. http://www.technologyreview.com/news/528841/thermoelectric-material-to-hit-market-later-this-year/
 
Rick Edwards
Posts: 182
15
  • Mark post as helpful
  • send pies
    Number of slices to send:
    Optional 'thank-you' note:
  • Quote
  • Report post to moderator
The Ghidora hydro cooker.

Tim and Ernie look over the beast on its initial firing and once the oven reaches 350 Rebecca puts in her test batch of goodies for baking.

 
author and steward
Posts: 52537
Location: missoula, montana (zone 4)
hugelkultur trees chicken wofati bee woodworking
  • Likes 1
  • Mark post as helpful
  • send pies
    Number of slices to send:
    Optional 'thank-you' note:
  • Quote
  • Report post to moderator

So, tentatively, the three day event would be october 7-9 2015, and the five day event would be october 12-16 2015.


I just got off the phone with Erica. We have decided to make the following modifications to the event:

Three day "show and tell"/"build and tell" event, october 7-9 is unchanged.

The five day innovators event will be changed to a 4 day innovators event followed by a one day observation event. Chances are that innovation stuff might still be going on, but it could also be a day of reflection for some.

We are going to try to cover the lions share of the travel expenses for the five innovators that will be returning. The five will be able to select two more. So there will be a total of seven innovators.

We estimate that the cost of materials for the innovators will be something around $10,000. Travel costs will be about $5500. Food, cooking and cleaning will be something around $10,000.

We also talked about adding a plasma cutter for the innovators: $1500

So, we are looking at about $27,000. I suspect there are some other expenses I haven't thought of yet, so let's say $30,000.

We will allow 21 lab rats for the events and an extra 12 people for observation day.

3-day "build and tell" event: $480
4-day innovators event: $850
observation day: $220

full 8 days: $1400

innovator event plus observation day: $1000

So if 21 people bought tickets for the full 8 days, that would be $29,400. Cutting it very close.

This is the time for feedback on the format. Ideas?


paul wheaton
author and steward
Posts: 52537
Location: missoula, montana (zone 4)
hugelkultur trees chicken wofati bee woodworking
  • Mark post as helpful
  • send pies
    Number of slices to send:
    Optional 'thank-you' note:
  • Quote
  • Report post to moderator
We are just a day or two away from accepting registrations for the 2015 event. More details here:

https://permies.com/t/44671/rocket-stoves/rocket-mass-heater-innovator-event


But, mostly, when we announce, it will be announced on the dailyish email: http://richsoil.com/email


I am Arthur, King of the Britons. And this is a tiny ad:
12 DVDs bundle
https://permies.com/wiki/269050/DVDs-bundle
reply
    Bookmark Topic Watch Topic
  • New Topic