• Post Reply Bookmark Topic Watch Topic
  • New Topic
permaculture forums growies critters building homesteading energy monies kitchen purity ungarbage community wilderness fiber arts art permaculture artisans regional education skip experiences global resources cider press projects digital market permies.com pie forums private forums all forums
this forum made possible by our volunteer staff, including ...
master stewards:
  • Carla Burke
  • Nancy Reading
  • r ranson
  • Jay Angler
  • John F Dean
  • Pearl Sutton
stewards:
  • Nicole Alderman
  • paul wheaton
  • Anne Miller
master gardeners:
  • Christopher Weeks
  • Timothy Norton
gardeners:
  • thomas rubino
  • Jeremy VanGelder
  • Matt McSpadden

Chicken Brooder

 
master gardener
Posts: 4748
Location: Upstate NY, Zone 5, 43 inch Avg. Rainfall
1990
monies home care dog fungi trees chicken food preservation cooking building composting homestead
  • Likes 6
  • Mark post as helpful
  • send pies
    Number of slices to send:
    Optional 'thank-you' note:
  • Quote
  • Report post to moderator
Good Evening Permies!

It is my first rodeo with raising chickens and I have nine (9) chicks arriving in the next few days!

I have buttoned up the coop and run to make sure they have a nice place to live but I have to finish up my brooder.

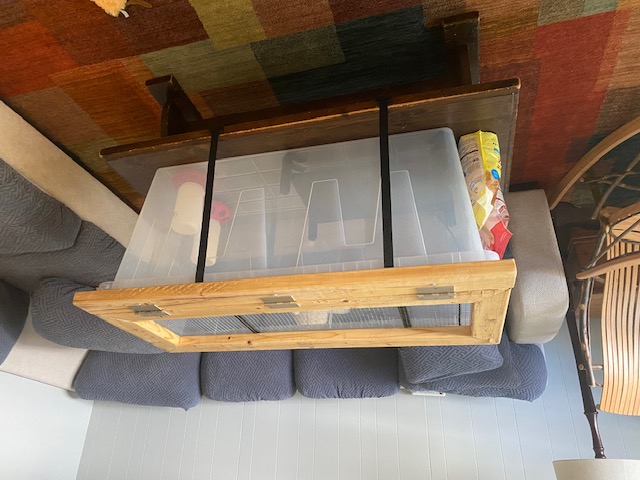
I had a spare 55 gallon tote that was intact with a lid, so I decided to utilize it with the intent of packing up chicken supplies in it after the chickens move to the coop.

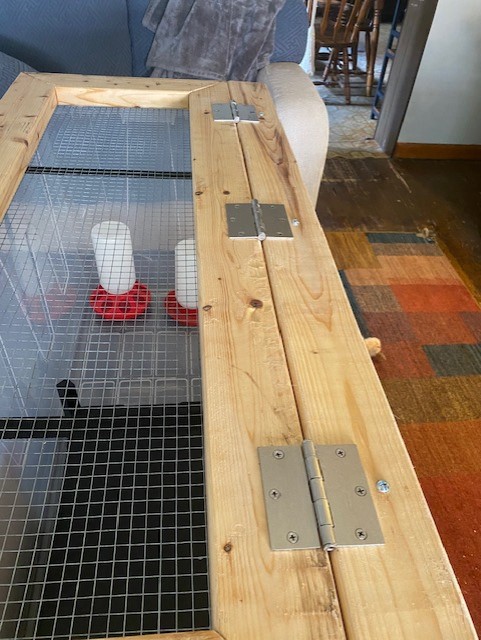
My fiancé measure and created a lid that could bolt to the tote without needing to modify or render the tote permanently altered. We sealed the wood with boiled linseed oil.

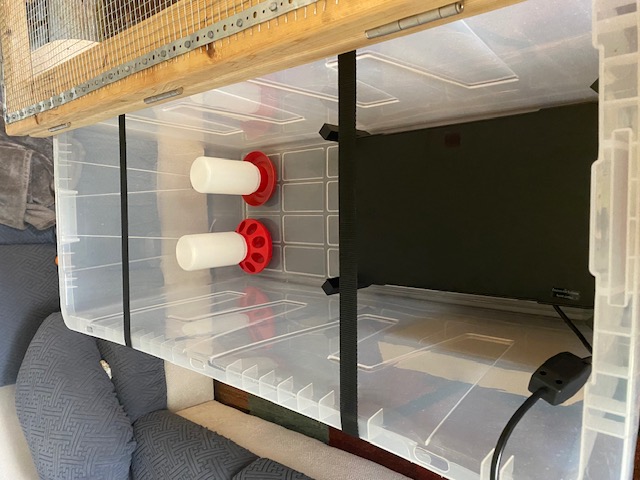
I realized once I got my hot plate, it was a bit on the big size. It might be a problem when they start growing in size but I think I'm fine for now.

I'm planning on utilizing pine flake for bedding.
Brooder4.jpg
Strapped because we don't know how our Plott Hound is going to be.
Brooder1.jpg
Decent amount of space, I hope!
Brooder2.jpg
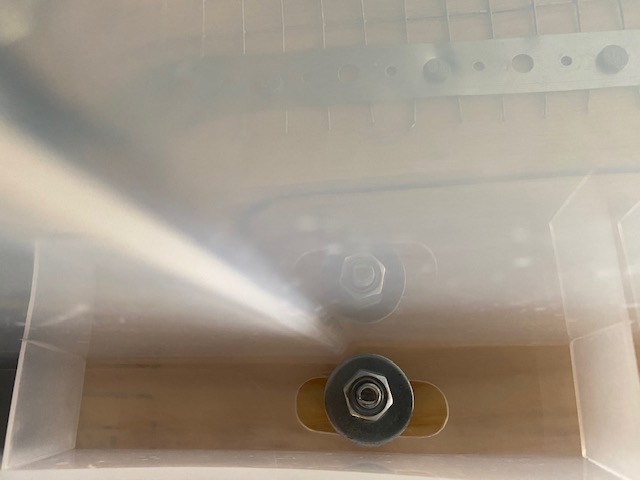
Three bolts securing the board. Need to figure out how to let the top rest in a semi-open position.
Brooder3.jpg
Washer and nut
Washer and nut
 
gardener
Posts: 681
Location: South-southeast Texas, technically the "Golden Crescent", zone 9a
485
3
foraging books chicken food preservation fiber arts homestead
  • Likes 6
  • Mark post as helpful
  • send pies
    Number of slices to send:
    Optional 'thank-you' note:
  • Quote
  • Report post to moderator
Yes. That is, most definitely, a good starting brooder that should do well for your 9 chicks for the first two weeks of their lives.

The plastic is easy to clean and you can line the bottom with paper towels or old towels - something that isn't wood shavings, doesn't have tiny "looks like edible" bits, and/or snags their feet. Trust me on this. Paper towels if you still have some. Something absorbent and fabric without a lot of pile if you have moved away from paper. I've used old terry cloth that no longer had pile worth mentioning, old linen (could be boiled later), and a layer made up of old washcloths- the ones that come in "value packs".

Once they are past the first few days - Day one - feed on the floor, just a pinch. Put it on top of your bedding choice. Stick their beaks in the water - you don't *have* to, but everyone says you should. I have watched them and they learn from watching each other.  Make sure they know where you put the water and food containers.

Watch them to see what they need. If they're peeping, they have a question and you get to play "Guess What the Chicks Need". Make sure they have water. Check to see if someone's stuck somewhere. Make sure they have food they can reach and that they can eat.  Don't kiss them. Wash your hands before and after playing with them. Try to keep their bedding as dry as possible.

If you can, GrowGel (tm) is fun to make up (it's a green powder you add water to and swells up into a fun green gel that is full of vitamins and minerals and is perfect for chicks. I also use QuickChick (also tm) which is a concentrated powder that lasts forever and is added to water. Make it dilute, half strength, and supercharge the peepers. Or use a little sugar, Apple Cider Vinegar, and give them a cooked apple to peck at. Really, their first meal should be a bit of something fun, something they can walk all over, and they should have stuff to help them recover from stress. There are lots of options.

You've covered the basics and they will be safe. Make sure they have light during a reasonable day span. They are diurnal critters but all babies are babies and chicks will fall asleep quickly and in odd positions. It's normal to have them fall asleep on their feet so their beak forma a tripod. It's normal for them to sprawl out in a "Superman" position and be flat. As long as they still breathe, they're just asleep.

Train your dog from the very beginning. Train the chicks while you train your dog. Use whatever techniques work for your relationship. This is amazingly important and don't stop just because it's hard or ... Bad Things Happen. (Not a tm, but as good as one.)

You can add a feather duster, if you can find one, or make something out of craft feathers. They will play with it. It's supposed to make them think of a Momma Hen, but I haven't tried that particular thing. There are some people who have a length of feathers they fasten around the warmer plate. I don't have one (a warmer plate) but have heard wonderful things.
The chicks will jump. They climb and hop and will get everywhere and poop on everything. This is normal.

After the first week or so, once they aren't as likely to eat things just because they look edible, you can put wood shavings, sand, pine pellets, whatever bedding you'd like to use. Or mix it up. Whatever. It's all good.
The first couple of days are the scary ones. Once you get past the first week or so, they get a lot more resilient and you'll have more confidence. They'll be adorable little peepers and you can spoil them rotten.

Have fun and enjoy! You will need to move them into a larger container, or build another and split them up as they get bigger. I've used a long 125 gal tote for as many as 12 chicks, but it's getting pretty crowded by the time they're ready to go out. More space is better, and letting them have some running around time in a supervised and secure area is always fun for everyone, as long as you can watch over them. Any time they aren't pooping in their tote is good time.

You got this! It's a huge step and a fun one!
 
gardener
Posts: 2392
Location: Central Maine (Zone 5a)
1036
homeschooling kids trees chicken food preservation building woodworking homestead
  • Likes 6
  • Mark post as helpful
  • send pies
    Number of slices to send:
    Optional 'thank-you' note:
  • Quote
  • Report post to moderator
Hi Timothy,
Sounds like an awesome start.

First, I will say ditto to everything Kristine said.

The only thing I want to expand on a tiny bit is around the heating. As you mentioned, the heat pad (which did well for me), is a little oversized for what you need :). People often focus on making sure the chicks are warm enough, that they do not remember to make sure the chicks can cool off too. With a heating pad, there is not as much sideways heat as with a heat lamp, but you still need to make sure there is a place for them to get cooled off if they need/want. That is one reason it is very important to increase the size of their space before they get too big... so they have enough room to have a cool side and a warm side.
 
pollinator
Posts: 556
Location: Northwest Missouri
214
forest garden fungi gear trees plumbing chicken cooking ungarbage
  • Likes 5
  • Mark post as helpful
  • send pies
    Number of slices to send:
    Optional 'thank-you' note:
  • Quote
  • Report post to moderator
That's a good brooder design but let me warn you of one thing: DUST! You would not believe how much dust these little chickums can kick up. We only brood in mud-rooms and such where it's not such an issue. If you keep this in your living room, be aware that the mess spreads well beyond the plastic walls.
 
Timothy Norton
master gardener
Posts: 4748
Location: Upstate NY, Zone 5, 43 inch Avg. Rainfall
1990
monies home care dog fungi trees chicken food preservation cooking building composting homestead
  • Likes 1
  • Mark post as helpful
  • send pies
    Number of slices to send:
    Optional 'thank-you' note:
  • Quote
  • Report post to moderator
I almost forgot that I made this thread. Let me give some insight to the things that I learned.

1. Matt Todd's comment on dust can not be overstated. The dust was unreal. I do not recommend brooding chicks in your living room! OOPS!

2. I thought the size of the container would be big enough but it was undersized once they had a few weeks under their belt. Kristine Keeney was on the money with their reply.

3. Brooder Heating Plates are nifty. I used to raise reptiles and the choice of heating generally came between heat lamps and heating pads. Same fire concerns with heating lights as is with chickens. The plate reduces the risk of fire quite a bit in its design. It also served as another 'level' of floor space for when the chicks were old enough to hop on top. Cleaning it was a breeze.

If I were to do it again, I probably would go with a design that can expand as the chicks age. Something that had panels like the image below.


The tote is nice because once they have finished brooding and I cleaned it out, I can store away the related equipment in it.

All in all, the setup worked for me.
 
I brought this back from the farm where they grow the tiny ads:
A PDC for cold climate homesteaders
http://permaculture-design-course.com
reply
    Bookmark Topic Watch Topic
  • New Topic