• Post Reply Bookmark Topic Watch Topic
  • New Topic
permaculture forums growies critters building homesteading energy monies kitchen purity ungarbage community wilderness fiber arts art permaculture artisans regional education skip experiences global resources cider press projects digital market permies.com pie forums private forums all forums
this forum made possible by our volunteer staff, including ...
master stewards:
  • Nancy Reading
  • Carla Burke
  • r ranson
  • John F Dean
  • paul wheaton
  • Pearl Sutton
stewards:
  • Jay Angler
  • Liv Smith
  • Leigh Tate
master gardeners:
  • Christopher Weeks
  • Timothy Norton
gardeners:
  • thomas rubino
  • Jeremy VanGelder
  • Maieshe Ljin

apartment solar air heater

 
steward
Posts: 3701
Location: woodland, washington
199
  • Mark post as helpful
  • send pies
    Number of slices to send:
    Optional 'thank-you' note:
  • Quote
  • Report post to moderator
hey gang.  I'm wondering about the practicality of a passive solar air heater for an apartment in Seattle.  our front door faces south and I was thinking of buying a used door from the Re-Store and building the heater into it.  I don't think I would have trouble building it, but my roommates want to be sure it will work before they agree to let me install it.  my brief internet searching hasn't turned up any numbers that I can show them.  the room it would heat is probably about 250 square feet.  we left the heat off all of last winter and about the coldest it got was 58 degrees, probably because we've got other apartments on three sides of us.  do you folks think a door-sized solar heater would heat that space up to the mid sixties?

thanks
tel
 
author and steward
Posts: 52410
Location: missoula, montana (zone 4)
hugelkultur trees chicken wofati bee woodworking
  • Mark post as helpful
  • send pies
    Number of slices to send:
    Optional 'thank-you' note:
  • Quote
  • Report post to moderator
I haven't seen anything for a door, but I have seen things for windows. 

The idea with the window is that you would have something about 2 feet wide and 3.5 feet high.  It's black.  I get the impression that there is insulation involved.  And further, there is glass riding about two inches out from the black layer.  So the air between the glass and the black gets very hot.  And the black things gets very hot too.  So hot air comes pouring out of the top and cooler room air is sucked in. 

When I read about it (I cannot remember where) it seemed that it did a LOT of heating!

 
tel jetson
steward
Posts: 3701
Location: woodland, washington
199
  • Mark post as helpful
  • send pies
    Number of slices to send:
    Optional 'thank-you' note:
  • Quote
  • Report post to moderator
that sounds like the design I have in mind.  my first thought was to put it in the window right next to the door, but there were immediate objections about blocking any portion of our only south-facing window.  so I'll just build the thing onto or into a door.  I'll either cut out a large chunk in the center of the door, or just cut out an air exit and intake in the top and bottom respectively.

I suppose hard numbers aren't going to be easy to come by, but hearing that it did a LOT of heating is encouraging.
 
gardener
Posts: 3249
Location: Cascades of Oregon
815
  • Mark post as helpful
  • send pies
    Number of slices to send:
    Optional 'thank-you' note:
  • Quote
  • Report post to moderator
Have you considered a tight fitting screen door and the entry door as the heat sink? You could even incorporate a solar cell and thermostatic switch to power a small fan.  I think it is an interesting concept.
Mother Earth News has several issues with solar heaters that are used next to or below a window.
Commercial heaters are available that attach to the side of the house and are vented through the wall.
With the door idea you already have the dead air space between entry door and screen door. Decorative molding could be incorporated of matrerials or shapes that would add to the solar heat sink.
 
tel jetson
steward
Posts: 3701
Location: woodland, washington
199
  • Mark post as helpful
  • send pies
    Number of slices to send:
    Optional 'thank-you' note:
  • Quote
  • Report post to moderator
the screen door is a pretty excellent idea.  I don't think our jamb has room for hinges on the outside, unfortunately.  I've seen the Mother Earth News plans for under the window.  our windows open horizontally, though, which makes that model rather more complicated to install in this particular situation.  I think I'm going to give it a shot in a couple weeks.  any more input would be great before then and I'll post my results when I get it together.
 
Robert Ray
gardener
Posts: 3249
Location: Cascades of Oregon
815
  • Mark post as helpful
  • send pies
    Number of slices to send:
    Optional 'thank-you' note:
  • Quote
  • Report post to moderator
Most screen doors afix to the brick molding around an exterior jamb, you might have room.  Now you have me thinking, tubes or corrugation on the collector side of the door that go through a door with bottom inlets and top outlets. Closeable vents for night time, you have a viable idea. I like it.
 
paul wheaton
author and steward
Posts: 52410
Location: missoula, montana (zone 4)
hugelkultur trees chicken wofati bee woodworking
  • Mark post as helpful
  • send pies
    Number of slices to send:
    Optional 'thank-you' note:
  • Quote
  • Report post to moderator
Here is one idea:  http://articles.directorym.com/Solar_Box_Window_Heater_Indianapolis_IN-r1072281-Indianapolis_IN.html

I can't seem to find the one I'm thinking about.

Here's another idea:  what about some black bricks with a bit of insulation on the bottom.  You just put them on your window sill.  It seems like they would get plenty warm.

 
tel jetson
steward
Posts: 3701
Location: woodland, washington
199
  • Mark post as helpful
  • send pies
    Number of slices to send:
    Optional 'thank-you' note:
  • Quote
  • Report post to moderator
paul: that design is roughly (and maybe exactly) the same as the Mother Earth News model.  the problem for me is that our windows open horizontally.  I'm sure with a couple extra steps, I could overcome that problem, but I think I'll put that one off for now.

black bricks... seems like a low-cost and easy supplemental option.  I don't think bricks alone would do the trick unless there were an awful lot of them, but that might give a little boost to the other options.

as soon as an automobile is available to me, I'm off to buy a door to get started.  could be a disaster, but I'll give it a shot.
 
                                                      
Posts: 3
10
9
  • Mark post as helpful
  • send pies
    Number of slices to send:
    Optional 'thank-you' note:
  • Quote
  • Report post to moderator
Please do post how this works for you - I've been mulling over doing something like this on my home, but am interested in how it actually worked for someone IRL (In Real Life).

Some interesting options I've pondered are:

MotherEarth's Heat Grabber-
http://www.motherearthnews.com/Do-It-Yourself/1977-09-01/Mothers-Heat-Grabber.aspx

and:

http://www.mobilehomerepair.com/article17solar.htm

Hope these links work. 
(And that posting something means I won't get purged from your Permies email list!)
thx,
-geebee
 
pollinator
Posts: 1528
Location: zone 7
18
  • Mark post as helpful
  • send pies
    Number of slices to send:
    Optional 'thank-you' note:
  • Quote
  • Report post to moderator
i built one of these for my greenhouse and i am in the process of connecting it to a thermal mass for storing that heat over night. i dont think you need that for a home though. i built a frame out of wood, plywood for the bottom, and 2x6 for the walls. over the wooden box i covered it with black plastic to seal it well and add to the heat process ( i could have added insulation between the plastic and the wood now that i think of it )  i got a glass door ( 4' x 7' ) and made the box to the exact size of the glass door.  so it covers and makes a nice sealed box. i left it in the sun for 5 minutes to test it out, it was 56 degrees outside. in that short amount of time it got to 140. next i put some pieces of wood inside making a zig zag pattern to the top, to slow the air flow some and allow it to heat up more. cut an inlet at the bottom and and and exhaust at the top and i was done for the most part. it pumps out some serious heat. the only problem i have is the greenhouse looses some of that heat over night, and the sun only heats it up in the day. that wont be a problem with an insulated home.

in the summer id like to turn it into a solar food dehydrator on a massive scale.
 
tel jetson
steward
Posts: 3701
Location: woodland, washington
199
  • Mark post as helpful
  • send pies
    Number of slices to send:
    Optional 'thank-you' note:
  • Quote
  • Report post to moderator
so I've gotten a door and some other materials and started on this project.  the door was pretty ugly, though, so I decided to sand off the paint and stain the wood so my land lord doesn't complain.  trouble is, the paint on the external side is so thick it's been gumming up everything I've tried to sand it with.  any suggestions for that front would be appreciated.  the interior side wasn't nearly as much trouble.  chemical paint stripper has been suggested, but, well, chemical paint stripper doesn't sound so great to me.  I cut some rigid insulation panels to fit and I've got a corrugated galvanized steel sheet to use as the heat collector.  I'm told aluminum is better, but it's also rather more expensive.  the only material I'm missing now is the glazing.  I'll probably use double- or triple-wall polycarbonate.  I'm really excited about this, but annoyed that sanding is taking so long.  the actual building of the solar heater will be much faster than refinishing the door.  I just hope I get it done while we've still got some cold weather left.
 
                          
Posts: 250
Location: Marrakai Northern Territory Australia
  • Mark post as helpful
  • send pies
    Number of slices to send:
    Optional 'thank-you' note:
  • Quote
  • Report post to moderator

sounds like you need a heat gun to remove the paint
 
tel jetson
steward
Posts: 3701
Location: woodland, washington
199
  • Mark post as helpful
  • send pies
    Number of slices to send:
    Optional 'thank-you' note:
  • Quote
  • Report post to moderator

Bird wrote:
sounds like you need a heat gun to remove the paint


how would that work?  heat it up and scrape it off?  that could be very much easier than what I'm doing.  I don't have immediate access to a heat gun, but I could probably rent one.
 
Robert Ray
gardener
Posts: 3249
Location: Cascades of Oregon
815
  • Mark post as helpful
  • send pies
    Number of slices to send:
    Optional 'thank-you' note:
  • Quote
  • Report post to moderator
Heat guns work great on paint that seems to melt and clog the sandpaper as you sand.
The heat gun softens the paint and you can run your putty knife or scraper under the softened paint.
I've had good luck with citric based paint strippers that are more environmentaly friendly and doesn't smell near as bad.
 
                          
Posts: 250
Location: Marrakai Northern Territory Australia
  • Mark post as helpful
  • send pies
    Number of slices to send:
    Optional 'thank-you' note:
  • Quote
  • Report post to moderator
a heat gun should only cost around $20 at your local hardware store chain, it's like a hair dryer on steroids

and yes it heats paint and you scrape off with a paint scraper or blade,( not sand paper) lead based paints will give off fumes so use a mask you can never be sure what type of paint your trying to remove

burning paint off is another method useing a flame thrower type thing, i reckon these types are dangerous and you can also damage timbers patina with them
 
tel jetson
steward
Posts: 3701
Location: woodland, washington
199
  • Mark post as helpful
  • send pies
    Number of slices to send:
    Optional 'thank-you' note:
  • Quote
  • Report post to moderator
sounds like my sanding days are over, then.  thanks.
 
                          
Posts: 250
Location: Marrakai Northern Territory Australia
  • Mark post as helpful
  • send pies
    Number of slices to send:
    Optional 'thank-you' note:
  • Quote
  • Report post to moderator
carefull with the hot air, dont blow direct on glass it will crack, easyest way is to push scraper forwards and use it as a shield for glass at the same time, a little practice is all thats needed sure you'll work it out

Bird
 
tel jetson
steward
Posts: 3701
Location: woodland, washington
199
  • Mark post as helpful
  • send pies
    Number of slices to send:
    Optional 'thank-you' note:
  • Quote
  • Report post to moderator
no glass on the door, so I'm in the clear on that count.  I'll glaze with polycarbonate, but that will be after the paint-stripping.
 
paul wheaton
author and steward
Posts: 52410
Location: missoula, montana (zone 4)
hugelkultur trees chicken wofati bee woodworking
  • Mark post as helpful
  • send pies
    Number of slices to send:
    Optional 'thank-you' note:
  • Quote
  • Report post to moderator
Is it done? Do you have pics?
 
tel jetson
steward
Posts: 3701
Location: woodland, washington
199
  • Mark post as helpful
  • send pies
    Number of slices to send:
    Optional 'thank-you' note:
  • Quote
  • Report post to moderator
I've got some pictures, but they're on a borrowed camera that I don't have on me.  not done, yet, though.  I'm working on it in a shop that's not terribly close to my home, so progress has been slow.  I'm headed out tomorrow to work on it some more, though.  the heat gun sped things up dramatically, but there are sections of paint that just turned to sticky goo that just won't scrape off.  and I still don't have the glazing yet.  if anybody knows of a source for double or triple wall polycarbonate in western Washington or northwest Oregon, I would love to hear about it.  I really need to quit dragging ass on this project, as higher sun and warmer weather will make it useless before long.
 
                          
Posts: 250
Location: Marrakai Northern Territory Australia
  • Mark post as helpful
  • send pies
    Number of slices to send:
    Optional 'thank-you' note:
  • Quote
  • Report post to moderator
sticky goo most likely lead based paint, use mask but pull back heat gun dont let it get over hot will still get sticky go slow so as not to oose the stickey into grain again use mask
if its a realy old window it may be calcimite paint which also gets sticky same instructions, this sort of paint would be powdery finish
one more thing gooie could also mean its just too hot/ heat gun to close to working surface paint realy only needs to get hot enough to start to blister as i mentioned before pactice makes perfect

alternative use citrus based paint stripper but thats pretty expensive
 
                          
Posts: 250
Location: Marrakai Northern Territory Australia
  • Mark post as helpful
  • send pies
    Number of slices to send:
    Optional 'thank-you' note:
  • Quote
  • Report post to moderator
nearly forgot the last gooie, simple old window putty, slows down the job but i dont think it's a baddie?
 
tel jetson
steward
Posts: 3701
Location: woodland, washington
199
  • Mark post as helpful
  • send pies
    Number of slices to send:
    Optional 'thank-you' note:
  • Quote
  • Report post to moderator
I've been wearing a respirator and gloves with the heat gun.  hopefully that's enough.  lead doesn't sound good, though.  I'll stop by a hardware store and price some stripper on my way out to work on it tomorrow.

there's no window in the door, so no window putty.  the paint around the frame of the door came off easy as pie with the heat gun.  didn't even have to bubble, just slid my little metal spatula device under and it came off eight inches at a time.  the paint on the middle brace and the recessed panels is the nasty stuff.  doesn't even really bubble at all.  just turns to goo.  I was hoping this project would be a bit cheaper, but the citrus stripper might be my only recourse.
 
                          
Posts: 250
Location: Marrakai Northern Territory Australia
  • Mark post as helpful
  • send pies
    Number of slices to send:
    Optional 'thank-you' note:
  • Quote
  • Report post to moderator

some painters use putty in blemishes, knots in wood ect, same as panel beater uses bog, would ask for photo to help determin but will be without access to computer for a while, only have access at work at present time, try lower heat, maybe a bit more force with scraper, its hard to tell without knowing size of problem, by your post of many layers i would asume lead as many layers indicates age and in old days lead was considered safe, so at this stage i can realy only recomend, persistance, determination and then some more persistance
you mention recessed panel is the goo in corners/joins? if it is i will go putty try wipe a small section with mineral turps it may soften putty to scrape without heat, but make sure its clean again if it does not before applying heat

Bird
 
tel jetson
steward
Posts: 3701
Location: woodland, washington
199
  • Mark post as helpful
  • send pies
    Number of slices to send:
    Optional 'thank-you' note:
  • Quote
  • Report post to moderator
alright, how about a photo update?  it's going to be a bit underwhelming, as I've made shamefully little progress, but I'll keep you all in the loop anyhow.

(click on the thumbnails for larger photos)

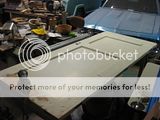
first up: the door as I got it (minus a little bit of paint)


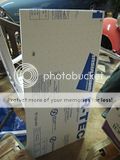
the insulation I'm using:


a corner of the insulation after I used a router on it so it will fit into the door's panels:

I'll glue these into the panels under the solar collector so they won't be visible.  the room side of the door won't be insulated.

this is the room side of the door:

it took me over two hours to sand the paint off that one side and less than thirty minutes to do the rest of it with a heat gun and scraper (thank you, Bird).

different methods, different results:

not the best picture, but I wanted to show how much wood I ended up taking off trying to sand the paint away.  with the heat gun, you can still see what looks to me like lines from the saw that cut the lumber.

next up we've got what happened when I tried to finish the heating and scraping in the middle of the door:

again, not the best picture, but you can see the old-bubble-gum result of the heat gun on this different paint.  I can't really think of a good reason to use different paint on different parts of the door, but then again, I'm not really any kind of door or paint expert.

here is the citrus stripper applied to the lower inside panel of the door:

this is as far as I got today because the stupid can broke or clogged or hates me for some reason and I couldn't spray any more.  the trip back to the hardware store was about an hour and a half, so I moved on to other projects.  I stopped by on my way home, though, and they replaced the can.  I'll head back out to work on this tomorrow and hopefully make some actual progress.

finally, here's an unrelated picture of a bowl my dad is working on:

I'm using my parents' garage for this project, as my roommates would certainly object to the mess I would make in our living room if I did it at home.  also, my dad has a whole lot of nice tools, including the lathe he's using for this lovely bowl.

I was planning on using a piece of corrugated galvanized steel for the collector, but I found a place in Seattle that sells sheet aluminum for less than I expected.  copper, silver, gold, and diamond would all work better than aluminum, but, well...

I haven't decided if I'll just use a flat panel of aluminum or try to attach fins to it somehow to maximize heat transfer.  any suggestions?  I also haven't found a place to pick up some polycarbonate, yet.  I would entertain suggestions for alternative glazing material.
 
                                          
Posts: 46
  • Mark post as helpful
  • send pies
    Number of slices to send:
    Optional 'thank-you' note:
  • Quote
  • Report post to moderator
Tel,

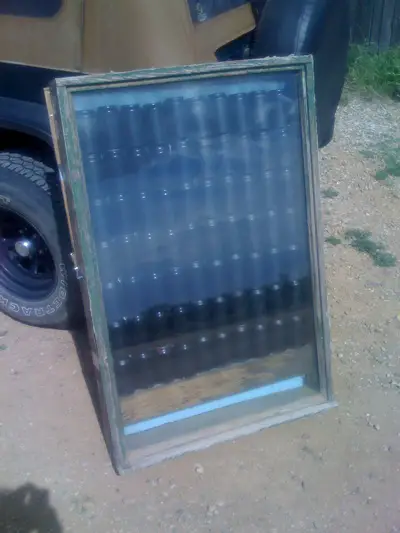
Have you considered using aluminum cans?  I have seen quite a few of these online, Google "soda can solar heater and there are a lot of results.


This one is from http://www.thegoodhuman.com/2009/06/09/solar-space-heater-made-from-soda-cans-an-old-window/

Talk about some recycling, these look pretty nice as well. 

Good luck, I am looking forward to seeing how your door project turns out

Lauren
 
tel jetson
steward
Posts: 3701
Location: woodland, washington
199
  • Mark post as helpful
  • send pies
    Number of slices to send:
    Optional 'thank-you' note:
  • Quote
  • Report post to moderator
I have seen those designs as well.  haven't given them any serious consideration, though.  I will now.  I don't think I would use the same layout, but I can't argue with reusing waste instead of buying new, especially something as nasty to produce as aluminum.
 
                                          
Posts: 46
  • Mark post as helpful
  • send pies
    Number of slices to send:
    Optional 'thank-you' note:
  • Quote
  • Report post to moderator
I have seen them where the cans were stacked up sideways instead of vertically, not sure what was used to connect the rows but that way the air had a back and forth path to follow instead of the upright channels like in the photo I posted earlier.  That is the beauty of doing it yourself, finding what works best for you and your situation.
 
tel jetson
steward
Posts: 3701
Location: woodland, washington
199
  • Mark post as helpful
  • send pies
    Number of slices to send:
    Optional 'thank-you' note:
  • Quote
  • Report post to moderator
so the second can of Citrustrip clogged as well.  not impressed.  made some progress today, though.  I am, however, regretting getting involved with the paint.  should have just left the outside as it was, or maybe thrown a new coat of paint over the old.  would have been done with this project long ago.
 
tel jetson
steward
Posts: 3701
Location: woodland, washington
199
  • Mark post as helpful
  • send pies
    Number of slices to send:
    Optional 'thank-you' note:
  • Quote
  • Report post to moderator
just bought a sheet of aluminum: 5052 H32 bare aluminum sheet, 0.063 x 24 x 60".  $30.38 from ThyssenKrupp OnlineMetals in Ballard.  got all set up to spray it black, but my rattle can of paint is clogged.  I am really not having much luck with spray cans lately.

I do want to add soda cans and/or fins to this at some point, but I'm trying to speed up the process right now so I'm cutting some corners.  hopefully once I take it down again this summer I'll have some time to retrofit the metal parts.  I'll add some extra surface area in the form of soda cans to the back side for better heat transfer to the air.

off to the shop again to work on this some more.
 
Posts: 308
Location: long island, ny Z-7a
4
  • Mark post as helpful
  • send pies
    Number of slices to send:
    Optional 'thank-you' note:
  • Quote
  • Report post to moderator
your dad's got a nice bowl going there, looks like bird's-eye maple
i love making things on my lathes (i have a full size and a portable mini )
recently got into making wooden rings,theyre quick and easy to make and i bought a set of ring gauge sizes on ebay to fit all fingers.

what're you going to do with the aluminum plate? not sure i follow your design now. i dont think an empty box with black metal front is going to work as well as the can method,nor would just screwing the plate flat to the door.

the soda can style seems the easiest thing to make, i'd come across around 80 various designs with them on youtube,from super detailed,to 30minute slapped-together types that still produced great results apparently, i plan on making 2 for my workshop
 
tel jetson
steward
Posts: 3701
Location: woodland, washington
199
  • Mark post as helpful
  • send pies
    Number of slices to send:
    Optional 'thank-you' note:
  • Quote
  • Report post to moderator

your dad's got a nice bowl going there, looks like bird's-eye maple


it does look like bird's-eye maple, but it's holly.  don't know the exact species, but our neighbor cut a big holly tree down last year and that's a chunk of it.  my dad said it's been a really nice wood to work with, he just wishes he had bigger pieces.  he's always looking for new projects, so I'll suggest wooden rings to him.

what're you going to do with the aluminum plate? not sure i follow your design now. i dont think an empty box with black metal front is going to work as well as the can method,nor would just screwing the plate flat to the door.


alright, imagine one of the soda can heaters: just replace the soda cans with a flat sheet of aluminum.  it's still enclosed in glazing.  air passes by both surfaces to transfer heat.  the cans, in this application, would just take up too much space.  without an awful lot of cutting, all that internal space is wasted as air is only passing over the outside.  using the plate, the heater can have a much lower profile without sacrificing a lot of surface area.  a lower volume of air will heat up faster and hopefully make the whole thing work smoothly.

adding cans to the back of the plate in the future will increase the metal area in contact with moving air and more efficiently transfer heat.  I may do that during the warmer months this year.  I would cut the cans in half, though.  not sure how I would attach them so that they would be thermally continuous with the sheet...

I'm out of town for the week, so I'm not making any progress on this at the moment, but I'm all set up to finish it when I get home.  I've got some paint stripper that works, some exterior stain, an aluminum sheet painted black on one side, and I'll pick up a sheet of polycarbonate on my way home on Saturday.  the only piece of the puzzle I haven't worked out just yet is how to install the doorknob and lock mechanism.  can't imagine that will be too difficult, though.
 
                                          
Posts: 46
  • Mark post as helpful
  • send pies
    Number of slices to send:
    Optional 'thank-you' note:
  • Quote
  • Report post to moderator
Tel,

With the can method, air DOES go through the interior of the cans.  A hole is punched in the bottom of the cans, and the hole already in the top is used.  So basically, the cans make aluminum tubes that heat up easily and transfer air from the bottom to the top.  You want to use the interior surface of the cans to channel the heat.  Sure, there will be some heated air on the outside of the cans, but the majority will be confined to the inside of the cans.  So on the ones where the cans are stacked horizontally, there is a hole where the air goes from one side to the other in a zig zag, as it rises.  That would give the air even more area to have to move through and pick up heat as it is rising.  Let's see:

                        (__)______________________________________________________
                                                                                                                                     
                         _________________________________________________________
                                                                                                               (    )
                         _________________________________________________________
                         (    )

Kind of like this. 

Hope this helps
 
tel jetson
steward
Posts: 3701
Location: woodland, washington
199
  • Mark post as helpful
  • send pies
    Number of slices to send:
    Optional 'thank-you' note:
  • Quote
  • Report post to moderator
I can see how that would work, but I'm really trying to save some time at this point.  if this goes well, I'm sure I'll make more heaters in the future, including models using soda cans.  I've also got a landlord and roommates to deal with.  I think the less this thing looks like it was made out of garbage, the better shape I'll be in on that front.  not the sort of thing I really want to think about, but in this case I've got to.

I do wonder why zigzagging would help, though.  sure, it would allow a given volume of air to pick up more heat on it's way through, but it would also reduce the total volume moving through substantially.  if there was a fan involved, that might make more sense, but I'm relying entirely on convection.  seems like more volume being heated less will work better.
 
                                          
Posts: 46
  • Mark post as helpful
  • send pies
    Number of slices to send:
    Optional 'thank-you' note:
  • Quote
  • Report post to moderator
Tel,

I haven't made either kind yet, so I am guessing here.  I am guessing that having the horizontal cans would give the air more time to heat up instead of just shooting up to the top through each column.  I would be more than happy to hear from someone who has actually made one of these, as I have not had the time or inclination at the same time to actually make one of these.  It's not anything I could use as well as you at this point with a lot of overcast and being set in some tall trees.

I am looking forward to seeing how yours turns out.  And hearing how well it works.  I was trying to give you a hand doing this as inexpensively as possible, inexpensively, and not cheap.  I think the black cans look pretty good, it's definitely inexpensive and it's a pretty cool type of repurposing.  From what I hear they work pretty well, too.  The aluminum you bought was not all that expensive.  Hope it works well for you. 

Cheers,
Lauren
 
tel jetson
steward
Posts: 3701
Location: woodland, washington
199
  • Mark post as helpful
  • send pies
    Number of slices to send:
    Optional 'thank-you' note:
  • Quote
  • Report post to moderator

I think the black cans look pretty good


the heaters with cans that I've seen (pictures of) don't look too bad.  trouble is, this isn't exactly a sanctioned project, so aesthetics are an unfortunately large part of the equation.  if a less than like-minded landlord weren't involved, the cans would be the way to go.  as it stands, though, I've put a lot more money into this than I intended, so money-saving ideas are welcome.  I'm at around $100 in right now with glazing left to buy.  could have done things cheaper and faster, but I'm very much in the learning phase right now.
 
Matthew Fallon
Posts: 308
Location: long island, ny Z-7a
4
  • Mark post as helpful
  • send pies
    Number of slices to send:
    Optional 'thank-you' note:
  • Quote
  • Report post to moderator

tel wrote:
I've put a lot more money into this than I intended, so money-saving ideas are welcome.  I'm at around $100 in right now with glazing left to buy. 


well for glazing, try finding a window company/contractor.old sliding glass door would work great. people salvage them to build greenhouses with.

as for doing the entire thing on the cheap, this guy used foilback foam panel for the box,and just loose cans inside, http://www.youtube.com/watch?v=XsF9RvVxFc4
think i'll go this route,maybe glue/screws rather than all that duct-tape.

how'd ya get up to $100?  guessing thats from buying the heat gun and paint strippers and sandpaper etc. oh,you bought the door too,i can see it adding up now.
rather than putting all that money/work into stripping the paint,maybe you could've had the solar box cover the entire face of the door? although that requires modifying the door-knob somehow ,hm.doable but little tricky.

tel wrote:
in Seattle.  we left the heat off all of last winter and about the coldest it got was 58 degrees,


wow, i'd of thought seattle gets way way colder than that???
 
tel jetson
steward
Posts: 3701
Location: woodland, washington
199
  • Mark post as helpful
  • send pies
    Number of slices to send:
    Optional 'thank-you' note:
  • Quote
  • Report post to moderator

wow, i'd of thought seattle gets way way colder than that???


it does get colder.  I think we hit 12 Fahrenheit briefly in December.  but our apartment has other apartments on three sides of it that most likely didn't leave their heat off and donated some to us through the walls.  during that cold spell this winter, it did get a little colder inside: closer to 55 Fahrenheit.  roommates rebelled and turned our heat on, too.

how'd ya get up to $100?


door was around $40, aluminum just over $30.  heat gun was somewhere north of $20 and paint stripper was about $10.

rather than putting all that money/work into stripping the paint,maybe you could've had the solar box cover the entire face of the door? although that requires modifying the door-knob somehow ,hm.doable but little tricky.


also requires me to be a much more precise carpenter than I generally am.  I think a new coat of paint would probably have been a better idea than stripping and refinishing.

well for glazing, try finding a window company/contractor.old sliding glass door would work great. people salvage them to build greenhouses with.


I would be a little nervous about using glass.  the door gets slammed.  not generally angry slamming, but slammed nonetheless.  I don't know how a piece of glass that large would hold up.  I priced a sheet of triple-wall polycarbonate yesterday: $70.91.  so that's out.  maybe Plexiglas or plane old thin polycarbonate sheet.  the place I bought the aluminum from sells polycarbonate at reasonable prices, so I'll probably go that route.
 
                                          
Posts: 46
  • Mark post as helpful
  • send pies
    Number of slices to send:
    Optional 'thank-you' note:
  • Quote
  • Report post to moderator
Tel,

There's a thread on the Soda Can Solar Heater in the Alternative Energy section.  They were mentioning there can be a smell from the paint used to darken the interior.  I am thinking something like high temp barbecue paint or engine paint might be the way to go.  You might still need to cure it in the heat but I can't see something made for a barbecue would have a lot of fumes once cured. 
 
tel jetson
steward
Posts: 3701
Location: woodland, washington
199
  • Mark post as helpful
  • send pies
    Number of slices to send:
    Optional 'thank-you' note:
  • Quote
  • Report post to moderator
a few more pictures of progress:

door with insulation.  the lumber on top is just weight while the glue cures.


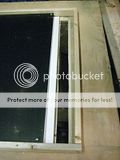
frame of the heater.


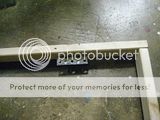
one of the brackets that holds the collector.


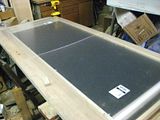
frame with collector.


collector and frame on door.


hot air outlet.

the cool air inlet looks just the same, but it's at the bottom of the door.

mostly put together.

that glazing that you may or may not be able to see is two sheets of acrylic.  also known as plexiglass.  polycarbonate ended up being too expensive.  the acrylic will be cut to size and screwed onto the front (and I'll peel off the backing, which is what's making it a bit cloudy in the photograph).  I'll seal up all the gaps, stain the door, and figure out how to hang a door and install the hardware.  this project's been a bit discouraging, but it's finally getting there.  I just hope the damn thing will work.
 
There are 10 kinds of people in this world. Those that understand binary get this tiny ad:
permaculture and gardener gifts (stocking stuffers?)
https://permies.com/wiki/permaculture-gifts-stocking-stuffers
reply
    Bookmark Topic Watch Topic
  • New Topic