• Post Reply Bookmark Topic Watch Topic
  • New Topic
permaculture forums growies critters building homesteading energy monies kitchen purity ungarbage community wilderness fiber arts art permaculture artisans regional education skip experiences global resources cider press projects digital market permies.com pie forums private forums all forums
this forum made possible by our volunteer staff, including ...
master stewards:
  • Nancy Reading
  • Carla Burke
  • r ranson
  • John F Dean
  • paul wheaton
  • Pearl Sutton
stewards:
  • Jay Angler
  • Liv Smith
  • Leigh Tate
master gardeners:
  • Christopher Weeks
  • Timothy Norton
gardeners:
  • thomas rubino
  • Jeremy VanGelder
  • Maieshe Ljin

Experimental batch rocket(ish) sauna heater

 
Apprentice Rocket Scientist
Posts: 35
5
  • Likes 4
  • Mark post as helpful
  • send pies
    Number of slices to send:
    Optional 'thank-you' note:
  • Quote
  • Report post to moderator
Hi folks. I'm attempting to build a sauna heater that fits into a 500mm diameter, 900mm height and 10mm thick steel tube I have. Initially I started out with the intention of following Peter's DSR3 design and am still trying to use the same relational dimensions, although the design is cylindrical and seems to be straying from these, so I'm kind of in unknown territory now!

Here's the current design...

- Metal air frame sits inside the big steel tube
- Insulating refractory concrete panels are cast in place around the frame - they should be easy enough to replace
- A secondary chamber sits above the main firebox and has a horseshoe shape in the middle, which diverts gasses around the sides of the cylinder and back into the middle
- There's a small riser after this, which draws the gases up and into the bell


Dimensions in the design are currently:
- Firebox: Hieght 250, Diameter 400
- Port: Diameter 38
- Secondary Chamber: Height 25
- System size: 150
- Riser: Diameter150, height 350

For prototyping, I'm trying to get away with a very simple design to test the basic dimensions, before doing anything too time consuming/expensive. Essentially, it uses kiln shelves propped up on top of each other for the firebox and secondary chamber, is wrapped in superwool, then a sheet of aluminium I had and is held together using a steel strap and hose clips.

So far I've run two tests...
Test 1 used the above dimensions, but with a firebox height of 400 and secondary chamber height of 200 - this is considerably larger than the design, but I its easier to start larger and then cut off the props to make things smaller.

I forgot to insulate above the secondary chamber until 45 minutes into the burn! I then chucked on some foamed glass insulation at this point (bad idea, it kind of explodes, like extreme rice crispsies). The first 45 minutes was smokey and slow, after about 50 minutes the smoke disappeared and the rest of the fire burned clean.

I'm guessing both chambers are too big and took too long to get hot (not helped by forgetting to insulate the top.)

Test 2 was the same, except I reduced the secondary chamber all the way to 25mm height and remember to insulate above it with superwool this time. It smoked until around 20 minutes, then seemed to burn clean, but then...smoked for the entire rest of the fire...not good! I peaked inside the firebox and all the wood quite quickly caught fire, but obviously wasn't burning completely...I'm guessing this is what folk refer to as 'thermal runway'?

It was more difficult to draw conclusions from this test. Neither test 1 or two gave any kind of roaring sound I'd associate with secondary combustion (unfortunately I can't see inside the chamber), so I don't think it was happening. It's possible the firebox is too big and it's just not getting hot enough. As for why test 2 went into runway I'm not sure, maybe the very low height of the secondary chamber increased the velocity of the gases too much and there simply wasn't enough heat or air for them to burn? If anyone has any ideas here, please let me know.

My next plan is to reduce the height of the firebox to 300mm and increase the air inputs, so they total 50% of system size (something I read from Peter on another post,) I think they are currently around 30% or less.

Any thoughts, ideas or feedback is welcome!

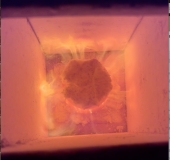
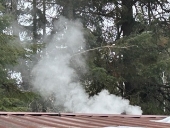
Here are some pics I took of test 1 and a little video of the exploding foamed glass!


Dave Rose
Apprentice Rocket Scientist
Posts: 35
5
  • Likes 3
  • Mark post as helpful
  • send pies
    Number of slices to send:
    Optional 'thank-you' note:
  • Quote
  • Report post to moderator
Test 3 - made the secondary chamber 50mm height and the firebox 250mm. This was certainly better than the last test, no thick brown smoke, but also no perfectly clean smoke. Just kind of light white smoke all the way through.

I could see flames coming up to the bottom of the riser - it was at this point I realised I hadn’t insulated the riser! So I wrapped it in super wool and within a couple of minutes, all smoke had disappeared. There was almost a double vortex shape forming at the bottom, but it was all quite messy - I’m guessing because of the way it has been cobbled together sloppily.

You can see it here: https://imgur.com/Fz6r1SJ

I tried adding a log half way through, it smoked at first but after 5-10 mins was burning clean again.

Promising though. It seems as though this configuration does cause some secondary combustion, but not enough to burn off all gases before they enter the riser.

I think I’ll try a larger secondary chamber next time, perhaps 100mm height, using some bricks I have, which will also mean a square horseshoe shape rather than round. Reason being it would be real handy to just use firebricks for this in the final version, rather than casting a custom ciircular horseshoe.
 
gardener
Posts: 1054
Location: +52° 1' 47.40", +4° 22' 57.80"
447
woodworking rocket stoves wood heat
  • Likes 7
  • Mark post as helpful
  • send pies
    Number of slices to send:
    Optional 'thank-you' note:
  • Quote
  • Report post to moderator
Sorry to say, but I'm inclined to think you aren't on the right path. The round opening between the firebox and the secondary chamber is far too small in my opinion. None of my designs has a port that's smaller than 50% of chimney cross section area, 70% is much more common. I did some calculation: your 38 mm diameter hole is 6.4% of system csa. In order to rise that to at least 50%, it should be somewhere around 106 mm diameter. As it is now, gas speed is far too slow, turbulence is lazy and the really hot afterburner flame won't occur.

The volume of the secondary chamber should be enough to accommodate rapid expansion and lots of turbulence. To my eyes, it looks far too cramped now. What you could do is rising the secondary chamber's height to 200 mm again. The horseshoe height to 100 mm or thereabouts and have the riser resting on the horseshoe. Or, with a full height horseshoe, the top half as a complete square. By doing that, the hot gases have plenty of space and need to go down in order to get into the riser.

The firebox could be defined as high as wide, say, 250 mm, being not critical.
Signals to keep in mind:
There should be an audible roar, then you'll know there's lots of turbulence.
Assuming the whole of the thing is completely dry, smoke should disappear completely within 10 minutes, preferably in 5.
When the above points are met with an open system, all air inlet should be in the top half of the fiebox, 30% of system csa in total is enough.
If and when the thing is running like it should, the afterburner flames could rise out of the riser because there's no back pressure of a bell at present.

Of course lots of different configurations are possible, although in my experience just one or two will turn out being the best performers.

All the above recommendations are based on educated guessing. Whether or not you are implementing those is entirely up to you.
 
Dave Rose
Apprentice Rocket Scientist
Posts: 35
5
  • Likes 4
  • Mark post as helpful
  • send pies
    Number of slices to send:
    Optional 'thank-you' note:
  • Quote
  • Report post to moderator
Thanks for the reply Peter and the educated guesses - this is exactly what I'm looking for.

The current prototypes I'm doing actually use a different port configuration, which I should haven mentioned - the designs were done after I already cut the kiln shelf. At the moment, I just sliced some of the shelf off, so its a bit closer to the long narrow port in the DSR3, or at least this is what I was aiming for at the time. The round port was designed to make it easier to construct later, but I haven't tested it yet. I've no idea how I arrived at 38mm, probably by mistake, so thanks for clarifying that! I'll check my current port size and make sure its enough.

Since the last post I did a couple more tests, using 100mm height for the secondary chamber, 250mm height, 400mm diameter for the firebox. Do you think the firebox is too wide in diameter? That would be good news, as I could get more insulation in as I'm working to a fixed 500mm outer diameter.

The lasts tests both took around 45 minutes to get hot enough, so still far too long, but after this point I was able to get the afterburner going and had a nice bubbly rumbling sound, no smoke for the most part. As you said, flames came out the top of the riser. I noticed that the afterburner was very sensitive to air, at least initially - it only worked when I pulled the door open a crack, which was in addition to the air already coming into the firebox via scaffolding tubes. When it was hot enough, I could close the door and the afterburner still functioned. I concluded that the air supply configuration I currently have without the door ajar isn't adequate.

Interesting idea for the secondary chamber. My thinking for reducing the height was that it would get hotter in there more quickly and potentially get the afterburner firing more quickly, but now I'm not so sure. Smaller would be better in terms of reducing the overall footprint/increasing the bell size, but I'll try 200mm again and see how that fares.

Other things I thought could be affecting the time - I'm using 25mm of superwool insulation, 50mm might speed things up? I wondered about the kiln shelves, there's a fair amount of mass in these and I've got 3, perhaps these are slowing things down a bit? My little wood stove has a stainless steel baffle, I imagine this allows the secondary chamber to get hotter quicker (yes it does warp a bit, I beat it back into shape very now and then). But, if you can get things down to 5-10 minutes using refractory materials, I think I'll stick with what I have for now and focus on the other variables.

Here's a video down the riser once it gets going...

https://www.youtube.com/shorts/K68f4DHBsnk


Peter van den Berg wrote:Sorry to say, but I'm inclined to think you aren't on the right path. The round opening between the firebox and the secondary chamber is far too small in my opinion. None of my designs has a port that's smaller than 50% of chimney cross section area, 70% is much more common. I did some calculation: your 38 mm diameter hole is 6.4% of system csa. In order to rise that to at least 50%, it should be somewhere around 106 mm diameter. As it is now, gas speed is far too slow, turbulence is lazy and the really hot afterburner flame won't occur.

The volume of the secondary chamber should be enough to accommodate rapid expansion and lots of turbulence. To my eyes, it looks far too cramped now. What you could do is rising the secondary chamber's height to 200 mm again. The horseshoe height to 100 mm or thereabouts and have the riser resting on the horseshoe. Or, with a full height horseshoe, the top half as a complete square. By doing that, the hot gases have plenty of space and need to go down in order to get into the riser.

The firebox could be defined as high as wide, say, 250 mm, being not critical.
Signals to keep in mind:
There should be an audible roar, then you'll know there's lots of turbulence.
Assuming the whole of the thing is completely dry, smoke should disappear completely within 10 minutes, preferably in 5.
When the above points are met with an open system, all air inlet should be in the top half of the fiebox, 30% of system csa in total is enough.
If and when the thing is running like it should, the afterburner flames could rise out of the riser because there's no back pressure of a bell at present.

Of course lots of different configurations are possible, although in my experience just one or two will turn out being the best performers.

All the above recommendations are based on educated guessing. Whether or not you are implementing those is entirely up to you.

 
Dave Rose
Apprentice Rocket Scientist
Posts: 35
5
  • Likes 4
  • Mark post as helpful
  • send pies
    Number of slices to send:
    Optional 'thank-you' note:
  • Quote
  • Report post to moderator
Well Peter, seems you are nothing short of genius. Todays test was a roaring success! Well, for the most part and certainly a vast improvement over the last iterations.

Video: https://youtube.com/shorts/6PfD5wpMyfY?feature=share

Here is the configuration:

- Firebox: 250mm height, 350mm diameter
- Insulation: 50mm superwool
- Main Port - roughly 50% of CSA (this is actually unchanged from all the previous tests, turns out I got this one right in practice after all, just wrong in the design)
- Secondary chamber: 200mm height
- Air port above door: 45x200mm (roughly 50% system CSA)
- The horseshoe shape was extended around the riser opening a little further, leaving a port entering the riser that was roughly system size

Here's what happened...it was a windy day and I used quite a lot of small dry kindling on top of 2x4 softwood offcuts

- afterburner fired up after 7 minutes! no smoke at this point
- a little smoke appeared after 15 minutes, burned clean again after 25
- added some logs after about 30 minutes - instant thick brown smoke for around 3 minutes, cleaner again at 5 and after 7 minutes was back to burning clean

I changed quite a lot of variables here, but most of them were actually improvements on the desired outcome or easier to build. The only real negative is the increased overall height, so I'm going to try 100mm again in the next burn and compare.

The only concern with this test was the thick smoke that appeared with a new log. It sorted itself out pretty quick, but it would be nice not to have it, or reduce it further. I'd be interested to see how the reduced secondary chamber will change things, it seems that getting the right 'pace' for these things is critical.


Dave Rose
Apprentice Rocket Scientist
Posts: 35
5
  • Likes 2
  • Mark post as helpful
  • send pies
    Number of slices to send:
    Optional 'thank-you' note:
  • Quote
  • Report post to moderator
Tested again with 100mm secondary chamber height, things started well, similar to the last test, with clean burning after 6 minutes, although it was still a little warm.

After 20 minutes, things took a downhill turn, at first with puffy white smoke, slowly turning thicker and greyer. I seemed to be able to get it under control a bit by partially closing the air flap, but it still was giving off more smoke and generally seemed twitchy, switching between clean burn, tall gusts of flame out the top of the riser and smoke.

It’s worth noting that the port to the riser was also reduced here, to 50% CSA - I might try this again and make sure it’s 100%. Or maybe will try 150mm height for the secondary chamber. Hmmm…
 
Peter van den Berg
gardener
Posts: 1054
Location: +52° 1' 47.40", +4° 22' 57.80"
447
woodworking rocket stoves wood heat
  • Likes 4
  • Mark post as helpful
  • send pies
    Number of slices to send:
    Optional 'thank-you' note:
  • Quote
  • Report post to moderator
<grin>Thanks for the compliment. After 40 years of playing with fire I am getting the hang of guessing what's going on.<grin off>

I've sort of seeing this coming.
Now you reduced the height of the expansion chamber the gases aren't being able to expand sufficiently anymore. The function of this chamber and both the ports before and after is (hopefully) to provide a kind of damper to the combustion rate. The first port is providing lots of gas velocity, in the chamber the gases are allowed to expand which next need to go through a restricted end port. The net result should be something that sports almost complete combustion and a limit to the combustion rate. Both my DSR3 and Shorty designs are providing this, the latter being the simplest to built.

What I would do in your place: make the first port slightly larger, say 55% to begin with and the end port slightly smaller, like 95%. Less velocity and a restriction that kicks in earlier. OR: you could opt for skipping all development work altogether and go for a 150 mm Shorty core. This one is quite a bit lower compared to what you have now and it's already optimized. Plus the design is free of charge, only subject to the Creative Commons Attribution-ShareAlike 4.0 International license. It's entirely up to you.
 
rocket scientist
Posts: 6320
Location: latitude 47 N.W. montana zone 6A
3191
cat pig rocket stoves
  • Likes 7
  • Mark post as helpful
  • send pies
    Number of slices to send:
    Optional 'thank-you' note:
  • Quote
  • Report post to moderator
Hey Dave;
I second Peter about the Shorty Core's performance and overall ease of construction. There are a few slabs to hand cast.
I built the first one in the US this spring, we test-fired it in my shop and got excellent results even with no bell.
In two weeks we are moving it indoors and putting it in a proper bell.

Here are the threads for core construction,  A new thread will document Shorty's installation in the house.
https://permies.com/t/254292/Airframe-Construction-Shorty-Core
https://permies.com/t/254283/Shorty-Core-Montana-Version-burn
 
Dave Rose
Apprentice Rocket Scientist
Posts: 35
5
  • Likes 4
  • Mark post as helpful
  • send pies
    Number of slices to send:
    Optional 'thank-you' note:
  • Quote
  • Report post to moderator
Thanks both. I looked closely at the DSR3 and the Shorty, the main reason for straying away from these was the shape - I'm pretty short on space and keen to shoehorn the thing into a 500mmx900mm steel tube I have, including the bell. If I'm unable to get something reliable going, at some point I'd accept defeat and follow a more well trodden path. But I think if the second to last performance turns out to be consistent (200mm secondary chamber height), I'd be pretty happy with that. Plus, I'm enjoying the process!

Actually I have a question - when reloading the Shorty or DSR3, do you typically expect some smoke when refuelling? If so, how long would you expect it to last and would you expect darker thicker smoke, or just a bit of white smoke? Second to last test went pretty much as well as I could hope for, bar 5 minutes of so of smoke after refuelling, darker initially for 2-3 mins.

Thomas, thanks for sharing those threads, I'll dig into those more deeply soon when I start building the final thing, looks like there is lots of detail on the build side of things, particularly the air frame, which is what I need - I've yet to pick up the stick welder lying boxed up in the workshop! Can't be that hard, can it?! 😧

Peter, thanks for the explanation and suggestions on what to do next, I'll try varying the first and second port sizes in order to dampen the combustion rate a little more on the 200mm heigh iteration. In fact, I was going to attempt a square horseshoe using kiln shelf offcuts, which will be easier/cheaper than anything circular (I'm currently just using steel pipe). So I'll give this a go before tinkering with port sizes.

Oh and one more thing, I could potentially try a fibonacci spiral instead of a horseshoe. So instead of splitting the gases in two before recombining again, I could send them all the same direction and into a single vortex into the riser. The benefit (I think) would be a longer path for the gas, the drawback it would also be narrower, so may have to increase the height more, which wouldn't be ideal. But if you have any hunches on horseshoe vs fibonacci, please share!

 
thomas rubino
rocket scientist
Posts: 6320
Location: latitude 47 N.W. montana zone 6A
3191
cat pig rocket stoves
  • Likes 7
  • Mark post as helpful
  • send pies
    Number of slices to send:
    Optional 'thank-you' note:
  • Quote
  • Report post to moderator
Hey Dave;
I grew up with a stick welder they do the job, especially on heavy metal.
In my Dragon Tech shop, I have switched to using a wire feed mig welder, it is fast and easy, especially with thinner steel.
I started out using flux core wire, it leaves slag similar to a stick welder.
Recently I invested in a gas mig welder that uses solid core wire, no slag at all, it makes very pretty welds... (it does, not necessarily me)
If you have never welded before you might find flux core wire feed is a better choice, the smaller 110 vt machines can be had for less than $200 on Amazon.
 
Peter van den Berg
gardener
Posts: 1054
Location: +52° 1' 47.40", +4° 22' 57.80"
447
woodworking rocket stoves wood heat
  • Likes 4
  • Mark post as helpful
  • send pies
    Number of slices to send:
    Optional 'thank-you' note:
  • Quote
  • Report post to moderator

Dave Rose wrote:Actually I have a question - when reloading the Shorty or DSR3, do you typically expect some smoke when refuelling?


The DSR3 need to be down to coals before refuelling. Shove all the coals to the back and reload with one end of the fresh fuel on the coals. The Shorty have been pestered with refuelling on purpose, but provided it's hot all over, it didn't emit even a whiff of smoke, of whatever colour.

Dave Rose wrote:Oh and one more thing, I could potentially try a fibonacci spiral instead of a horseshoe. So instead of splitting the gases in two before recombining again, I could send them all the same direction and into a single vortex into the riser. The benefit (I think) would be a longer path for the gas, the drawback it would also be narrower, so may have to increase the height more, which wouldn't be ideal. But if you have any hunches on horseshoe vs fibonacci, please share!


A long time ago, I tried a fibonacci spiral in order to compare it to a simple j-tube. The spiral tended to be dirtier then the j-tube. Under only one condition it was better than the j-tube, with very high winds, more like a gale.
In short: the spiral needed much more velocity in order to burn clean so I dropped that one.
 
Dave Rose
Apprentice Rocket Scientist
Posts: 35
5
  • Likes 2
  • Mark post as helpful
  • send pies
    Number of slices to send:
    Optional 'thank-you' note:
  • Quote
  • Report post to moderator
Ok, next test will be 200mm height, with a little stumbler attached to the top of the final port I think.

I’ve run a few more tests with smaller heights, but all seem to go into over fuel mode. The last one was 150mm and it seemed to oscillate between clean and over fuelling every couple of seconds, was interesting to watch. I concluded it was almost able to burn everything in the secondary chamber, but would periodically spew out the excess, resulting in puffs of smoke and or flames coming out the riser. So far then, the best burn by far has been at your suggested 200mm height, despite attempts to prove otherwise! I also tinkered with a Fibonacci, but at 100mm height - it made a nice vortex, but the burn wasn’t great, in line with the other at this height. I might test again if I find a solid configuration as I like how it looks, but it’s interesting to hear your experience.

Have you published any final dimensions for the Shorty? I searched your main thread and a couple of others, I did find reference to a sketchup file but couldn’t find it or the dimensions anywhere. I’d be interested to compare the dimensions of the different chambers and port sizes to my current configuration, so far I’ve been referencing the DSR3 only.

Also, I wonder if you have any thoughts on the effect of the riser after the secondary combustion chamber, so essentially a third chamber? Do you think it could potentially be quite small or even not there at all, given most of the combustion should be happening in the secondary chamber? For my implementation, the only negative of having it I can think of is it will take up space in the bell, so potentially reduce time the gasses have hang around and transfer their heat. I can of course just test this, but let me know if you have any hunches on this. And apologies for all the questions, you just get a lot of these!
 
Peter van den Berg
gardener
Posts: 1054
Location: +52° 1' 47.40", +4° 22' 57.80"
447
woodworking rocket stoves wood heat
  • Likes 2
  • Mark post as helpful
  • send pies
    Number of slices to send:
    Optional 'thank-you' note:
  • Quote
  • Report post to moderator

Dave Rose wrote:Ok, next test will be 200mm height, with a little stumbler attached to the top of the final port I think.


The shape and location of the first port is as important as it's size. So, if you've got good results, don't change the shape and location, otherwise you are back to square one.

Dave Rose wrote:I’ve run a few more tests with smaller heights, but all seem to go into over fuel mode. The last one was 150mm and it seemed to oscillate between clean and over fuelling every couple of seconds, was interesting to watch. I concluded it was almost able to burn everything in the secondary chamber, but would periodically spew out the excess, resulting in puffs of smoke and or flames coming out the riser. So far then, the best burn by far has been at your suggested 200mm height, despite attempts to prove otherwise! I also tinkered with a Fibonacci, but at 100mm height - it made a nice vortex, but the burn wasn’t great, in line with the other at this height. I might test again if I find a solid configuration as I like how it looks, but it’s interesting to hear your experience.


It might be that with a greater chamber height the results are better across the board, whatever turbulencer (turbulator?) you choose. No guarantees, though.

Dave Rose wrote:Have you published any final dimensions for the Shorty? I searched your main thread and a couple of others, I did find reference to a sketchup file but couldn’t find it or the dimensions anywhere. I’d be interested to compare the dimensions of the different chambers and port sizes to my current configuration, so far I’ve been referencing the DSR3 only.


Hmmm... could you sent me the url of the page where the reference is on? I'd like to check what might be wrong.
Dimensions, here we go:
The proportions are done with the figure "B", 72.34% of the chimney's diameter, in line with the normal batchrocket.
Width of the main firebox: 2B,
height of the same: 3B,
depth of the same: 4B. This last one isn't critical, could be 25% larger.
Port size: height 2.1B width 0.5B, depth about 1B. See the following how to achieve that.
Riser depth and width: 2B, height: 5.5B.
Inside the riser box there's a liner, to reduce the sides of the square to equal of the chimney's diameter. This liner is the same left and right, and double or as much as required in order to achieve this goal, on the wall where the port is in. Height of the liner: a bit (30 mm or thereabouts) higher than the port, in such a way there's a small lintel over it. No liner at the back, at all.
Top of the riser is closed, exhaust opening in the wall facing the core's front. The opening is as wide as the riser box, height calculated so that the opening is exactly the same as the cross section area of the chimney. Placement of this opening: a piece of wall above it, equal to the opening's height.
This is about it, there are strong signals that the top gap, above the riser box, could be equal to zero if desired. This has been done with a cook stove in July. The ceramic glass cooking surface was resting directly on the riser box, effectively it was functioning as the lid. Quite spectacular to see it working like that, knowing there was nothing on the riser top but glass! We even tried it on a bare core first, with a piece of clear ceramic glass on top.

Dave Rose wrote:Also, I wonder if you have any thoughts on the effect of the riser after the secondary combustion chamber, so essentially a third chamber? Do you think it could potentially be quite small or even not there at all, given most of the combustion should be happening in the secondary chamber? For my implementation, the only negative of having it I can think of is it will take up space in the bell, so potentially reduce time the gasses have hang around and transfer their heat. I can of course just test this, but let me know if you have any hunches on this. And apologies for all the questions, you just get a lot of these!


Lots of questions, that's true. Much more so during the colder seasons.
As I've proven that the riser could be very short, the riser in your construction might not need to be high as well. What the actual cutoff value would be, the fine line between long enough and too short, I am unable to tell you that.
 
Dave Rose
Apprentice Rocket Scientist
Posts: 35
5
  • Likes 3
  • Mark post as helpful
  • send pies
    Number of slices to send:
    Optional 'thank-you' note:
  • Quote
  • Report post to moderator
Thanks for the detailed reply and dimensions, appreciate the time you take to do this.

On re reading the thread, the reference to a sketchup file was to one you sent privately I think, so makes sense I couldn’t find it. It was on this thread: [url] https://permies.com/t/60/234638/Development-compact-batchrocket-core[url]

Before I go back to the 200mm secondary chamber height, one thing occurred to me - I’m using up a lot of CSA space by attempting to return the gasses to a central riser. If I just leave the secondary chamber empty and have the exit exactly the same dimensions as the first port, but at the front this time, 100mm secondary chamber height should provide a slightly larger csa at its widest point than the 200mm design did. The cylindrical shape would also naturally allow the gasses to expand at its widest point and contract again towards the second port. The overall volume is still much smaller though, so perhaps it won’t work, the gases will inevitably have less time to combust in this chamber..I think

I’d lose any nice visible vortexes, but I’d gain an extra 100mm height in the bell with a very compact core that might be useful to others. So I’ll give it a whirl and if it does work, at least I’ll be able to weigh up the tradeoff’s, if not I’ll double down on optimising the 200mm height chamber.
 
Dave Rose
Apprentice Rocket Scientist
Posts: 35
5
  • Likes 3
  • Mark post as helpful
  • send pies
    Number of slices to send:
    Optional 'thank-you' note:
  • Quote
  • Report post to moderator
Well that was an utter failure and I’m sure many here could have predicted it. Extremely slow start, white smoke and poor draw. When flames eventually started appearing out of the final port, after 45 minutes or so, it still wasn’t burning clean.

If I was going to continue down this route, I’d probably try smaller ports front and back, but that isn’t going to happen. Back to the 200mm secondary chamber it is!
 
Dave Rose
Apprentice Rocket Scientist
Posts: 35
5
  • Likes 3
  • Mark post as helpful
  • send pies
    Number of slices to send:
    Optional 'thank-you' note:
  • Quote
  • Report post to moderator
Slight delay as one of my kiln shelves has broken. I'm slightly concerned about whether they'll hold up over time, I've significantly weakened one of them by drilling a big hole in the middle. There's a chance it got wet and that may have caused it, but I think the donut shape certainly won't help. I suppose the alternative would be to cast one myself using high alumina refractory concrete, maybe with stainless needles, but that's quite a bit more effort and I'm not that confident in my casting skills yet. If anyone has experience using anything else 'off the shelf' that works as a nice thin slab, please let me know. In the meanwhile, I'll wait for a new shelf to come.

I also think I may be able to get away with a smaller hole. The most successful test used a secondary chamber height of 200mm and the top of the secondary chamber had a 150mm diameter hole in it, to go into the 150mm riser. I think I'll try a 100mm hole in the next one, which is about the same CSA as the port. This would also allow me to use a thicker horseshoe, which I'll need to do in the final thing anyway - I'm currently using thin metal, but think I'll need to either cast it or use rigidised superwool for the final thing (casting it is probably better as it will support the shelf in the middle).
 
Dave Rose
Apprentice Rocket Scientist
Posts: 35
5
  • Likes 3
  • Mark post as helpful
  • send pies
    Number of slices to send:
    Optional 'thank-you' note:
  • Quote
  • Report post to moderator
Ok, new kiln shelf new test!

- 200mm secondary chamber height
- 100mm final port into 150mm riser
- 25 mm thick horseshoe

Bit of a slow start, but that might be down to not quite dry enough kindling and wet insulation. Burning clean after 10 minutes, but smoke appeared again at 12 minutes. This carried on for around 6 minutes - not thick, but more than ideal. After this, it burned clean again.

I added a log at around 30 minutes into the burn. It smoked initially, but quickly began to clean up and within 2 minutes of adding it was completely clean again. From here, it burned completely clean.

The second half of this burn was promising, especially the re fuel. But the 6 minute Smokey section wasn’t ideal, so would like to get to the bottom of this.

Does anyone have any thoughts on what’s going on here and what to test next? I’m thinking potentially one of the following…

- smaller air intake port (attempting to put the brakes on a bit to allow things to get hot before the things gets into full swing)
- put the super wool on the other side of the metal horseshoe (see photo below), which would restrict the gases more just after they’ve come out the port, but less later
- go back to 150mm final port


Dave Rose
Apprentice Rocket Scientist
Posts: 35
5
  • Likes 3
  • Mark post as helpful
  • send pies
    Number of slices to send:
    Optional 'thank-you' note:
  • Quote
  • Report post to moderator
Another test - this time I made the air intake port, the horseshoe entry port and the horseshoe exit port all 50% chimney CSA.

Not great, it took a full 25 minutes to burn clean and even after that wasn’t quite 100% clear, was worse than the previous test.

My theory is that I’m adding too many restrictions before the vertical riser, where secondary combustion still occurs, so in effect I’m trying to put the breaks on too early.

Next test, I’m going to try adding the restriction right at the end of the riser, so horseshoe entry and exit will be 100% chimney csa, riser exit 50%.

Another crack appeared in the kiln shelf after one firing - not good. I’ve soaked it in water glass and was surprised how absorbent they are, will see if it makes any difference. Also removed the metal pipe from the riser so it’s now just superwool, putting less stress on the middle of the shelf. 🤞

 
Dave Rose
Apprentice Rocket Scientist
Posts: 35
5
  • Likes 3
  • Mark post as helpful
  • send pies
    Number of slices to send:
    Optional 'thank-you' note:
  • Quote
  • Report post to moderator
Another test … success! Pretty much perfect burn id say, I’d certainly be happy if the finished thing performs like this.  

Here’s a video just after re-fuelling when things were extremely hot: https://youtube.com/shorts/QL-KSVFTrN8?si=b63XMBOL4D6f8eY9

The burn took about 8 minutes until in secondary combustion started and from here it burned clean as a whistle. Things felt nice and smooth, it just did its thing with no hiccups.

I added a log at 27 minutes into the burn when things were already raging, after 10 seconds there was some light smoke, but this immediately started to thin and was gone after a minute. I noticed a strange rhythmical pulsing sound from the gasses, as if there was some two and fro going on, but it disappeared pretty quickly.

I added another after 43 minutes - slightly darker smoke appeared instantly, but again started to thin out straight away and was clear again within a minute (things were truly crazy in the firebox at this point, in normal use you’d be pretty bonkers to throw a log in!)  

All in all, very happy with this. Next stage will be to build the final version using cast in place refractory walls.

I’ll also post the design and full dimensions here at some point in case anyone’s interested. I think the benefit of this design would be where space is at a premium as it will fit into a 500mm footprint and the circular design makes it well suited for a corner.

The test was with
- 200mm secondary chamber height
- metal horseshoe with entry and exit port equal to 100% chimney CSA
- restrictor on top of the riser equal to 50% chimney CSA.
- air intake size 50% chimney csa


Rocket Scientist
Posts: 790
Location: Guernsey a small island near France.
299
  • Likes 3
  • Mark post as helpful
  • send pies
    Number of slices to send:
    Optional 'thank-you' note:
  • Quote
  • Report post to moderator
Well that is good for you, now you need to test the same format with a chimney and in different conditions.
Things like wind and air temp, plus back pressure and other factors can all make a big difference but, it seems like you have found some base dimensions to work with.
 
Dave Rose
Apprentice Rocket Scientist
Posts: 35
5
  • Likes 2
  • Mark post as helpful
  • send pies
    Number of slices to send:
    Optional 'thank-you' note:
  • Quote
  • Report post to moderator
Thanks, yes I highly doubt it will be plain sailing from here, especially given it will be a short chimney (3m) and small bell. What could go wrong?

Actually, any advice on refractory concrete mixes for the walls? They’ll be cast in a cylinder, 75mm thick. I need them to be insulating, but strong enough to bear the weight of a kiln shelf.
 
Fox James
Rocket Scientist
Posts: 790
Location: Guernsey a small island near France.
299
  • Likes 2
  • Mark post as helpful
  • send pies
    Number of slices to send:
    Optional 'thank-you' note:
  • Quote
  • Report post to moderator
75mm is pretty thick, you might not need to go that thick?
The obvious answer is to buy a commercial  ready mix but, you can successfully use powdered vermiculite and fondu cement at 4-1 or 3-1 depending on its purpose. For a tube, I would cast in a mold to form small sections like large curved bricks.
 
Dave Rose
Apprentice Rocket Scientist
Posts: 35
5
  • Likes 2
  • Mark post as helpful
  • send pies
    Number of slices to send:
    Optional 'thank-you' note:
  • Quote
  • Report post to moderator
Main reason for the thickness is to reach the ideal internal dimensions as the outer diameter is fixed at 500mm. Also needs to give enough surface to prop up the kiln shelves, which are 420mm diameter. Cheers for the recipes!
 
Fox James
Rocket Scientist
Posts: 790
Location: Guernsey a small island near France.
299
  • Likes 2
  • Mark post as helpful
  • send pies
    Number of slices to send:
    Optional 'thank-you' note:
  • Quote
  • Report post to moderator
You might think about making the walls 40-50mm from a dense mix and back filling with loose vermiculite.
Where I live vermiculite is a very common product available from many stores and garden centres, I believe that is not so in America but I dont know where you live.
Vermiculite is a completely safe material to use but it is both soft and absorbent, so not the best choice in area of high wear and tear. However it can still last for many years if not abused.
 
Dave Rose
Apprentice Rocket Scientist
Posts: 35
5
  • Likes 2
  • Mark post as helpful
  • send pies
    Number of slices to send:
    Optional 'thank-you' note:
  • Quote
  • Report post to moderator
That’s a good idea, it would be nice to have a durable firebox. I’m in Yorkshire, UK, very easy to get hold of vermiculite. I’ve also got quite a lot of charcoal I made, so wondered about using that somewhere, as long as it’s not exposed to air.

If I was going to loose fill, I’d need something to stop the casts being pushed outwards. I could potentially do a very light vermiculite clay mix for the outside, dense on the inside. Or maybe just attach something for them to push against.

Do you think you could go as thin as 25mm with a high density mix reinforced with fibres? I’m keen to keep the insulation values as close to what I have now, which is 50mm superwool, which I think has a similar insulation value as vermiculite.

All that said, something that appeals to me is casting the main firebox walls all in one go, inside the barrel, maybe with a layer of superwool between the cast and the steel outer. It would be much easier, but whether I’d be able to find a good tradeoff between insulation and durability I’m not sure. I’d expect it to crack, but in theory it couldn’t really go anywhere if it does and could easily be patched up with some clay/ash/sodium silicate.
 
Fox James
Rocket Scientist
Posts: 790
Location: Guernsey a small island near France.
299
  • Likes 3
  • Mark post as helpful
  • send pies
    Number of slices to send:
    Optional 'thank-you' note:
  • Quote
  • Report post to moderator
You cant actually cast refractory against superwool as it will suck up the moisture and be too flexible to compact against. Also a continuous circular shape without an expansion break with crack.
I often cast 32mm thick components but if you go any thinner using standard home casting methods, I have found the result too fragile.
You could cast half circumference  rings, maybe 200mm tall and just stack them in place with some clay in between.
Many hardware stores sell refractory clay in 310ml tubes (like silicon tubes) for £3-4 that is very easy to use for bonding.
You could make a mold by cutting out mdf circles and flexible hardboard for the sides, line it with duck tape before assembling. That way you can vibrate the pieces and reuse the mold the next day.
When dealing with vermiculite and fondu cement, the more cement the lest insulating it becomes, a 3-1 mix with fibres is surprisingly strong, 4-1 is still quite structural and often a good compromise, 6-1 is good for back fill and even 10-1 will hold its shape for backfill.
The most insulating vermiculite mix uses the larger grains but the vermiculite dust (used for gardening) is very easy to use and get a great smooth finish.  The larger grains used for house insulation, are far more difficult to use but offer far more insulating properties so best for backfill.
The curing process is critical, if I am making small components, I will dry them in my oven ie one hour at 100c two hours at 200c this will guarantee there is no moisture when you super heat the stuff.
I would never describe casting refractory as easy!

 
Dave Rose
Apprentice Rocket Scientist
Posts: 35
5
  • Likes 2
  • Mark post as helpful
  • send pies
    Number of slices to send:
    Optional 'thank-you' note:
  • Quote
  • Report post to moderator
Thanks James that’s all very helpful and good to know about casting against the superwool - saved me a few quid!

I ran another test this morning, with 25mm of super wool wrapped around the outside of the metal horseshoe, to simulate the thickness of a cast component. This had quite a noticeable effect - the burn couldn’t quite keep up, it wasn’t terrible, but it took longer to get going and never went fully clean, switching between clean and light puffs of smoke. It also made the oscillating back and forth sound that happened very briefly after refuel yesterday.

So it seems the space in the secondary chamber is critical and yesterday’s burn was probably just about enough, but any less isn’t good. I have a few potential options…

- Reduce the thickness of the walls in the secondary chamber, to free up some space, if using a 25mm thick horseshoe
- increase the height of the chamber to 225 or 250mm (potentially lower the ceiling of the main burn chamber a little too, to keep the overall height similar)
- use a very thin horseshoe, like thin rigidised ceramic paper or something fancy like zirconium sheet (v expensive!)
 
Peter van den Berg
gardener
Posts: 1054
Location: +52° 1' 47.40", +4° 22' 57.80"
447
woodworking rocket stoves wood heat
  • Likes 3
  • Mark post as helpful
  • send pies
    Number of slices to send:
    Optional 'thank-you' note:
  • Quote
  • Report post to moderator
The slow oscilating sound like a steam locomotive is pointing to a restriction somewhere in the system, showing up especially while the thing is running full bore. Did you say you had an end port at the top of the riser? Best to widen that again, this end port should be directly between the expansion chamber and the riser, in my opinion. Making an orifice at the end the riser has other, mostly negative implications.
 
Dave Rose
Apprentice Rocket Scientist
Posts: 35
5
  • Likes 2
  • Mark post as helpful
  • send pies
    Number of slices to send:
    Optional 'thank-you' note:
  • Quote
  • Report post to moderator

Peter van den Berg wrote:The slow oscilating sound like a steam locomotive is pointing to a restriction somewhere in the system, showing up especially while the thing is running full bore. Did you say you had an end port at the top of the riser? Best to widen that again, this end port should be directly between the expansion chamber and the riser, in my opinion. Making an orifice at the end the riser has other, mostly negative implications.


Yes there is an end port 50% csa at the top of the riser. The second to last test had this and performed pretty well bar some very brief locomotives,  so I’ll try a test tomorrow that mirrors this, but move the 50% port from the end of the riser to the end of the secondary chamber and see what effect that has.
 
Dave Rose
Apprentice Rocket Scientist
Posts: 35
5
  • Likes 2
  • Mark post as helpful
  • send pies
    Number of slices to send:
    Optional 'thank-you' note:
  • Quote
  • Report post to moderator
Ok, another test, with the 50% chimney csa restriction moved from the top of the riser to the bottom.

Overall this was a good test, almost but not quite as good as when it was at the top - but the difference could have been down to other factors as it wasn’t large.

Secondary combustion started after 7 minutes and smoke was completely gone after 9. There was a little bit of smoke from 10-12 minutes, quite light, but more than in the burn with the restriction at the top of the riser. From here, it burned clean. I added a log after 21 minutes - it smoked for a minute, a little more than when the restriction was at the top, then quickly burned clean again. No chugging this time (by this point I’d enlarged the air port, which I think was the cause of this, see end of post)


I think when the restriction was at the end of the riser, it seemed to push combustion further back into the secondary chamber, so it wasn’t as visible as often.

Perhaps by creating more back pressure? I’m not 100% on this, but Peter if you’re reading - I’d be interested to hear any thoughts you have on why it’s not a good idea to have the restriction here. I initially thought that having the combustion occur further back was a good thing and perhaps give the gasses a little more time to combust, but as mentioned I can’t be 100% sure this is what’s happening.

It was chugging a little more than before at the beginning of this test  - however I think I got to the bottom of it - widening the air port seemed to fix it, it was previously 50% chimney csa and I think this was too small…big enough to create a complete combustion, but seemingly causing issues with the velocity of the gasses trying to draw more air in than it could handle smoothly.
 
Dave Rose
Apprentice Rocket Scientist
Posts: 35
5
  • Likes 2
  • Mark post as helpful
  • send pies
    Number of slices to send:
    Optional 'thank-you' note:
  • Quote
  • Report post to moderator
Seems I have a height issue. The best configuration I have so far is 350mm primary chamber height, 200mm secondary chamber and 500mm riser, totalling 1050mm. Problem is I want this all to fit in an 880mm tall steel tube.

I tried just shortening the riser to 300mm - not good. Definitely more smoke in the first half of the burn, it eventually got clean but clearly the gases needed more time to fully combust.

My current theory is that I need to slow things down, so less fuel enters the secondary chamber and riser at any given time, so I’m going to try reducing the secondary chamber entry port size and keep the 300mm riser. I may also reduce the air intake size a little.

A little frustrating as the tall version seems quite stable and I’m guessing that reducing the height is going to need quite a bit more experimentation. If anyone has any thoughts/ideas that might speed this up please let me know!

It would be very nice if there were scaleable relationships between secondary chamber port, secondary chamber height and riser height, but I’m not sure such a thing exists. For example, if I want to slow things down a bit, reducing the port by x would mean I can reduce the secondary chamber height by y and the riser height by z. Maybe I’ll just try reducing them all by the same % from their optimum dimensions and see what happens?!
 
Dave Rose
Apprentice Rocket Scientist
Posts: 35
5
  • Likes 3
  • Mark post as helpful
  • send pies
    Number of slices to send:
    Optional 'thank-you' note:
  • Quote
  • Report post to moderator
This went a little better than expected. I scaled the secondary chamber entry port, air intake port, secondary chamber height and riser height to 60% of the most optimal dimensions so far.

It was an improvement on simply shortening the riser, so potentially backs up my theory that making the main port size smaller might allow other things to be smaller too.

Things got going quite quickly and was almost burning clean after 4 minutes. It looked a little calmer and slower, but smooth also.

However, it never quite fully burned clean. It almost did at times, but would then revert to light smoke. Never heavy, thick or dark, but it didn’t seem to be quite keeping up and gasses were still getting through without being fully combusted.

I tried adding the removed part of the riser back on and it certainly improved things, but takes me back over maximum available height again.

For the next one, I’ll try simply reducing the first port size further in order to limit the volume of gasses entering the secondary chamber and riser at any given time.
 
Dave Rose
Apprentice Rocket Scientist
Posts: 35
5
  • Likes 2
  • Mark post as helpful
  • send pies
    Number of slices to send:
    Optional 'thank-you' note:
  • Quote
  • Report post to moderator
Ran a test with a much smaller port yesterday, didn’t provide optimum results, but helped me develop some theories about what’s going on in there.

This test had a port that was around 30% csa, 150mm secondary chamber height, 300mm riser.

- slow start, took 16 minutes to burn clean.

Theory: restricting port size is effective in slowing things down, but also reduces the temperature, which changes the requirements for complete combustion.

- it burned clean for a couple of minutes, then switched between clean and light smoke for ten minutes. Promising, but not perfect.

- 28 minutes into the burn things took a downhill turn, darker smoke appeared and it clearly wasn’t able to combust all the gases. Even adding the full height riser didn’t fix it. It did eventually burn clean after another 20 minutes or so.

Theory: in this design, there wasn’t the right balance of temperature, air and/or mixing to create complete combustion, but hard to say what the main culprit is.

Here’s what I’m thinking of trying next:

- add secondary air near the main port, to help with combustion at lower temperatures

- introduce two chambers:

chamber 1 is 50mm height, no restrictions. Being smaller, it could allow higher temperatures to be reached more quickly and help with the slow start. It also gives more time for the gasses and secondary air to mix, before they can expand…

Chamber 2 is 200mm height, lots of room for the gasses to expand and combust and has shown to be effective in previous attempts. Horseshoe restriction brings gasses to central port into a riser.

- riser stays at 300mm height - if (big if) the previous two chambers are more efficient at combusting the gasses, hopefully i can get away with a smaller riser and therefore keep the overall height lower.


It’s a little frustrating having to change so much to reduce the height after finding something that worked well, albeit taller. If I can’t get something working at a smaller height, I’ll have to try and figure out how to work with something taller. But it’s worth a few attempts I think, so let’s see what happens.
 
Dave Rose
Apprentice Rocket Scientist
Posts: 35
5
  • Likes 3
  • Mark post as helpful
  • send pies
    Number of slices to send:
    Optional 'thank-you' note:
  • Quote
  • Report post to moderator
Complete and utter failure! Secondary combustion just didn’t happen until 28 minutes in. Maybe not enough secondary air? Maybe the kiln shelves were robbing too much heat and it never got up to temperature? Either way, it’s back to the drawing board, head hanging in shame
 
Fox James
Rocket Scientist
Posts: 790
Location: Guernsey a small island near France.
299
  • Likes 4
  • Mark post as helpful
  • send pies
    Number of slices to send:
    Optional 'thank-you' note:
  • Quote
  • Report post to moderator
Dave, it is not easy to get all the dimensions right and even when you do, the same settings fail the next day!
You are taking on an ambitious project and so far you are taking the rough with the smooth and soldiering on, I have been there many times ha ha.
I feel you  frustration, it would be great if we could just employ a group of technicians and scientists, mathematicians and other experts in the field to solve our issues but at the end of the day it is just you verses the stove!
I have my trusty vortex J tube that works faultlessly over and over, it took me around five years to get there and then there is the vortex stove that I have spent two years on and quite a bit of money too but still I cant get it perfect!
I dont know what to suggest, I would hate to see you give in now though….

 
Dave Rose
Apprentice Rocket Scientist
Posts: 35
5
  • Likes 4
  • Mark post as helpful
  • send pies
    Number of slices to send:
    Optional 'thank-you' note:
  • Quote
  • Report post to moderator
No surrender! In fact something interesting just occurred to me…

Turns out the optimum (but too tall) design I had - the gas had to travel a total of roughly 1200mm after the firebox, which is roughly the recommended length of a standard J rocket, when you add the burn tunnel and riser, for a 150mm system. Any time I shortened the length of the riser or reduced the height of the secondary chamber, it got worse (and according to my calculations, the secondary chamber was still a little too short).

If I can use standard rocket principles, whilst still using this cylindrical design with horseshoe obstruction, that would make life much easier. In theory, I could simply add two 235mm height chambers on top of each other and I’d reach the desired burn length without the need for a vertical riser. Or could reduce the system size to 125mm or even 100mm, meaning a shorter secondary chamber and vertical riser is required to reach the desired burn length.

I’ll test the theory, with two 235mm chambers on top of each other, no riser


Dave Rose
Apprentice Rocket Scientist
Posts: 35
5
  • Likes 4
  • Mark post as helpful
  • send pies
    Number of slices to send:
    Optional 'thank-you' note:
  • Quote
  • Report post to moderator
This is promising, not perfect, but promising!

It was a little slow to start, but once it got going it was pretty much perfect.

Smoke disappeared after 18 minutes, so need to work out what the issue was. But after that, it was clean as a whistle and stayed clean from then on. I added a log at 30 minutes and not even a puff of smoke.

So this was two chambers above the firebox, both 200mm height, both with horseshoes in the middle, with the exit at the top the same as the port from the firebox - 50% csa.

If I was following true rocket principles, chamber height should be 235mm and ports should be 100% csa. I was using components I already had, hence the differences. I might try chopping the kiln shelves so the ports are both 100% csa  next and see if that speeds up the start.

One thing I noticed is no visible flames when staring into the second chamber, indicating combustion is completing further back. Could be due to lack of draw as no vertical riser, or that it has more than enough distance to complete combustion, in which case I may be able to shorten it further.

 
Dave Rose
Apprentice Rocket Scientist
Posts: 35
5
  • Likes 2
  • Mark post as helpful
  • send pies
    Number of slices to send:
    Optional 'thank-you' note:
  • Quote
  • Report post to moderator
Well, turns out you can’t just turn a riser on its side and expect it to be a rocket. I tried this, adding all sorts of clever obstructions so the gasses wove through a long path in two chambers whilst maintaining system CSA.

The result was smokey and slow, very little draw despite large ports, total dud. I’m guessing all those obstructions and lack of anything vertical just didn’t draw enough air and fuel in to get things up to temp.

I think I need to revisit the two designs that have worked and stay closer to those…


A. Was the first success, with a tall riser. 200mm secondary chamber and 500mm riser on top (700mm if you count the horseshoe in the secondary chamber)

Quite fast burning, quick to get going and overall pretty clean, bar a minute or two of smoke after refuel. Flames coming out the riser at times - felt pretty close to the edge of overfueling, but seemed to keep a handle on things.

It’s just too tall for my needs and shortening the riser resulted in incomplete combustion.

B. Was the next best. Two 200mm chambers one after the other. Problem is it took 15 minutes to get going. Once going it was super clean and steady, not a puff of smoke even on refuel, calmer than A and no visible flames. Felt like it just had plenty of space to do all of its combusting with some to spare and wasn’t in a hurry to do it.

Latest theory: the vertical riser on A is creating plenty of draw and getting things going very quickly, but things aren’t hanging around for as long and need quite a long run to burn.

B has no riser and is therefore much slower, so it takes longer to heat up to temperature. Once it gets there, the two chambers provide ample space for a clean burn.

An ideal version would be the fast start of A and the reliable super clean burn of B. So I wonder if I can find some balance between the two, which is where C comes in.

The idea is that a taller secondary chamber of 300mm might allow more things to combust before the riser, so less riser height required. The reduced draw would also allow more time for combustion, but hopefully not too much. The total riser here is 500 vs A’s 700, just about low enough to fit in my 880mm steel tube. We shall see!

One thing I haven’t tried yet is preheated secondary air - it’s possible this could aid in getting B going more quickly, but it’s a bit more tricky to prototype, so trying to find something that works without this.

If anyone has any ideas how I might get the best of A and B in one go, please let me know!

 
Dave Rose
Apprentice Rocket Scientist
Posts: 35
5
  • Likes 2
  • Mark post as helpful
  • send pies
    Number of slices to send:
    Optional 'thank-you' note:
  • Quote
  • Report post to moderator
Well, another failure. No secondary combustion until over 25 minutes in. I think the 300mm secondary chamber height is just too much. Plenty of draw this time, but seems the 200mm chamber height is just right, everything else I’ve tried is no good. I’ll come back when I’ve got something working!
 
Proudly marching to the beat of a different kettle of fish... while reading this tiny ad
the permaculture bootcamp in winter (plus half-assed holidays)
https://permies.com/t/149839/permaculture-projects/permaculture-bootcamp-winter-assed-holidays
reply
    Bookmark Topic Watch Topic
  • New Topic